Provident Home Design

Decor, DIY, and Interior Design

  • HOME
  • ABOUT
    • About PHD
    • Contact Me
  • DIY PROJECTS
  • DESIGN 101
  • PAINT
  • HOME TOUR
  • DESIGN INSPO
  • DECOR TIPS

Kitchen Makeover on a Budget Update

A few months ago I shared the plans of my friend’s kitchen makeover on a budget.  I promised I would give you an update on their progress once they had painted the walls, kitchen cabinets, and added trim on the area above the cabinets (the soffit)!

Well, they did it and I’m here today to share their progress so far!

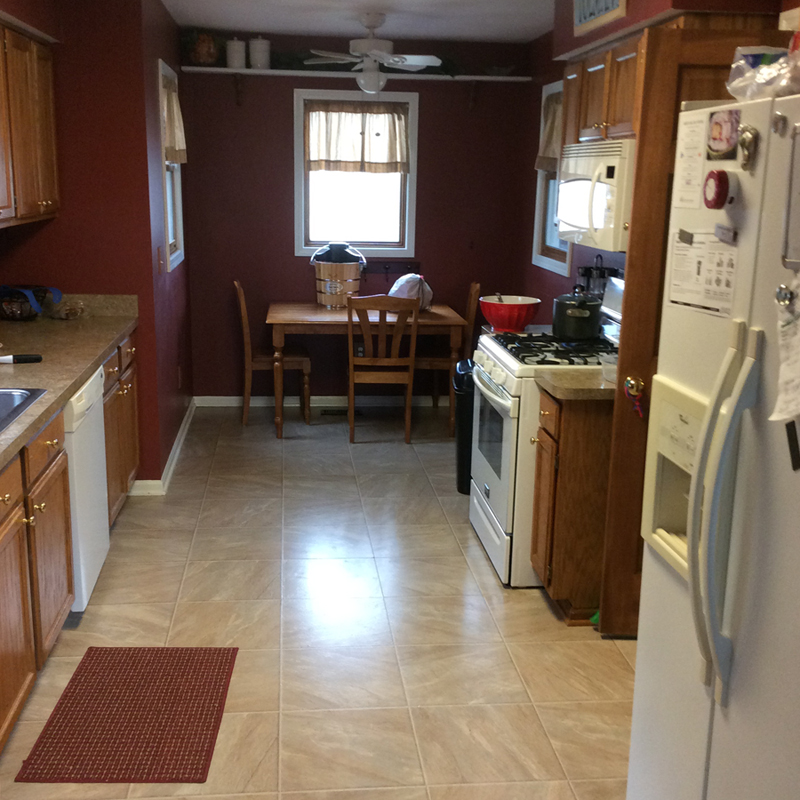
First here is a reminder of what their kitchen looked like before they got started on the makeover.


BEFORE

Kelli's Kitchen Before


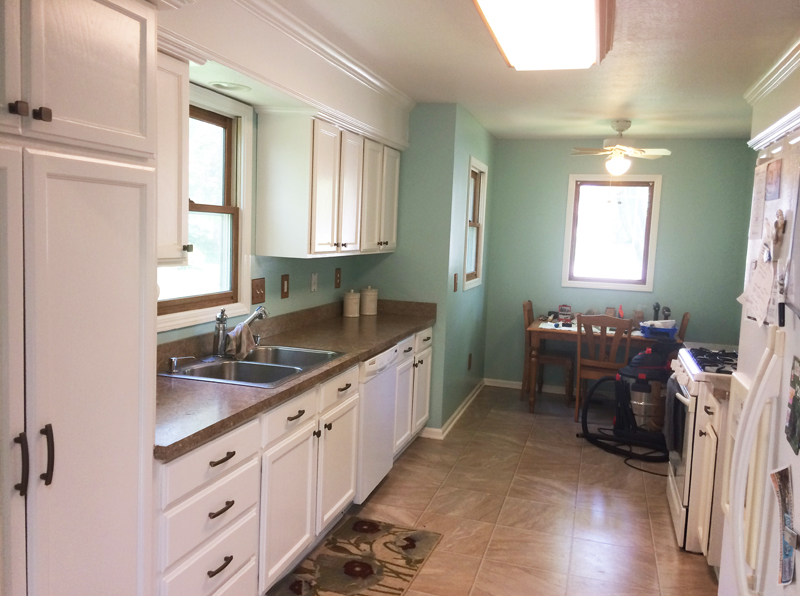
Here is the progress!

PROGRESS

Kitchen Reno Progress 2


I had suggested a light gray color (specifically Benjamin Moore Classic Gray) for the walls, however, the hubby loves color so color they got!

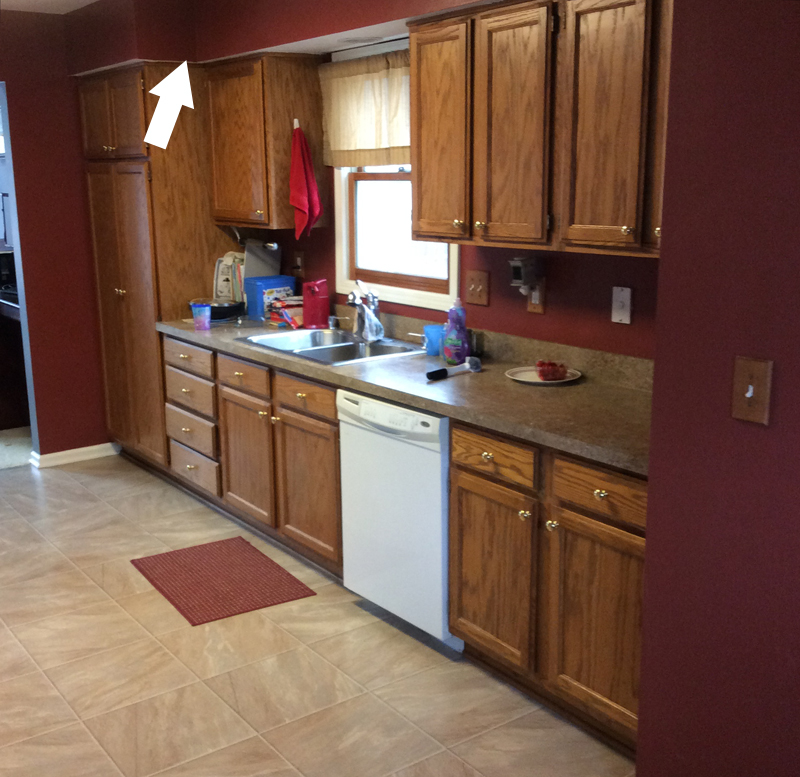
BEFORE

Kelli's Kitchen Before 3


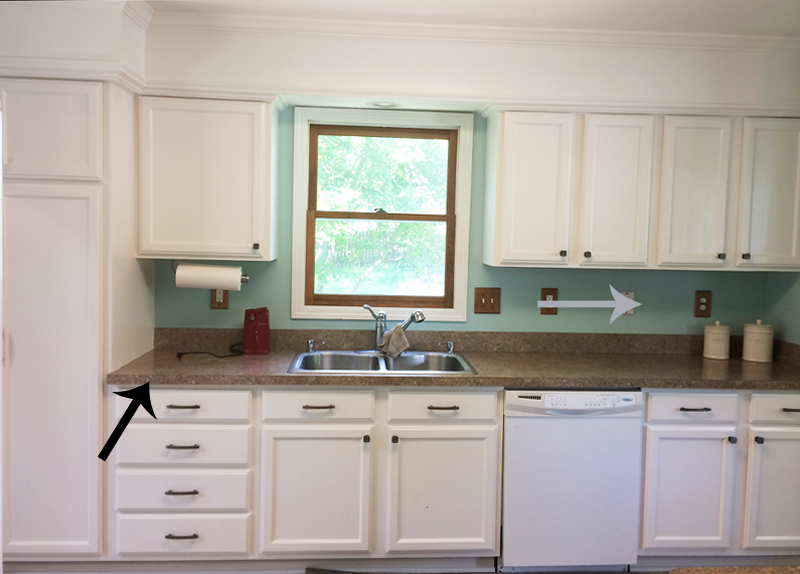
The black arrow in the picture below indicates that they will be replacing the countertops next (probably to a black countertop) and the gray arrow shows that a backsplash will be installed after that (probably a marble one).

PROGRESS

Kitchen Reno Progress


My friend was nice enough to write out all of the steps she took to get from the Before to the Progress.

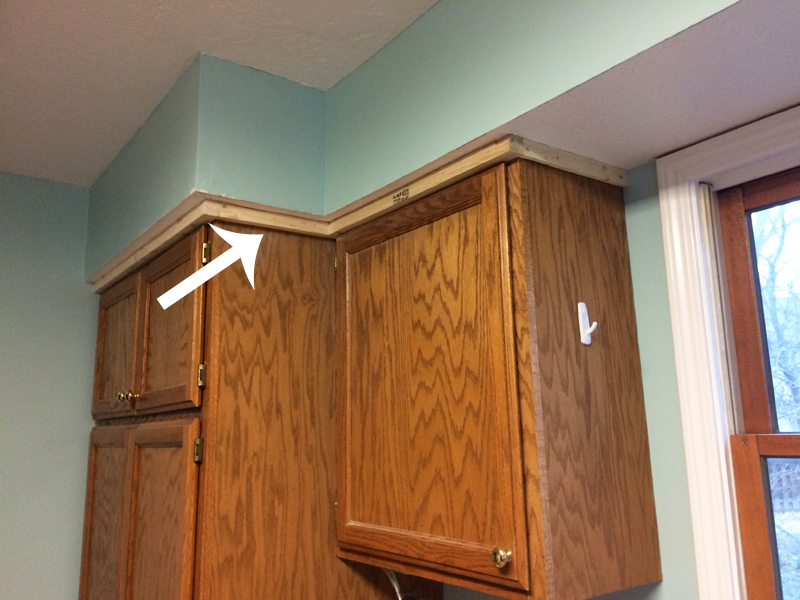
Step 1. Attached boards of varying widths immediately below soffit so that the crown molding would be flush with soffit.

Attach board Kitchen Reno Step 1


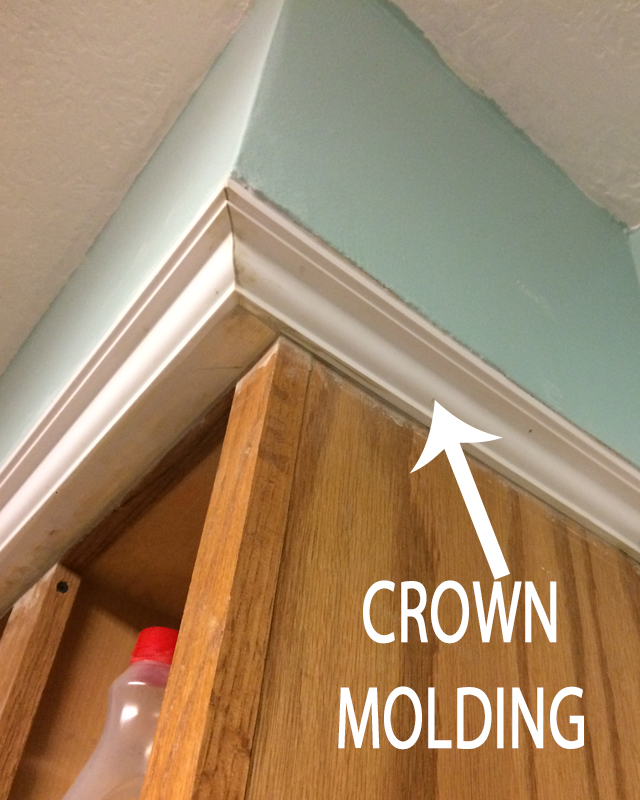
Step 2. Attached crown molding (Ekena Millwork Hillsborogh Crown) from board on cabinet to soffit.

Kitchen Reno Step 2 Crown


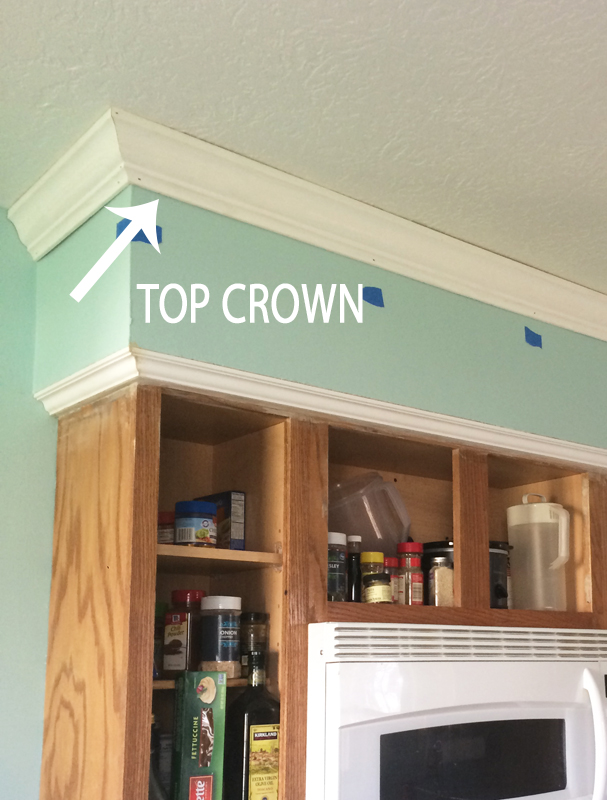
Step 3. Attached crown molding (Evertrue Crown Molding) from soffit to ceiling. https://www.lowes.com/pd/EverTrue-8-Pack-3-625-in-x-12-ft-Pine-PFJ-Crown-Moulding/3161245. The material of my crown was PFJ so I had to nail to studs. I marked them all in blue painters tape before I started so that I could easily locate them as I was going.

Kitchen Reno Step 3 Ceiling Crown

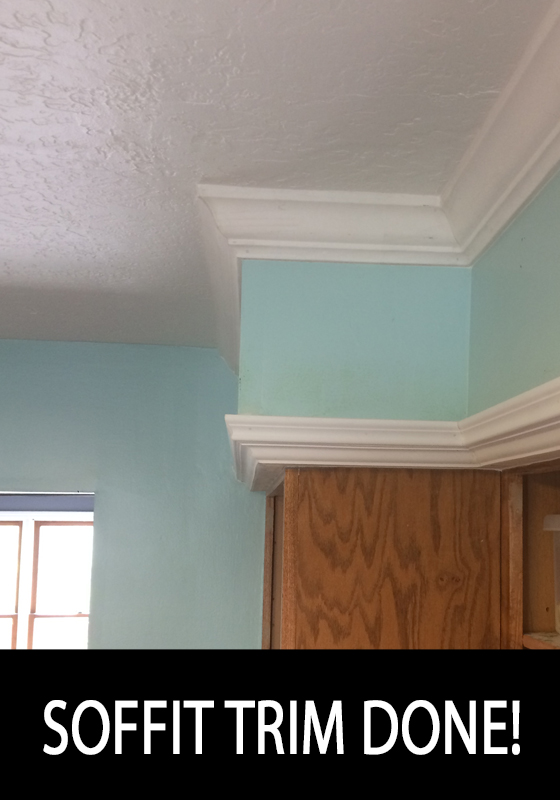
Step 4. Attached decorative trim (Ekena Millwork Stockport) at the top of the lower crown molding.

Step 5. Used wood filler and caulk to fill gaps.

Kitchen Reno Soffit Trim Done Step 4

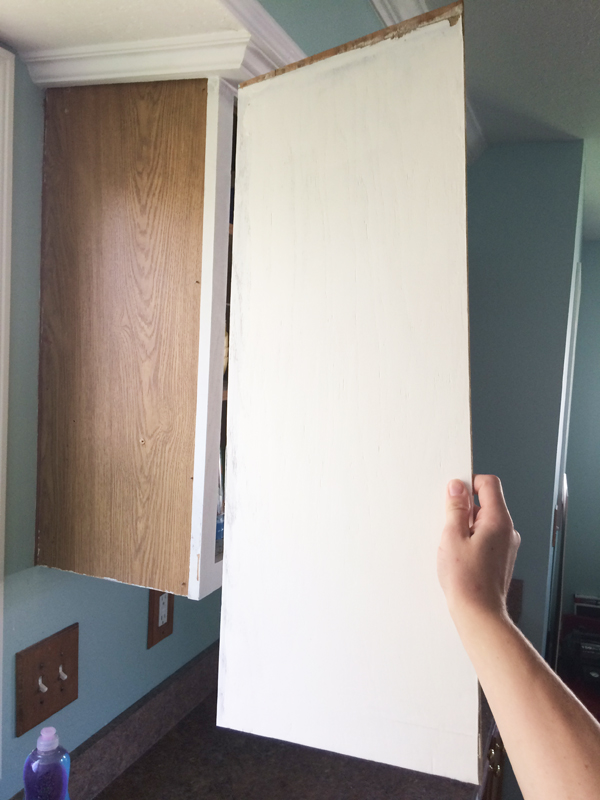
Step 6. Removed all doors & hardware. Filled holes.

Step 7. Repaired damaged wood and replace warped cabinet facing. The side of the cabinet to my sink was looking very old, worn, and warped. I tried filling it and sanding it smooth, but it still did not look good. So, I used a crowbar to carefully pry the wooden piece away from the cabinet. It easily pulled away in one piece, and for $7 at Home Depot I bought a new board, they cut it to size for me, and with just 6 nails the side was as good as new.

Step 7 Kitchen Reno

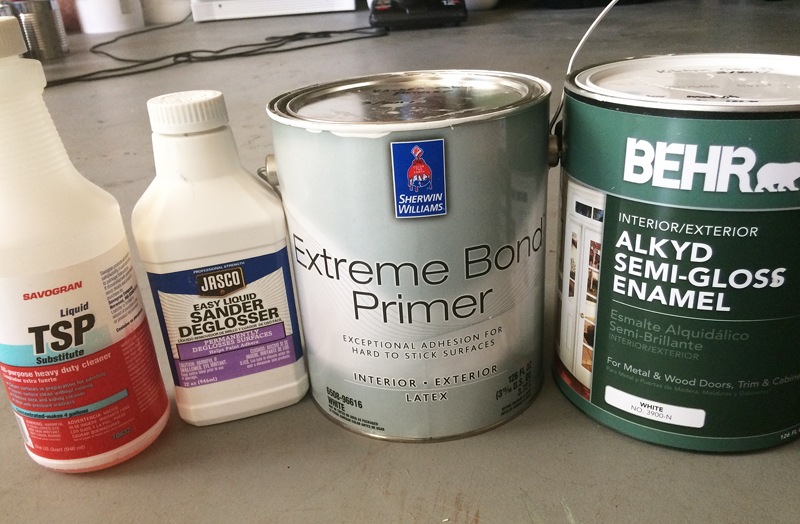
Step 8. Cleaned cabinets with TSP substitute. I used one bottle

Kitchen Reno Supplies Step 6 or 8

Step 9. Roughened surfaces and remove some varnish with Liquid Deglosser. I used 1.5 bottles.

Step 10. Primed with Sherwin Williams Extreme Bond Primer. I used 1/2 gallon.

Step 11. Painted 3 coats of Behr Alkyd Semi-Gloss Enamel color matched to Sherwin Williams Alabaster (using THIS tutorial). For the cabinet doors, I would paint the bottom of all doors, wait for the paint to dry, and then paint the top side. I lightly sanded everything before the final coat of paint. The paint does take a very long time to fully cure. I foolishly staked some of the doors after they had been drying for over a week, and the paint stuck to each other in some places.

Step 12. Installed Knobs/Handles. I bought them discounted from Amazon Warehouse, which just means that they are open box items, but still new condition. We used Franklin Brass Heirloom Silver 1-1/8-Inch Webber Kitchen Cabinet Hardware Knobs and Franklin Brass Heirloom Silver 4-Inch Pierce Kitchen or Furniture Cabinet Hardware Drawer Handle Pulls (Affiliate Link).

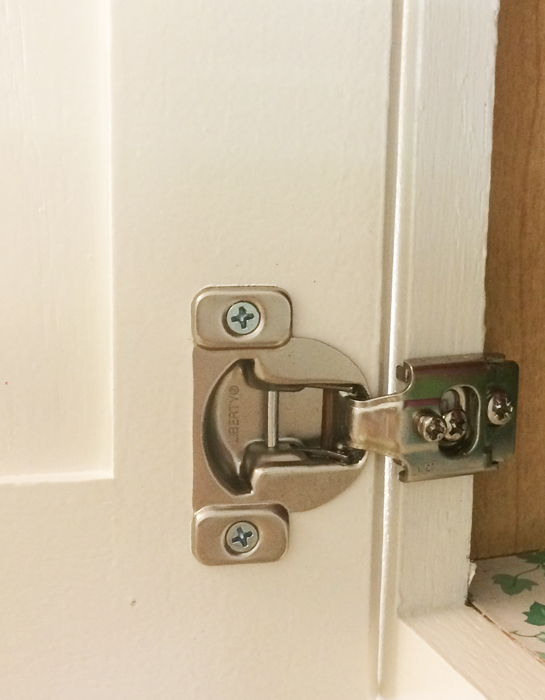
Step 13. Installed Hinges. Our previous hinges were Self-Closing, Partial Wrap Hinges with 1/2 inch Overlay. Because we couldn’t find hinges that perfectly matched the knobs we chose, we decided to use overlay hinges. This is what we bought http://www.homedepot.com/p/Liberty-35-mm-105-Degree-1-2-in-Overlay-Hinge-10-Pack-850304/203274047. They aren’t visible at all when the door is closed, and as an added bonus, they were cheaper than partial wrap hinges.

Step 13 Kitchen Reno New Hinges


Step 14. Installed under pull-out recycler/garbage can. I have always thought my garbage cans were unsightly, but I didn’t think I had room under my sink for a recycling bin and trash can. And then I found this! https://www.bedbathandbeyond.com/store/product/simplehuman-reg-35-liter-pull-out-recycler/1014623515?skuId=14623515&mcid=PS_googlepla_nonbrand_kitchenaccessories_&product_id=14623515&adpos=1o1&creative=43742642389&device=c&matchtype=&network=g&gclid=CJCD4JrK99MCFVi4wAodKLwMNw. It was really easy to install and I love it!


Expenses

Trim  $122.00

Wood Equip (Nail gun equip, fence for ripping wood, chisels, cabinet side replacement, caulk, wood filler)     $95.00

Primer, TSP, Deglosser  $56.00

Paint (2 gal cabinets, 1 gal wall)  $109.00

Painting Supplies (brushes, trays, etc)  $27.52

Knobs/Handles $100.00

Hinges  $123.00

Pull Out Garbage Recycler  $68.00

   Progress Total      $700.52


What is Left to Do?

  • Replace Countertop
  • Install Backspash
  • New Sink and Faucet
  • Paint Kitchen Table
  • Perhaps Build Banquette Seating Around Table
  • Window Treatments (shades)
  • Paint Trim Around Ceiling Light White
  • Accessorize (rug, kitchen towel, etc).

I’m so proud of my friend, Kelli! She has had very limited DIY experience before this kitchen makeover and has simply jumped in and worked so hard on it!

I just know it is going to pay off in the end and I will of course share the final reveal with you when it is all done!!:-)

On a personal note my kids got out of school yesterday for Summer break.  I am also watching a friends child 3 days a week this Summer which means most days I will have 5 kids at home 11 years old and under.

I truly hope to maintain my weekly posts this Summer but wanted to give you a heads up that there may be some weeks where I just can’t.:-(

I hope you have a wonderful and safe Memorial Day weekend!!  So thankful for those who have sacrificed even their lives for the precious gift of freedom!!

Thank you so much for following along!!!:-)

signature


Related Posts From the Blog:

  • Makings of a Stylish Man CaveMakings of a Stylish Man Cave
  • My House Hunters EpisodeMy House Hunters Episode
  • How to Paint a Bathroom Vanity like a ProfessionalHow to Paint a Bathroom Vanity like a Professional
  • How to Paint a Gray Weathered Finish on FurnitureHow to Paint a Gray Weathered Finish on Furniture
  • DIY Stretched Fabric Wall ArtDIY Stretched Fabric Wall Art
  • DIY Christmas CountdownsDIY Christmas Countdowns
  • 15 Chic Light Fixtures for Less!15 Chic Light Fixtures for Less!
  • Pantone’s 2015 Color of the YearPantone’s 2015 Color of the Year

budget decor// cabinets// decorating// kitchen// woodwork9 Comments

« Master Bedroom and Girl’s Bedroom Makeover Reveal!
A New Brick Step! »

Comments

  1. Colleen says

    Thursday, May 25, 2017 at 6:31 pm

    Your friend’s kitchen looks great. Amazing what a fresh coat of white paint can do!!

    Reply
    • Tamara says

      Thursday, May 25, 2017 at 7:53 pm

      Thanks, Colleen, that will make my friend happy to hear!:-) I love the power of paint!!

      Reply
  2. Marie Hiney says

    Thursday, May 25, 2017 at 7:10 pm

    Tamara I love your posts. Your friends DIY kitchen is awesome. I wish I could do something with my eating area. I do get to paint my storage shed this weekend. I just wish the rainy week end soon. Thanks again for the post.

    Reply
    • Tamara says

      Thursday, May 25, 2017 at 8:00 pm

      Yes, the song “Rain Rain go away…” has come to mind a few times today! I’m also itching to get some outdoor projects going soon. I so appreciate your kind words about the blog, Marie!:-)

      Reply
  3. Emma Jones says

    Friday, May 26, 2017 at 11:49 am

    This is gorgeous! It’s amazing how much your friend has been able to transform your kitchen on such a budget! I love the white and blue especially! It’s crazy how simply changing the colors can make such a big difference! We just redid our kitchen with similar white cabinets and it’s completely changed the look as well! I love it so much!

    Reply
    • Tamara says

      Monday, July 24, 2017 at 8:25 pm

      Great job, Emma! It sure is a lot of work but SO worth it!

      Reply
  4. Amy Rogers says

    Monday, May 29, 2017 at 4:18 pm

    This is unbelievable. Your kitchen has completely transformed! I love how it’s looking now, so fresh, bright and new. This just inspired me to try and remodel my kitchen too. Love it!

    Reply
    • Tamara says

      Monday, July 24, 2017 at 8:25 pm

      So happy to hear you were inspired!:-)

      Reply
  5. Kristina says

    Tuesday, July 9, 2019 at 10:39 am

    This is an old post, but wondering what size that crown molding and what is the distance from the cabinet to the edge of the soffit?

    Reply

Leave a Reply Cancel reply

Your email address will not be published. Required fields are marked *

Hello and Welcome!! My name is Tamara and this is where I share my tips and tricks to creating a beautiful home! If you are new, feel free to start HERE.

More Blog Inspiration:-)

  • Icon Caroline on Design

    Close preview

    Loading...
  • Icon Centsational Girl

    Close preview

    Loading...
  • Icon Decorating Delirium

    Close preview

    Loading...
  • Icon Lauren Liess

    Close preview

    Loading...
  • Icon Life on Virginia Street

    Close preview

    Loading...
  • Icon Remodelaholic

    Close preview

    Loading...
  • Icon The Creativity Exchange

    Close preview

    Loading...
  • Icon Thrifty Decor Chick

    Close preview

    Loading...

Categories


Disclosure & Privacy Policy

You might also like

The Final Before & After of our Current Home

The Final Before & After of our Current Home

New Build Update-Paint, Lighting, and Floors oh My!

New Build Update-Paint, Lighting, and Floors oh My!

New Home Update

New Home Update

New Build Update- Cabinets are in!

New Build Update- Cabinets are in!

House Update–We Have Walls!

House Update–We Have Walls!

Join Me on Instagram!

[instagram-feed num=9 cols=9 showbutton=false]

Privacy

Copyright © 2022 · Savory theme by Restored 316