Provident Home Design

Decor, DIY, and Interior Design

  • HOME
  • ABOUT
    • About PHD
    • Contact Me
  • DIY PROJECTS
  • DESIGN 101
  • PAINT
  • HOME TOUR
  • DESIGN INSPO
  • DECOR TIPS

GET NOTIFIED VIA EMAIL WHEN THERE'S A NEW POST!

Couch Makeover & DIY Chalk Paint

If you would have asked me a year ago if painting a couch would be in my near future I probably would have responded, Please? (Which is a polite/strange way people from Cincinnati ask others to repeat themselves, aka What?)

Having ruined lots of clothes with paint splatters I knew paint and fabric was not a good combination.

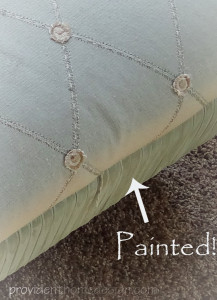
In 2012 I came across a great blog where I learned that upholstery can be painted by mixing paint medium and latex paint.  So, when making over my family room ottoman I used fabric on the top and paint on the bottom!

Ottoman painted

Then 2 years went by and all of a sudden I began to spot several pins on Pinterest about painting upholstery, especially upholstered chairs.

I think I read every single one of them because I was so in awe of the idea (even though I had already done it with my ottoman it was not on a part you would sit on).

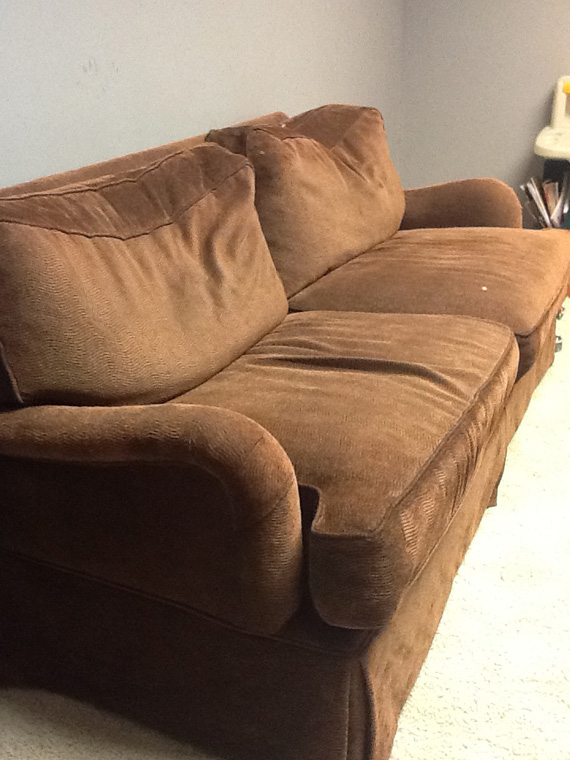
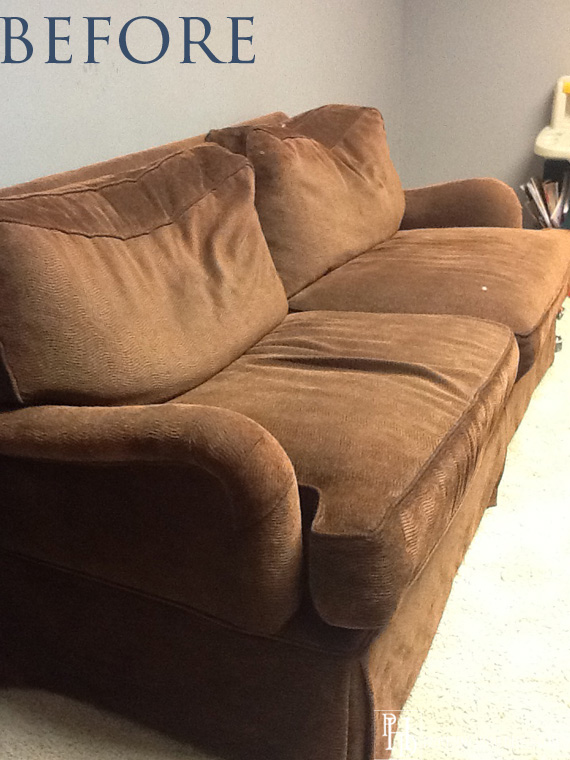
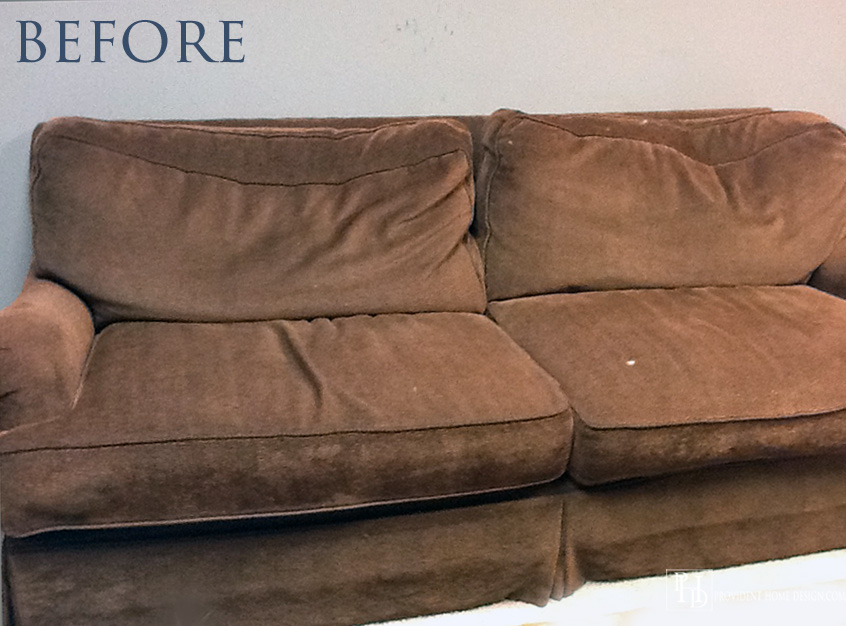
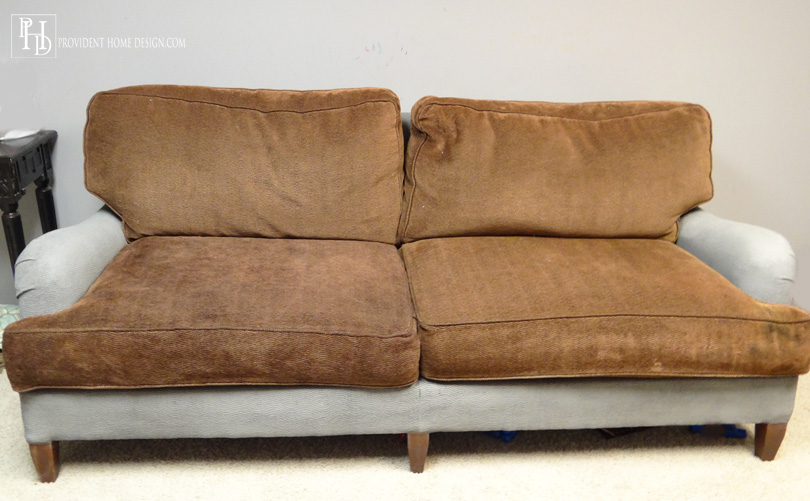
About a month ago a friend texted me saying she was getting rid of her brown couch in their playroom and would I want to work some DIY magic on it. The structure was good and it was SO comfortable but the fabric had a couple of stains and I wasn’t a fan of the brown color.

couch before


So did I really need another couch or another DIY project for that matter??

Well kind of.  The green/tan couch in our living room is a sleeper sofa and was my first (and I think only) Craigslist mistake. In the picture on the listing it looked tan and it looked super nice for a sleeper couch (I’ve seen way too many velvet floral sleeper sofas in my time). I talked the guy down to selling it for $100 and rented a uhaul for $20 to pick it up and transport it.

My husband and I showed up with the uhaul at his apartment only for me to realize it was definitely more green than tan. I mumbled something to my husband like, UMMM, I didn’t realize it was green and he gave me a look like you’ve gotta be kidding me! Needless to say the green couch came home and I’ve made it work. But lesson learned! Go see the Craigslist item in person before renting a uhaul!:-)
living room2

So back to why I would need another couch. We are co-hosting a family reunion this year and I liked the idea of the green sleeper sofa being in the basement where overnight guests could have more privacy and room.

I decided the free brown couch would be a very fortunate opportunity to getting the green couch downstairs and to trying out this painting upholstery you actually sit on thang (wow that was a mouthful)!

When researching I came across two main methods of painting upholstery.  First, use fabric medium with latex paint or second, use chalk paint. I read that fabric medium can get expensive when doing large pieces so I opted for the chalk paint method  (I calculated that I would have needed over $60 worth of fabric medium plus the latex paint).

You may be thinking but, Tamara, chalk paint is expensive too, right? You are right it is and even though Americana chalk is so much cheaper it still would have cost too much to do a whole couch. So I made my own chalk paint!

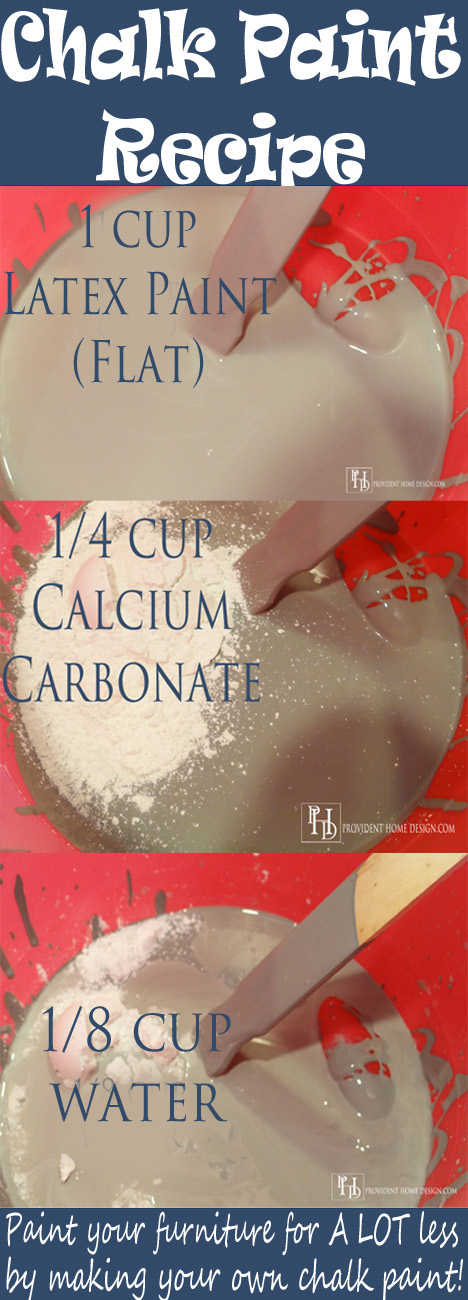
For this I did some more research and discovered that the consensus among DIY-ers is that the calcium carbonate recipe is the best.  After trying out lots of recipes I came up with  my own recipe that used less calcium carbonate but enough to do an awesome job.  Here is the recipe (feel free to pin it for later)!

Easy Chalk Paint Recipe


But before going on, are you ready to see some before and afters?:-)

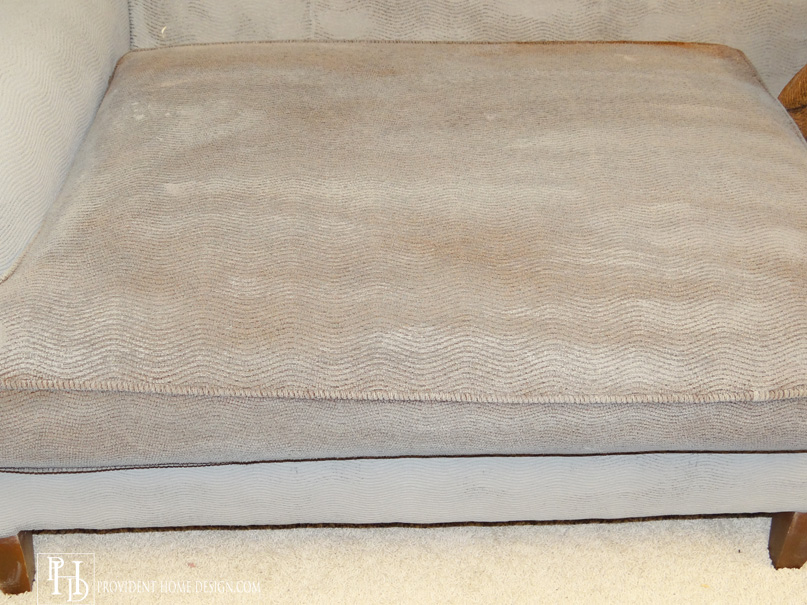
Couch Side Shot Before Painting

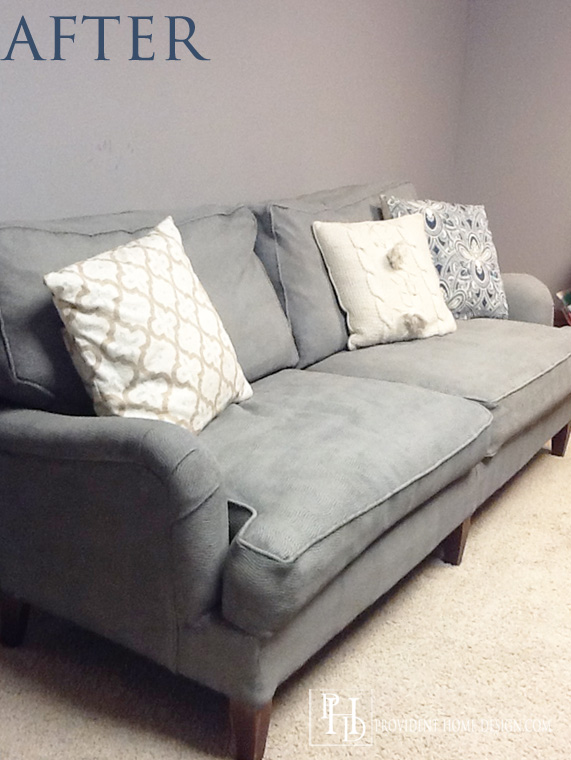
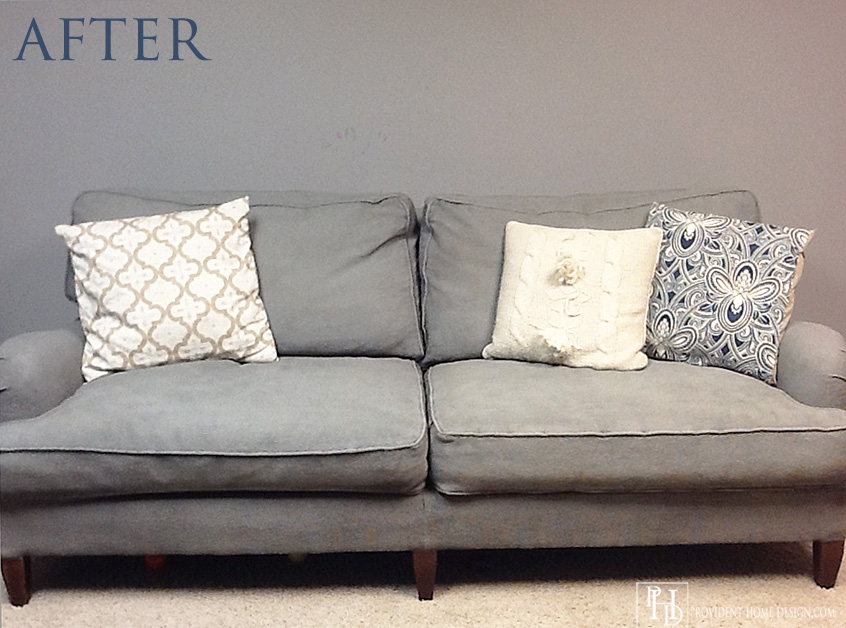
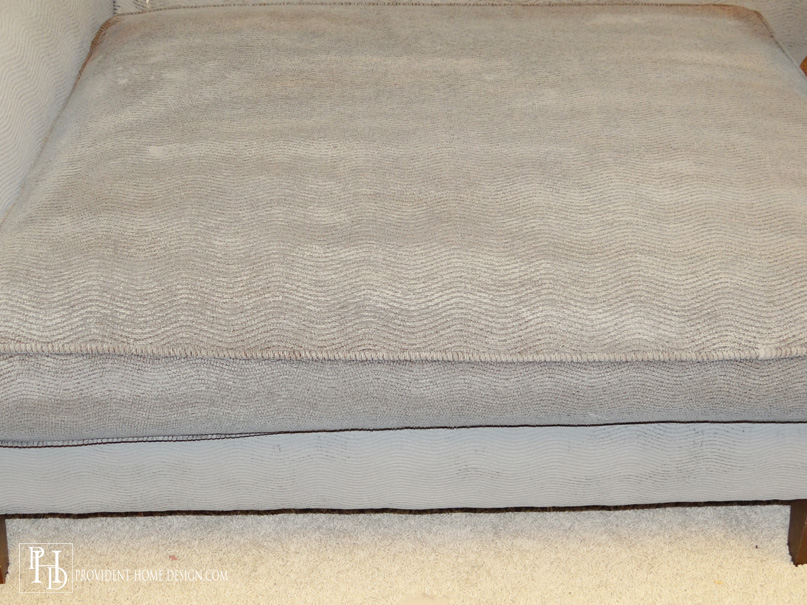
DIY Painted Couch

Couch Headshot Before Painting

Couch Headshot After Painting

The lighting in the photos is not great because it’s in our basement where there is no natural light and lots of fluorescent lighting.  I can’t wait to get the couch upstairs to the living room (anyone want to come over and help bring the huge, heavy sleeper sofa downstairs)??:-)

So here is the Step by Step process I took to paint the couch.

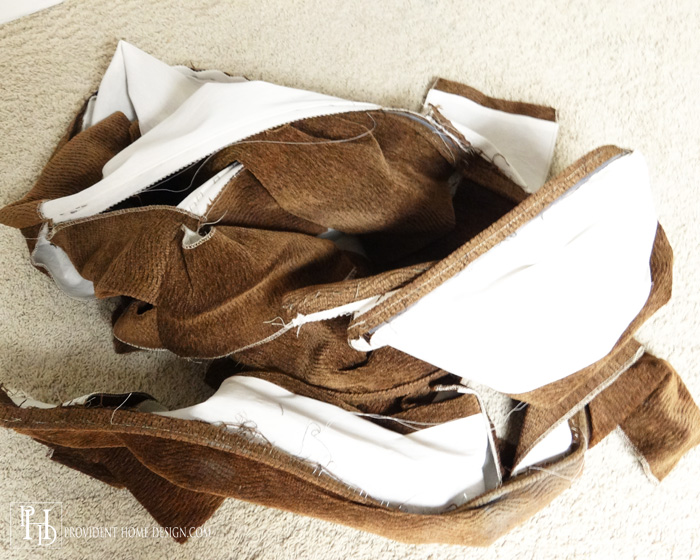
First, I removed the couch skirt from the bottom of the couch for a more streamlined appearance.  It was attached by staples so I just used a pair of pliers to pull the skirt off.

How to Pull off Couch Skirt


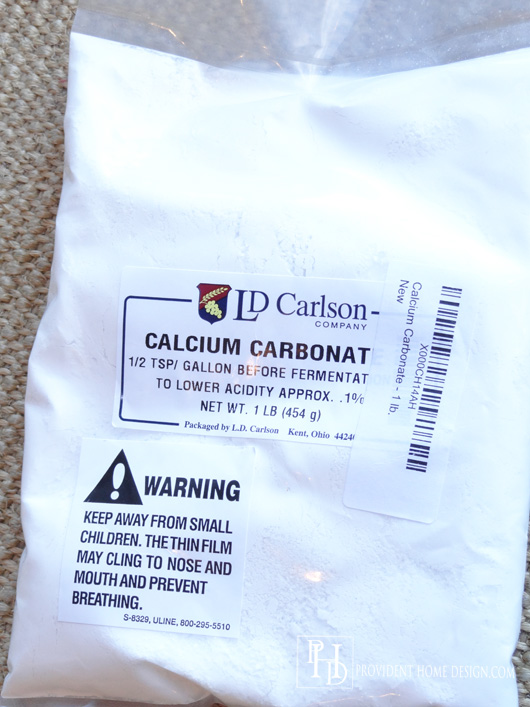
In a bucket I started by adding 4 cups of latex paint in a flat finish (color is Behr Slate Gray), 1 cup of calcium carbonate (I bought mine here off of Amazon–it was a good price and came quickly) and 1/2 cup of water.  Stir really well.

Calcium Carbonate for DIY Chalk Paint


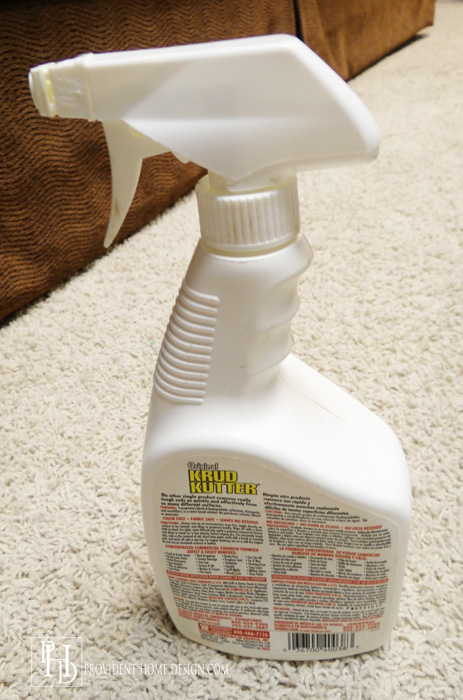
I filled an empty spray bottle with water and began spraying the down the couch.  Don’t soak it just wet it down.

Water to Spray Couch

For the brush I used the Zibra square detail and molding option.  It held up beautifully to all the abuse this project renders.  You can also use a large, round, stenciling brush.
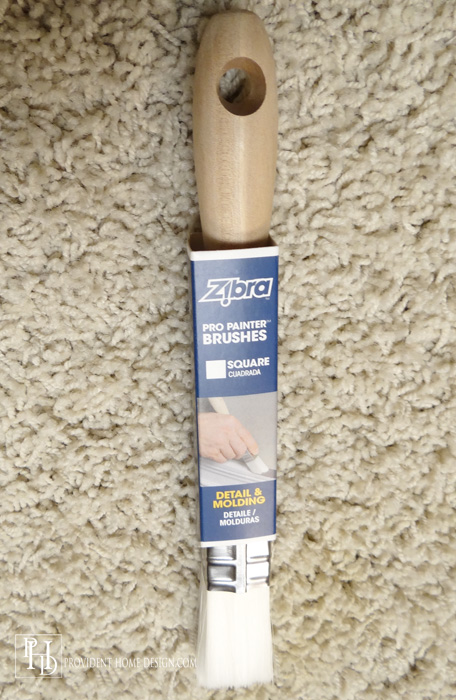
Brush used to Paint Couch
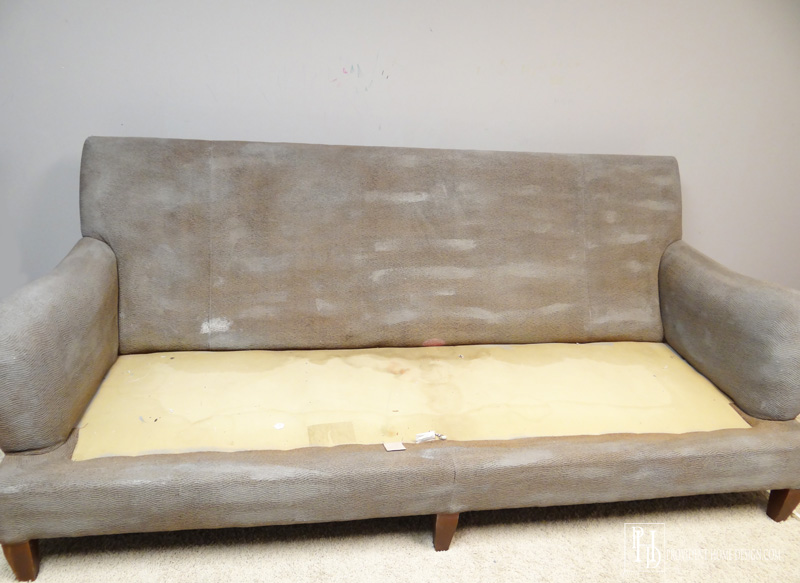
I took all the cushions off the couch, sprayed it down in sections and then painted the couch quickly in circular motions.  A link to a helpful video demonstration of this process can be found here.

In this photo sequence you can see the step by step progress.

First Coat

First Coat of Chalk Paint

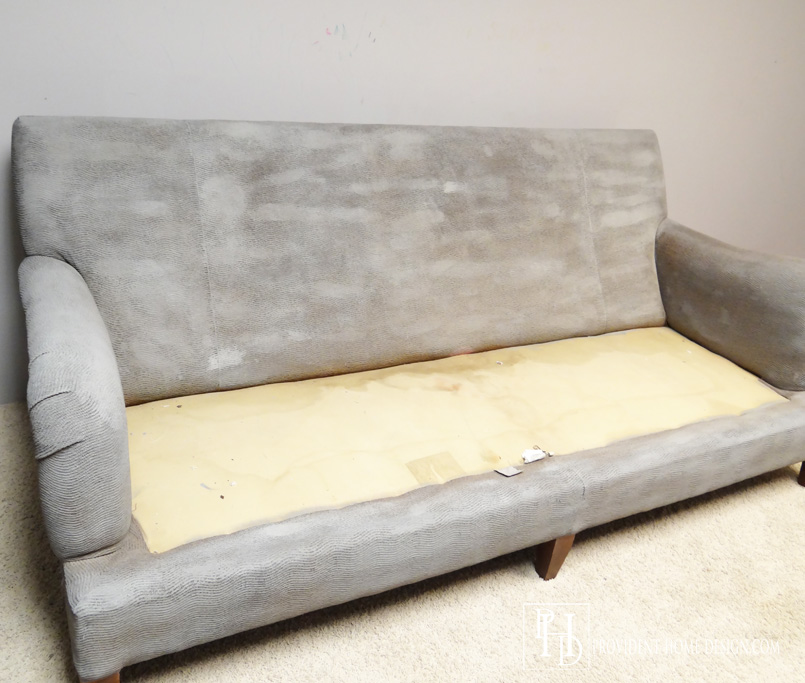
Second Coat
Second Coat of Chalk Paint

Third Coat
Third Coat of Chalk Paint on Couch

Next I worked on the cushions.

First coat  

Painting Couch Cushion First Coat
Second coat
Painting Couch Cushion Second Coat

Third Coat (I had to do a 4th coat in some areas as shown by the arrows)
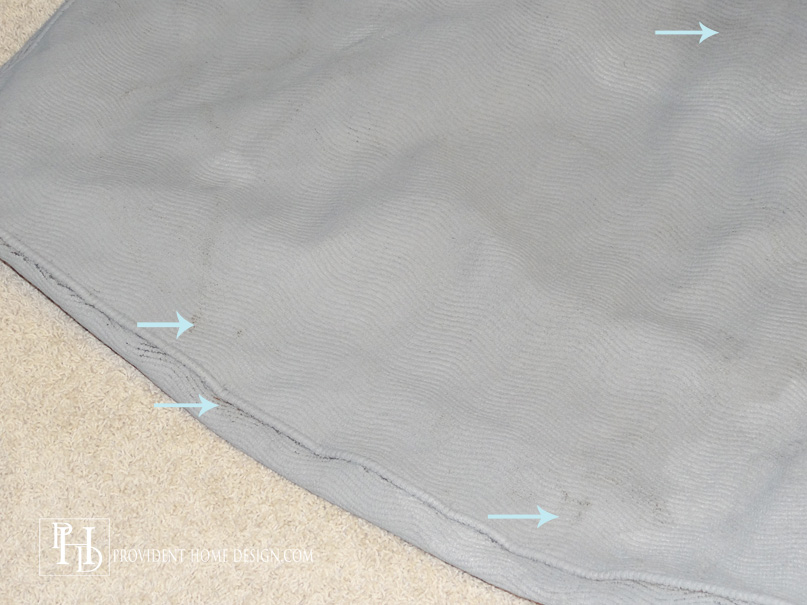
Paint a Couch Cushion Coat 3

Once it is all painted and dry it is time to sand and sand and sand some more.  I went through about 3 packs of sandpaper plus a sanding block.  Sanding is what gets the fabric to not feel rough and prickly.  Make sure to wipe away the dust that the sanding creates (I vacuumed the cushions to get the dust off).

I had read that some people used a clear wax to try and soften up the fabric.  I tested this out in some areas but didn’t find it helpful.

Couch Headshot After Painting

Now even though the sanding takes the roughness away, the material will still be stiffer than most upholstered furniture.  I had heard people compare it to the stiffness of outside furniture and I think that is a great comparison.  The couch is still comfortable to me but would I rub my bare body all over it, probably not!:-)

Our living room isn’t a high traffic room so it’s not an issue to me.  If you don’t want a somewhat stiff couch I would suggest reupholstering the cushions.  You could take the new material for the cushions to Home Depot or Sherwin William’s paint desk and ask them to color match the material.  Then you could paint the frame of the couch but have the cushions be totally normal (not outdoor fabric) feeling.

 The price to paint the couch was great!

Couch-Free

Latex Paint-$25

Calcium Carbonate-$16 (I bought 2 bags and use 1 1/2)

Brush-$7

Sandpaper-$12

A grand total of $60!

Now this project does take a lot of time, patience, and ability to see things to the end but in my book it was worth it!

I’m very pleased with the couch’s new streamlined, updated persona.

What I Learned From Painting My Couch

So what do you think of it’s new look??  As always feel free to ask questions!

(You can now get a 1 year update on the DIY Painted Couch, HERE).

Signature

Follow Provident Home Design! Subscribe to get the latest content sent to you via email.

* indicates required


Related Posts From the Blog:

  • DIY Ceiling Beam-One Room Challenge Week 3`DIY Ceiling Beam-One Room Challenge Week 3`
  • Last Chance Deals!Last Chance Deals!
  • Best Tip for Picking the Right Paint Color for a RoomBest Tip for Picking the Right Paint Color for a Room
  • The Look for A Lot Less #2The Look for A Lot Less #2
  • Color Feature:  BlackColor Feature: Black
  • Happy Imperfect Mother’s Day!:-)Happy Imperfect Mother’s Day!:-)
  • DIY Painted Couch- A One Year Update!DIY Painted Couch- A One Year Update!
  • Progress on the Floors & Inspiring DesignProgress on the Floors & Inspiring Design

before and afters// budget decor// decorating// DIY// furniture// money saving tips// paint// tutorials192 Comments

Subscribe

GET NOTIFIED VIA EMAIL WHEN THERE IS A NEW POST!

« A New Rug for the Living Room
What I’ve Learned in my First Year of Blogging & a Favor to Ask »

Comments

  1. JJ says

    Monday, January 19, 2015 at 8:13 am

    That’s a pretty amazing transformation! A lot of work, but definitely gave the sofa a new life.

    Reply
    • Tamara says

      Monday, January 19, 2015 at 9:00 am

      Thanks, JJ! There’s something very satisfying about breathing new life into things. Paint s such an amazing tool for doing that! Hope you have a great week!

      Reply
      • Ed Stines says

        Saturday, July 18, 2015 at 11:45 am

        Looks great, I probably would have been a bit more radical and chose a brighter color but I guess it is preference and where it would be placed relative to the rest of the room. I just started using chalk on fabric and learned a great deal. For the first coat after spritzing down the fabric (not soaking wet), I mixed the paint 1:1 with water then I put on 3 coats, after each one dries, followed by two coats of wax. Had to mix the paint since you know what it is like to get a splatter of paint on your clothes, mixing it keeps it soft. Yes, it is expensive however much cheaper than buying a new couch 🙂

        Tamara, you did a great job, not sure I would tackle my living room set as much as I would like to. Too many damn cushions, would take forever. Thanks for your blog.

        Reply
        • Tamara says

          Saturday, July 18, 2015 at 1:17 pm

          Yes, I have ruined lots of clothes with paint splatters! Thanks, Ed, for sharing your experience with painting fabric!!

          Reply
          • Martha says

            Monday, February 1, 2016 at 4:33 pm

            I recently made chalk paint using latex paint and plaster of Paris to redo some wooden picture frames. Would that recipe work as well as the one you used with calcium carbonate?

          • Tamara says

            Monday, February 1, 2016 at 4:36 pm

            Hi Martha! Yep, it should work the same!

        • Melissa davis says

          Tuesday, August 20, 2019 at 7:26 am

          Ed you just mixed with water not other stuff?

          Reply
  2. Sue says

    Monday, January 19, 2015 at 1:13 pm

    Wow! You are amazing and the couch looks fantastic! I thought that I would stop by your blog today, to see if you had posted any ideas that might be helpful in re-transforming the hope chest that Emily worked on last summer . . . she/we have decided that if would look much better if it was painted instead of just finishing/staining the wood.

    Reply
    • Tamara says

      Monday, January 19, 2015 at 1:53 pm

      Hey, Sue!:-) Happy you came by!! The DIY chalk paint would work awesome for Emily’s hope chest redo! Email me (or call me) if you have any ?s. Enjoy the sunshine today!

      Reply
  3. Decorating Delirium says

    Monday, January 19, 2015 at 11:39 pm

    It looks sooo much better Tamara. I love the color and how it looks without the skirt. I have tried making my own chalk paint using calcium carbonate and was pretty impressed. I also like that you can make any color. I was wondering how you made the fabric less stiff. Quite a transformation Tamara!

    Reply
    • Tamara says

      Tuesday, January 20, 2015 at 3:04 pm

      Thanks, Jennifer! I agree removing the skirt definitely helped the new look as well!

      Reply
  4. Tammie Greenwell says

    Tuesday, January 20, 2015 at 2:28 pm

    Shocked! Def. worth pinning.

    Reply
    • Tamara says

      Tuesday, January 20, 2015 at 3:10 pm

      I appreciate that, Tammie!:-)

      Reply
  5. Michelle Walters says

    Tuesday, January 20, 2015 at 7:27 pm

    Best painted couch redo I have seen!!! I have thought about trying this, but was concerned about the stiffness. Nice to know sanding is the way to go!!! Love the color and the no skirt. Awesome job!

    Reply
    • Tamara says

      Tuesday, January 20, 2015 at 7:44 pm

      Thanks, Michelle!:-). There will still be some stiffness to it but it won’t be rough which I was happy about.

      Reply
  6. Tammie says

    Wednesday, January 21, 2015 at 10:30 pm

    Does the paint wear off….does it get on your clothes when you sit on the sofa?

    Reply
    • Tamara says

      Wednesday, January 21, 2015 at 11:13 pm

      Great question, Tammie! No it doesn’t wear off or get on your clothes at all. Once it dries it is there to stay!

      Reply
  7. Carol Stafford says

    Thursday, January 22, 2015 at 12:41 pm

    What sort of drying time did this involve? Would it be possible for someone who lives in a more humid area?

    Reply
    • Tamara says

      Thursday, January 22, 2015 at 1:12 pm

      Hi Carol, great question! I actually live in a pretty humid area. When I first started spraying down the couch with water I kind of drenched it and after painting the first coat it took about 6 hours to dry. I realized I didn’t need to use so much water so the 2nd and third coats I got it nice and damp but not soaking and subsequently it only took a couple of hours to dry between coats. I hope this answered your question! Let me know if you have any more ?s!

      Reply
      • Sarah says

        Wednesday, May 20, 2015 at 9:11 am

        So you have to spray it with water between each coat of paint? Or just at the very beginning before you put any paint on?

        Reply
        • Tamara says

          Wednesday, May 20, 2015 at 12:08 pm

          Yes, I sprayed with water between each coat!

          Reply
  8. Parsimonious Décor Darling says

    Friday, January 23, 2015 at 3:14 pm

    Wow, amazing! Visiting you from The Shabby Nest.

    Reply
    • Tamara says

      Friday, January 23, 2015 at 4:42 pm

      Thank you for visiting today!!

      Reply
  9. Larissa says

    Sunday, January 25, 2015 at 5:37 am

    This probably seems like a stupid question but would this work on leather furniture do you think?

    Reply
    • Tamara says

      Sunday, January 25, 2015 at 12:45 pm

      Not a stupid question at all. I’ve read on other blogs that it works on leather! I would google it first though. I google everything first to find all the information I can!:-)

      Reply
  10. Larissa says

    Sunday, January 25, 2015 at 5:38 am

    By the way, yr couch looks fab, you did an awesome job 🙂

    Reply
    • Tamara says

      Sunday, January 25, 2015 at 12:46 pm

      Thanks, Larissa! I appreciate you stopping by today!!

      Reply
  11. Lemon Peel says

    Wednesday, January 28, 2015 at 10:02 am

    That’s pretty amazing! I don’t like the color of ours either, so maybe I should try that.

    Reply
  12. Carrie From Carrie This Home says

    Wednesday, January 28, 2015 at 1:48 pm

    Tamara–you may have just solved my couch problem! I have two perfectly good couches in my living room but I just don’t like the color. This would be the perfect solution! Pinning this!

    Reply
    • Tamara says

      Wednesday, January 28, 2015 at 1:59 pm

      Awesome, Carrie!!

      Reply
  13. Terri mason says

    Friday, January 30, 2015 at 6:24 am

    I luv it! Would this work on micro fiber too? First I’m gonna try it on an orange velvet type love seat I got r frm a thrift shop.

    Reply
    • Tamara says

      Friday, January 30, 2015 at 8:28 am

      Hi, Terri! I’ve read that it works on microfiber! Good idea to start with the orange velvet loveseat to make sure you don’t mind the little bit of stiffness painting it brings!

      Reply
  14. Kathy says

    Friday, February 20, 2015 at 8:37 am

    HOW DURABLE IS IT. DOES THE PAINT WEAR OFF OVER TIME?

    Reply
    • Tamara says

      Friday, February 20, 2015 at 9:14 am

      The paint appears very durable. I haven’t had it long enough to tell if it will stand the test of time but from what I’ve read from others’ experience it most likely will. Thanks for the question, Kathy!

      Reply
  15. krissie says

    Tuesday, February 24, 2015 at 9:21 am

    Beautiful! Well worth your time and money. I attempted to paint a leather chair with purchased chalk paint – spent a ton of money only to have it flake off everywhere! DIY disaster! For the record, if you’re going to paint a leather piece, make sure it is only a small area that is smooth. My chair was large and “cushiony”. Next time I will take your advice and paint fabric instead. Thanks for the great tutorial.

    Reply
    • Tamara says

      Tuesday, February 24, 2015 at 11:28 am

      Krissie, so good to know! Thank you for sharing your experience!!

      Reply
  16. Nancy says

    Wednesday, February 25, 2015 at 2:05 pm

    I am so excited to learn about this! I have a couch and 2 side chairs from my mother who passed away 7 years ago. She always bought very nice furniture….. unfortunately they’re PINK!! She LOVED the 80s dusty rose color. Hated to just get rid of them and no one wants them. LOL Now I get to keep mom’s furniture and make it my own. Thank you so much!!

    Reply
    • Tamara says

      Wednesday, February 25, 2015 at 2:30 pm

      That’s awesome, Nancy! I’m excited for you to be able to make them your own!:-)

      Reply
  17. Madnna cole says

    Thursday, February 26, 2015 at 10:01 pm

    I thought this was an amazing idea, i love this web site, i just did some Ballard look alikes and if i do say so myself they look pretty amazing. Thanks.

    Reply
    • Tamara says

      Thursday, February 26, 2015 at 10:11 pm

      Thanks, Madnna!:-) Your Ballard look alikes sound super cool!!

      Reply
  18. Tiffany Smith says

    Friday, February 27, 2015 at 3:50 am

    Are there fabrics that it won’t work on? Do you have to sand it? What about using a shedding brush with fine steel tines? How long of a drying time, in between coats and final time?

    Reply
    • Tamara says

      Friday, February 27, 2015 at 10:47 am

      These are great questions, Tiffany! I have heard mixed reviews about it working on leather. I used it on chenille so I know it works on that. I have heard it works really well on microfiber! I’m not sure about the rest though.:-( Sanding it was VERY important to it becoming comfortable to sit on and touch so I would not skip sanding it. I haven’t had any experience with using a shedding brush. You could try it but my guess is it won’t work the same as sandpaper. Drying time between coats will vary depending on humidity and how wet the material gets. For me the first coat took the longest to dry like 6-8 hours. But after that each coat took less time to dry like 4 hours and then 2 hours. Thanks for the questions, Tiffany!

      Reply
  19. heather says

    Friday, February 27, 2015 at 4:49 am

    Love the couch! Would the paint cover patterned fabric? I have 2 chairs that I would love to do but they have a rose print on them.

    Reply
    • Tamara says

      Friday, February 27, 2015 at 10:01 am

      This is such a great question, Heather! I am not completely sure to be honest but from what I understand I think it will still work to paint patterned fabric. It will be like painting over a mural on a wall. After the first and second coat you will probably still see some of the pattern but by the the 3rd or 4th coat it should all be blocked!

      Reply
  20. Seina says

    Monday, March 2, 2015 at 5:50 pm

    What type of fabric was the brown couch? I noticed a bit of a ribbed pattern. Was that something you created or was it already part of the fabric?

    Reply
    • Tamara says

      Monday, March 2, 2015 at 9:51 pm

      Hi, Seina! The brown couch was a chenille fabric and was ribbed with a bit of a wave movement to it already. Thanks for your question!:-)

      Reply
  21. Carole says

    Wednesday, March 4, 2015 at 8:23 am

    ……just finished painting a canvas loveseat a beautiful chocolate brown for a theater set. It’s stiff, but looks great and the stiffness doesn’t really matter for its use onstage. The problem I’ve run into is that the loose back cushions make light marks on the arms of the loveseat when they rub against it, such as when someone sits down, leans against the cushions and wiggles around. Can I seal the painted fabric with a spray-on poly to stop the abrasion marks? Whatever I do must be fast and ….our first performance is in 5 days! Help!!! Thanks so much for any advice you can offer.

    Reply
    • Tamara says

      Wednesday, March 4, 2015 at 9:08 am

      Hi Carole! Yes, you can seal it with a clear finishing wax! I know the brand Miniwax sells one at Home Depot for about $10. Wishing you a wonderful performance!!:-)

      Reply
  22. Jeanie says

    Thursday, March 12, 2015 at 1:58 pm

    What about adding fabric medium paint that softens the paint?… the kind that is sold for painting on teeshirts. I have wondered about painting upholstered furniture for a long time. I think I will follow your recipe and also add fabric medium – perhaps in place of the water, as it’s more a thin liquid.

    Reply
    • Tamara says

      Thursday, March 12, 2015 at 5:59 pm

      I think that’s worth a try, Jeanie! I didn’t use the fabric medium because I had heard it is pricey but maybe you won’t use as much your way. Thanks for sharing your idea, Jeanie!:-)

      Reply
  23. Lisa Frost says

    Friday, March 13, 2015 at 12:09 pm

    You did such a good job of explaining this process. Thank you. I have been toying with this idea for awhile and now i feel like going ahead and giving it a try.

    Reply
    • Tamara says

      Friday, March 13, 2015 at 2:27 pm

      Thanks for your feedback, Lisa!:-)

      Reply
  24. lisa volk says

    Sunday, March 15, 2015 at 11:29 am

    cant wait to try this have great living room furniture I have outgrown the style but cant part with it has stood the test of time,get back to you when project is completed

    Reply
  25. Lindsey Blincoe says

    Wednesday, March 25, 2015 at 1:35 am

    This is amazing! I just love how it turned out and this is such a great tutorial to follow too. I won’t be doing this on my couch because I JUST reupholstered it (wish I had seen this first!) but I’m thinking of maybe scavenging some old accent chair just to give it a try! Thanks so much for sharing! 🙂

    Lindsey
    http://hhandtw.blogspot.com

    Reply
  26. Wendy says

    Thursday, March 26, 2015 at 10:59 pm

    We just recently purchased a 1992 camper that is getting a total remodel. The ceiling has a chenille type fabric on the ceiling. Do you think this would work for that?

    Reply
    • Tamara says

      Thursday, March 26, 2015 at 11:10 pm

      What a cool remodel, Wendy! Yes, I do think it would work for that! After you paint, sanding is so important to get the fabric not rough to the touch. I would just be sure to use goggles and a mask to protect your eyes and respiratory when sanding the ceiling. Congrats on your new camper!:-)

      Reply
  27. Kay Christopher says

    Saturday, March 28, 2015 at 5:18 pm

    Will I have to use Flat paint? Could I not use Semi-gloss?

    Reply
    • Tamara says

      Saturday, March 28, 2015 at 5:34 pm

      Good question, Kay. I think flat works better for this project because it has no sheen. Most fabric isn’t shiny so the flat paint will look more like normal fabric. But if you don’t mind then i shine I think it’s worth a try!

      Reply
  28. stephanie says

    Sunday, March 29, 2015 at 1:13 am

    So we don’t have to seal it?? Do you like the chalk paint to fabric/acrylic paint on this project?

    Reply
    • Tamara says

      Sunday, March 29, 2015 at 10:57 am

      Hi, Stephanie! Yep you don’t have to seal but if you wanted to you could. Which method had better results? Hmmm, that’s a hard one. I would say the fabric paint method is less stiff. I think if I were doing a chair or something small I would use the fabric paint but to do a whole big couch I would use the DIY chalk paint because the fabric medium can get pricey. Another idea would be to pour a bottle of fabric paint into the DIY chalk paint to see if a little of it would go a long way. Might be worth a try!

      Reply
  29. dodie says

    Friday, April 3, 2015 at 8:56 pm

    I think you did a great job sweetie…….Thats a little harder job for an old gal like me, but I love the way you jump right into something and give it a go……I need to learn to throw caution to the wind also..You have inspired me to try and do this to a chair…:)

    Reply
    • Tamara says

      Friday, April 3, 2015 at 9:11 pm

      Thanks, Dodie! Go for it! I love a little DIY adventure to spice life up a bit.:-)

      Reply
  30. Theresa Cisco says

    Monday, April 6, 2015 at 7:24 pm

    My couch is a beige And really stained it is a suede material Will this work on mine?

    Reply
    • Tamara says

      Monday, April 6, 2015 at 10:01 pm

      Hi Theresa! If it’s like a microfiber synthetic suede then definitely yes! If otherwise I’m not sure…if the cushions come off the couch you could always try it out first on one of the backsides of the cushions to see!

      Reply
  31. Lisa says

    Tuesday, April 7, 2015 at 3:32 am

    Do I need to spray water before I paint each coat? I am going to pin this on my Pinterest . Great tutorial!

    Reply
    • Tamara says

      Tuesday, April 7, 2015 at 8:35 am

      Thanks, Lisa! Yes, spray it down with water before each coat!:-)

      Reply
  32. Mary S says

    Wednesday, April 8, 2015 at 5:47 am

    Reading through this thinking what a great idea but I’ll never do it … you got this couch from a friend, however cushions on a thrift store piece can be rather skeevy

    Reply
  33. Paige says

    Friday, April 10, 2015 at 2:40 am

    I’ve heard that sanding between coats can help with the stiffness. Do you think that would have made a difference on the cushions?

    Reply
  34. Breckein says

    Sunday, May 3, 2015 at 2:09 pm

    It looks fantastic! I’ve wanted to paint my couch for a couple years but its a strange fabric, almost like velvet, do you think this technique would work on that?

    Reply
    • Tamara says

      Monday, May 4, 2015 at 10:15 pm

      I couldn’t say for sure but I think it would be okay. Microfiber is soft kind of like velvet and it works well on it so I would guess so.

      Reply
  35. Gina says

    Monday, May 4, 2015 at 9:50 pm

    How does this hold up to dogs jumping up on it? I am wondering if their nails would make any marks or once it’s on there it is on? I have an old, ugly , brown sofa sleeping in my basement that my daughter left when she moved that I would love to try this on!

    Reply
    • Tamara says

      Monday, May 4, 2015 at 10:10 pm

      Hi Gina, that’s a good question. I don’t have dogs so I’m not quite sure but it holds up to being aggressively sanded. Once the paint is on there it’s on so I would guess it would be fine for dogs.

      Reply
  36. Susan says

    Tuesday, May 5, 2015 at 12:32 am

    Hi Tamara I love the color of your couch and your instructions are easy to follow, I was wondering if you could do this on heavy blackout curtains?

    Reply
    • Tamara says

      Wednesday, May 6, 2015 at 2:37 pm

      I think for blackout curtains I would use fabric paint. With chalk paint you need to sand it afterwards. I would think it might be hard to sand a curtain because it would move around too much. I hope this helps, Susan!

      Reply
  37. Val says

    Thursday, May 21, 2015 at 4:54 pm

    What if you added fabric medium to the chalk paint, would that make fabric softer? BTW great job!

    Reply
    • Tamara says

      Thursday, May 21, 2015 at 5:14 pm

      Thanks Val! I wish I could give you a for sure answer but I haven’t tried it. I do agree that it would make sense that a fabric medium would soften it!:-)

      Reply
  38. Carole Lane says

    Thursday, May 28, 2015 at 6:20 am

    I have a fabric called olefin on my couch. Very thick and also was a great piece my mother bought the best. Would this paint work on my couch?

    Reply
    • Tamara says

      Friday, May 29, 2015 at 11:19 pm

      Hi Carole, it should work on Olefin fabric. My couch had pretty thick material too. Just make sure to wet it so the paint will soak into the fabric!

      Reply
      • Carole says

        Sunday, May 31, 2015 at 5:34 pm

        Thanks for answering Tamara

        Reply
  39. lorrainecalvert says

    Saturday, May 30, 2015 at 12:22 am

    Great job! What a transformation. Now you’ve got me thinking about doing this to my microfiber sofa. It’s perfectly fine, fabric is great, vacuums up nicely, but I’ve always wanted a purple sofa. My friend had one with a paisley inlay that was gorgeous. I would love to do an eggplant color with a large black paisley stencil. Meanwhile I still haven’t finished my little 4 seat dining room table. Oh to dream!

    Reply
    • Tamara says

      Saturday, May 30, 2015 at 12:30 am

      Lol, Lorraine, I know what you mean about having too many projects at a time!:-) I’ve heard this works really well on microfiber material!

      Reply
  40. Dena Cottrell says

    Wednesday, June 3, 2015 at 12:49 am

    Wow! That is really awesome! After seeing this on Hometalk I’ve been thinking about doing it to our sectionals. I hate them personally but since we have young children and dogs I refuse to purchase a new couch. Did you took the covers off the cushions while you were painting them? Do you think using an electric sander would work? I’m disabled and this may be a huge task but I really want to do it. And if there are any shortcuts along the way I’m all for taking advantage. Thanks for sharing.

    Reply
    • Tamara says

      Wednesday, June 3, 2015 at 9:10 am

      Hi Dena! My couch’s fabric was on the thicker side so I just kept the covers on while I painted. I think it’s fine (and easier) to keep the covers on while you paint. I’m not sure about using an electric sander but I think it could work if it’s kept on the surface of the couch and isn’t pushed into the couch. I hope this makes sense. As long as you are okay with the sectional not being useable you can do this project at any pace you want. Just put the used brush in a ziplock bag and it won’t dry out for when you want to do the next coat the next day. You can also put a garbage around the paint bucket to keep it contained for the next day!:-)

      Reply
  41. Deborah Redman says

    Wednesday, June 3, 2015 at 9:37 am

    This is so beautiful. I would love to try it but the couch I want to paint has a large ink stain on the cushion. Would you do something to block the ink stain before painting? What would you use?

    Reply
    • Tamara says

      Wednesday, June 3, 2015 at 9:55 am

      Hi Deborah! I don’t think you need to block the stain. I think the paint should cover the stain. When the fabric is wetted first it allows the paint to absorb into the fabric. The paint should cover the stain after a few coats.

      Reply
  42. Becky says

    Sunday, June 21, 2015 at 5:27 pm

    Im curious, have you washed the fabric since its been painted? With two dogs and five kids, I need to throw the cushion covers in the washer weekly. I’d like to know how they stand up to the washing.

    Reply
    • Tamara says

      Sunday, June 21, 2015 at 5:51 pm

      Hi, Becky, I did try it once. The paint got a bit splotchy though in a few places. I don’t know if it was caused by the water or the liquid fabric softener I used with it. Anyways I ended up repainting the splotchy areas. It might be too much of a risk for weekly washings though. Thanks for the question!

      Reply
  43. Lynn Richards says

    Friday, June 26, 2015 at 4:25 pm

    Just read this from pinterest and I can’t wait to give it a go! What grit sandpaper did you use and, what do you think about using a power sander?
    thanks!

    Reply
    • Tamara says

      Friday, June 26, 2015 at 10:55 pm

      Hi, Lynn! I would start out with 120 grit and then finish with 400 or higher grit. The super fine grit paper really is what smooths it out the best. I’m not sure about using a power sander. I think you could try it but just be careful not to push hard into the upholstery. I’d love to hear how it goes!

      Reply
  44. Naomi says

    Saturday, June 27, 2015 at 10:53 am

    I’m excited to try this idea and I can see why you would need patience and your couch turned out fabulous! Thanks for sharing

    Reply
  45. Jamielynne says

    Wednesday, July 1, 2015 at 8:40 pm

    Heck ya..I gotta try this I have the ugliest loveseat in the whole world and since I am on disability, I am cash strapped. Never-the-less I’m gonna do it. Yours looks awesome..GOOD JOB!!

    Reply
    • Tamara says

      Friday, July 3, 2015 at 9:03 am

      Awesome, Jamie!!

      Reply
  46. Maleri says

    Monday, July 6, 2015 at 1:47 pm

    Would this work on a textured pattern you think? My couch has a textured design fabric and I’m wondering if it would wipe out the pattern or not.

    Reply
    • Tamara says

      Monday, July 6, 2015 at 2:35 pm

      Hi Maleri! With enough coats I think you could cover a colored pattern but I don’t think it would cover a textured pattern. My couch had a texture and it still does even with 3-4 coats.

      Reply
      • Maleri says

        Monday, July 6, 2015 at 9:32 pm

        Ok great. Thank you.

        Reply
  47. Elizabeth Butler says

    Wednesday, July 8, 2015 at 7:32 pm

    Tamara, I LOVE IT! I’m going to do something similar to mine, I need a new one but I can’t afford it. I will probs try to waxing part though. A spring recently went on mine too, I shall have to investigate. A friend gave me my 3 piece suite about 25 year ago, the chairs are still almost perfect, I am just so fed up with the colour and the look. I might go for aubergine, or may pistachio, possibly hot pink.

    Reply
    • Tamara says

      Wednesday, July 8, 2015 at 10:53 pm

      Fun colors, Elizabeth! I’m excited for you!

      Reply
  48. Lisa says

    Monday, July 13, 2015 at 5:29 am

    This looks great. I was in a store recently and they had chalk painted a chair and it was amazing. What would be the purpose of waxing it? Would waxing be after sanding?

    Reply
    • Tamara says

      Monday, July 13, 2015 at 9:08 am

      Hi Lisa, thanks for the question! The purpose of waxing is to seal the paint and protect it. Waxing can also add luster or shine which can look great but it want what i wanted for this project. Waxing comes at the very end after sanding. Let me know if you have any other questions!:-)

      Reply
  49. Charlotte says

    Thursday, July 16, 2015 at 3:42 pm

    It’s amazing ! I’m gonna follow this tutorial for a nice sofa I found in the streets 😛
    How much paint did you use for yours ? Thank you !

    Reply
    • Tamara says

      Thursday, July 16, 2015 at 4:48 pm

      Hi, Charlotte! I used about 1/2 of a gallon can of latex paint to make the chalk paint for the couch. Hope this helps!

      Reply
  50. soniagarcia.pr@gmail.com says

    Sunday, July 19, 2015 at 8:11 pm

    Hi Tamara,

    I stumbled on your blog through Pinterest. I’m thinking about painting my couch as well. However, I’ve looked on other websites and have read mixed reviews about painting couches, especially those with cordoroy fabric. Do you know if your paint mix and gray color would work well with a cordoroy couch? My couch is currently white and I think the color you chose for your couch would look great on mine, but I am hesitant due to the fabric. What do you think?

    Thanks!

    Reply
  51. Janet says

    Monday, July 20, 2015 at 1:34 pm

    Do you think it would work on outdoor sun fella chair cushions?

    Reply
    • Janet says

      Monday, July 20, 2015 at 1:35 pm

      Sorry I meant to say outdoor sunbrella fabric cushions?

      Reply
      • Tamara says

        Monday, July 20, 2015 at 3:59 pm

        It’s hard to say, Janet. I’ve heard that chalk paint does well outdoors on other things but I haven’t read anything on how it does with fabric. I would suggest googling “chalk paint and outdoor cushions” and hopefully you will get some answers. Let me know what you find out!!

        Reply
  52. DK says

    Wednesday, July 22, 2015 at 5:15 pm

    I love the transformation and really want to chalk paint my couch and chair in my formal living room. I was worried how it would feel since we spend a lot of time in there (most natural light in the house so my hubby and I like to hang there). All I had available to test the paint on was some fabric pillows to give me an idea of how it would feel. They are definitely more difficult to sand and I am a little worried that the couch and chair I want to paint might not feel so good to sit on after doing my pillows. Any tips of advice? I really want to do this

    Reply
    • Tamara says

      Wednesday, July 22, 2015 at 7:21 pm

      If it’s your go to chair for relaxation and comfort that you use multiple times a day then maybe don’t paint it. I don’t use the couch I painted very much because it’s in the living room and we spend much more time in other rooms. It’s comfortable enough to me for occasional use but it’s not where I’d want to cozy up on multiple time a day. I hope this helps, DK!!:-)

      Reply
  53. Remy says

    Monday, July 27, 2015 at 8:18 pm

    Hey Tamara, your couch turned out so beautifully! I just bought a gorgeous three piece suite, reupholstered curved 60’s sofa and two armchairs, that I love the shape of and are in great condition. I’m planning on putting new legs on them, similar to the ones on yours. My only problem is I’m not crazy about the cream colour that they are, and I’d love to paint them without sacrificing too much comfort. Do you think the fact that they’re very light in colour could mean I could water down the recipe a little more, or try adding fabric medium or something to make it more like a stain than a paint? Would love to hear your thoughts! Remy 🙂

    Reply
    • Tamara says

      Tuesday, July 28, 2015 at 12:28 am

      Hi, Remy, thanks for your question. I think the fact that your couch is cream probably means you will have to do less coats– perhaps 2-3 coats instead of 3-4. I’m not sure that watering it down even more will help make it more comfortable but if you are willing to spend the extra money then I think adding fabric medium would be your better bet. Would love to hear how it goes!!! Sounds like you scored a beautiful 3 piece suite! Congrats!:-)

      Reply
  54. jjflamingo says

    Sunday, August 9, 2015 at 8:32 am

    How did you fix your cushions so that they do not sag like in the before photo? I can’t wait to paint my free from Craigslist couch, but will only paint the base since the cushions are fine, and removable. I am thinking of a contrasting color since it might be difficult to match the original color of the cushions. I may recover them at a later date.

    Reply
    • Tamara says

      Sunday, August 9, 2015 at 8:01 pm

      Doing contrasting colors sounds cool. I actually didn’t do anything about the sagging except to jump on them after I painted them.:-). Here is a link to an article about repairing sagging cushions, http://www.hometalk.com/4156124/how-to-make-a-saggy-sofa-look-brand-new. Hope it helps!

      Reply
  55. Marcy marshall says

    Thursday, August 13, 2015 at 11:36 pm

    I just did my first chair! When I got the chair I only had 2 sons, so I got a off white chair with small red stripes. I now have 5 sons, my furniture had been through a lot! My mother and I recovered my couch and a wing back chair. It was a chore! Lol. So for my third piece in my living room, I just bout a leather chair. I decided to reprint my old chair to put on my front porch. I haven’t put the wax on it yet, but I was wondering if something happens and it gets a little wet will the pain come off on clothes? Since I am putting it on my porch should I go ahead and use the wax?

    Reply
    • Marcy marshall says

      Thursday, August 13, 2015 at 11:41 pm

      Please ignore the misspellings, I was typing that with 2 five year olds and an 8 year old fighting over the t.v. Remote with me in the middle. Sorry!

      Reply
      • Tamara says

        Friday, August 14, 2015 at 9:46 am

        No worries, I understand that scenario all too well! 🙂

        Reply
    • Tamara says

      Friday, August 14, 2015 at 9:45 am

      Congrats, Marcy, on your hard work! Yes, I recommend using wax since it will be outdoors on a porch. Better safe than sorry since the outdoor elements can be hard on furniture. The wax will seal and protect it better. Thanks for your question!:-)

      Reply
  56. Hettie says

    Monday, August 17, 2015 at 7:47 am

    Hi there, can you paint a leather couch too?

    Reply
    • Tamara says

      Tuesday, August 18, 2015 at 8:48 am

      Hi, Hettie, I’ve never done it but have heard you can. Here’s a link to someone that did, https://m.youtube.com/watch?v=MTnu7ZPLiJw. Thanks!

      Reply
  57. Bree says

    Tuesday, August 18, 2015 at 11:12 am

    It looks amazing! Just a couple questions before I paint my own white couch (it was free- I would have NEVER paid money for a white couch… especially when I have three kids). Did you sand between layers of paint? And did you try spot washing the couch beforehand to get rid of stains before you started painting? As I said previously, I have a white couch… that isn’t so white anymore.

    Reply
    • Tamara says

      Tuesday, August 18, 2015 at 11:44 am

      Hi, Bree, I didn’t try spot treating the stains before other than the water I sprayed on it before I started painting. The paint covered the stains without me having to do anything special to them. I tried sanding in between coats on one cushion to see if it was better but I didn’t see much difference so I just painted all the coats and then sanded just at the end because it was easier.

      Reply
  58. Brandi says

    Wednesday, September 2, 2015 at 7:44 pm

    How bad is the paint smell, and about how long does it take to go away? Or does it not have much of an odor?

    Reply
    • Tamara says

      Wednesday, September 2, 2015 at 7:52 pm

      It’s just like painting a wall…it smells for the first couple of days and then goes away. Thanks for your question, Brandi!

      Reply
  59. Stacie says

    Saturday, September 12, 2015 at 11:05 am

    If you go with recovering the cushions and painting the back and kick area, can you just use paint without the additive?

    Reply
    • Tamara says

      Saturday, September 12, 2015 at 11:13 am

      Hi Stacie, that is a great question! To be honest I’m not sure because I’ve never tried to paint fabric without the calcium carbonate. If you want to try it I would start in an area maybe on the back bottom side of the couch first and see how it works. The calcium carbonate really is very easy and pretty inexpensive to order through amazon if you decide to do it the chalk paint way. I’d love to hear how it goes!!:-)

      Reply
  60. Stefani Shreve says

    Tuesday, September 15, 2015 at 5:33 pm

    Does it stain when people sit on it?

    Reply
    • Tamara says

      Tuesday, September 15, 2015 at 6:40 pm

      No, not at all. Once it is dry it doesn’t go anywhere.:-)

      Reply
  61. Marja-Liisa McKee says

    Saturday, September 19, 2015 at 11:20 am

    I LOVE, LOVE, LOVE the painted couch! Absolutely AMAZING! ♡

    Reply
    • Tamara says

      Saturday, September 19, 2015 at 11:25 am

      Thank you, Marja-Liisa!:-)

      Reply
  62. ryanne says

    Sunday, September 20, 2015 at 1:52 pm

    does it stain your clothes when you sit on it, or rub off in anyway?

    Reply
    • Tamara says

      Sunday, September 20, 2015 at 4:38 pm

      Not at all, Ryanne!

      Reply
  63. Brenda Benton says

    Sunday, September 20, 2015 at 2:09 pm

    Hi. Tamara!! YOU are a girl after my own heart as I am a little bit daring myself!! Early after you posted this a man named Ed S. was going to apply wax to his couch after painting it. Wonder how that turned out…? Do you have t sand before or AFTER the wax? And one more question is, like how comfortable would the wax project be to sit on and (fourth one, sorry) does any of this rub off on people or clothes? Thank you so much. Maybe, just maybe, Ed S would answer himself….? I appreciate what you have done, Tamara and all of your great info!!

    Reply
    • Tamara says

      Sunday, September 20, 2015 at 4:56 pm

      Hi Brenda! The sanding part comes before you wax. When I waxed the couch in a couple of spots I was hoping it would soften the painted material on the couch but it didn’t…it felt the same. Once the paint and wax are dry there is no transferring unto clothes. Thanks for your questions, Brenda, and keep up your daring spirit!:-)

      Reply
  64. Mary says

    Tuesday, September 22, 2015 at 7:59 pm

    Hi Tamara. love your couch. Why couldn’t you use fabric softener instead of fabric medium. It would be cheaper.

    Mary

    Reply
    • Tamara says

      Tuesday, September 22, 2015 at 10:36 pm

      Hi Mary, that’s a good question. From what I’ve read and experienced it seems as though the fabric softener has chemicals that do not gel well with the paint properties. I tried fabric softner on the couch after I painted the couch and it made the paint splotchy. But it you were up for experimenting you could try mixing the water with some fabric softener and spraying it on before you paint. If you try it let me know how it goes!!

      Reply
  65. Kristi says

    Tuesday, September 22, 2015 at 8:49 pm

    The couch turned out fabulous. I wanted to ask if you thought this would be good for a piece of upholstered furniture that you want to place on your covered patio. For indoors I think I’d just get it re-upholstered, but I have a couple of chairs I’d like to put on my patio, but would prefer them not to get ruined by water or humidity. Do you think it would help protect them????

    Reply
    • Tamara says

      Tuesday, September 22, 2015 at 10:47 pm

      Hi, Kristi, I think since the patio is covered in should do okay. I would finish it with the wax as an added layer of protection. Will it protect the chairs more by being painted? To be honest I’m just not sure. I would try googling “paint outdoor cushions with chalk paint” and see if you get any further info. Thanks for being here!:-)

      Reply
  66. Mary says

    Friday, October 2, 2015 at 7:50 pm

    I have been going on so many website about painting a couch. So far I love how you have transform the dull to the beautiful couch. I started painting my cushion and it’s already feeling stiff , I was wondering if you have other tips when mixing. I followed your instruction but should I add more water or calcium?

    Reply
    • Tamara says

      Friday, October 2, 2015 at 8:12 pm

      Hi Mary, it will feel stiff until you sand it really well at the end. What chalk paint recipe did you use?

      Reply
  67. Debbie says

    Sunday, October 25, 2015 at 10:22 pm

    Looks great!! How does the fabric feel after it was painted? Does it feel hard or soft? Does the paint come off on your clothes?

    Reply
  68. Tami B. says

    Thursday, November 5, 2015 at 11:03 am

    We’re closing on our house in December and are in serious need of furniture. One of hubby’s co-workers is giving us a sectional. Yay, right? But this is my house and I’m painting and it’s all going to be specific colors and I get to be a control freak and … oh, I can paint that sectional? <3 Thank you 🙂

    Also, I think I freaked hubby out just a bit by telling him I'd be painting it. Gotta keep that boy on his toes! 🙂

    Reply
    • Tamara says

      Thursday, November 5, 2015 at 9:55 pm

      i bet it did freak him out!?

      Reply
  69. JustMe says

    Friday, November 6, 2015 at 6:58 pm

    Omigosh thank you for being so informative about this. I’m a total DYI junkie and thrive on a challenge. I have two beautifully crafted carved wood chairs that desperately need an update. I can reupholster them myself but I’m thinking of giving this a try first. Looks like I have a project for Sunday!

    Reply
    • Tamara says

      Friday, November 6, 2015 at 8:30 pm

      Sounds fun!!

      Reply
  70. melaniearallen says

    Sunday, November 22, 2015 at 12:27 pm

    Hi Tamara! I am so intrigued by this! The couch looks so stunning and I’m planning to try it myself. I have a few questions.

    1. It’s been almost a year since you posted this. How is the painting holding up?
    2. Is it safe to do this project indoors? I live in Indiana and it will likely be too cold/snowy to do outside.
    3. Is the paint used safe for kids/pets? My kids will be the ones primarily sitting on the couch.

    Thanks for your help and for posting such a cool project!

    Reply
    • Tamara says

      Monday, November 23, 2015 at 5:27 pm

      Hi Melanie! It has held up great–I’ve had no problems with it. I painted mine in my basement in Ohio during the winter. The basement isn’t well ventilated so it probably the best thing to so but the paint is basically very similar to wall paint which is not toxic. I would just suggest doing in a place that Is blocked off (by a door) from the rest of the house. So you can get away from it in between coats. Yes the paint is safe kids and pets. It is basically wall paint. If you make the chalk paint recipe I used you can get a latex paint that is low or no VOC. Thanks for your questions it makes me think it might be helpful to do a 1 year after post.:-)

      Reply
  71. Pat says

    Saturday, December 12, 2015 at 7:24 pm

    What a beautify job you did! I have a couch and loveseat that are about 14 years old. They are so comfortable and I love them but want to change the colors in my living room. There is nothing wrong with them but I got a price to have them reupholstered and it was well over $3000!!! Much more than I paid for them. There’s no way… so I was thrilled to see the beautiful outcome of your couch. Thanks so much for sharing.

    Reply
  72. Vanessa says

    Tuesday, December 29, 2015 at 3:23 pm

    I too want to change my sofas. They are about 11yrs old and they are a navy microfiber. I am having trouble finding a grey sofa that I like as much as these that we have. I never even thought of painting as an option! It looks really great!
    I am not much of a diy-er myself and we practically live on these sofas so I am going the route of reupholstering. I know it is going to cost me almost double what I paid in 2004 but I hear wonderful things about how long it can last and I want another 11+ yrs out of these guys.

    Reply
  73. Stephanie says

    Tuesday, January 19, 2016 at 12:04 am

    I’ve got a couch mostly leather and cushioned seats. I would love it if you gave me some ideas On how to spice it up? It’s a bit worn down. Email me at auquilla69 @ gmail.com thanks !! – Steph 🙂

    Reply
  74. Erin says

    Tuesday, January 19, 2016 at 12:51 am

    Couldn’t sleep and stumbled on your talent… Great stuff here!
    To my point… If this is a repeat I apologize!
    I used to paint my own photography backgrounds. Really heavy 12′ x 16′ canvas. I mixed in liquid fabric softener and it made the canvas MUCH more flexible.
    Just keep that under your hat for the next time you want to experiment! I’d be curious to hear a comparison.

    Reply
    • Tamara says

      Tuesday, January 19, 2016 at 8:47 am

      Hi, Erin! Sorry to you couldn’t sleep! That’s never fun! Thanks so much for the tip!! I tried liquid softener after but not mixed in with the paint. I will have too give that a try next time!:-)

      Reply
  75. Yookin Tryta says

    Monday, February 8, 2016 at 5:39 pm

    oh my gosh honey, where in the world do you find sandpaper for $12? You can buy 5 multi packs on sale at my local store for that, and 3 not on sale… i couldn’t afford to sand ANYTHING that expensive…That’s 5 gallons of gas for hecks sake, and all you got was paper with a teaspoon of grit. I hope you aren’t one of the money is no issue bloggers, aren’t there plenty of those out there that demo beautiful things that most find unattainable? Real people want to know how to do it on a dime, after all, we’d buy new couches if we could afford it. needless to say, your couch turned out gorgeous and scanning quickly through your blog, i’ve bookmarked for a look when have more time.. off to work. I shoud earn that sandpaper after an hour, minus taxes. haha

    Reply
    • Tamara says

      Monday, February 8, 2016 at 6:04 pm

      Sorry for the confusion… I bought 3 PACKS of sand paper and a sanding block for $12 and went through it all (from Home Depot). Where do you find your good deals on sandpaper?

      Reply
  76. Mandie says

    Wednesday, February 10, 2016 at 4:55 am

    Hey Tamara
    Just read your blog and found it really helpful.I do furniture upcycling and have painted lampshades and bases but have yet to try material. I’m gonna give it a go on some chairs that I have tho and see how it goes.humidity isn’t a problem here in Scotland but rain can be a tricky problem for getting outdoors to do stuff .I also use homemade chalk paint tho and I use calcium carbonate and buy this in bulk I love it cos you can coordinate it to fit in with people’s decor..thanks for your blog it was most helpful and has inspired me xx

    Reply
    • Tamara says

      Wednesday, February 10, 2016 at 8:47 am

      So happy to hear you were inspired here!! Thanks, Mandie!:-)

      Reply
  77. Ayda says

    Thursday, February 18, 2016 at 8:49 am

    Great Post! Loved it – Will definitely share with my clients (I am an agent) and this is a great way to utilize their existing couches and just paint them instead of replacing them. You can always be in Style! – Do you know how many times you can paint a couch..lol not that I would recommend just keep on painting but just wondering!
    Thank you for taking the time to take such great pictures and taking so much time to put all the details of this post together. It is really appreciated!! I will direct my clients to your posts and post some of your ideas with the links to here 🙂
    Thanks again!

    Reply
    • Tamara says

      Thursday, February 18, 2016 at 6:00 pm

      Thank you for your kind words, Ayda, and for sharing the post! Your question is a really good one! I’m not sure…I think the more it is painted the more likely it will get more stiff. I would guess that painting it twice is probably a maximum amount you would want to paint it. Hope this helps!!:-)

      Reply
  78. Robin says

    Thursday, March 10, 2016 at 10:15 am

    Thanks so much for your tutorial!! My outdoor cushions are so faded and outdated, but when I priced them…so expensive. I’m eager to try your DIY method and add some new life into my patio furniture. Thanks so much!!! 🙂

    Reply
  79. Zyi says

    Tuesday, April 5, 2016 at 1:33 am

    How well does the couch hold up? Is it good for everyday use?

    Reply
    • Tamara says

      Tuesday, April 5, 2016 at 12:48 pm

      Hi Zyi, here is a link to my one year update that I think would help reading, http://providenthomedesign.com/2016/02/05/4602/. It has held up really well but isn’t a super comfy couch. So if it is your everyday couch to get comfy in I maybe wouldn’t paint it. Check out the link for more info! Thanks!

      Reply
  80. david says

    Thursday, May 26, 2016 at 9:54 am

    hi, Very interesting article . have you ever tried upholstery or leather spray paint like the ones available at simplyspray.ca . I ve heard good things about the paint . i am interested since it is non toxic and non flammable .

    Reply
    • Tamara says

      Thursday, May 26, 2016 at 10:58 am

      Hi David! I haven’t tried but it looks promising. If you end up trying it please come back and let us know how it went!!:-)

      Reply
  81. shouthuzzah says

    Tuesday, June 28, 2016 at 6:40 pm

    Hi there! I’m inheriting an “interesting” sofa from my fiancee’s grandparents–it’s a multicolored plaid pattern. Do you think this method would work for something like that? I just want it to be a solid color and debating between covering it and painting it…

    Reply
  82. Kelly murr says

    Thursday, July 7, 2016 at 1:40 am

    That’s awesome….I’m going to do it to my grandfathers old recliner/rocker. I can’t find anyone who will reupholster it for less than $500!! Worth a try!!

    Reply
  83. Audrey says

    Sunday, August 14, 2016 at 10:13 pm

    Great tutorial. I am going to try this on something other than my main couch. Then, perhaps I will find the courage to take the plunge. A helpful hack, albeit to late for you – the guts of a sleeper sofa come out fairly easily. You may have to stand on your to remove some of the screws but it is well worth the effort. Thanks for the post! xo

    Reply
    • Tamara says

      Monday, August 15, 2016 at 1:34 pm

      Good to know, Audrey! Thanks for letting me know!:-)

      Reply
  84. Pamela says

    Thursday, September 1, 2016 at 6:54 am

    WOW!!! I love the transformation and the color.
    Thanks for sharing maybe I will give it a try.

    Reply
  85. Felicia Kramer says

    Tuesday, September 6, 2016 at 9:56 am

    Hi Tamara, thought I would let you know that your post (and your 1-year followup) were very helpful to me this summer when I painted my sofa. Thanks! As I mention in my post, this was the second time I painted upholstered furniture and I found this method to be much easier (and less expensive) than my last one. I’m very happy with my redecorating project and my friends and family are blown away with my sofa’s dramatic change. Thanks again!
    http://feliciakramer.blogspot.com/2016/09/redecorating-project-target-for-change_6.html

    Reply
    • Tamara says

      Tuesday, September 6, 2016 at 10:48 am

      Oh my gosh, Felicia, it looks so good! You really did mix up the perfect paint color for it! It lightens the space so much and looks beautiful. I’m very impressed! Thanks so much for sharing!:-)

      Reply
      • Felicia Kramer says

        Tuesday, September 6, 2016 at 11:35 am

        Thank you for responding – I’m grinning ear to ear! I am so happy with it, especially since I have hated that sofa since I bought it. Now it has a reprieve for a long time to come!

        Reply
  86. christina says

    Tuesday, November 8, 2016 at 12:03 pm

    this was such a great BLOG! you did such a great job! I attempted this project with the same color because gray looked best with my furniture. It didn’t come out as great as yours but I really enjoyed this project and shared your blog with all my friends
    thanks
    ~Christina

    Reply
    • Tamara says

      Tuesday, November 8, 2016 at 9:41 pm

      Thank you, Christina, that really means a lot!:-)

      Reply
  87. Trudie Machado says

    Friday, February 10, 2017 at 10:42 pm

    I have a perfect 30 year old couch in the living room, only used one or two days a year, and would love to paint it. I’ve used chalk paint for furniture and am please with the outcome. I have some questions about using chalk paint on fabric. Does it crack? Does it rub off? The fabric on my couch is plain cotton, there is no texture. I look forward to your response.

    Reply
    • Tamara says

      Friday, February 10, 2017 at 11:02 pm

      Hi Trudie! The chalk paint doesn’t crack or rub off! It sounds like your couch would do well with the chalk paint.

      Reply
  88. Ronni says

    Friday, February 17, 2017 at 6:09 pm

    I have been thinking about painting my sofa. It is a beautiful piece but also a very expensive Schnadig sofa. I have painted an upholstered chair once but it was vintage and not something we actually used. More of a decorative piece. I am wondering how this wears over time. My plans for my sofa would be to paint the body and reupholster the seat cushion since it is down filled and then buy new pillow covers for the throw pillows.

    Reply
  89. Cheryl says

    Tuesday, May 23, 2017 at 1:02 am

    Tamara, do u think that spraying the fabric with watered down fabric softer wold help slove stiffness? I realize you would need to be sure the paint was thoroughly dry.

    Reply
    • Tamara says

      Tuesday, May 23, 2017 at 11:54 pm

      Hi, Cheryl! Thanks for your question. To be honest I’m not completely sure. When I first painted the couch I experimented with a similar idea. I washed the painted upholstery with fabric softner and it didn’t really become softer and it actually made it splotchy so I had to do paint touch ups over the splotchy parts. I’m doubtful but I don’t want to dissuade you from trying if you want to give it a try. Hope this helps!!

      Reply
  90. Taryn Schnugh says

    Thursday, July 6, 2017 at 6:28 pm

    Hi, just curious, after all these years how is the painted sofa holding out? I am thinking of painting my couches, but we site on them often. They are in the TV room. Would it work?

    Reply
    • Tamara says

      Thursday, July 6, 2017 at 11:01 pm

      Hi, Taryn, thanks for reaching out! The couch has held up perfectly but it is still not the most comfortable couch. If you use them often then I would say maybe not to paint them. You can read my full update post which will explain more at this link, http://providenthomedesign.com/2016/02/05/4602/. Hope this helps!!

      Reply
  91. Safiyyah says

    Sunday, August 6, 2017 at 4:57 am

    Thanks for sharing this info! Now that a couple of years have passed, how is the couch holding up?

    Reply
    • Tamara says

      Sunday, August 6, 2017 at 8:05 pm

      Hi, Safiyyah! It still looks as good as it did after I first did it (but we don’t use that room very much so that might be part of the reason, not sure).

      Reply
  92. MerPau says

    Wednesday, October 25, 2017 at 5:56 pm

    Did you use a finishing wax?

    Reply
    • Tamara says

      Wednesday, October 25, 2017 at 9:44 pm

      Hi, MerPau, I tried using a finishing wax on one of the sides of the couch to see if it would help soften the painted fabric at all but it didn’t make any noticeable difference so I didn’t finish doing it to the rest of the couch.

      Reply
  93. Jen says

    Tuesday, March 13, 2018 at 4:45 pm

    I have a chair with plain cotton fabric that I got at Saver’s for $20!! My plan was to recover it, but now I’m kicking around the idea of painting it since the upholstery is actually in good shape. However, I think it was Scotchguarded at some point. I cleaned it with my Little Green Machine when I bought it and the water seemed to bead off. Do you think that would be a problem for having the paint adhere?? Is there a way to strip off Scotchguard?? Hmmmmm… *off to google I go*

    Reply
  94. Bill says

    Thursday, March 15, 2018 at 2:05 am

    I was interested in the actual time it took to make this great couch happen. How may work hours.

    Reply
    • Tamara says

      Thursday, March 15, 2018 at 12:29 pm

      Hi Bill! I would say maybe a max of 4 hours of actual work and then it takes at least a couple of hours in between coats to just let it dry.

      Reply
  95. Kylee says

    Thursday, March 15, 2018 at 11:40 pm

    Hey! I’m getting ready to do this for my sofa and loveseat combo. I just can’t stand the couch covers that exist and I definitely am not ready to go buy a new couch. Did you use only 1 gallon of paint on the entire sofa? I saw you said 25 dollars for paint so I was curious.

    Thanks!

    Reply
    • Tamara says

      Friday, March 16, 2018 at 9:41 am

      Yep, I bought a gallon! If I remember correctly I only used half of it. I bought Behr through Home Depot which I think is reasonably priced. Let me know how it goes!!

      Reply
  96. Nancy Crews says

    Friday, April 13, 2018 at 9:47 am

    Do I dare! I have a chair in pristine condition but I’ve come to hate the plaid pattern. It would be my luck to ruin a perfectly good, but ugly chair!!

    Reply
  97. Beth Affolter says

    Sunday, May 20, 2018 at 6:27 pm

    Hey, Im thinking of doing this to my grandmother’s winged back chairs instead of recovering them. I wonder if you added a cap full of fabric softener to the paint if that would help with the stiffness? I may do a test and let you know! Thanks!!

    Reply
    • Tamara says

      Monday, May 21, 2018 at 10:20 am

      Hi, Beth, I’ve read mixed reviews on the fabric softener helping. I would love to hear how it works for you! Thanks!!

      Reply

Leave a Reply Cancel reply

Your email address will not be published. Required fields are marked *

Hello and Welcome!! My name is Tamara and this is where I share my tips and tricks to creating a beautiful home! If you are new, feel free to start HERE.

Subscribe

Get notified via email when there's a new post!

Join me on Instagram!

[instagram-feed]

More Blog Inspiration:-)

  • Icon Caroline on Design

    Close preview

    Loading...
  • Icon Centsational Girl

    Close preview

    Loading...
  • Icon Decorating Delirium

    Close preview

    Loading...
  • Icon Lauren Liess

    Close preview

    Loading...
  • Icon Life on Virginia Street

    Close preview

    Loading...
  • Icon Remodelaholic

    Close preview

    Loading...
  • Icon The Creativity Exchange

    Close preview

    Loading...
  • Icon Thrifty Decor Chick

    Close preview

    Loading...

Categories


Disclosure & Privacy Policy

You might also like

The Final Before & After of our Current Home

The Final Before & After of our Current Home

New Build Update-Paint, Lighting, and Floors oh My!

New Build Update-Paint, Lighting, and Floors oh My!

New Home Update

New Home Update

New Build Update- Cabinets are in!

New Build Update- Cabinets are in!

House Update–We Have Walls!

House Update–We Have Walls!

Join Me on Instagram!

[instagram-feed num=9 cols=9 showbutton=false]

Privacy

Copyright © 2021 · Savory theme by Restored 316

Enter your name and email to get my weekly post sent to your inbox... it's FREE!
Want to learn more about DIY, decorating, and making your home beautiful? Sign up below!
Your information will *never* be shared or sold to a 3rd party.