Provident Home Design

Decor, DIY, and Interior Design

  • HOME
  • ABOUT
    • About PHD
    • Contact Me
  • DIY PROJECTS
  • DESIGN 101
  • PAINT
  • HOME TOUR
  • DESIGN INSPO
  • DECOR TIPS

A New Brick Step!

I’ve been crushing on the classic beauty of brick porch steps for awhile now.  So timeless!
Photo by C Kevin Coffey Dwellings  via Houzz


brick-porch

Highland Homes Inc. via Houzz

When we first moved into our house there was no step up to our porch and I noticed quickly that the distance was too large especially younger children and older adults.

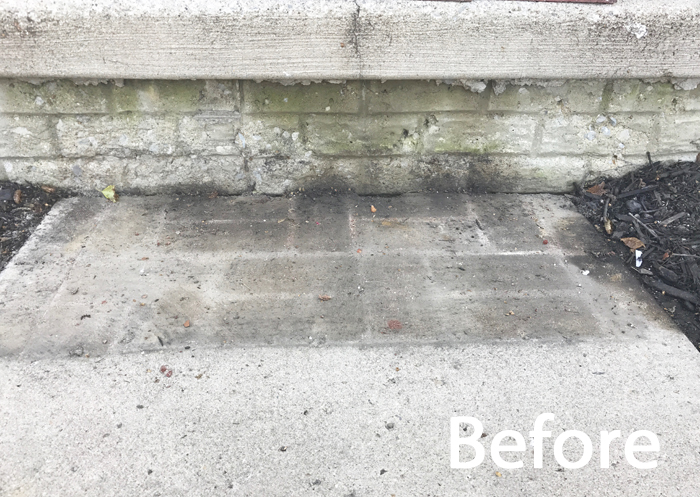
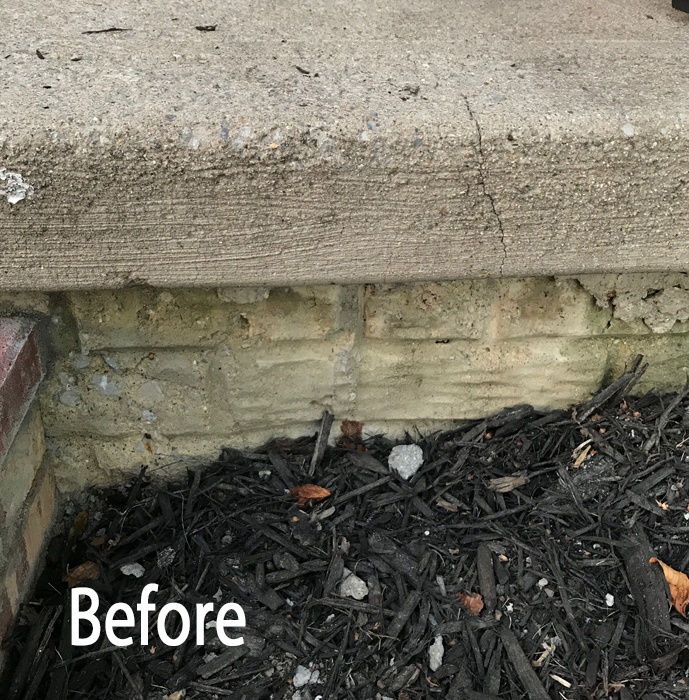
So, I created a little make shift step out of concrete 8″x12″ slabs stacked on top of each other and called it good for a few years (pictured below).

Steps Before

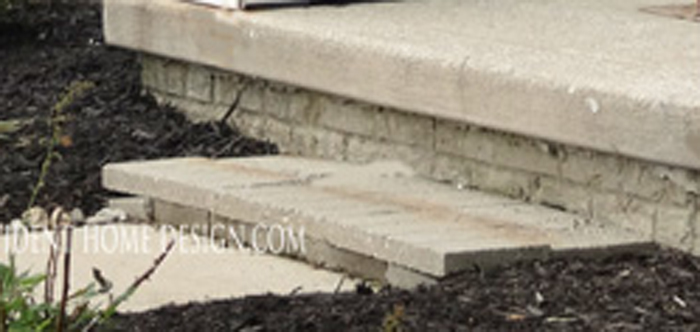
However as time has passed a slab or two cracked and I was ready for a more permanent solution.  I of course researched making my own brick step and although I was intimidated by the idea it looked do-able so I did it!
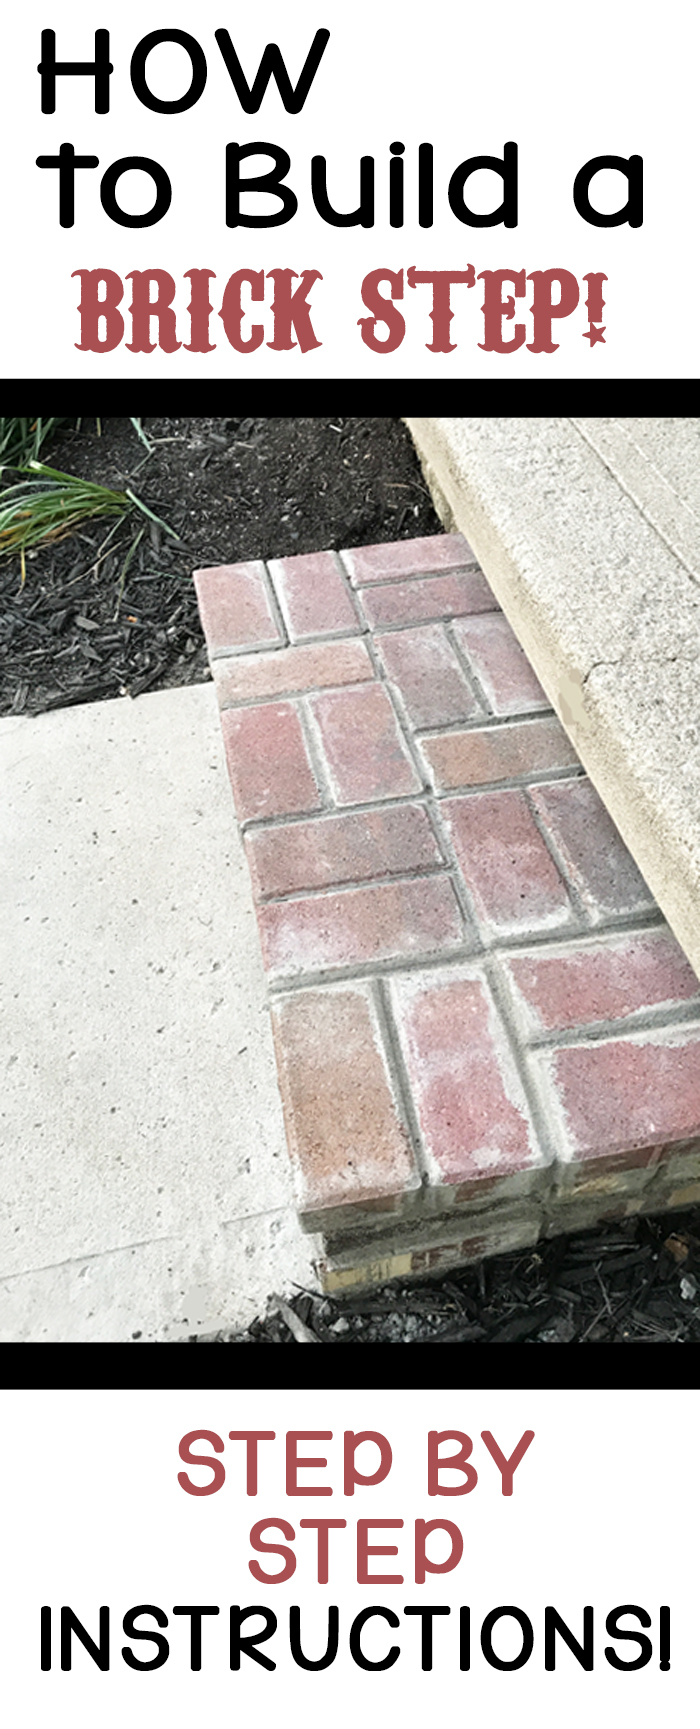
HERE’S THE RESULT:

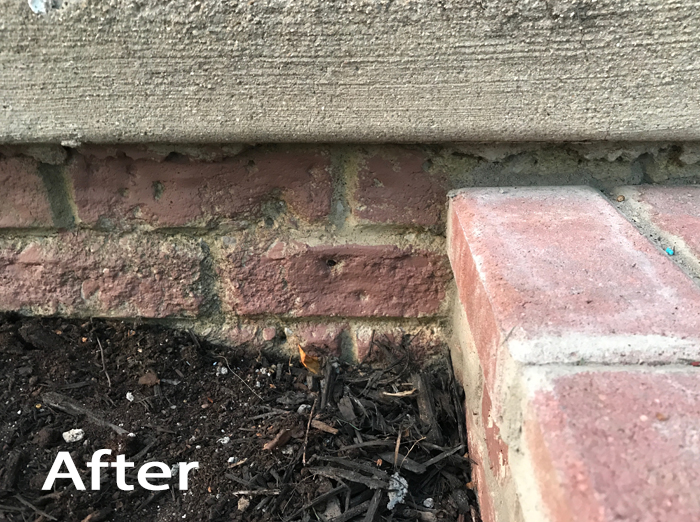
Note: The black stuff in the before photo is not mold, it is dirt and debris from the concrete slabs that laid there for years.

DIY Brick Step Before There was a Step

AFTER

How to Build a Brick Step 3

How to Build a Brick Step 2

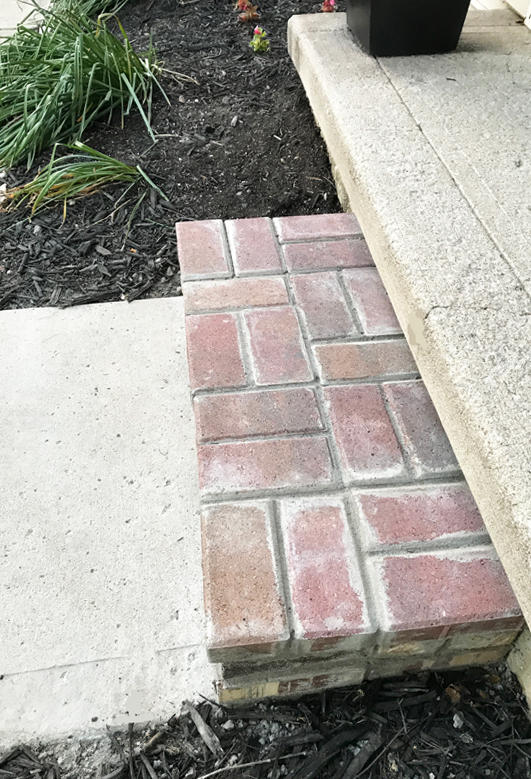
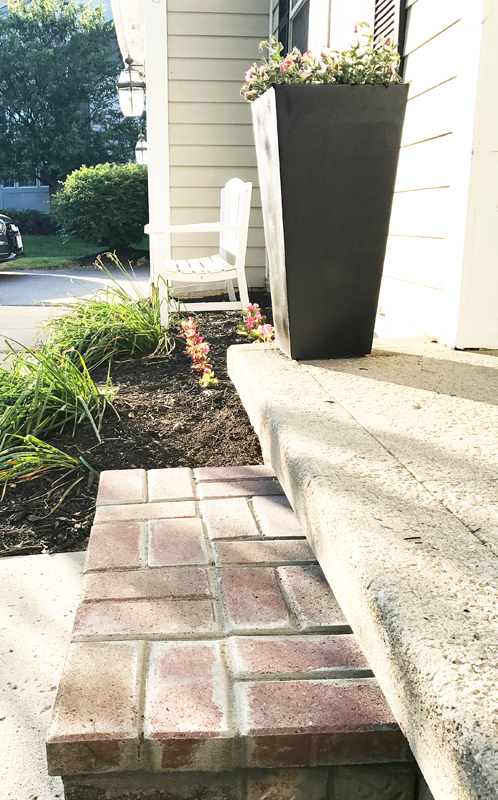
Because the concrete around the porch was already stamped into brick shapes I decided to paint the concrete a brick color.

DIY Brick Step Before

I really like how it turned out but since brick has natural variations of color I plan to add more  paint colors for a more natural look.

DIY Brick Step After with Paint

So want to learn how to build a brick step? Great!
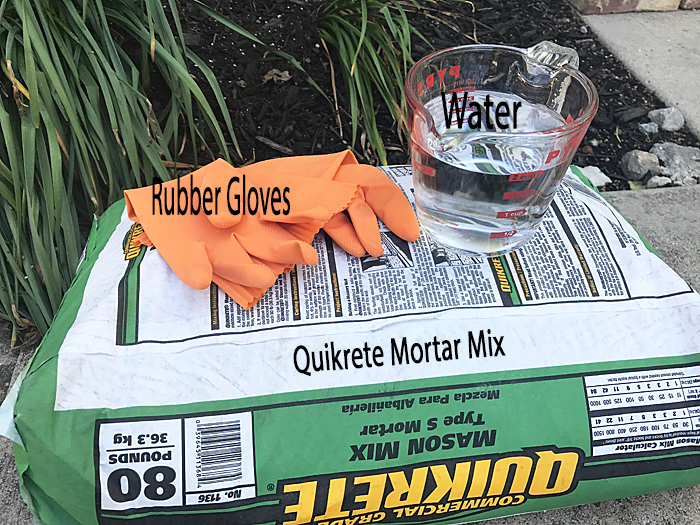
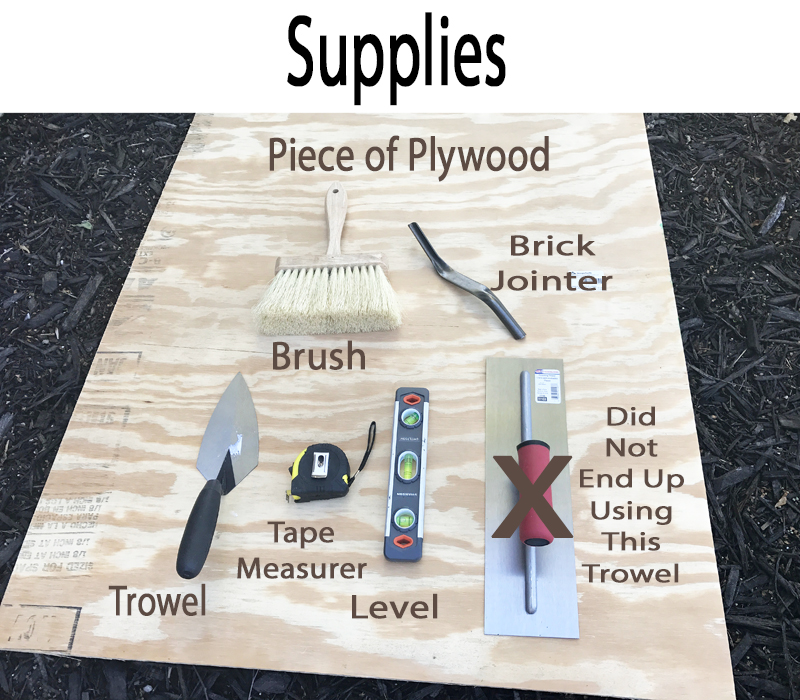
SUPPLIES

-Quikrete Mortar Mix

-Rubber Gloves

-Water

DIY Brick Step Mortar

-A Large piece of Plywood

-Trowel

-Tape Measurer

-Level

-Brick Jointer

-Brush

-Bricks (For the first 2 levels of brick I used free bricks that I got from my neighbor…they were sitting in her garage when she moved in and she was happy to get rid of them.  The top level are brick pavers I purchased from Home Depot for .52 cents each).

DIY Brick Step Supplies

DIRECTIONS:

  1.  Do the planning.  Measure out how large you want the step to be and arrange them.

DIY Brick Step Arrange Them

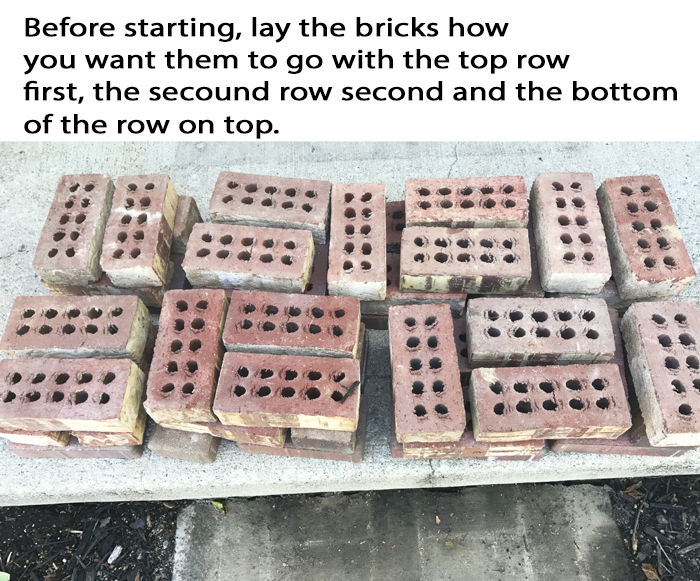
This way as you are laying them down with mortar it is easy to grab the one you need and know where to put it.

Here are some brick pattern ideas if you need them.

Brick Patterns

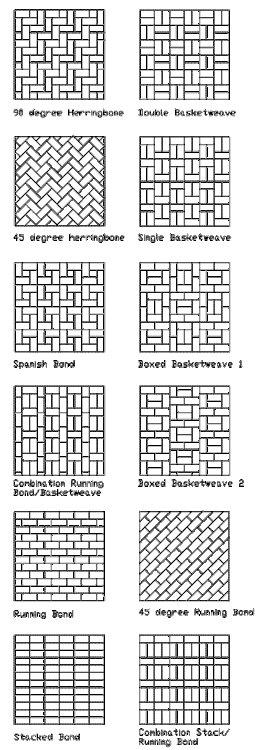
Source: Purestform.tumblr

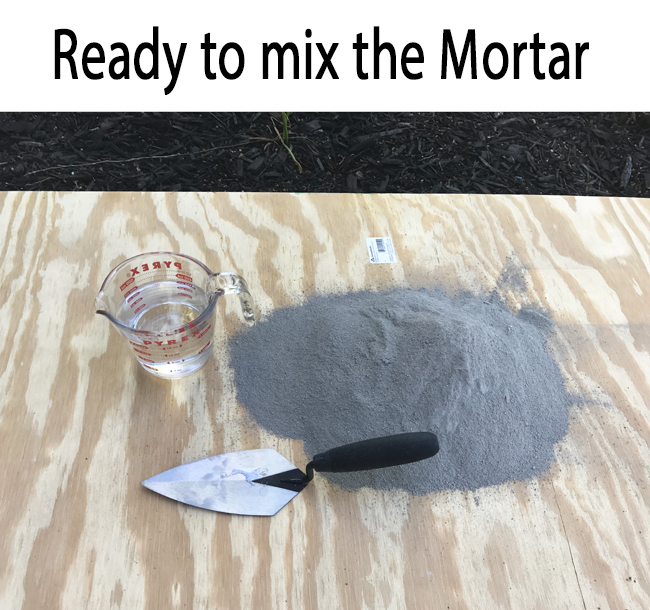
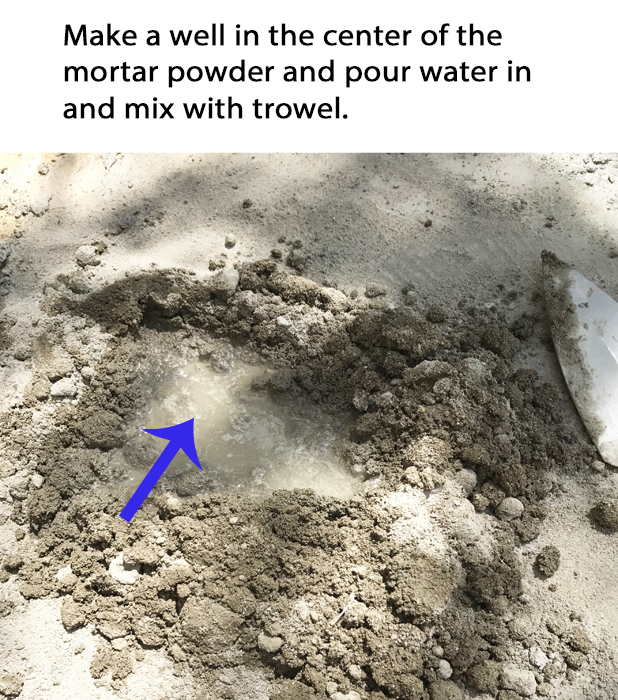
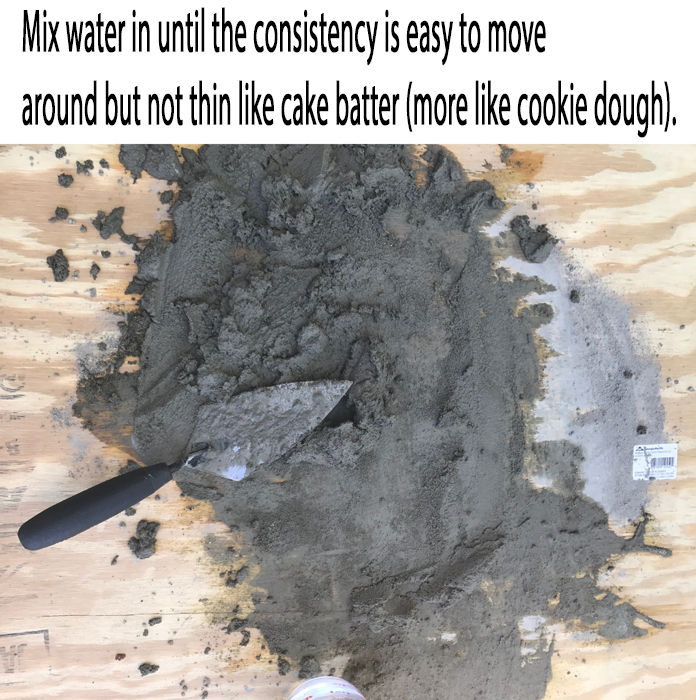
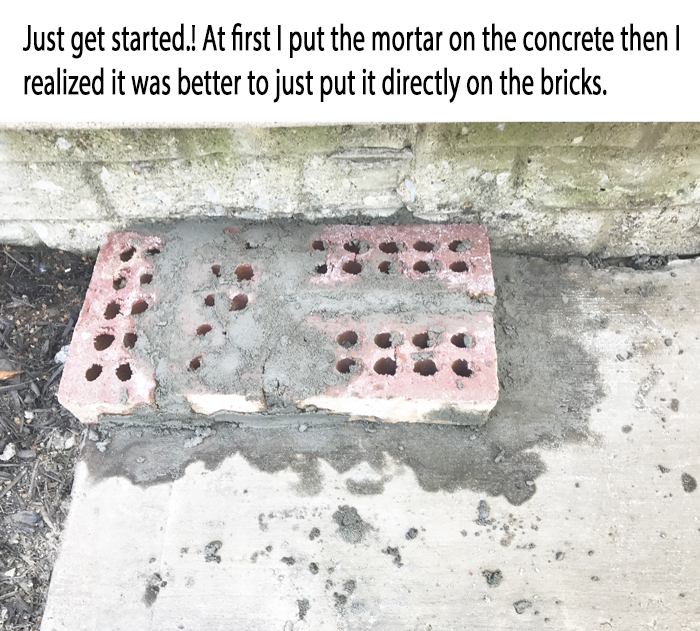
2.  Get the Mortar Ready.

DIY Brick Step Ready to Mix

DIY Brick Step Mix Mortar

DIY Brick Step How to mix mortar

  3.  With the trowel put the mortar on the bottom and side of the brick and lay the brick firmly in place.

DIY Brick Step Get Started

Tip- HERE is a video showing how to properly “butter” a brick   I didn’t quite master this technique but I got the job done.:-)

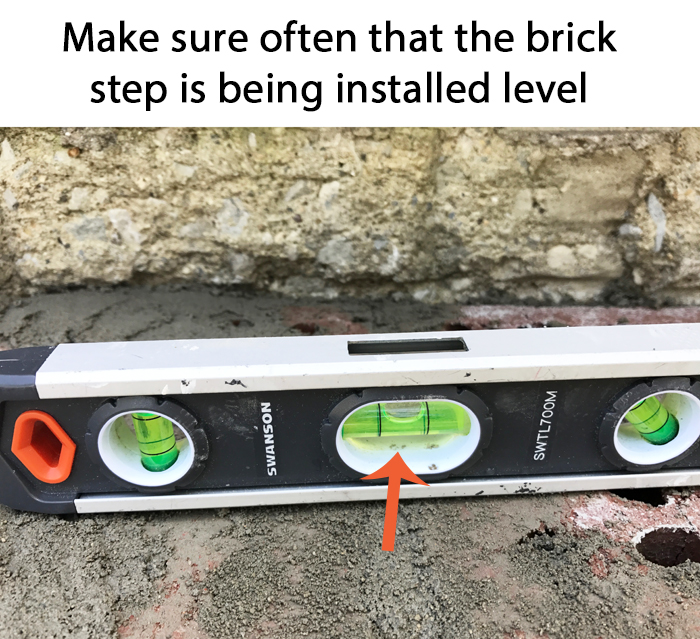
Also, as you go consistently use your level to make sure the bricks are being installed level.

DIY Brick Step Keep it Level

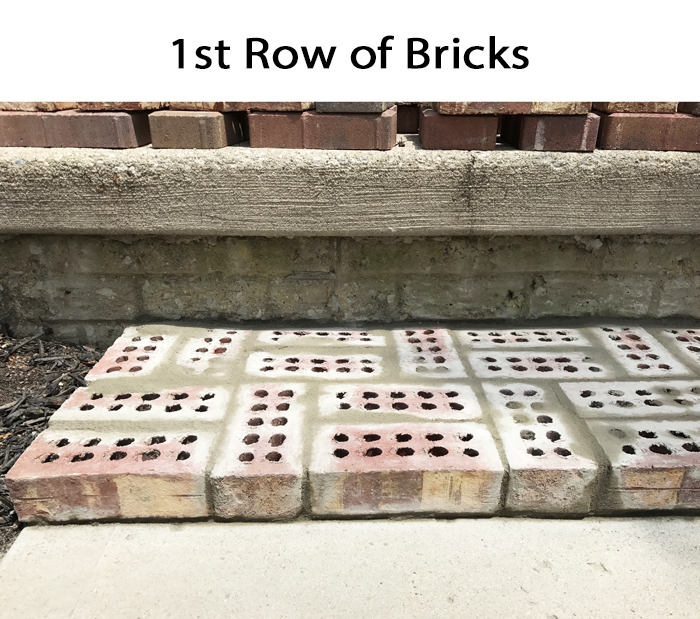
4. Complete your first row.

DIY Brick Step First Row of Bricks

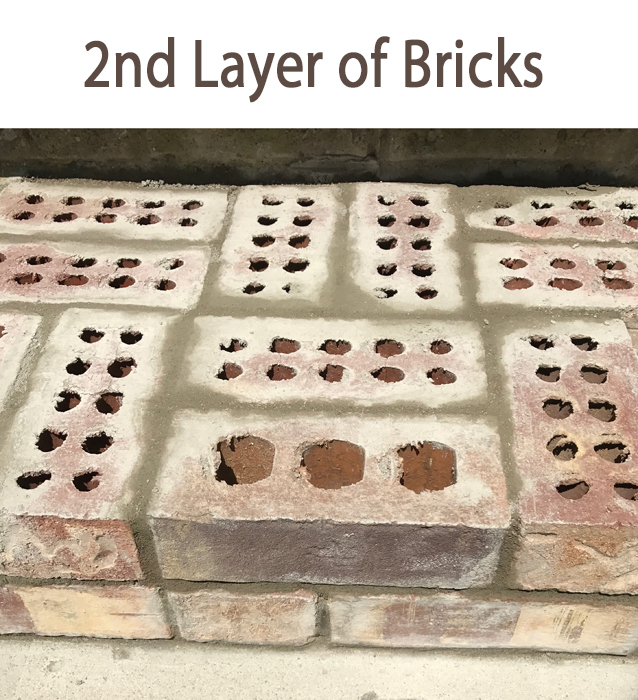
5. Complete your second row.

DIY Brick Step Process Picture

DIY Brick Step Second Row of Bricks

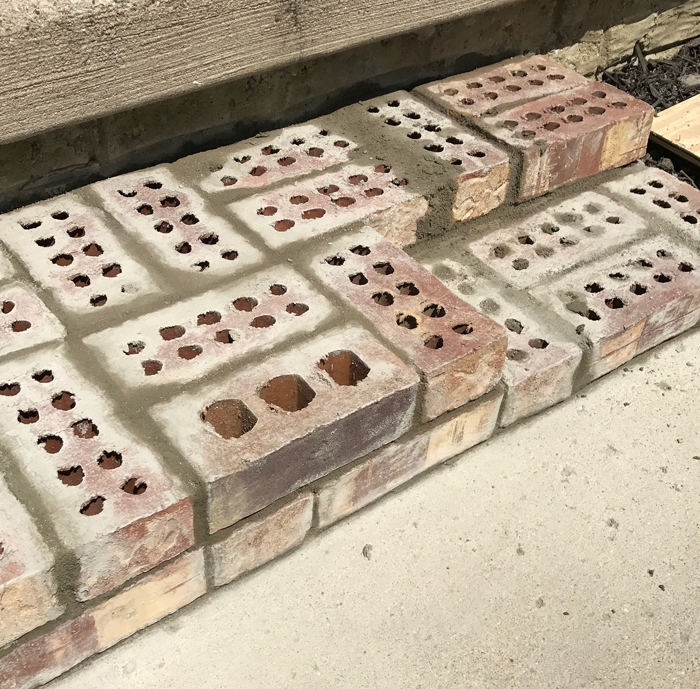
6.  Add your last layer of bricks.

How to Build a Brick Step 3

7.  Finishing Touches.  Once the mortar starts  to dry a little bit push the jointer along the grout lines to create a smooth, uniform divot.

Then with the brush thoroughly brush the steps clearing away any mortar debris.  Once the mortar is completely dry (I waited 24 hours) use a hose to spray down the step.

I’m so glad I faced my fears and tackled this project!  I now have an attractive, durable step to my porch and only cost $50 to make   Since this was my first brick project it did take me about 6 hours to complete but I’m still really glad I did it!

I hope this post helps you (if not now then maybe down the line)!  As always thanks for being here!!

signature

How to Build a Brick Step Tutorial

Related Posts From the Blog:

  • Restoration Hardware Knockoff MirrorRestoration Hardware Knockoff Mirror
  • My Christmas Home Tour & MoreMy Christmas Home Tour & More
  • Easiest Ottoman Slipcover Ever (and ORC Week 4 Update)Easiest Ottoman Slipcover Ever (and ORC Week 4 Update)
  • 20 Best Quick & Easy Appetizers!20 Best Quick & Easy Appetizers!
  • One Room Challenge Week 5- One Week Left!One Room Challenge Week 5- One Week Left!
  • 38 Go-To Paint Colors for Your Home!38 Go-To Paint Colors for Your Home!
  • 10 High-End Wall Art Look-Alikes for Under $1010 High-End Wall Art Look-Alikes for Under $10
  • 20+ Budget-Friendly Drapes20+ Budget-Friendly Drapes

before and afters// budget decor// DIY// tutorials13 Comments

« Kitchen Makeover on a Budget Update
House Exterior Paint Refresh »

Comments

  1. Shirl says

    Friday, June 9, 2017 at 3:18 pm

    Great results!

    Reply
    • Tamara says

      Friday, June 9, 2017 at 6:38 pm

      Thank you, Shirley!:-)

      Reply
      • Mary Anne says

        Friday, June 9, 2017 at 8:54 pm

        Like it!!
        I do have brick steps now and like how they look and feel! Admire your “can do” way of tackling projects. You remind me of a younger me!! LOL
        I still figure that if I can read, I can at least try something new! Just know my limitations! You seem to be having a fun time with your blog!

        Reply
        • Tamara says

          Friday, June 9, 2017 at 10:52 pm

          Thanks, Mary Anne, I’m glad to hear I’m not alone in my “can do” spirit!:-)

          Reply
  2. Ella says

    Friday, June 9, 2017 at 11:39 pm

    I am impressed. Good job and it looks great!

    Reply
    • Tamara says

      Saturday, June 10, 2017 at 12:48 pm

      Thank you, Ella, I appreciate it!:-)

      Reply
  3. Linda Jones says

    Saturday, June 10, 2017 at 9:28 am

    You are amazing !

    Reply
    • Tamara says

      Saturday, June 10, 2017 at 12:49 pm

      Sweet of you to say, Linda!!

      Reply
  4. Amy says

    Saturday, June 10, 2017 at 6:13 pm

    Your brick steps look great, Tamara! I can’t wait to see a full front photo of your home now! And because we read too much Dr Seuss, when I saw your Pinterest photo labeled “How to build a brick step” I thought “How to build a quick trick brick stack!” =)

    Reply
    • Tamara says

      Monday, June 12, 2017 at 6:54 pm

      Ha! That would have been a much better title!:-) I still need to have the front of the house painted and then I will do a full front photo for you!:-)

      Reply
  5. Paint it white says

    Sunday, June 11, 2017 at 6:42 am

    That’s fantastic! Well done. I was quoted a ginormous price recently to have a small patio layed so this is making me think I just might be able to try doing it myself.

    Reply
    • Tamara says

      Monday, June 12, 2017 at 6:56 pm

      That would be awesome!

      Reply
  6. Amy says

    Tuesday, June 13, 2017 at 1:34 am

    I would love to see a picture of the front of the house with the stair in it. 🙂

    Reply

Leave a Reply Cancel reply

Your email address will not be published. Required fields are marked *

Hello and Welcome!! My name is Tamara and this is where I share my tips and tricks to creating a beautiful home! If you are new, feel free to start HERE.

More Blog Inspiration:-)

  • Icon Caroline on Design

    Close preview

    Loading...
  • Icon Centsational Girl

    Close preview

    Loading...
  • Icon Decorating Delirium

    Close preview

    Loading...
  • Icon Lauren Liess

    Close preview

    Loading...
  • Icon Life on Virginia Street

    Close preview

    Loading...
  • Icon Remodelaholic

    Close preview

    Loading...
  • Icon The Creativity Exchange

    Close preview

    Loading...
  • Icon Thrifty Decor Chick

    Close preview

    Loading...

Categories


Disclosure & Privacy Policy

You might also like

The Final Before & After of our Current Home

The Final Before & After of our Current Home

New Build Update-Paint, Lighting, and Floors oh My!

New Build Update-Paint, Lighting, and Floors oh My!

New Home Update

New Home Update

New Build Update- Cabinets are in!

New Build Update- Cabinets are in!

House Update–We Have Walls!

House Update–We Have Walls!

Join Me on Instagram!

[instagram-feed num=9 cols=9 showbutton=false]

Privacy

Copyright © 2022 · Savory theme by Restored 316