Provident Home Design

Decor, DIY, and Interior Design

  • HOME
  • ABOUT
    • About PHD
    • Contact Me
  • DIY PROJECTS
  • DESIGN 101
  • PAINT
  • HOME TOUR
  • DESIGN INSPO
  • DECOR TIPS

Basement Rec Room Makeover Reveal! (ORC Week 6)

Well guys and gals, it’s here! The day of the big reveal for the One Room Challenge! It’s been an extra busy past 6 weeks but I’m glad it’s done and am very happy with the result.

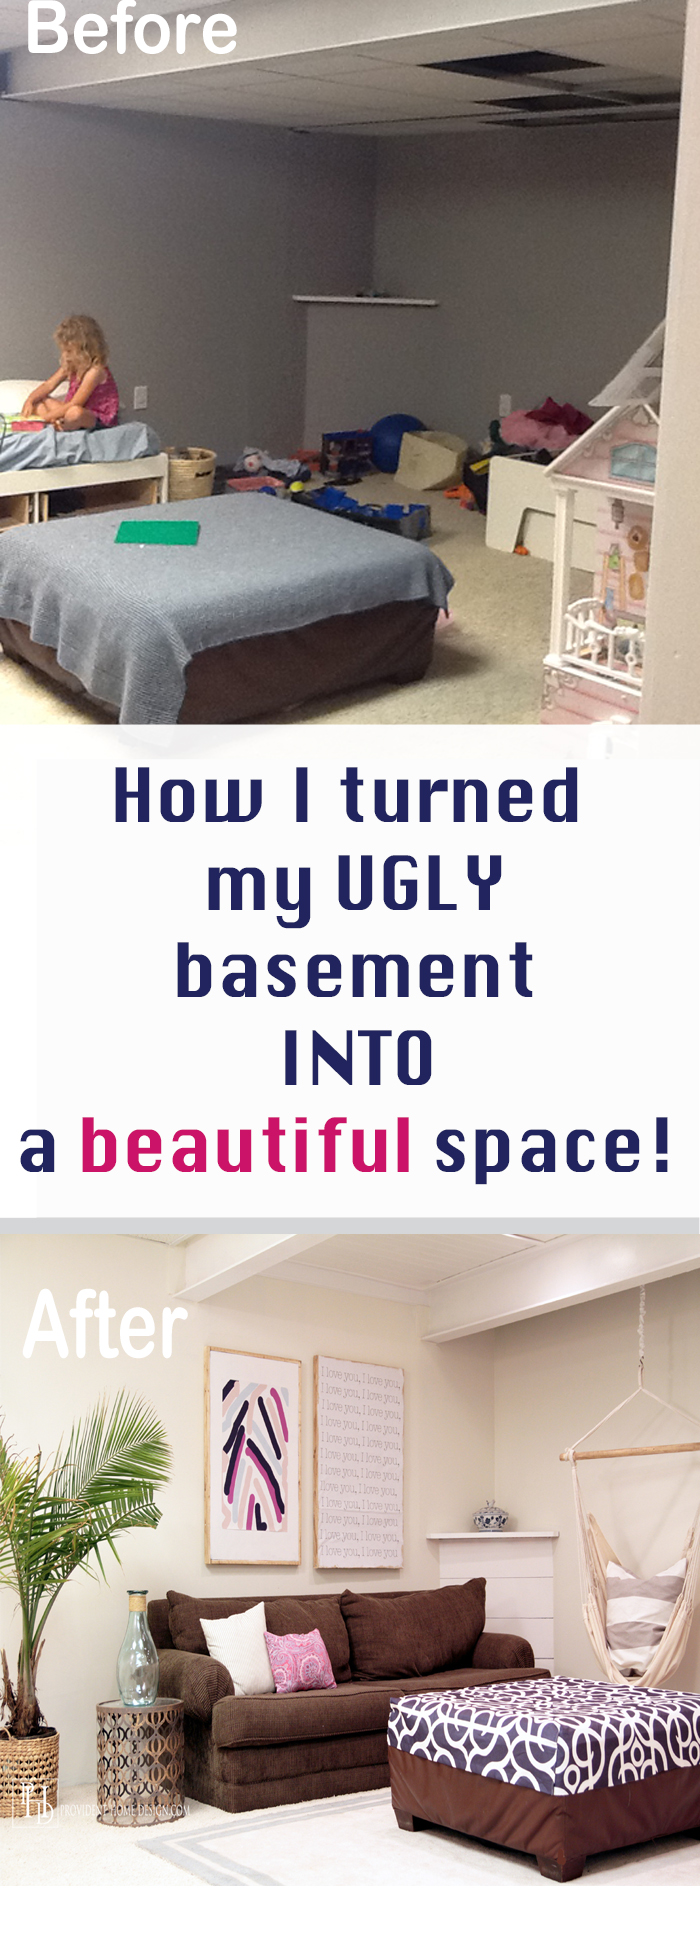
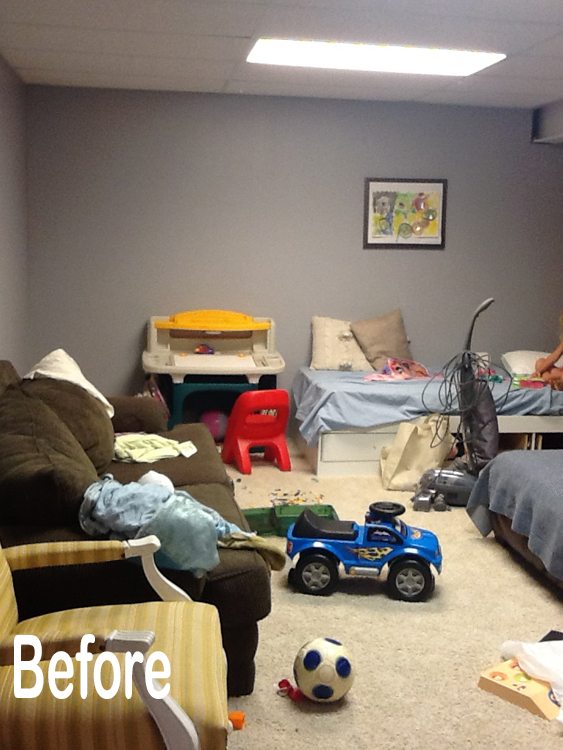
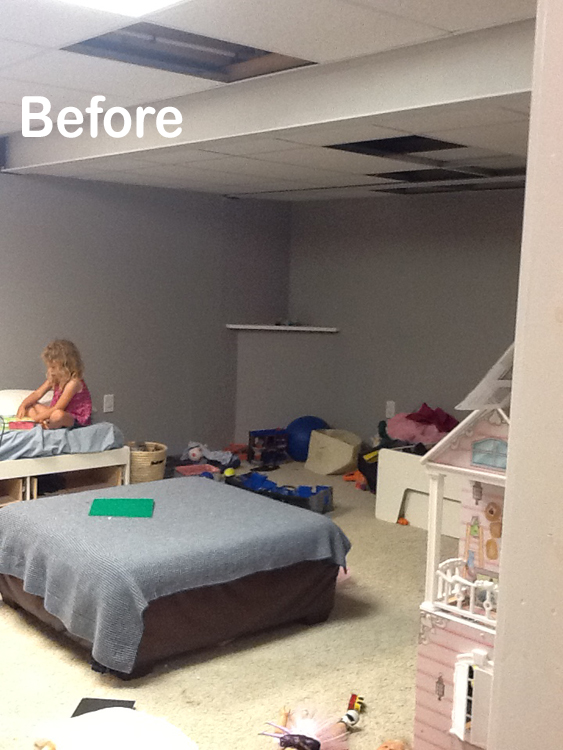
As a reminder the finished part of our basement is a rec/playroom for our 4 young kids (ages 2-9). It has been neglected for the past 3 years as I have been single handedly making over the rest of our house (you can see the Before and Afters for the rest of our house Here).

So please don’t be too judgmental when you see the befores (it ain’t pretty)!!

Basement Before

Basement Playroom Before

Before Shot


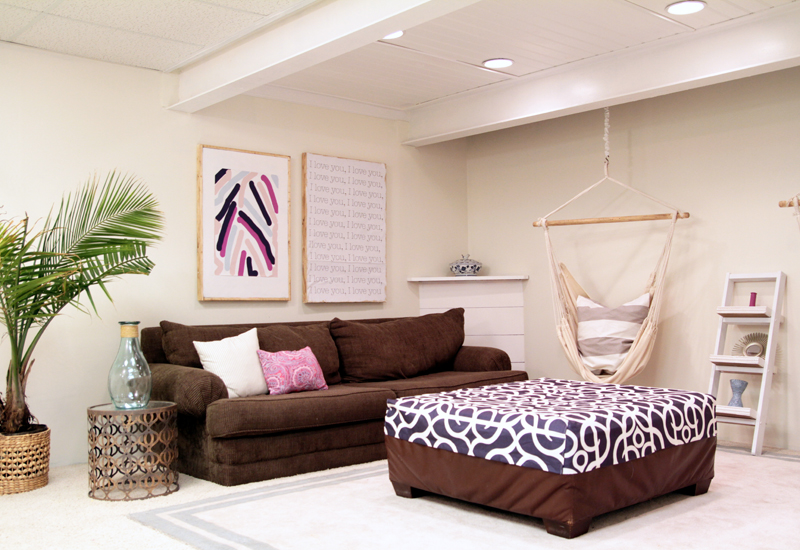
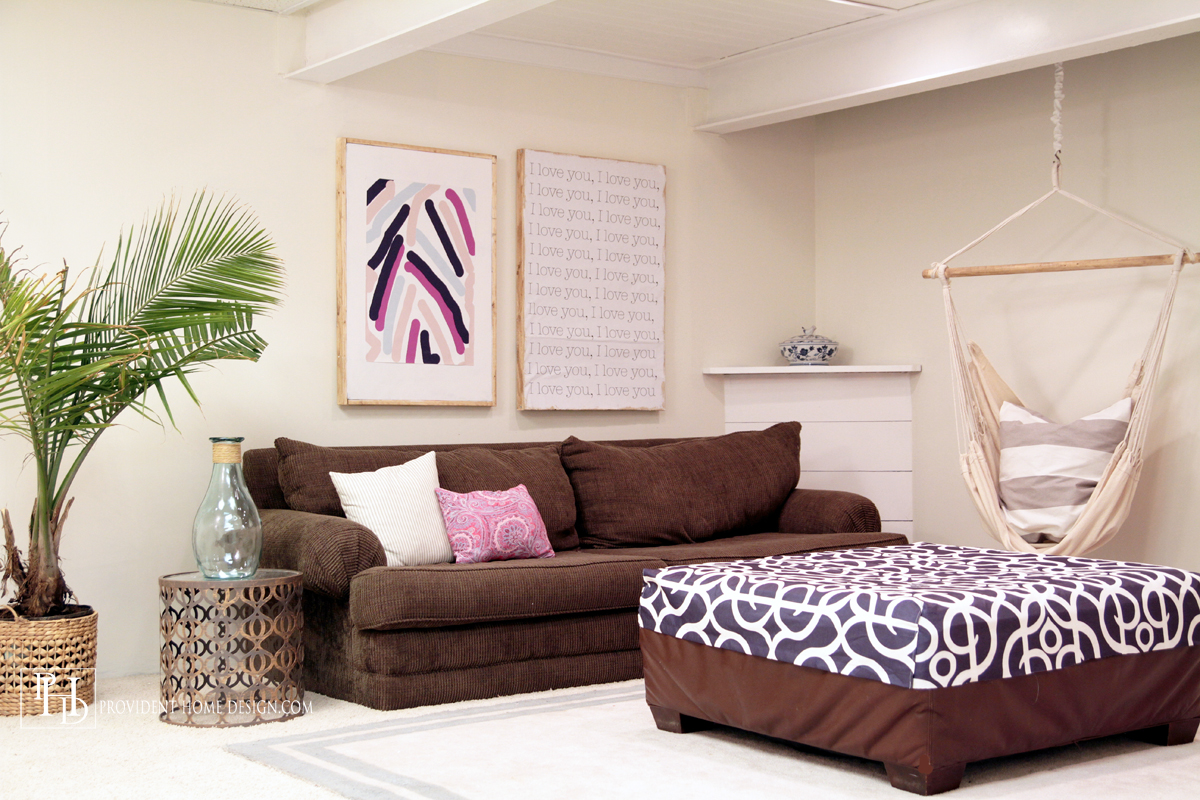
And here are the Afters (please forgive the bad lighting–there is no natural light in the basement)!

Basement Playroom Makeover After

Basement Rec Room Reveal

Bright and Cheerful Basement

Hanging Chair in Basement Rec Room

Majenta, Navy, and Aqua Space

How to Make a Basement Playroom Bright

Playroom Vignette

How to Make a Basement Brighter

Basement Wall Storage System

DIY Wall Storage System in Basement

In this pic I photoshopped some trim and handles on the storage system to see what it would look like.

Styled Bookcase in Basement Playroom

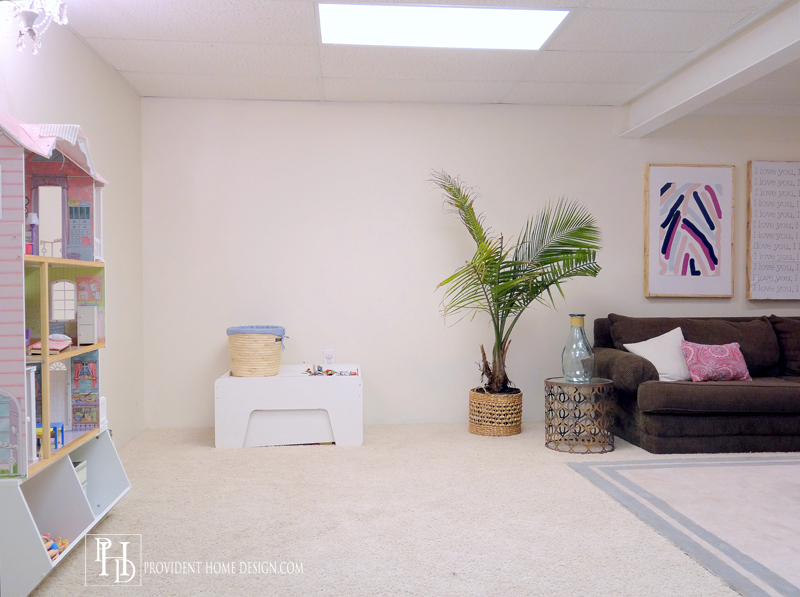
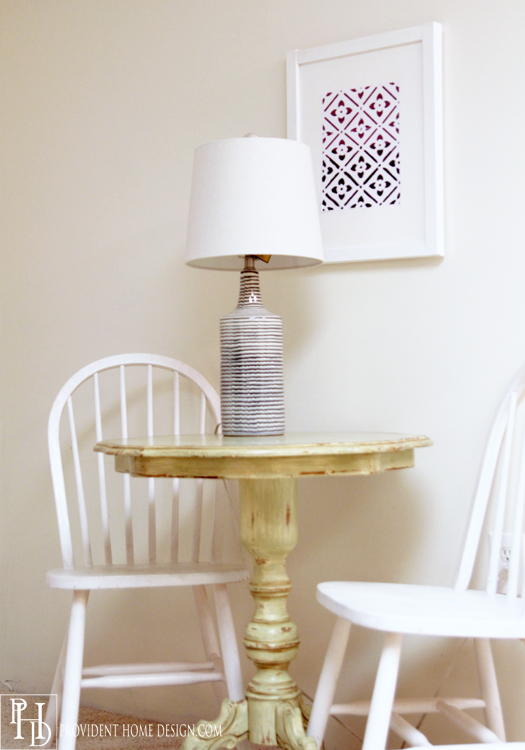
My older boys wanted a place they could draw so I found a little green table at a stager’s sale for only $20.

Basement Playroom Rec Room Makeover

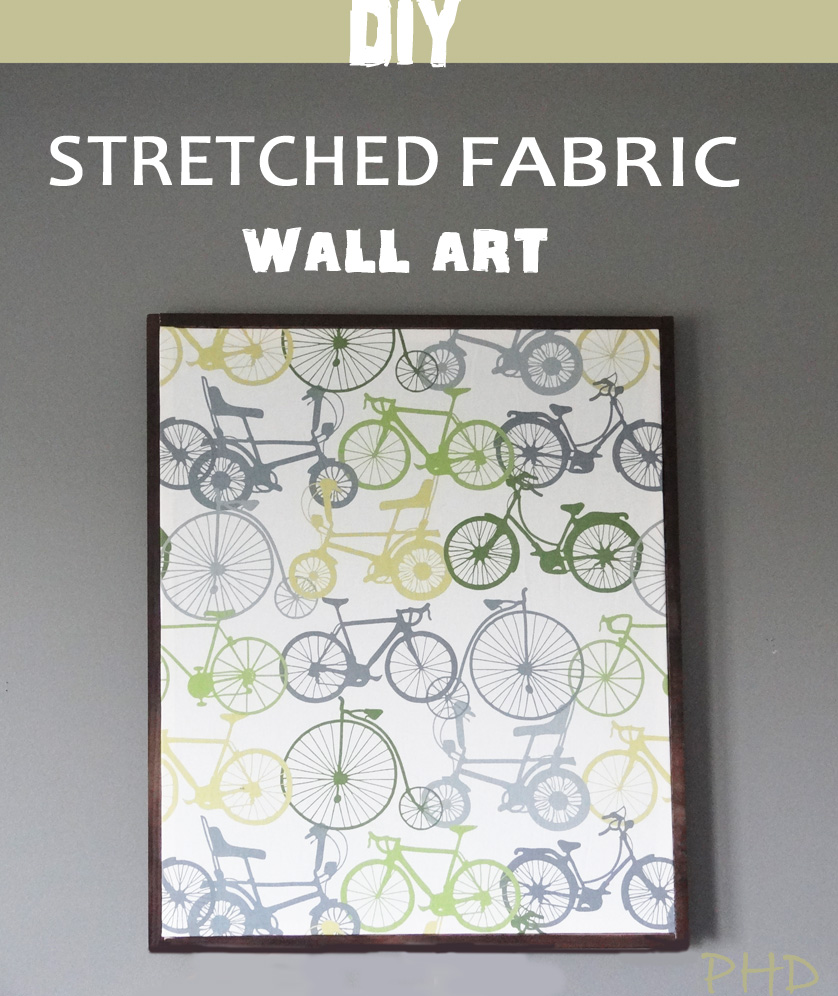
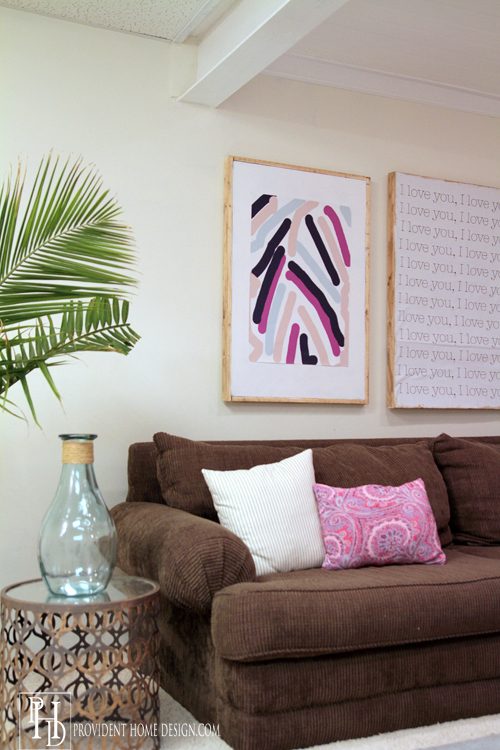
The lamp is from Homegoods and the picture is a DIY I whipped up.

Drawing Table in Playroom

The side table and plant are from my patio.  The side table was starting to rust so I will keep it in and the plant needed to come in for the Winter anyway.

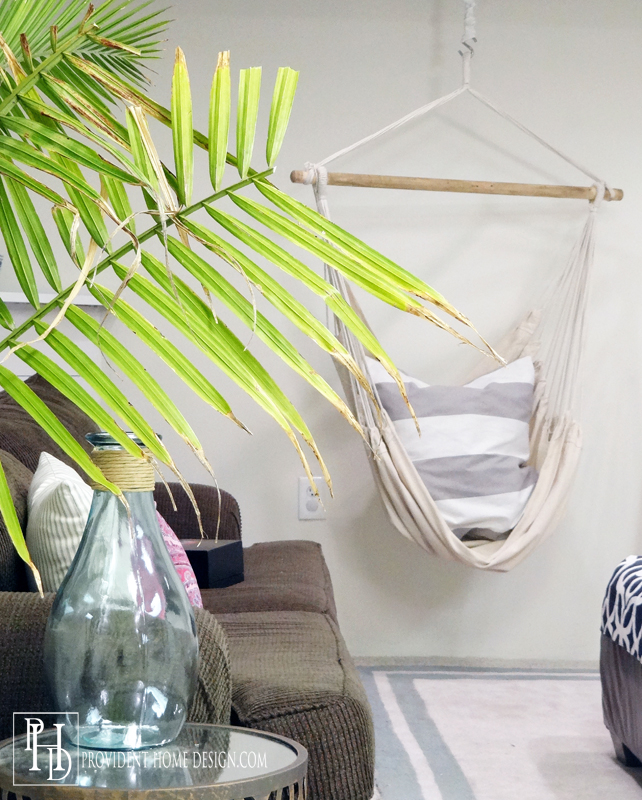
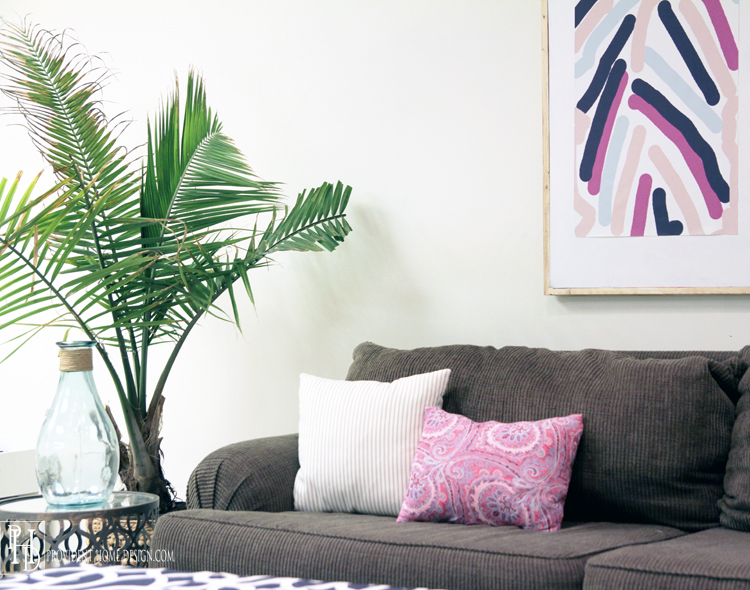
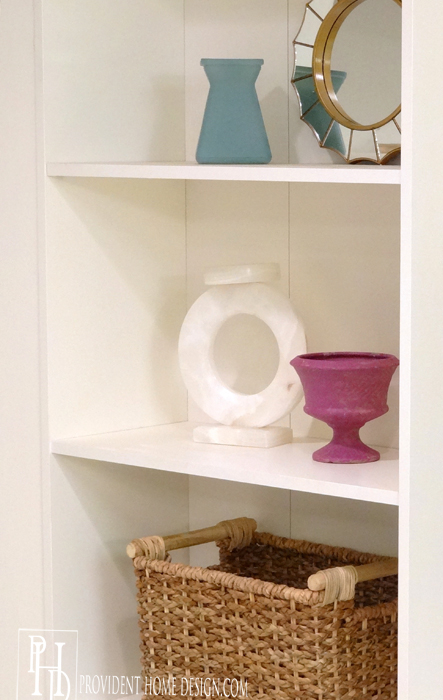
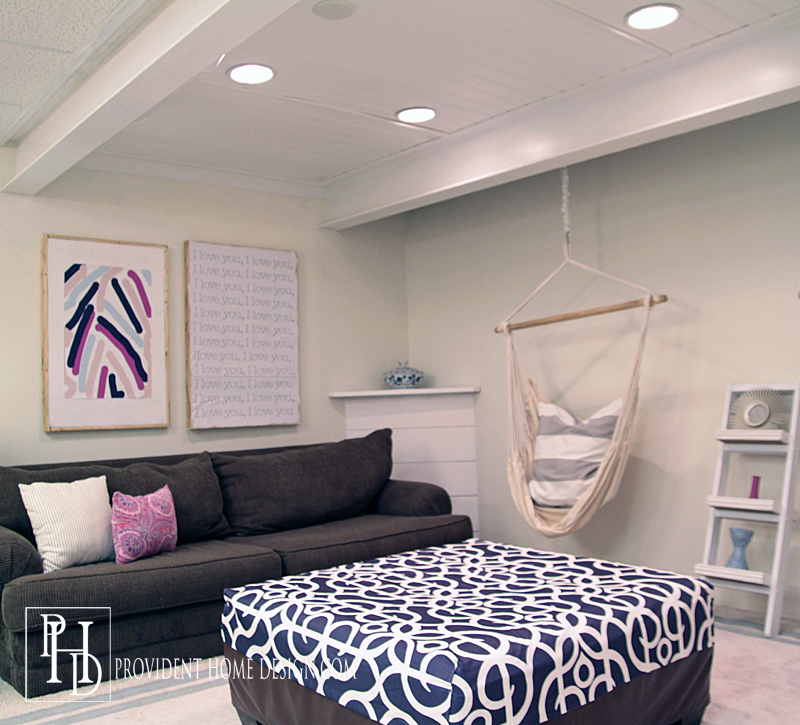
The large vase is from Homegoods for only $12 and the pillows covers were DIY-ed.  The pink one was made out of an old skirt.  You can find out how to DIY the artwork, Here.

Playroom Makeover

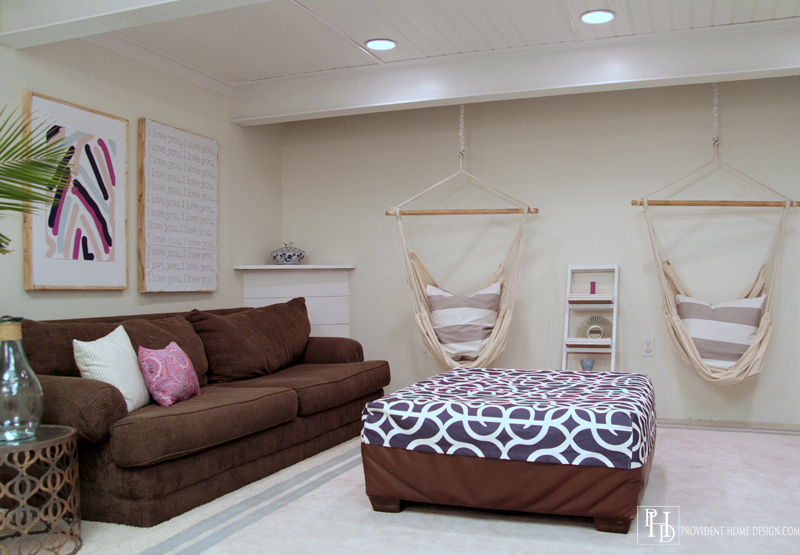
I bought the hanging chairs on ebay for $25 a piece and made the pillows for them.  I made the large ottoman slipcover out of $5 clearanced drape panel, tutorial Here.

Kids Hangout Room

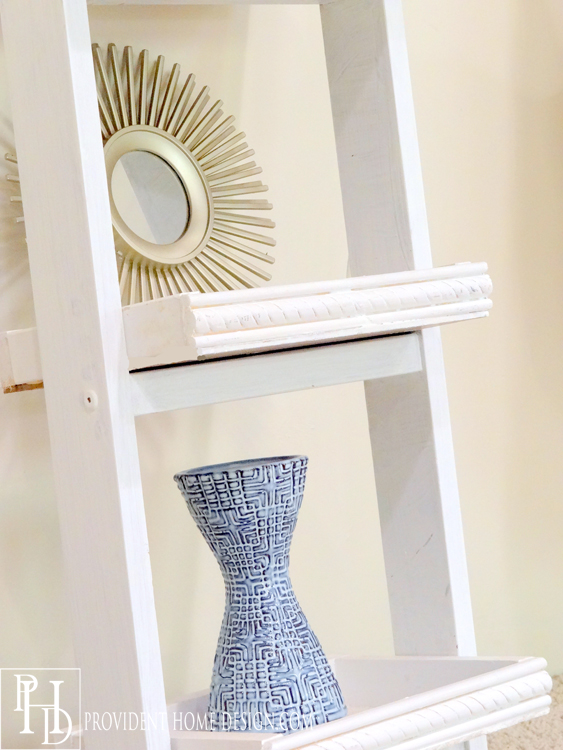
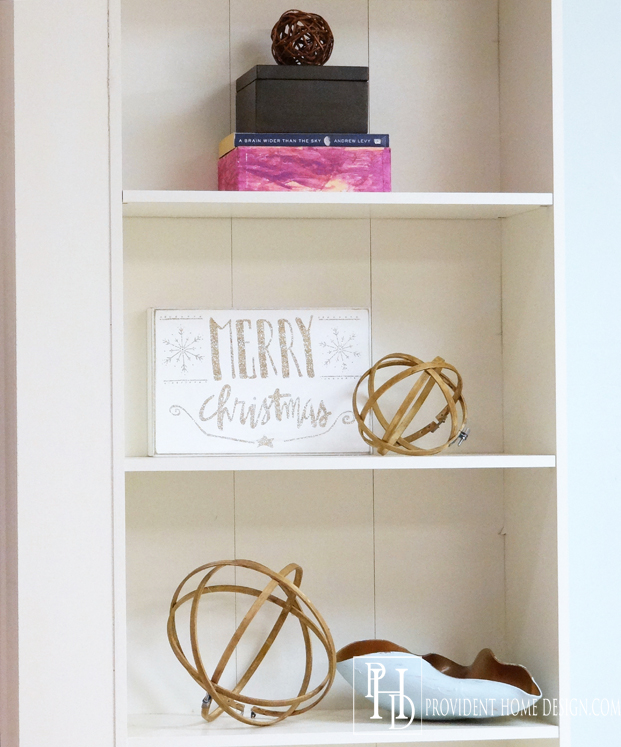
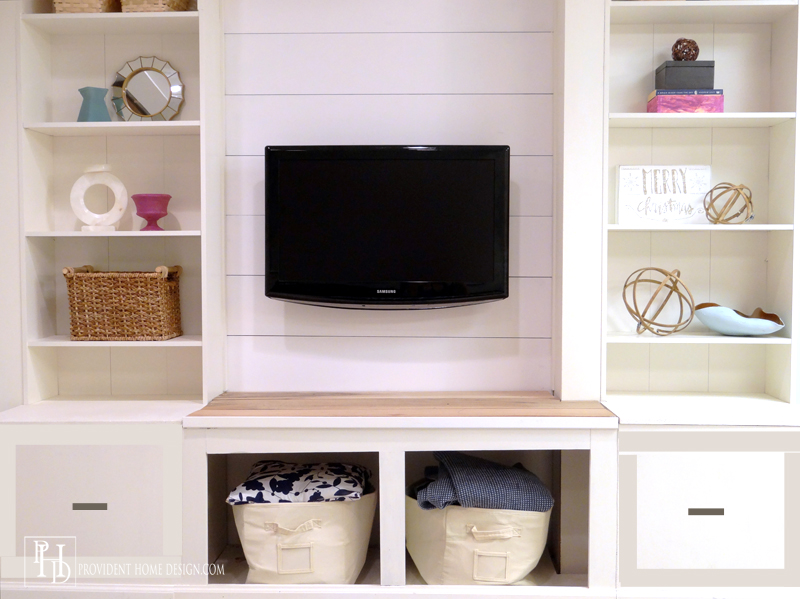
I built the wall storage system for about $100–full tutorial to come.  Everything on the bookcases cost between $1-$5 and came from the thrift store, the dollar tree, Aldi or Homegoods.

Rec Room in Basement

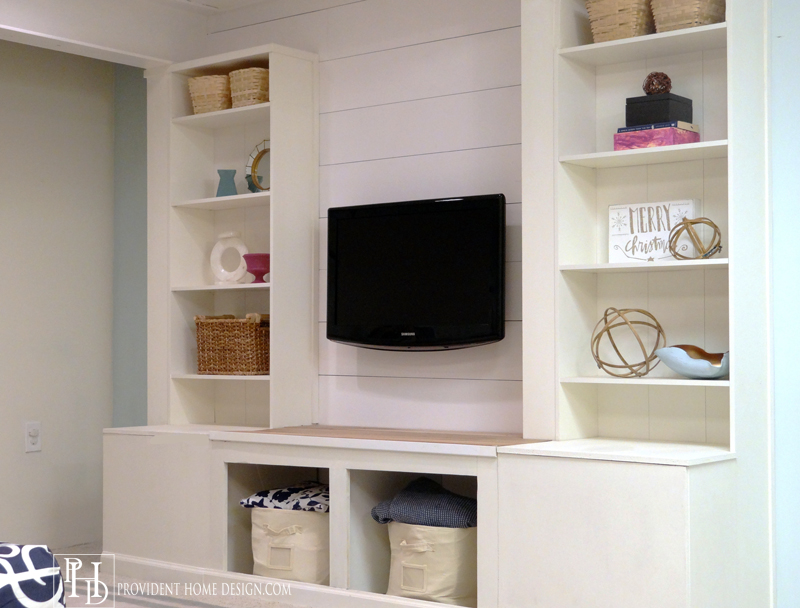
The TV is our old one that had collecting dust in storage.  The rug is actually a leftover carpet remnant that I cut to size and painted (more on that in another post).

Bright and Cheerful Basement

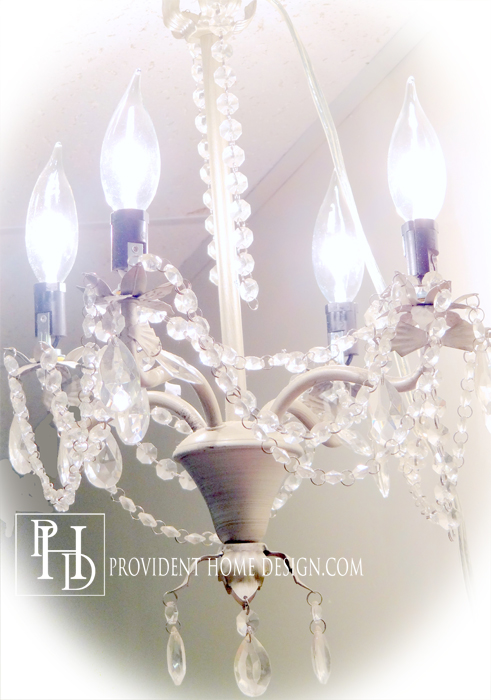
I hung a pretty, little chandelier above my daughter’s doll house that I got at Goodwill for only $2.50.  I know in the photo it looks spooky but I promise you in real life it’s very pretty and cute, not spooky at all!:-)

Chandelier for Basement

Basement Playroom Makeover After

A big goal for this space was for it not to feel like a basement.

With the lack of natural light basements can feel gloomy.  We had a rec room in our basement growing up and I didn’t like going down there very much (especially alone) because it had dark colors and was poorly lit.

So, for the basement playroom makeover I went really light on the walls (cream-Valspar Del Tequila Coronado,  Blue/green accent wall- Behr Melting Moments) and added 6 can lights in addition to the tube lights,  the little chandelier, and the table lamp.

Hiring someone to put in the can lights was the biggest cost of the makeover but it was well worth it because the additional lighting really helps the space not feel like a basement as much.

DIY Beadboard Ceiling in Basement

It also helps to raise the ceiling as high as possible.  There use to be a drop down ceiling that ran between  the bottoms of the two ceiling beams.  I took it down and put up a beadboard ceiling which helped open the space up a lot (tutorial to come)!

If I’ve forgotten anything or if you have any questions please let me know.  I have found that it often takes extra time and thought to do things on budget but it can be oh so very rewarding in the end!!

I hope you enjoyed this makeover!  You can check out the other One Room Challenge Participant’s reveals, Here.  Till next time, Friends!!

Signature

[jetpack_subscription_form]

Follow me on Pinterest and Instagram for more decorating ideas and inspiration!

Basement Remodel on a Budget

Related Posts From the Blog:

  • Everything you Need to Know about Painting a Room!Everything you Need to Know about Painting a Room!
  • A New Rug for the Living RoomA New Rug for the Living Room
  • Making Progress in the BathroomMaking Progress in the Bathroom
  • Design  101- Balancing Cool and Warm ColorsDesign 101- Balancing Cool and Warm Colors
  • Easy DIY Painted $1 Glass VaseEasy DIY Painted $1 Glass Vase
  • Need a Valentine’s Gift Idea?Need a Valentine’s Gift Idea?
  • DIY Pet Feeder- 3 Different Style Options!DIY Pet Feeder- 3 Different Style Options!
  • DIY Tabletop Christmas TreesDIY Tabletop Christmas Trees

before and afters// budget decor// decorating42 Comments

« Free Abstract Art Printables (and Week 5 ORC Update)
Your Guide to Using a Paint Sprayer & a GIVEAWAY! »

Comments

  1. Joyce Stickney says

    Thursday, November 12, 2015 at 8:28 am

    Tamara, your basement makeover is awesome! I especially like the built-in surrounding the television. You are so creative and can do so many handy, crafty things. I enjoy all of your posts. Keep them coming!

    Reply
    • Tamara says

      Thursday, November 12, 2015 at 8:50 am

      Hi, Joyce! Thank you for your kind and encouraging words!!!!:-)

      Reply
  2. thecreativityexchange says

    Thursday, November 12, 2015 at 11:18 am

    So awesome Tamara! I love it all but that built in and the art is crazy amazing!! High five girl! 🙂

    Reply
    • Tamara says

      Thursday, November 12, 2015 at 11:56 am

      Thank you, Cyndy!! High five!:-)

      Reply
  3. Amy says

    Thursday, November 12, 2015 at 11:37 am

    Tamara, it doesn’t even look like the same room! The white bead board ceiling with the can lighting make it so much brighter. I also love the color palette you chose. Your bold artwork works great in this space and the wide stripes on the rug really help define your seating area. Congratulations on an amazing basement makeover!

    Reply
    • Tamara says

      Thursday, November 12, 2015 at 12:00 pm

      Thank you, Amy!!:-)

      Reply
  4. venice12 says

    Thursday, November 12, 2015 at 11:47 am

    Tamara you totally achieved your goal. If you hadn’t said it was a basement I would never know it. It is light and airy. I really love all of your DIY art and the built in around the TV. Bravo my friend!!

    Reply
    • Tamara says

      Thursday, November 12, 2015 at 11:57 am

      Thank you, Jennifer! XO

      Reply
  5. rajnialexdesign says

    Thursday, November 12, 2015 at 12:19 pm

    Love how much brighter it is! And the art is great 🙂

    Reply
    • Tamara says

      Thursday, November 12, 2015 at 3:04 pm

      Thank you, rajnialexdesign!

      Reply
  6. shelley says

    Thursday, November 12, 2015 at 5:48 pm

    the ceiling idea is pure GENIUS!! it really is bright and clean looking-a huge improvement over the ugly,dated dropped ceiling tiles that are usually found in a basement . You have done a great job by also using “found’ and thrifted accessories…the space really looks inviting!

    Reply
    • Tamara says

      Thursday, November 12, 2015 at 8:03 pm

      Thanks so much, Shelley!!

      Reply
  7. Teresa @ Life and Renovations says

    Friday, November 13, 2015 at 9:21 am

    This looks amazing! I love the hanging chairs and the TV area. The planking behind the TV is fantastic. You did an amazing job!

    Reply
    • Tamara says

      Friday, November 13, 2015 at 9:52 am

      Thank you, Teresa!

      Reply
  8. Debbie says

    Friday, November 13, 2015 at 4:09 pm

    WOW!! That looks so great!! I love how bright it is now and the color palette you chose!! Beautiful job!!

    Reply
    • Tamara says

      Friday, November 13, 2015 at 4:19 pm

      Thank you, Debbie! I appreciate you coming by and checking it out!!

      Reply
  9. Amy says

    Friday, November 13, 2015 at 11:35 pm

    Great job! I can’t even get my dishes done and you are able to accomplish tons!

    Reply
    • Tamara says

      Friday, November 13, 2015 at 11:58 pm

      Lol, Amy! Luckily I have a really supportive husband who has been picking up my slack (dishes and laundry) the past few weeks!:-)

      Reply
  10. Lhiannon says

    Saturday, November 14, 2015 at 1:16 pm

    This is a huge transformation and looks very nice. I just know how much work that was. We are remodeling a very old house here at the time. Same ceiling problems. Wish you a lot of energy 🙂 It is so worth it.

    Reply
    • Tamara says

      Saturday, November 14, 2015 at 2:30 pm

      Thank you, Lhiannon!:-) Good luck with your remodel and the ceiling problems (which are never fun to deal with)! Wishing you lots of energy too!!:-)

      Reply
  11. Biggerthanthe3ofus (@ashleylmayes) says

    Saturday, November 14, 2015 at 4:08 pm

    You made it feel light and welcoming which is so hard in a basement. Great job.

    Reply
    • Tamara says

      Saturday, November 14, 2015 at 4:58 pm

      Thank you, Ashley!:-)

      Reply
  12. Corinna - A Designer At Home says

    Sunday, November 15, 2015 at 5:03 pm

    Everything is so budget friendly! And beautiful! Those hanging chairs are so incredibly fun.

    Reply
    • Tamara says

      Sunday, November 15, 2015 at 9:59 pm

      Thanks, Corinna!:-)

      Reply
  13. Erin @ The Organized Life says

    Monday, November 16, 2015 at 1:43 pm

    I love your realistic before pictures. Life with kids doesn’t make for photo-ready rooms real often. You did a great job in the basement and truly accomplished your goal of making it light and bright. Beautiful job.

    Reply
    • Tamara says

      Monday, November 16, 2015 at 1:56 pm

      Aw thanks, Erin! 🙂

      Reply
  14. thehandymansdaughter says

    Tuesday, November 17, 2015 at 3:54 pm

    Your rec room looks amazing! Your kids must love it. It looks so bright and cheerful now!

    Reply
    • Tamara says

      Wednesday, November 18, 2015 at 12:09 am

      Thank you!:-) Yep, the kids are finally actually going and playing down there now. Wahooo!

      Reply
  15. Sharleen Miller says

    Sunday, November 22, 2015 at 11:46 pm

    Beautiful. Who’d think it was a basement.

    Reply
    • Tamara says

      Monday, November 23, 2015 at 5:13 pm

      Thank you, Sharleen!:-)

      Reply
  16. Amy Cochran says

    Friday, November 27, 2015 at 9:39 pm

    You did a fantastic job!! Love the orbs!

    Reply
    • Tamara says

      Friday, November 27, 2015 at 10:13 pm

      Thank you, Amy!!:-)

      Reply
  17. sherry hart says

    Wednesday, December 2, 2015 at 7:55 am

    Well since you said it first….Good Lord….what a makeover from ugly duckling to swan! Fabulous job and you are right….adding the lights made a big difference!

    Reply
    • Tamara says

      Wednesday, December 2, 2015 at 10:36 am

      Yes, lighting makes a world of difference!!

      Reply
  18. Krista @ the happy house says

    Monday, December 7, 2015 at 8:14 pm

    Fabulous makeover!! I love the after – such an amazing change. We are about to tackle our basement and this is super inspiring!!

    Reply
    • Tamara says

      Monday, December 7, 2015 at 8:28 pm

      Thanks so much, Krista!! I’m so happy to hear you were inspired and I can’t wait to follow your basement makeover!

      Reply
      • Tamara says

        Tuesday, December 8, 2015 at 9:08 am

        Thank you, Amanda!:-)

        Reply
  19. Linda @ Calling it Home says

    Saturday, December 12, 2015 at 10:54 pm

    This was a huge before/after. Love the light bright feel of the space, now. Hope it is still neat and tidy. Happy Holidays!

    Reply
  20. Kristina says

    Friday, December 2, 2016 at 9:23 pm

    What kind of lights did you use for the ceiling fluorescent lights? The color looks so bright white. Mine looks green/purple and awful haha! Do you have a trick for this?

    Reply
  21. lynn says

    Saturday, February 4, 2017 at 8:48 pm

    can you tell me what I can get to stop the white powder I find in my basement the Breathe Ventilation System is expensive

    Reply
  22. julie says

    Wednesday, February 14, 2018 at 2:51 pm

    what color is the ceiling?

    Reply
    • Tamara says

      Thursday, February 15, 2018 at 12:43 pm

      Hi Julie! It is Behr Ultra Pure White!

      Reply

Leave a Reply Cancel reply

Your email address will not be published. Required fields are marked *

Hello and Welcome!! My name is Tamara and this is where I share my tips and tricks to creating a beautiful home! If you are new, feel free to start HERE.

More Blog Inspiration:-)

  • Icon Caroline on Design

    Close preview

    Loading...
  • Icon Centsational Girl

    Close preview

    Loading...
  • Icon Decorating Delirium

    Close preview

    Loading...
  • Icon Lauren Liess

    Close preview

    Loading...
  • Icon Life on Virginia Street

    Close preview

    Loading...
  • Icon Remodelaholic

    Close preview

    Loading...
  • Icon The Creativity Exchange

    Close preview

    Loading...
  • Icon Thrifty Decor Chick

    Close preview

    Loading...

Categories


Disclosure & Privacy Policy

You might also like

The Final Before & After of our Current Home

The Final Before & After of our Current Home

New Build Update-Paint, Lighting, and Floors oh My!

New Build Update-Paint, Lighting, and Floors oh My!

New Home Update

New Home Update

New Build Update- Cabinets are in!

New Build Update- Cabinets are in!

House Update–We Have Walls!

House Update–We Have Walls!

Join Me on Instagram!

[instagram-feed num=9 cols=9 showbutton=false]

Privacy

Copyright © 2022 · Savory theme by Restored 316