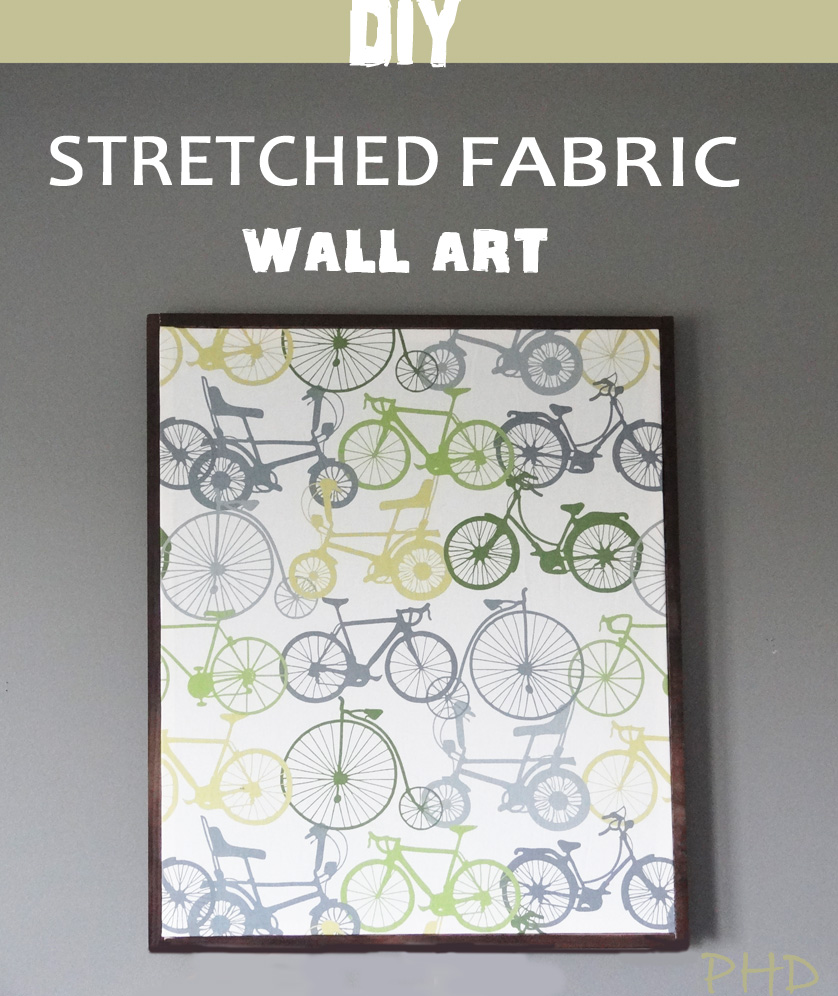
Hey Guys! I’m here today with a tutorial on how to make the DIY Fabric Wall Art I did in my Boys’ recent bedroom makeover.
When I saw this fabric on Fabric.com I knew it would be perfect to use in my boys room because it pulled together all the colors already going on in their room plus the bicycles sum up the stage of life my boys are in right now!

Via Fabric.com
At first I thought I’ll use the fabric to make decorative pillows. But as I went back and forth on how I should decorate the wall space between their beds I got the idea to use the much loved bicycle fabric (I ended up buying it on amazon because shipping was only $2)!
In college (a scary number of years ago) I took one art class, Intro to Oil Painting. In the class we were taught how to build our own stretched canvases to paint on.
I figured that the same method would work with any medium/heavyweight fabric.
So the first thing I needed to figure out was how big I wanted my fabric wall art to be. I did this by using painters tape and taping a rectangle between the boys’ beds. I kept tweaking the position of the tape until I was happy with the size and location of the taped rectangle on the wall.

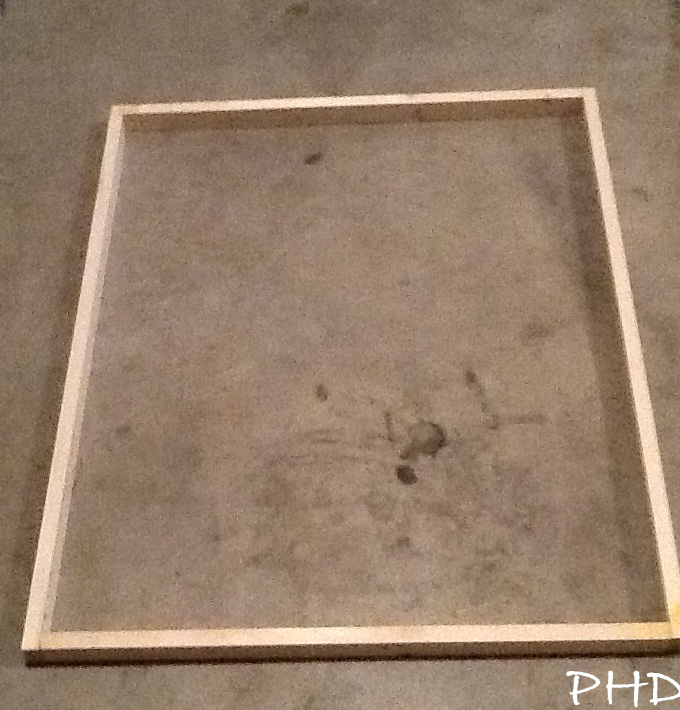
Once I was happy with the size I measured the height and width of the rectangle (it was 29 x 36). Then I used 1×2 pine wood pieces that I bought from Lowes and cut them to my determined height and width.
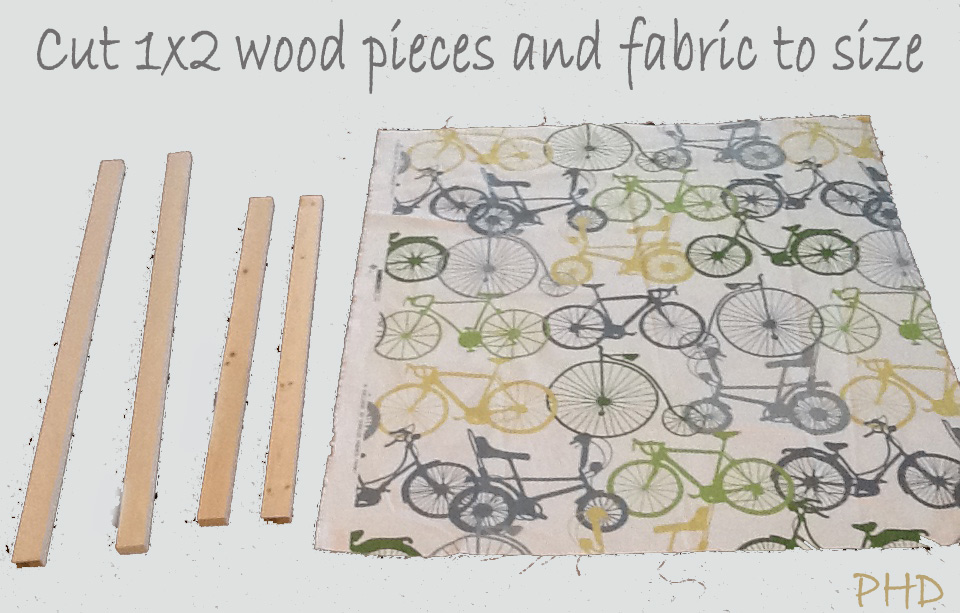
I also cut my fabric. Since I knew I would need my fabric to wrap around the back of the wood pieces I added a total of 4 inches in height and 4 inches in width to my desired measurements. Meaning I cut the fabric 40 inches in height and 33 inches in width (let me know if this isn’t making sense).
Next I put the wood pieces in a rectangle shape and added a generous amount of wood glue to each corner making sure the corners were straight and flush.
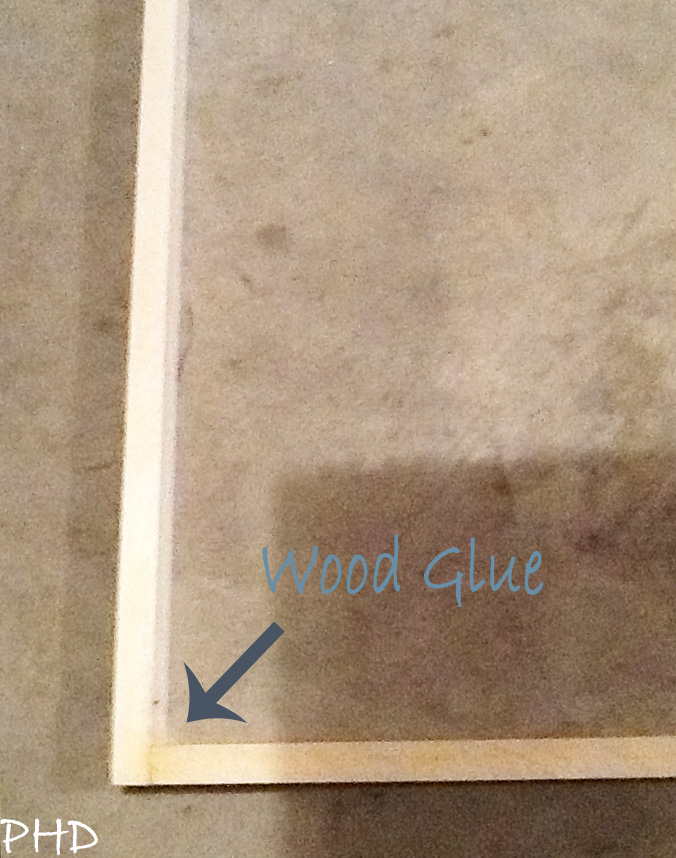
Then I left it alone for 12+ hours.
Next I placed the wood rectangle over the backside of the bicycle fabric.
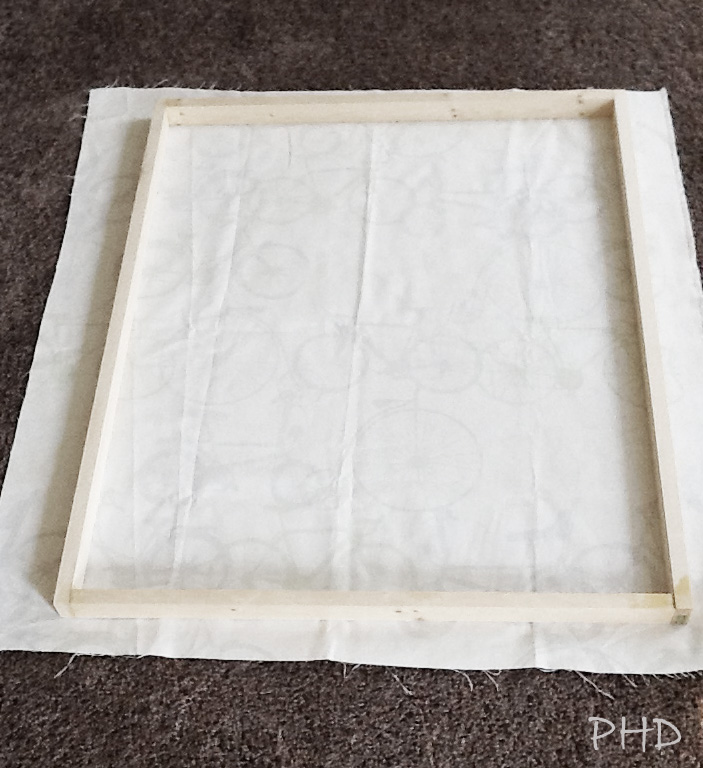
I made sure that the fabric was lined up how I wanted and then I pulled one side of the fabric over the side of the wood to the back of it and using a staple gun stapled along the back of the wood.
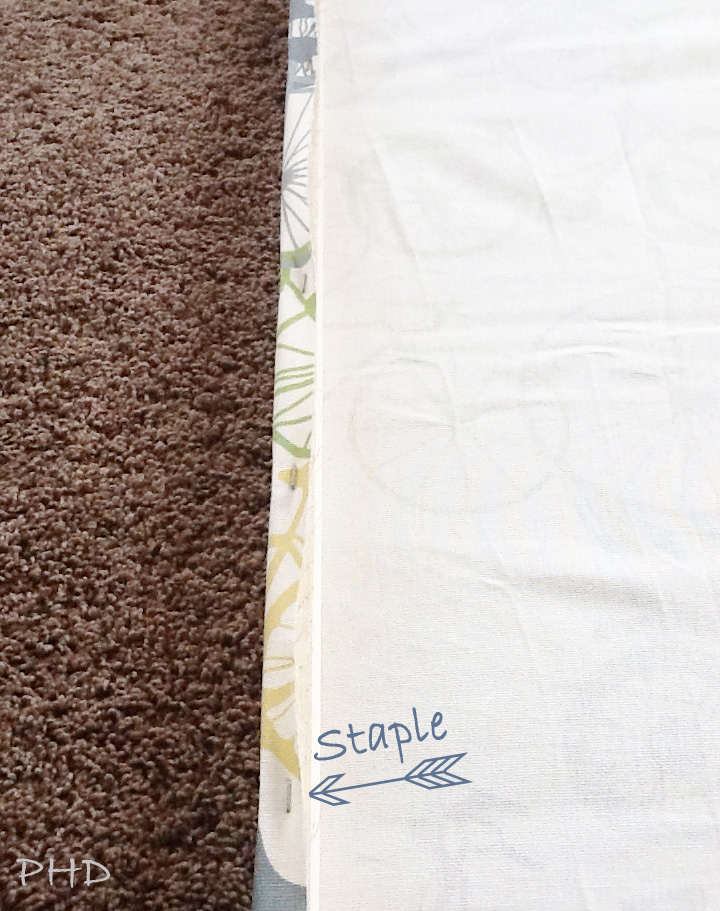
Once the first side was secured with staples I pulled the parallel side as tight as I could and stapled along it’s side making sure that is was evenly pulled across.
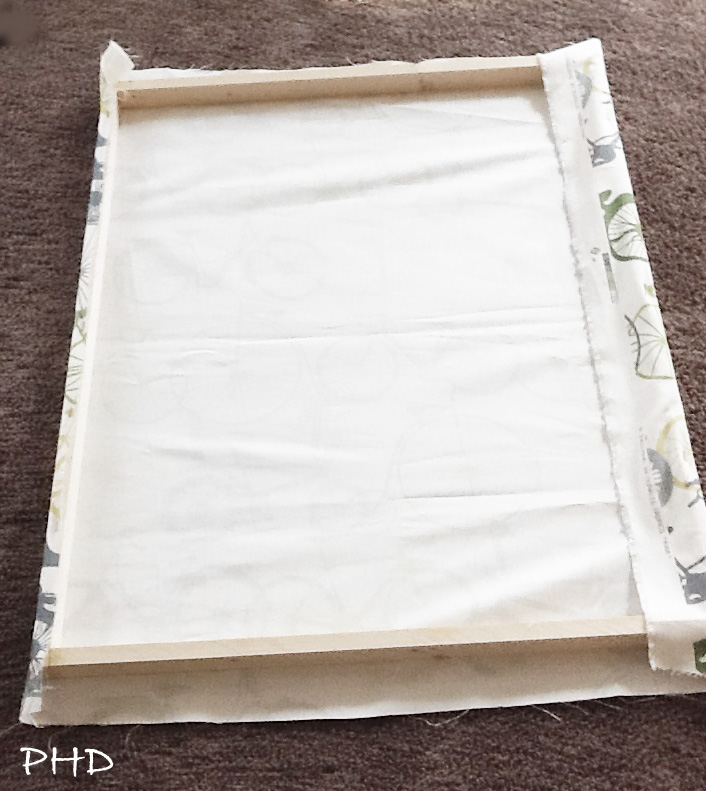
I cut off the excess fabric on the right side. Next I pulled the top of the fabric as tight as I could and stapled it to the back of the wood piece. And lastly I pulled the bottom of the fabric as tight as I could and stapled it to the back of the wood piece.
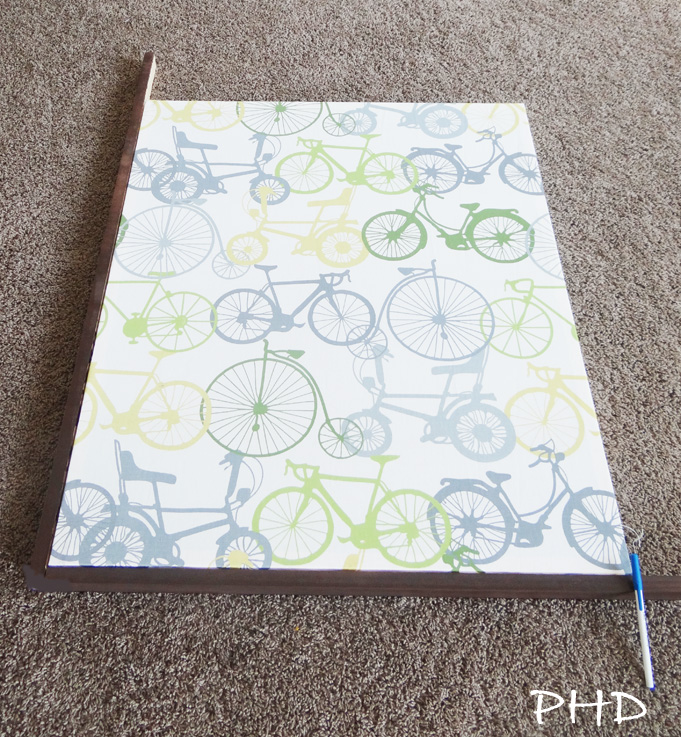
Turn it over and voila! Wall décor!

I love this clean look but you can also frame it out to give it more finished presence.
I ended up buying a couple more 1×2 pieces and spray painted them rubbed oil bronze. Then I held them up to stretched fabric wall art and marked with a pen where the frame wood pieces should be cut.
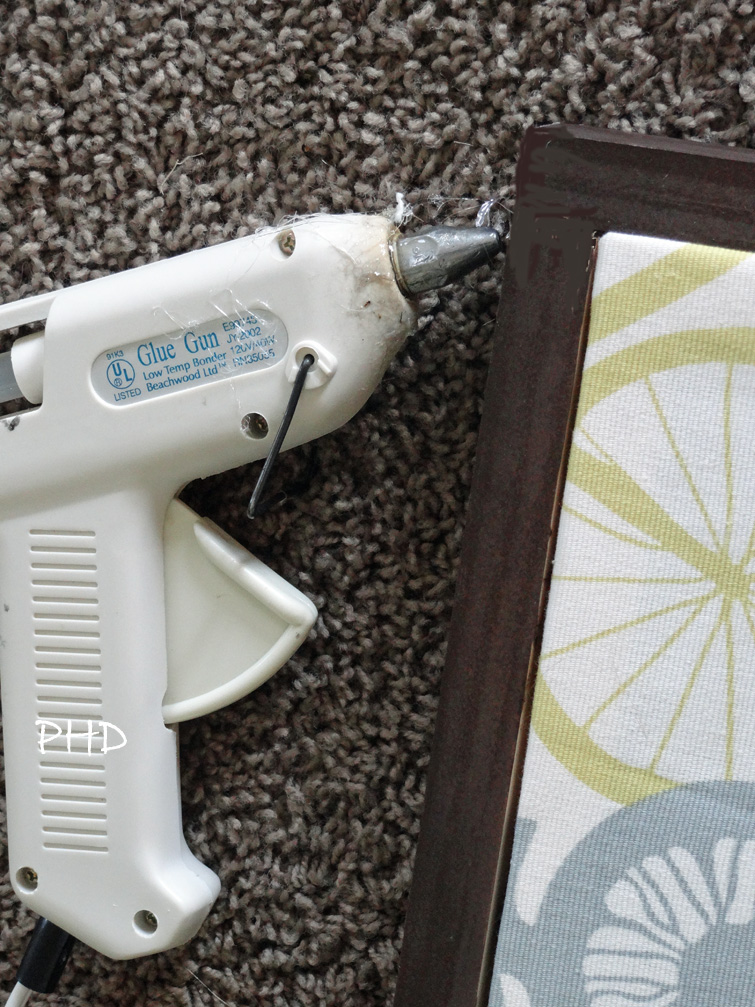
Then with a glue gun I glued all the frame corners together.
I’m not sure if I want to keep mine framed or not framed but if you know for sure you want yours to be framed then you can glue the whole edge of the frame to the wall art.

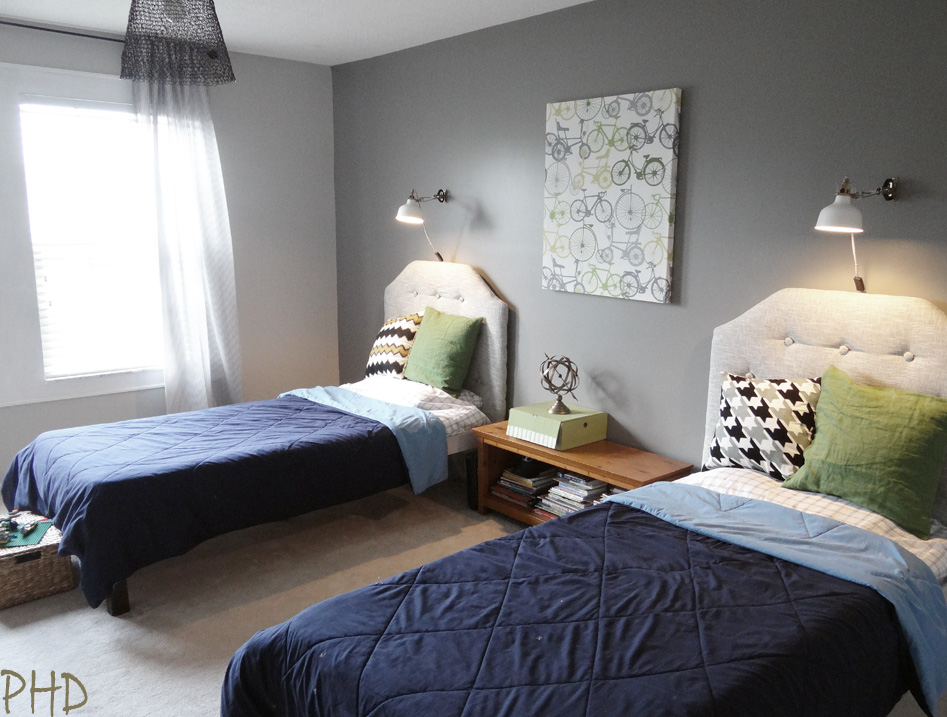
I like both looks! To frame or not to frame? That is the question. 🙂
As I mentioned in the last post we are installing engineered hardwood flooring throughout most of our main level this weekend. We have been in constant motion around here tearing out baseboards, carpet, and tile. Here are a couple of pics of what my home looks like right now. Fun times!
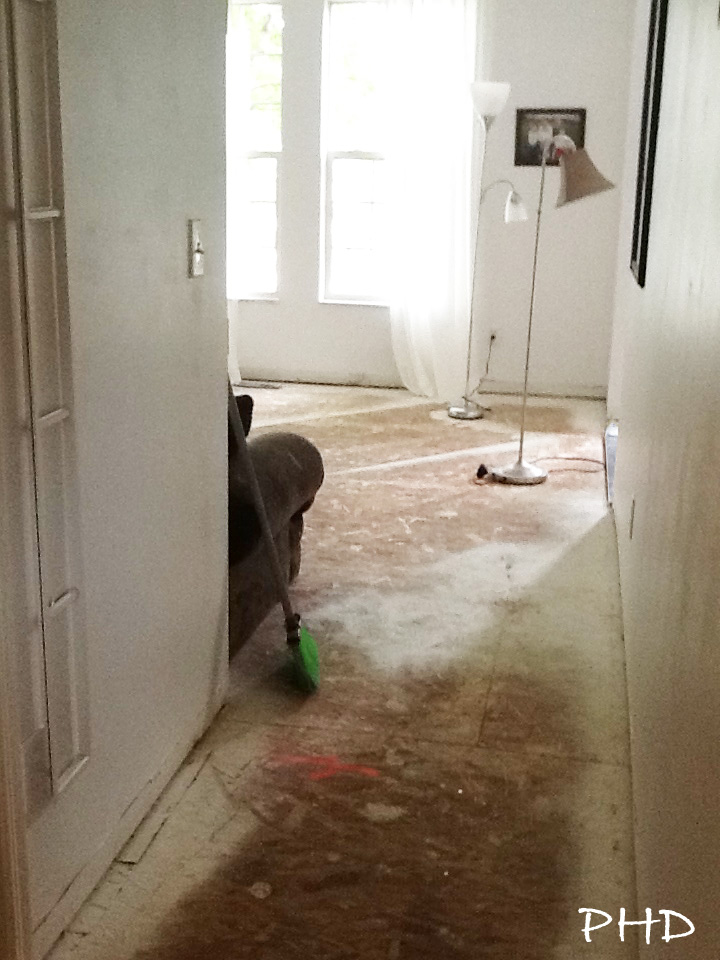
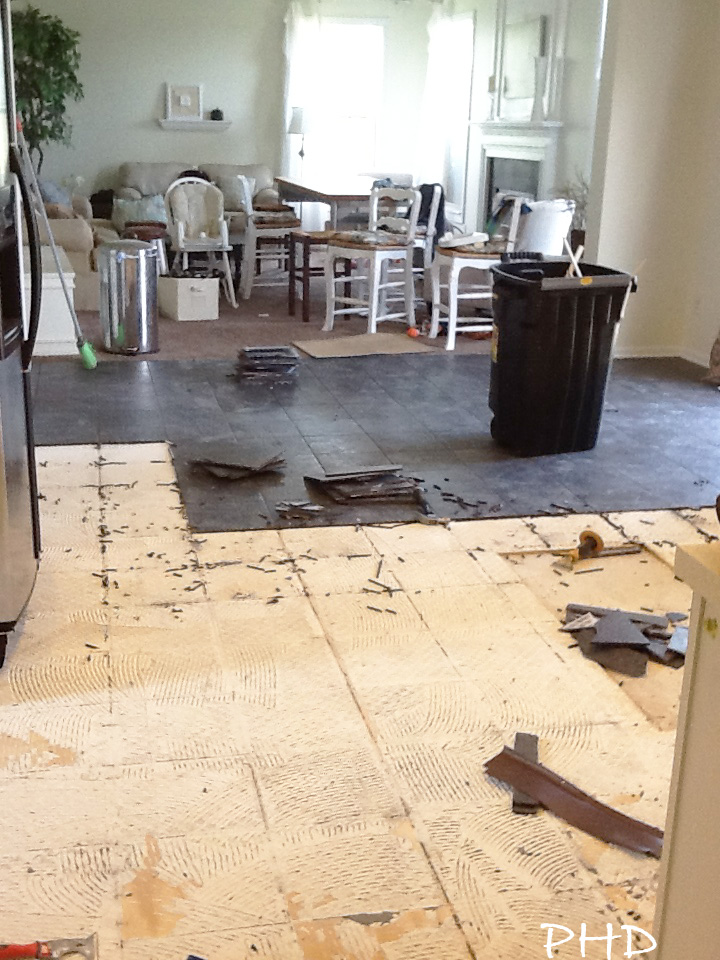
It’s a mess right now but I’m looking forward to the end result! I can’t wait to share more details about our new floors and all the things I’ve learned in this demolition preparation stage. Till next time!