Provident Home Design

Decor, DIY, and Interior Design

  • HOME
  • ABOUT
    • About PHD
    • Contact Me
  • DIY PROJECTS
  • DESIGN 101
  • PAINT
  • HOME TOUR
  • DESIGN INSPO
  • DECOR TIPS

GET NOTIFIED VIA EMAIL WHEN THERE'S A NEW POST!

Your Guide to Using a Paint Sprayer & a GIVEAWAY!

Hello!  I hope you’ve had a good week.  Today I have a new tool friend I want tell you all about and also give you the chance to win one!  For years I have heard of other DIY-ers using a paint sprayer and to be honest I thought it sounded intriguing but even more so intimidating.

Unlike some DIY-ers I didn’t grow up around power tools nor do I have husband who uses power tools SO if I’m to try a new power tool I’m on my own.  For this reason I can sometimes be reluctant.

But as often happens once I get the tool in hand it is so much easier than I had imagined it would be.  This is how it went with my new tool friend, the Homeright HVLP Finish Max Fine Finish Paint Sprayer (reminds me of the “official Red Ryder, carbine action, two-hundred shot range model air rifle”).:-)

How to use the Homeright Paint Sprayer

Since I have had it (3 months now) I have had a chance to use it on several projects.  I first used it to paint a coffee table that I got at a stager’s sale (for $20) a pale blue color.Coffee Table Before
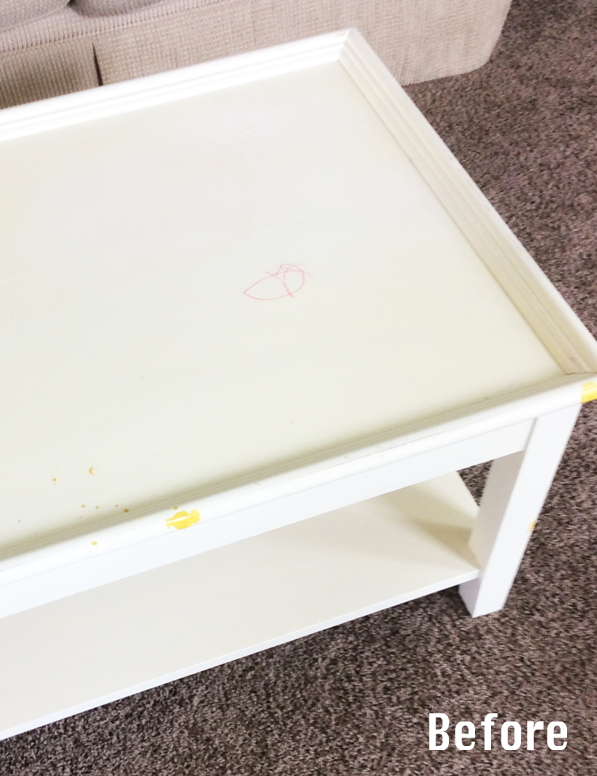
 

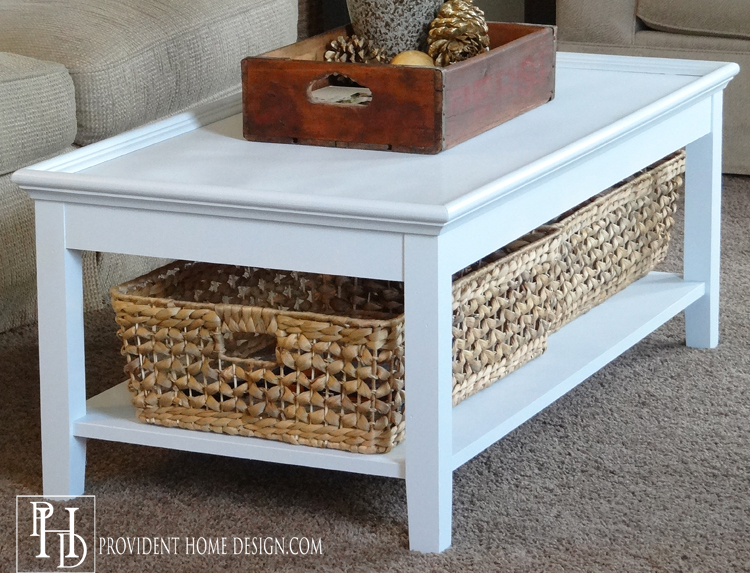
Paint Sprayer Coffee Table Results

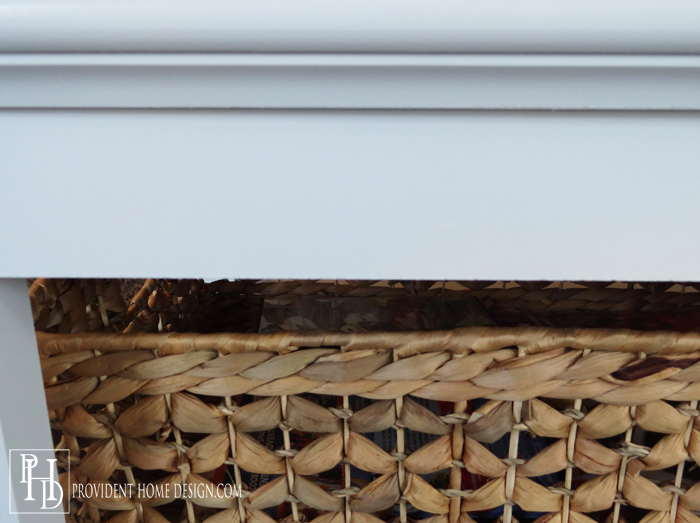
Below is a close up.  I love the flawless results!

Upclose of Paint Sprayer Finish

When you use a paint sprayer you definitely need to lay down some kind of drop cloth.  There is a huge plastic one that I always get from Home Depot.  It’s about $4 but I use over and over an over again.

It’s also good to use the sprayer in a well ventilated area like a garage with the door opened.  I have used it in our basement a couple of times (which is not well ventilated) but I was sure to use a dust/paint mask.

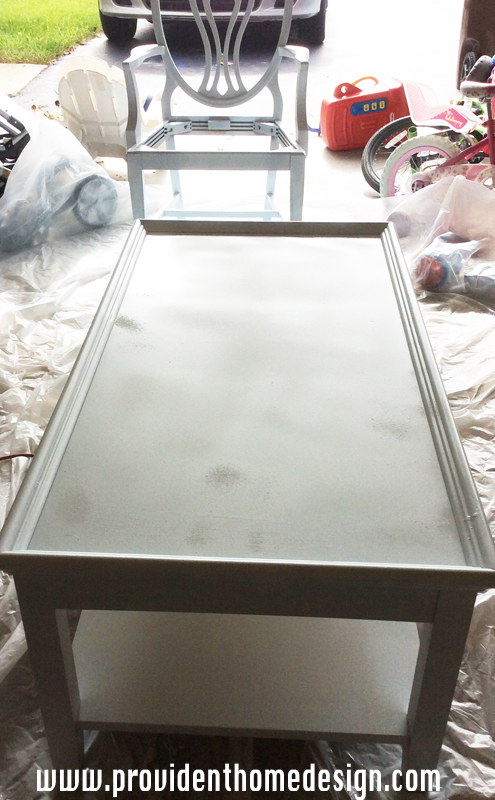
Painting a Coffee Table

In the picture above I had only sprayed on the first coat (no primer was used).  I ended doing 2 coats total on both the coffee table and the chair behind it.

One of the things that made me apprehensive about using a paint sprayer is that I had heard “horror stories” of them clogging up with thicker paints, etc.  I didn’t want to have to deal with a clogged sprayer or with adding paint thinners and trying to figure out ratios.

In contrast to my fears and the “horror stories” the process is really simple!!

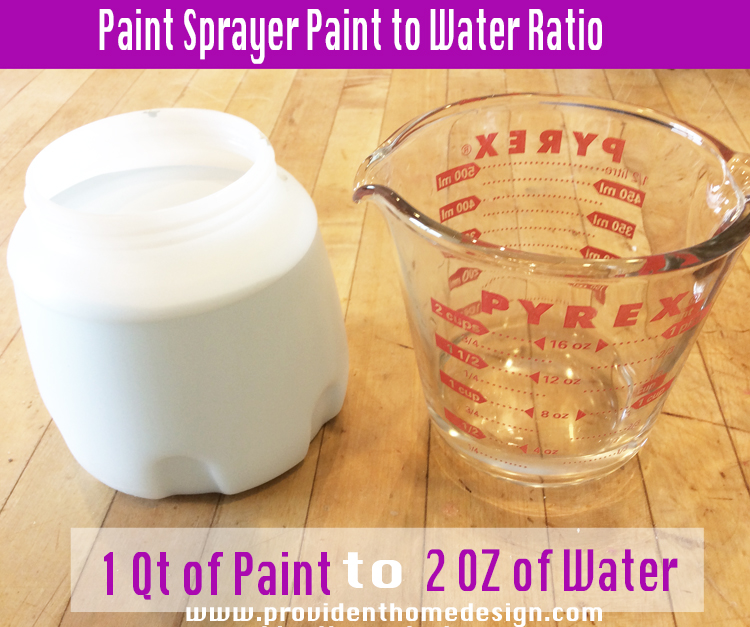
Just add 2 ounces of water to every quart of paint (I did this with latex and enamel paints).

How to Use a Paint Sprayer Paint to Water Ratio

The paint sprayer container is about a quart in size.  I just poured the paint into the container until it was almost full and then added 2 ounces of water.  Lastly, I stir the water and paint together with a paint stir stick.  I’ve had no clogging problems!

The other concern I had about using a paint sprayer was cleaning it!!  I had heard that they are a pain to clean and I’m not a good match for high maintenance tools.  Thankfully, it isn’t a big deal to clean (doesn’t mean I don’t sometimes get lazy and not clean in right away though).


I made a short video for all of you visual learners (which includes me)!

In the video I will show you:

  1. how to put the sprayer together once you get it
  2. how to take it apart for cleaning
  3. how to clean it
  4. how to use it

(Note:  I hate how my voice sounds in the video and thankfully my husband agreed that I don’t sound like that in person…phew)!:-)


In the video I forgot to mention that after cleaning the sprayer parts the owner’s manual suggests filling the container with water, turning on the sprayer, and spraying the water out of it for a thorough cleaning.  I’ve only done this 2 out of the 4 times I’ve used it and it has been fine.

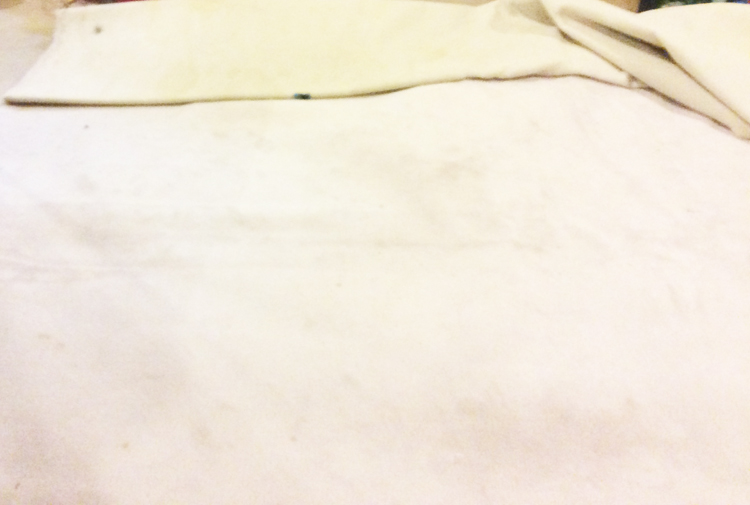
Another project I used the sprayer on was to paint a design on an old carpet remnant we had in storage.  It became the perfect rug for the kids playroom.
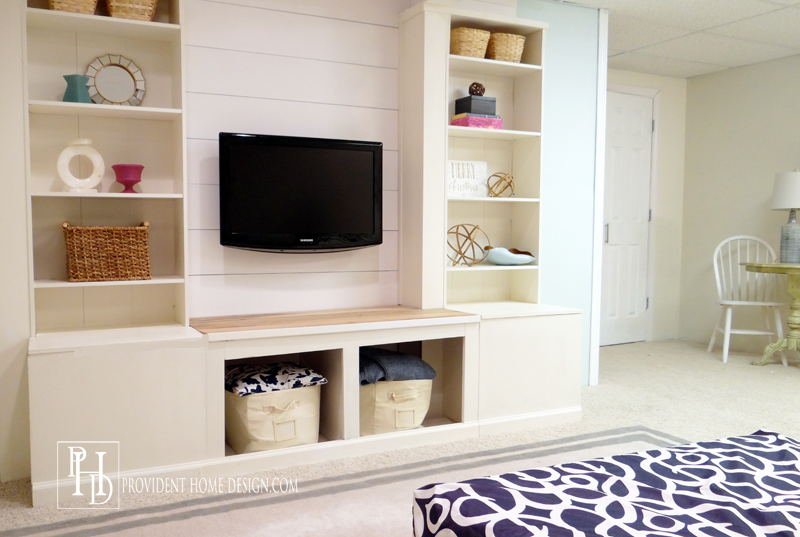
I started by measuring out and marking the desired rug size.  Then used a rug cutter (looks like an exacto knife) to easily cut the rug to size.

What to do with Old Carpet Remnants

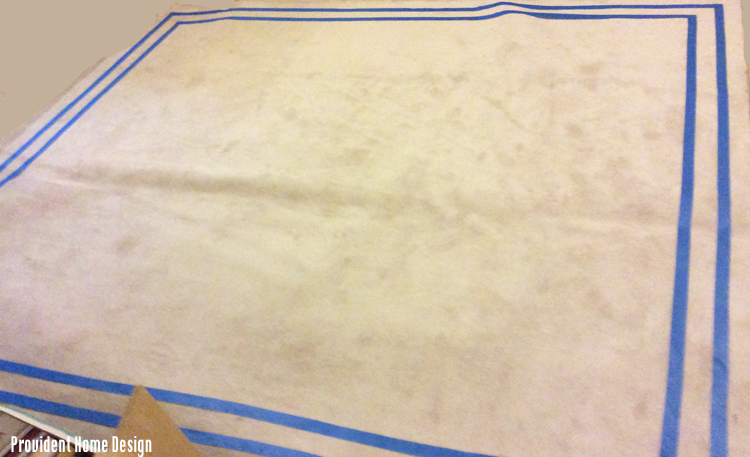
Then using painter’s tape I taped off the design I wanted to create.

How to Paint a Carpet Remnant

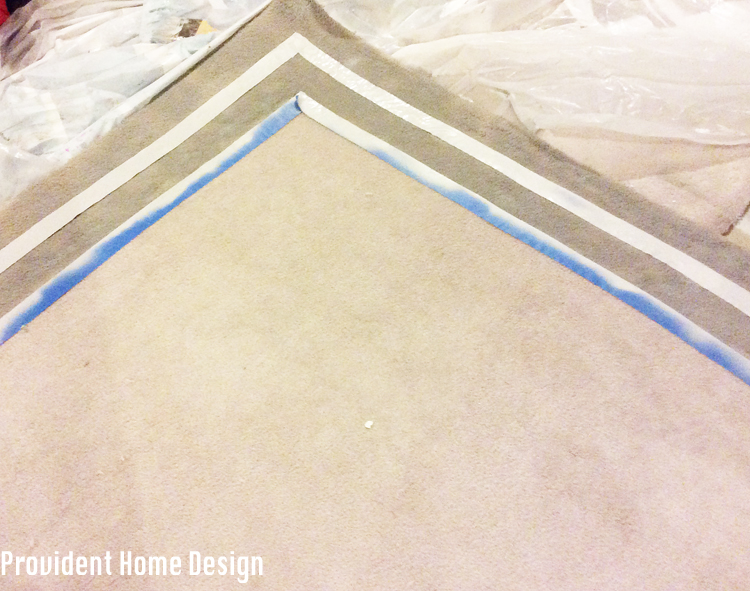
Then I used the paint sprayer to paint the border portion of the rug.

How to paint a rug

This wasn’t the first time I’ve painted a rug.  I also painted one, Here.  After the paint dries on the rug you can go over it a few times with a vacuum to soften the painted area up.  I’ve been really happy with my painted rugs.

Here is a short video of me spraying the rug with the Homeright HLVP Finish Max Fine Finish Paint Sprayer.

As you can see in the video, you move the sprayer back and forth over the area in an almost robotic way for best results!

I’ve been really happy with the smooth finish the paint sprayer produces and how much quicker and easier it makes certain projects (i.e. chairs, shiplap boards, painting upholstery, etc.).

Now it’s your chance to win one!!!

In order to enter to win leave a comment on this blog post stating what project you would use the Homeright Paint Sprayer on and then log into the rafflecopter below and click the box “I commented”.

For extra chances to win follow me on Instagram and Pinterest.

***Only US residents over 18 years of age can enter to win.  Winner will be chosen by random via Rafflecopter and notified promptly via email.  Giveaway ends Thursday, November 26, 2015 (Thanksgiving).  All information provided (i.e.: email address) is confidential.


a Rafflecopter giveaway

Disclosure:  I was given a Homeright Paint Sprayer in order to provide a review.  All opinions and content in this post are my own. Also if you end up purchasing the Homeright Paint Sprayer HERE I will get a small percentage of the sale.

Good luck and let me know if after watching both videos you have any lingering questions!!  I will do my very best to answer them!  And don’t forget paint sprayers are not scary…they are our friend.:-)

Signature

[jetpack_subscription_form]

Your Guide to Using a Paint Sprayer with Videos

Related Posts From the Blog:

  • Increasing Our Curb AppealIncreasing Our Curb Appeal
  • New Build UpdateNew Build Update
  • To Create Your Own Artwork or Not to Create Your Own Artwork?To Create Your Own Artwork or Not to Create Your Own Artwork?
  • Makings of a Stylish Man CaveMakings of a Stylish Man Cave
  • A Bit of Everything- A Recipe & Halloween DecoratingA Bit of Everything- A Recipe & Halloween Decorating
  • Tool Time with Tamara- Air Compressor and Nail Gun KitTool Time with Tamara- Air Compressor and Nail Gun Kit
  • Benjamin Moore’s 2017 Paint Color ForecastBenjamin Moore’s 2017 Paint Color Forecast
  • The Easiest Way to Add Brick to Your HomeThe Easiest Way to Add Brick to Your Home

before and afters// cabinets// decorating// furniture// paint// tutorials52 Comments

Subscribe

GET NOTIFIED VIA EMAIL WHEN THERE IS A NEW POST!

« Basement Rec Room Makeover Reveal! (ORC Week 6)
11 Money-Saving Tips for Decorating Your Christmas Tree »

Comments

  1. Sally says

    Friday, November 20, 2015 at 12:04 am

    Wow, your projects look great! The videos are wonderful too, very informative. I have so many projects backlogged, but the biggest one that I want to do is an old secretary piece. That thing has been haunting me. Thanks for the chance to win.

    Reply
    • Tamara says

      Wednesday, November 25, 2015 at 10:35 pm

      Thank you to everyone who participated in the Giveaway! You are all awesome and I wish you luck! I will announce the winner in my post on Friday, November 27th! Have a wonderful Thanksgiving, Everyone!!

      Reply
  2. Holly Walters says

    Friday, November 20, 2015 at 2:22 am

    All of my cabinets, kitchen and both bathrooms, badly need a couple of coats of paint. I would use the Homeright Paint Sprayer to happily spray all of my cabinets with a beautiful, streak and drip free coat of paint!

    Reply
  3. Diane Hurst says

    Friday, November 20, 2015 at 7:56 am

    Thank you for the tutorials. I would love to try this sprayer!

    Reply
  4. Courtney says

    Friday, November 20, 2015 at 9:13 am

    Thanks for this post! It’s perfect timing for me – I just chose a paint color for our kitchen cabinets. My boyfriend bought this house 4 years ago and hadn’t done any updates on his own and now we’re starting the process of turning this little house into our home. I’ve been looking at sprayers because we want to lighten up the dark wood cabinets in the kitchen and the built-ins in the living room with paint. I heard stories about the horror of cleaning them too so thanks for including that in your video!

    Reply
  5. Lori says

    Friday, November 20, 2015 at 9:23 am

    Thank you for your well-written and interesting blogs, and also for taking the time to put the videos together for us. I am learning so much! I have several pieces of furniture that I plan on painting. There’s an end table, a vanity/desk piece, and a thrift chair that need painting in order for me to make it a part of our home decor. A quality sprayer like the Homeright would be amazing to use! Thanks for the opportunity to win one!

    Reply
  6. Holly says

    Friday, November 20, 2015 at 9:42 am

    I can absolutely relate to being the DIY’er in the family. My hubby is of the school that if something is not broken, it doesn’t need fixed, changed, updated…(head in hands) Slowly, I have been making updates by hand- painting a few pieces of furniture and I have a few more to go. I have been dreaming about a paint sprayer. A smooth finish ?! (heart-eyes), done in a fraction of the time?! (dreamy sigh). Good luck to us all!

    Reply
  7. Denise P. says

    Friday, November 20, 2015 at 9:51 am

    I would love to have a Homeright sprayer for my houseful of solid wood doors! I can also think of a dozen more projects, too! The possibilities are endless. Love, love your tutorials!

    Reply
  8. Jody Lester says

    Friday, November 20, 2015 at 10:49 am

    I have a large armoire just begging to be painted!

    Reply
  9. Lisa Rigby says

    Friday, November 20, 2015 at 11:40 am

    I have painted a side table and a hutch and it would have been easier to do with a paint sprayer. I sure would love this!

    Reply
  10. Wendy says

    Friday, November 20, 2015 at 1:18 pm

    A giveaway! How exciting! This sprayer will most definitely make my upcoming board and baton project much easier. I hope the random raffler picks me!

    Reply
  11. Bharati says

    Friday, November 20, 2015 at 1:25 pm

    I would love to paint the kitchen cabinets.

    Reply
  12. Susan says

    Friday, November 20, 2015 at 1:34 pm

    I must be doing some thing terribly wrong because for the life of me I cannot pull up a place to actually leave a comment…it is either thank you for your comment or terms and agreement click here. It would be nice to win if I could figure out how to enter.

    Reply
    • Tamara says

      Friday, November 20, 2015 at 2:24 pm

      I’m sorry for the confusion, Susan!! This is where you comment then you go back to the rafflecopter enter in you email (or Facebook login) and then click “I commented”. Let me know if you have anymore problems with it!

      Reply
  13. Lillian says

    Friday, November 20, 2015 at 2:12 pm

    I thoroughly enjoyed the video tutorials! Very helpful and informative! The sprayer would save me soo much time painting my 17 year old son’s “barn” he built. I would LOVE to win!!!

    Reply
  14. Verna Vuckovich says

    Friday, November 20, 2015 at 3:13 pm

    My master bedroom set would look lovely painted with sprayer!

    Reply
  15. Gail says

    Friday, November 20, 2015 at 3:17 pm

    I need to paint the outside of my home. A paint sprayer would be quicker and do a better job. Thank you for the opportunity to win.

    Reply
  16. Dana says

    Friday, November 20, 2015 at 3:41 pm

    Hi Tamera. I tried to enter to win the sprayer but it would not let me comment. It was just checked that I had commented??? I have been thinking if maybe getting a sprayer ti restrain my fence and my daughter and I want to try painting her sofa and I thought it might work for that. I am 73 which I know is old for starting to DIY but it is fun (usually) and I have some carpet pieces I was about to throw out but now might try painting them! The first blog of yours that I read gave me the courage to paint my ugly bathroom vanities and I want to try the kitchen cabinets. What kind of edger do you use when painting walls?

    Reply
    • Tamara says

      Friday, November 20, 2015 at 4:17 pm

      Hi, Dana, this is where you comment. So the comment you just made counts (just make sure you clicked on the button in the rafflecopter that says “I commented”). I love that you have started DIY-ing!! I think DIY-ing is so empowering.:-) As far as an edger goes I usually just use a trim brush which is angled and makes going along the edges a lot easier. Hope this helps!!

      Reply
  17. Lindsay says

    Friday, November 20, 2015 at 4:36 pm

    I’m about to refinish a kitchen table and chairs, and a sprayer would make the job so much easier (especially for the chairs)! I’ve wanted one for so long!!

    Reply
  18. Cheri Garber says

    Friday, November 20, 2015 at 4:40 pm

    I would paint the ugly red siding on the house we are purchasing!

    Reply
  19. julia says

    Friday, November 20, 2015 at 4:53 pm

    I painted my kitchen cabinets white – and I love the results but when I get up close you see texture – I wish I had a sprayer. I have several furniture pieces that need a fresh coat of paint to bring them back to life. I’d love to have a sprayer for that – and redoing my cabinets!

    Reply
  20. Sara LeSueur says

    Friday, November 20, 2015 at 5:04 pm

    Recently, I was fortunate to receive my great grandmother’s kitchen cabinet which needs a lot of paint and TLC. I am sure I could restore this cabinet to its former glory with the paint sprayer, as well as leaving some it to more rustic appeal. Your projects are the inspiration I need!!!

    Reply
  21. aphares2 says

    Friday, November 20, 2015 at 5:08 pm

    Great demo, I have been wanting to paint my basement walls. Can I use the thicker paints with this sprayer or should I roll on as directed?

    Reply
    • Tamara says

      Friday, November 20, 2015 at 5:30 pm

      Hi there, you can use the paint sprayer with thicker paints too just be sure to add the 2 ounces of water per 1 quart of paint!

      Reply
  22. M. Jones says

    Friday, November 20, 2015 at 7:31 pm

    I would love to use this to repaint my daughters dressers. I rolled it on and would love to win this so it could look better. Thank you so much

    Reply
  23. Kim Smith says

    Friday, November 20, 2015 at 10:29 pm

    I have just this fall begun to chalk paint furniture. I am hooked! I love it, but have decided that a sprayer would make it much, much less time consuming! Especially for shutters! I spent 4 hours painting 2 shutters, front and back, for a shelf project.I decided then that I need a sprayer :-). Love your blog, and your creativity.

    Reply
  24. Barb V. says

    Friday, November 20, 2015 at 11:22 pm

    I have 4 Windsor-style dining chairs I need to spray! I can’t imagine painting all those spindles by brush!!

    Reply
  25. Stacey B says

    Saturday, November 21, 2015 at 7:40 am

    I am dying to try this on my kitchen island!

    Reply
  26. Denise says

    Saturday, November 21, 2015 at 8:02 am

    I painted my kitchen cabinets two years ago but have two cabinets I never completed!

    Reply
  27. c taylor says

    Saturday, November 21, 2015 at 2:37 pm

    I would love to try this sprayer on my interior doors.

    Reply
  28. Sylvia says

    Saturday, November 21, 2015 at 8:20 pm

    I would like to try spraying a dresser and if that works out then I have along list of things to paint! I like reading your blog. Hope I win!

    Reply
  29. Virginia says

    Saturday, November 21, 2015 at 8:50 pm

    I would paint the inside of my cabinets and then I would paint my family room!

    Reply
  30. Debbie Jorgensen says

    Saturday, November 21, 2015 at 10:17 pm

    I would love one to paint my kitchen cupboards! I want to spray them white and I know this would make the finish flawless and I could tell all my friends that they are custom!): or maybe not or I might get coal in my stocking.

    Reply
  31. Benny Sequeira says

    Sunday, November 22, 2015 at 7:09 am

    I am likely to tackle the craft room.

    Reply
  32. Natasha S says

    Sunday, November 22, 2015 at 7:10 am

    Recently moved to a new apartment, maybe the living room to start with.

    Reply
  33. Ananya Gupta says

    Sunday, November 22, 2015 at 7:11 am

    Our kitchen cabinets need new paint !

    Reply
  34. Amelda Shaw says

    Sunday, November 22, 2015 at 10:18 am

    I painted my kitchen cabinets using a paint brush and now my daughter would like for me to do hers. The paint sprayer would be a god send since i just had my hip replaced.

    Reply
  35. Barbar keeler says

    Sunday, November 22, 2015 at 3:16 pm

    Bought a sprayer a few years back but never took it out of the box I was worried about cleaning it so I sold it at my garage sale. Wish I had seen your tutorial then. Keep up the good work u do. Good luck to all

    Reply
  36. Sarah says

    Sunday, November 22, 2015 at 4:17 pm

    I’m a newbie! I have a dress up closet I’m working on for my daughter that I would try it on first. And then … Who knows?

    Reply
  37. Runa Saunders says

    Monday, November 23, 2015 at 8:03 am

    I’m so excited about all the painting possibilities with the Homeright Paint Sprayer!!! Kitchen cabinets, dining table, chairs and hutch, makeover for our fireplace, patio cushions, armchair…rug…desk…dresser….the ideas are endless as the transformation begins!!!!

    Reply
  38. Sam G says

    Monday, November 23, 2015 at 8:57 am

    There are so many things I’d love a paint sprayer for, but first up are some old dressers that need a refresh!

    Reply
  39. Pam says

    Monday, November 23, 2015 at 1:17 pm

    i want to build beds i would spray paint them, i have a ton of projects to complete

    Reply
  40. Jennifer@decoratingdelirium says

    Monday, November 23, 2015 at 3:06 pm

    I love the professional finish! No brush stokes there. I would love to win this to tackle some of my more intimidating paint projects!!

    Reply
  41. twinky41 says

    Monday, November 23, 2015 at 7:51 pm

    I would love to paint my wall.This would be a good prize to win for me.

    Reply
  42. chris aka monkey says

    Monday, November 23, 2015 at 9:11 pm

    i haven’t ever seen anyone paint a rug with the homeright before wow i was impressed with that i have so much old stuff it all needs a coat of paint starting with my bedroom furniture thanks and happy thanksgiving xx

    Reply
  43. Linda says

    Tuesday, November 24, 2015 at 12:51 am

    Hi,
    I think this paint sprayer will very helpful to me. It is better than traditional paint devices like brush or roller. I am going to work by paint sprayer for better solution.

    Reply
  44. Cheryl says

    Wednesday, November 25, 2015 at 4:10 am

    I would use the Homeright HVLP paint sprayer on outdoor furniture.

    Reply
  45. Grace says

    Wednesday, November 25, 2015 at 9:39 am

    I would use it on my tacky floor! It would have to be easier than rolling it on, and faster too.

    Reply
  46. Hanna says

    Wednesday, November 25, 2015 at 2:35 pm

    Ha! I like your final words of wisdom, not to be scared off by the idea of a paint sprayer! Our kitchen cabinets would look 100x better with a coat of paint.

    Reply
  47. Alix says

    Sunday, December 13, 2015 at 7:11 pm

    I am turning a hanging kitchen cabinet into a French country standing bathroom cabinet. It’s going to take some work but I’m feeling lucky!

    Reply
  48. Cindy says

    Friday, November 17, 2017 at 9:04 am

    I’m getting ready to refinish kitchen cabinets and a bathroom cabinet and I have an old army trunk that I getting to refinish too. One of these sure would come in handy!

    Reply

Leave a Reply Cancel reply

Your email address will not be published. Required fields are marked *

Hello and Welcome!! My name is Tamara and this is where I share my tips and tricks to creating a beautiful home! If you are new, feel free to start HERE.

Subscribe

Get notified via email when there's a new post!

Join me on Instagram!

[instagram-feed]

More Blog Inspiration:-)

  • Icon Caroline on Design

    Close preview

    Loading...
  • Icon Centsational Girl

    Close preview

    Loading...
  • Icon Decorating Delirium

    Close preview

    Loading...
  • Icon Lauren Liess

    Close preview

    Loading...
  • Icon Life on Virginia Street

    Close preview

    Loading...
  • Icon Remodelaholic

    Close preview

    Loading...
  • Icon The Creativity Exchange

    Close preview

    Loading...
  • Icon Thrifty Decor Chick

    Close preview

    Loading...

Categories


Disclosure & Privacy Policy

You might also like

The Final Before & After of our Current Home

The Final Before & After of our Current Home

New Build Update-Paint, Lighting, and Floors oh My!

New Build Update-Paint, Lighting, and Floors oh My!

New Home Update

New Home Update

New Build Update- Cabinets are in!

New Build Update- Cabinets are in!

House Update–We Have Walls!

House Update–We Have Walls!

Join Me on Instagram!

[instagram-feed num=9 cols=9 showbutton=false]

Privacy

Copyright © 2021 · Savory theme by Restored 316

Enter your name and email to get my weekly post sent to your inbox... it's FREE!
Want to learn more about DIY, decorating, and making your home beautiful? Sign up below!
Your information will *never* be shared or sold to a 3rd party.