Provident Home Design

Decor, DIY, and Interior Design

  • HOME
  • ABOUT
    • About PHD
    • Contact Me
  • DIY PROJECTS
  • DESIGN 101
  • PAINT
  • HOME TOUR
  • DESIGN INSPO
  • DECOR TIPS

I Reupholstered My Side Chairs!

Happy St. Patrick’s Day!  This St. Patrick’s is a little more meaningful for me because I now know I’m 28% Irish!  You may be wondering how I know this exact percentage??

This past Christmas my Dad gave all my immediate family a present we didn’t ask for or expect but one we have all enjoyed!  He gave us an Ancestry DNA kit.  Basically you spit in a tube and send it off to a lab and then 3 weeks later they send you back your personal countries of origin percentages.

I now know I am 40% German, 28% Irish, 16% Scandanavian, and 10% Great Britain (and trace percent of some others).   It’s been fun to see the similarities and differences I have with my parents and siblings (mostly similarities).  A long story (but hopefully interesting 😉 ) to explain why I know I’m Irish and 28% for that matter!:-)

As I mentioned in an earlier post I lucked  out one day (my Irish luck perhaps:-) ) while scavenging a local thrift store.  Besides some décor items I found  two matching green vinyl chairs for only $6.50 a piece!

New Chairs from Thrift Store_edited-1
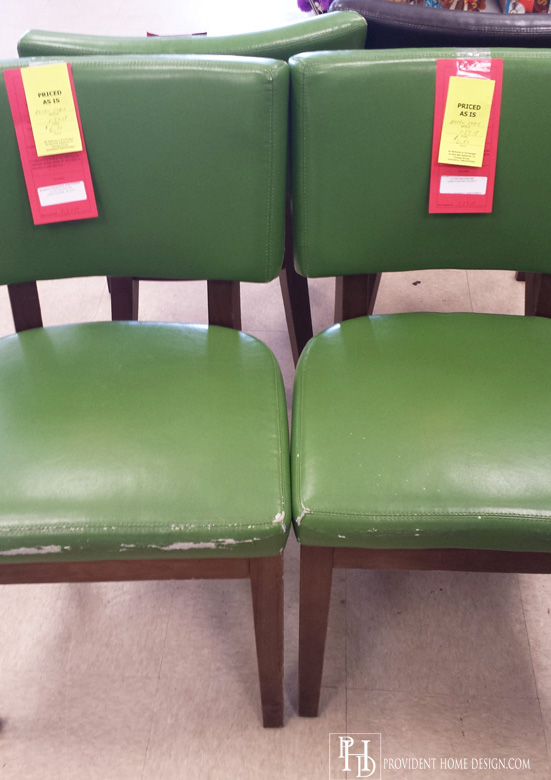
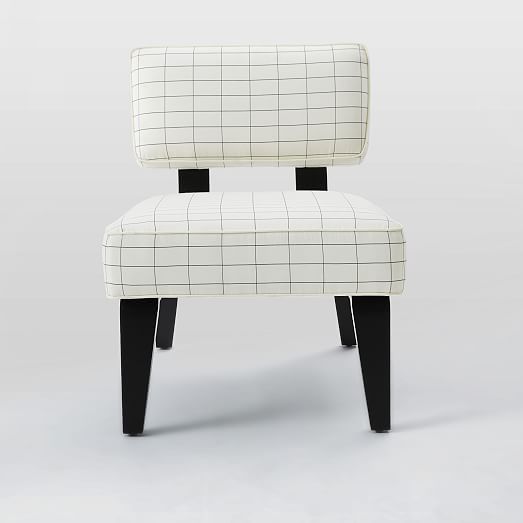
The lines of the chair reminded me of the West Elm Bentwood Slipper Chair selling for a hefty $399 per chair.  I thought for sure I could figure out a way to reupholster them and use them in my Living Room Makeover!

img2c

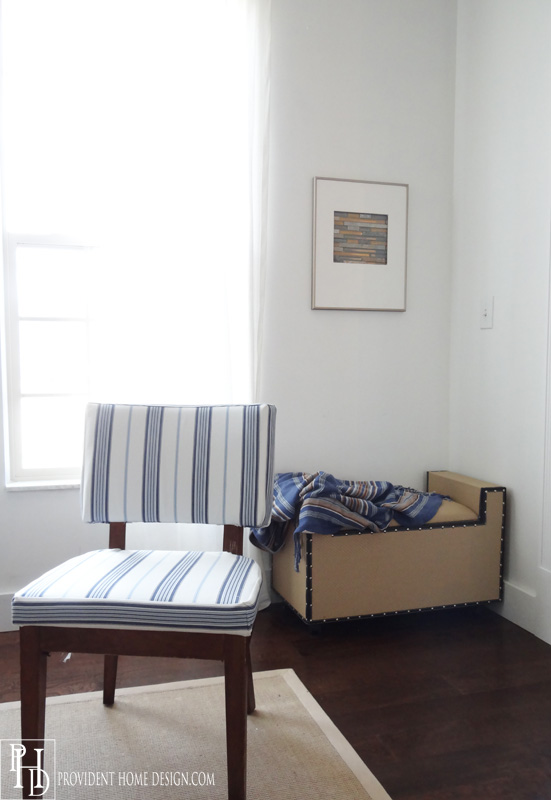
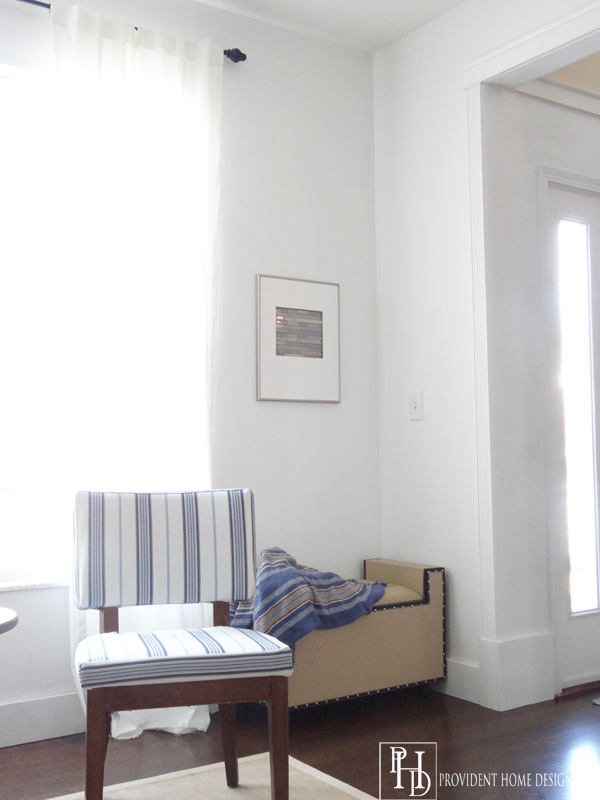
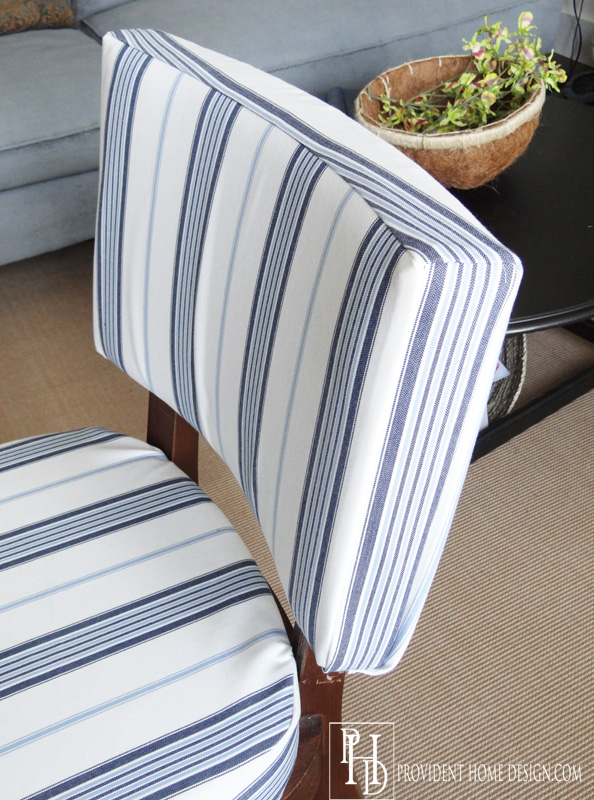
Well, I did it!!  Please let me introduce you to my newly upholstered matching chairs! Only $16 a piece!

DIY Chair Reupholstering Tutorial


Reupholstered Chair

Chair Makeover After

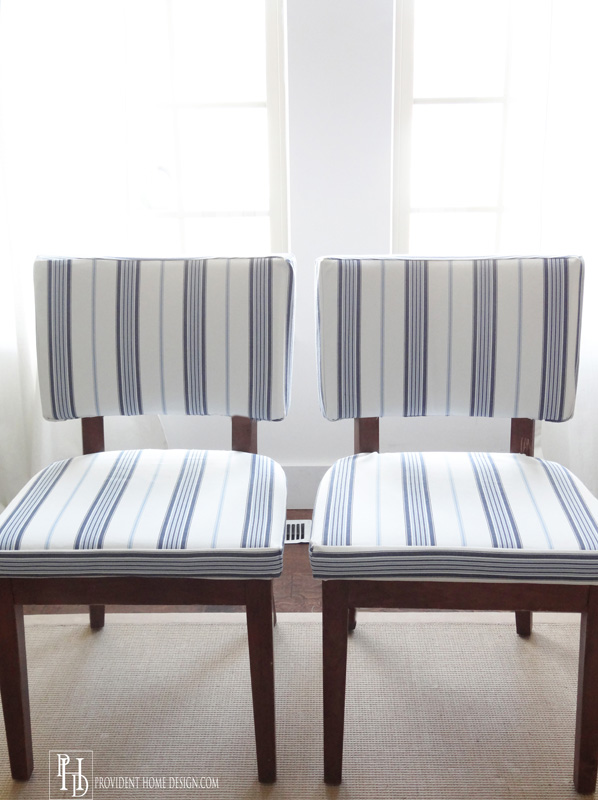
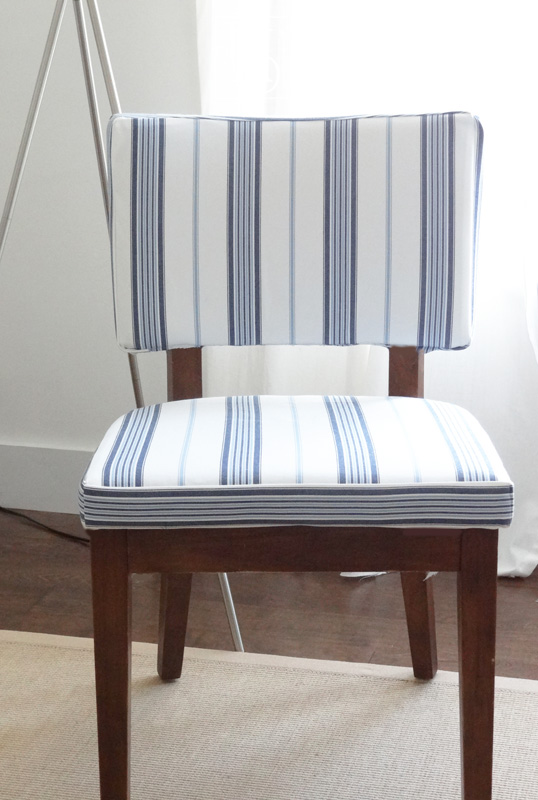
I purchased the fabric from Fabric.com.  It was only $7.98 a yard and the material is the perfect weight and quality for this project.

Fabric Chair Makeover

TIP:  If you are buying more than $35 worth of fabric from fabric.com then shipping is free.  However, if you buy less then $35 then I usually go find it on Amazon (they sell most of their fabrics on Amazon too) because the shipping for it is only $2 on Amazon.

 How to Reupholster Chairs

Okay, so here is the Tutorial!  I want to preface this saying I’m not much of a seamstress so this was a big deal for me to try but I’m so glad I did!

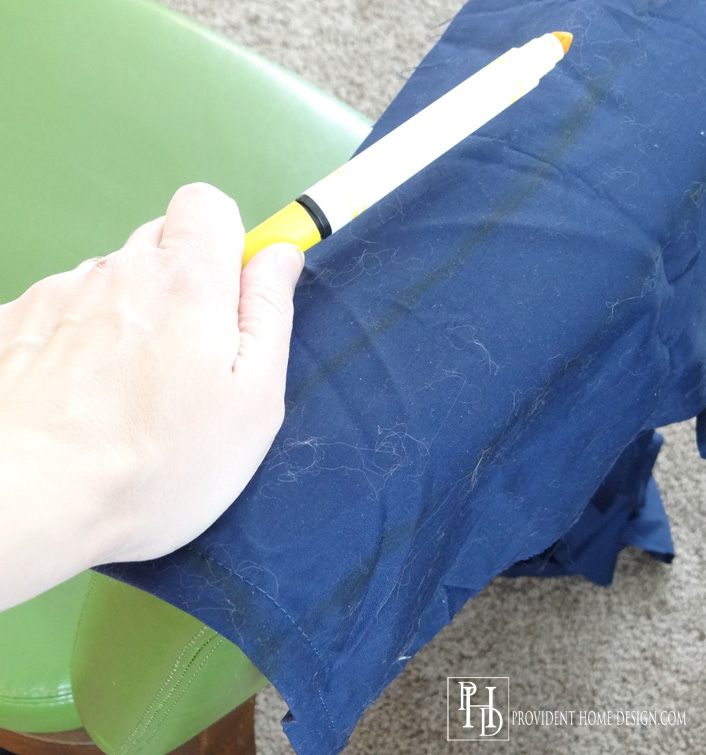
1. Using an old sheet I held the sheet up to the chair and traced around each part of the chair (the seams of the chair).

Steps to Reupholster a Chair

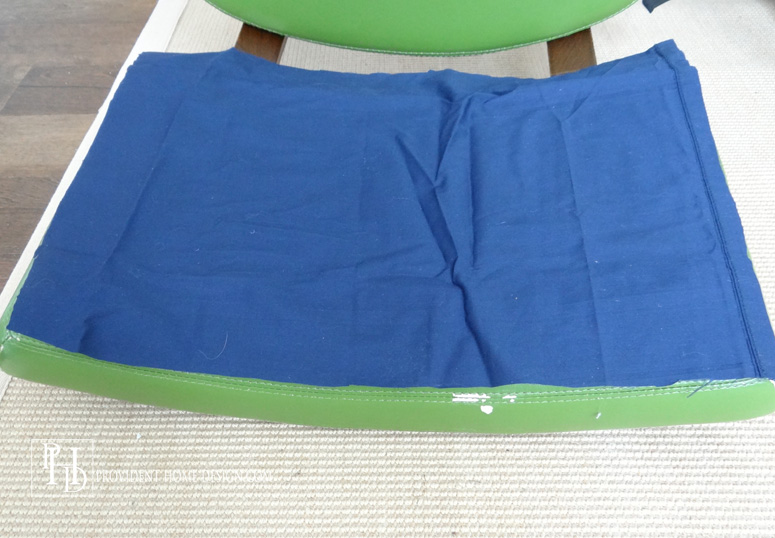
This is me tracing the very top of the chair with a yellow marker.  When I tried to take a picture the sheet slipped so the photo is not great (plus the lovely cat hair adhered to the sheet).:-/

Tips to Reupholster a Chair

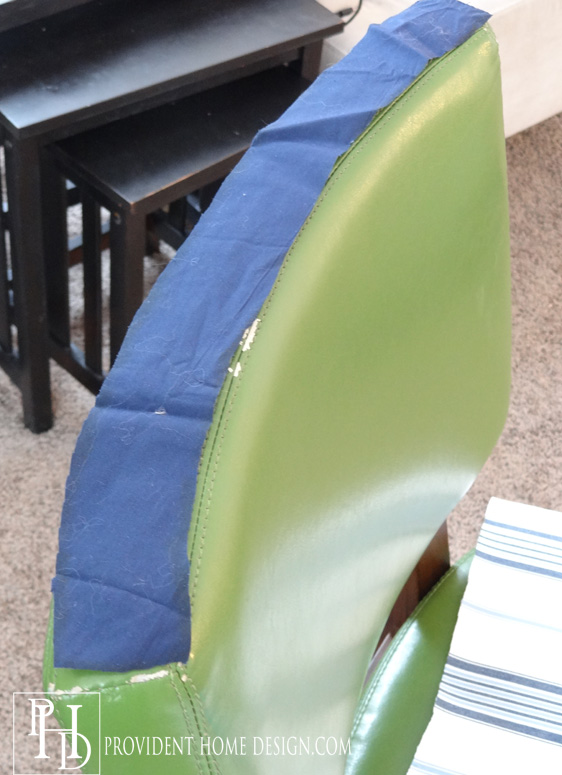
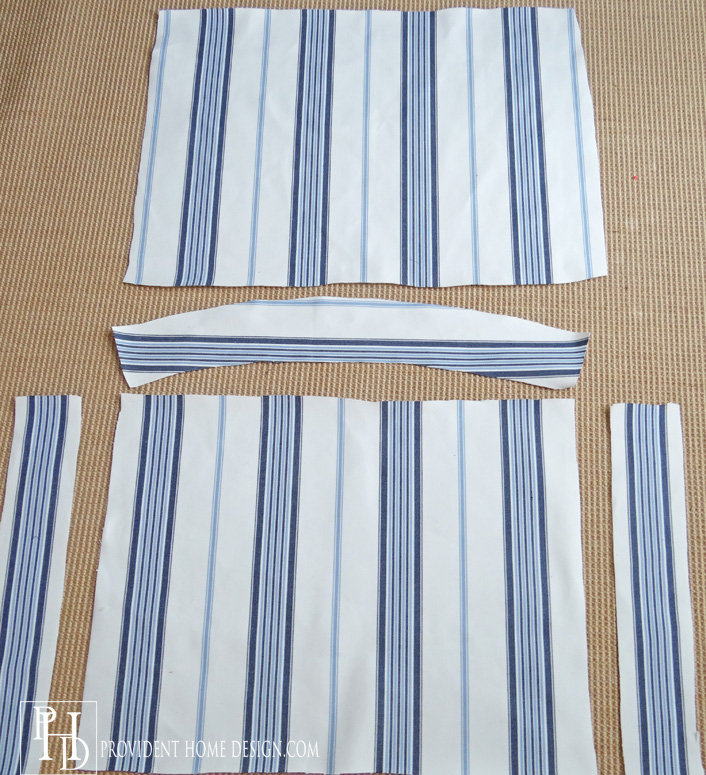
2.  Once I traced each part I would cut it out with scissors and then hold it up to the chair to make sure it fit correctly (as seen below).

DIY Chair Reupholstering

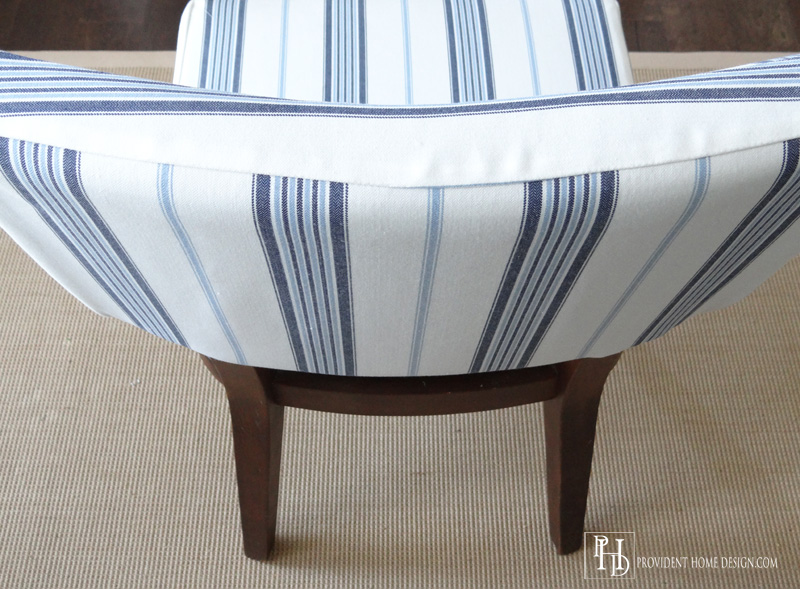
3.  At this point it is very important to decide what parts of the fabric you want showing where.  For example, I decided that I wanted the light blue stripe to be centered to the front, back, and seat of the chair.  And the side pieces of the chair to be centered to the navy stripes (as shown below).

How to Reupholster a Side Chair

I dedicate this step to my Mom. 🙂 Thanks, Mom, for helping me think this one through!  I may have jumped into the cutting part without taking the time to plan it out!  The results would have been no bueno!

4.  Next I pinned my sheet pieces to the planned out parts of the fabric and cut around each sheet piece adding 1/2 an inch to every side.

Reupholster a Chair_edited-1

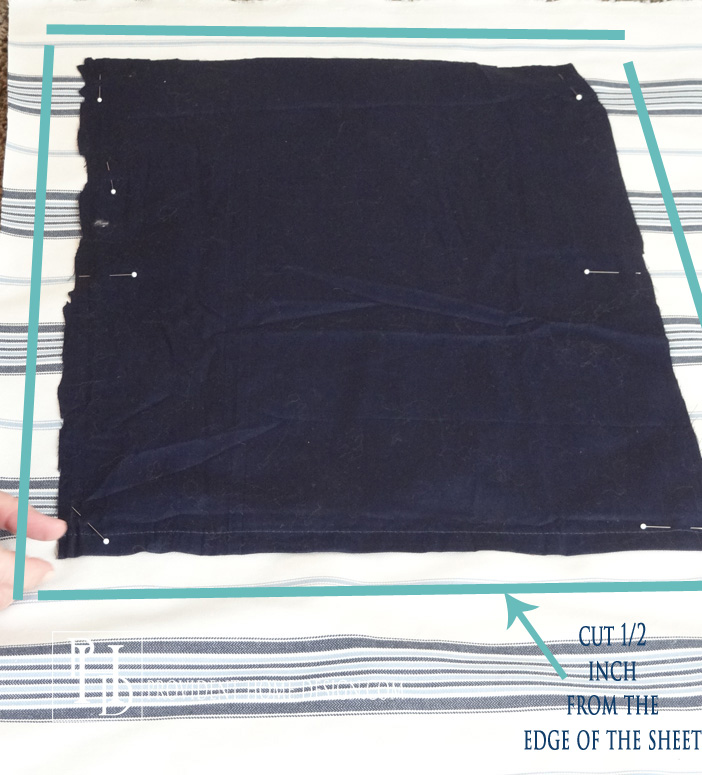
NOTE:  Be sure to add an inch or two to the bottom of each piece so you can tuck it under and staple it (you will understand what I mean as you read on).

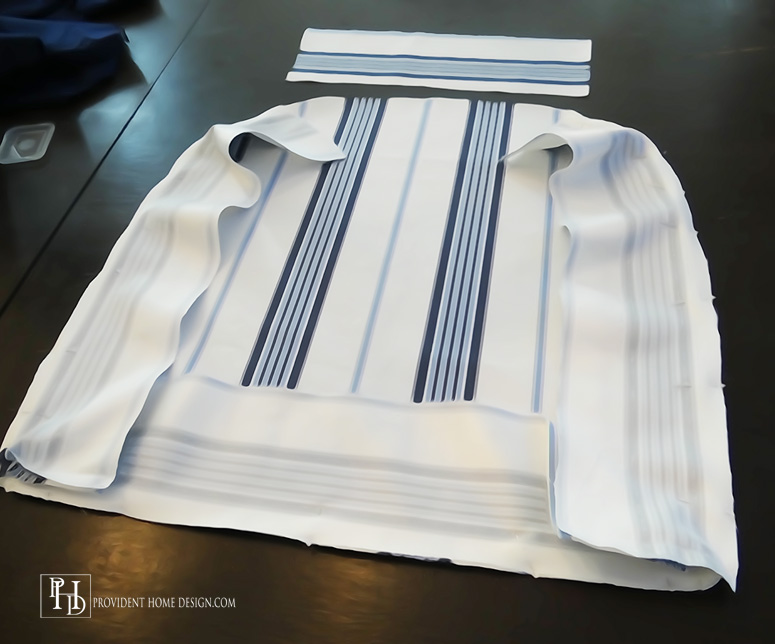
5.  Organize pieces together.

Top Half of Chair

The Process of Reupholstering a Chair

Bottom Half of the Chair

Reupholstering how to

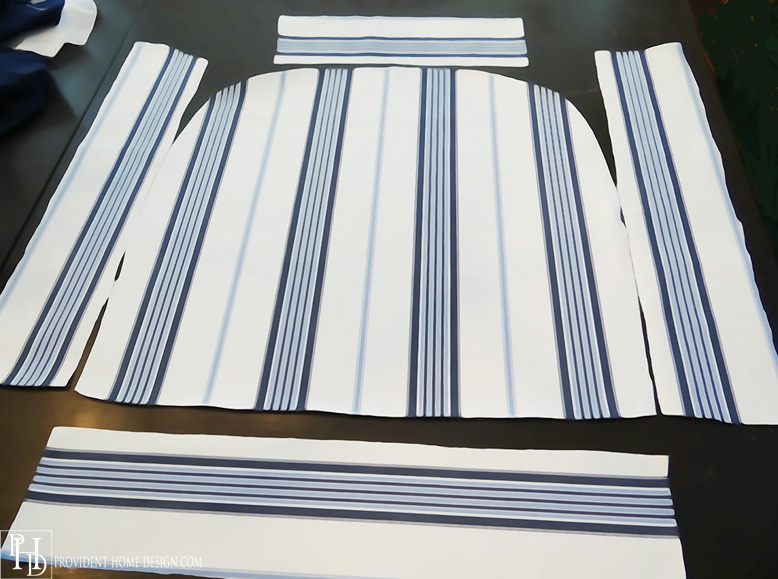
6.  Start Sewing Pieces Together.  (Looking at the photo above) I took the piece on the left and placed it facing down onto the piece on the bottom (like you are making a sandwich with nothing in it).  Then I sewed a straight line along the left side of the sandwich.

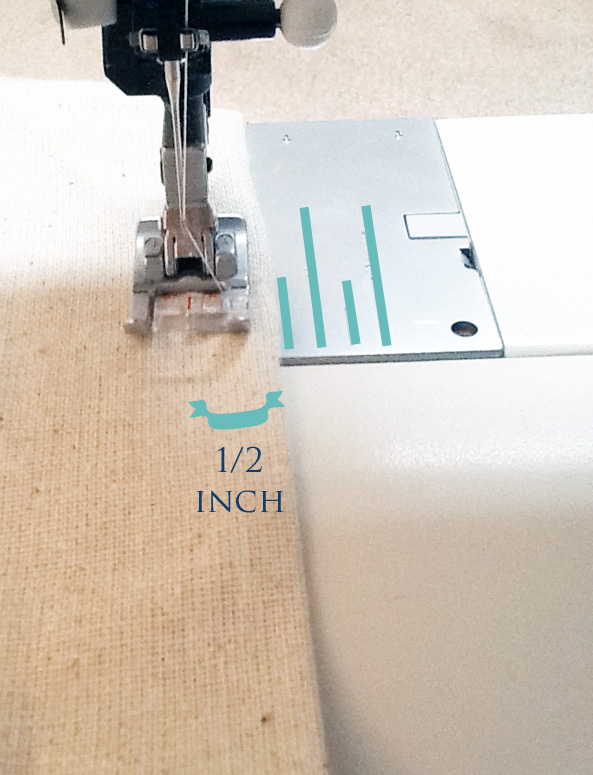
The photo below shows where to place the edge of the sandwiched side.  The edge should be about a half an inch from the sewing machine needle (usually there will be a red line on the foot of the of the sewing machine as well to measure from).

Sewing a Slipcover

The photo below shows that I have sewn together three of the sides.

Sewing a Chair Slipcover

(As shown below)  Next, I centered the front side piece to the front seat piece and flipped it over and pinned the edge.   I then pinned the left and right sides to the left and right edges of the seat.

Thrift Store Chair Makeover

Continue to sew it together inside out piece by piece (much like putting together a puzzle) until you are all done.

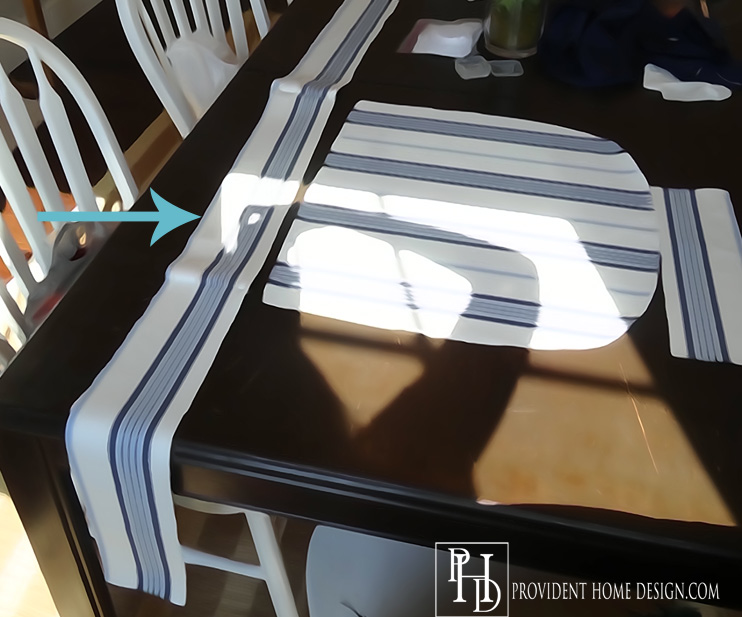
7.  Next, I turned over the chair and pulled off the black backing.

Vinyl Chair Before

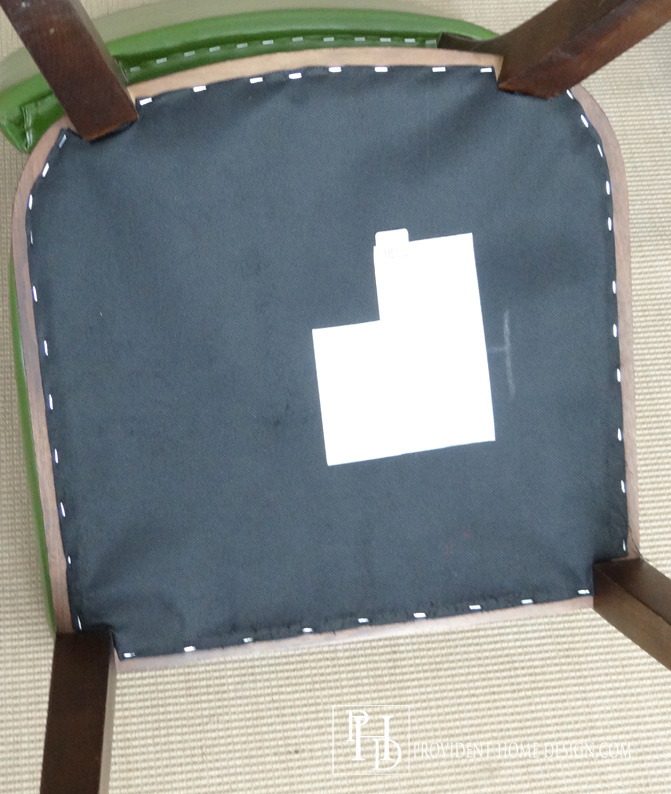
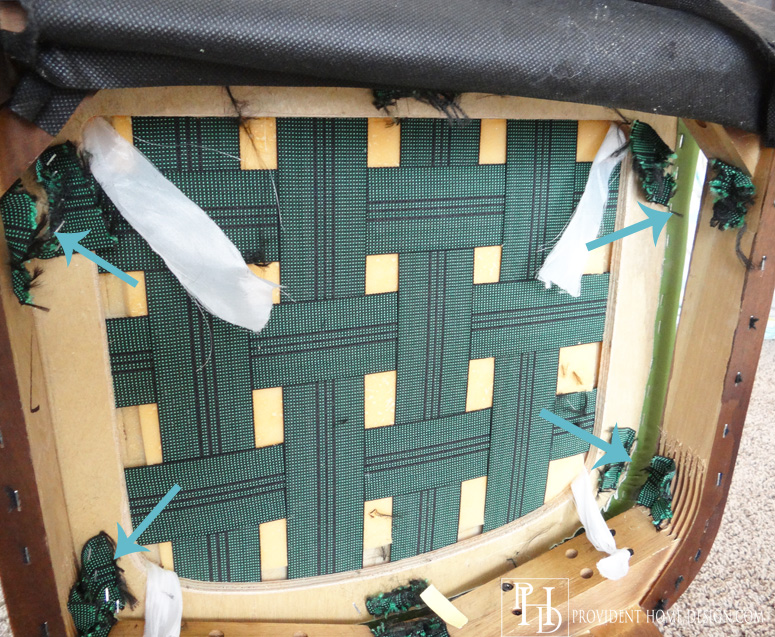
This was what was underneath the black backing.

Reupholstering a Side Chair

Depending what your chair looks like underneath you will either need to unscrew some screws in order to lift the seat off the frame or in my case I had to cut (with scissors) the straps in each corner where the arrows indicate below.

Reupholstering an Accent Chair

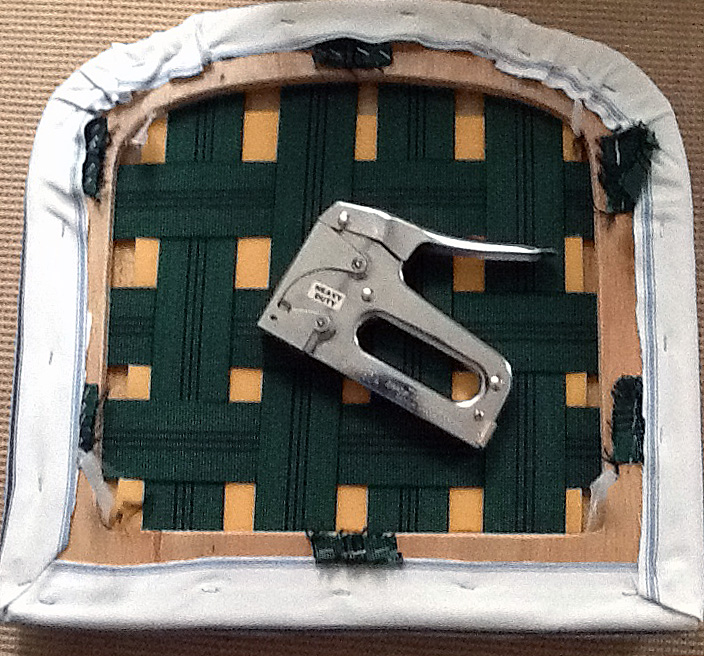
8. Staple the covers on.  Once the seat was off of the frame  I turned my striped seat cover right side out and placed the seat cover over the existing green vinyl cushion (I know, how dare I cover my Irish roots!).

Then while making sure to keep the cover centered I pulled the cover taut and stapled all around the back of the cushion (shown below).

Stapling Reupholstered Chair


Next put the top cover on right side out and while another person is pulling the cover down tightly, staple the fabric on the underside of the top portion of the chair.  My Mom helped me with this part and we found it is pertinent to start pulling down and stapling the center before moving on to the sides (this help the fabric stay smooth and not wrinkle up).

Reupholstering Tutorial

9.  Last Step!!  Reattach the bottom seat cushion.  Do this by either re-stapling the straps or screwing the screws back in the bottom of the chair.  I plan on spraying the chairs with scotch guard to protect the new fabric.

I’m very happy with how they turned out and the price!  I have a few loose ends to tie up in my Living Room Makeover but I’m hoping to be able to share the reveal with you next week!  Have a great week!!

Signature

DIY Reupholstering a Chair Tutorial

Related Posts From the Blog:

  • How to Replace a Hollywood Light with 2 Vanity Lights & How to Patch a Hole in the Wall like a ProHow to Replace a Hollywood Light with 2 Vanity Lights & How to Patch a Hole in the Wall like a Pro
  • Parade Of Homes Home Tour  #1Parade Of Homes Home Tour #1
  • Painting Laminate-One Room Challenge Week 2Painting Laminate-One Room Challenge Week 2
  • Love your Kitchen Series-IKEA CountertopsLove your Kitchen Series-IKEA Countertops
  • Tips & Tricks to Getting Free FurnitureTips & Tricks to Getting Free Furniture
  • Decor Deals for $5Decor Deals for $5
  • Easy DIY Painted $1 Glass VaseEasy DIY Painted $1 Glass Vase
  • Let’s Talk Best DIY ToolsLet’s Talk Best DIY Tools

before and afters// budget decor// decorating// DIY// furniture// money saving tips// tutorials45 Comments

« Favorite Interior Designers Series- Victoria Hagan
Design 101-Symmetrical & Asymmetrical Balance »

Comments

  1. Jennifer @ Decorated Chaos says

    Tuesday, March 17, 2015 at 4:05 pm

    Your chairs look great! (Love that fabric too) and they look pretty professional if you ask me! I would have never thought about using a sheet-thanks for the tid bit.

    Reply
    • Tamara says

      Tuesday, March 17, 2015 at 4:23 pm

      So sweet of you, Jennifer!:-)

      Reply
      • amy says

        Tuesday, March 24, 2015 at 3:05 pm

        Tamara, I did the same project a couple of years ago and still love my chairs! Yours look terrific! Hope you are doing great!
        :)Amy

        Reply
        • Tamara says

          Tuesday, March 24, 2015 at 3:52 pm

          Hi Amy! I’d love to see the chairs you did! Maybe I’ll get a chance this Summer when I’m out there visiting!:-)

          Reply
  2. Jen says

    Tuesday, March 17, 2015 at 4:07 pm

    That looks great! Love the fabric you chose

    Reply
    • Tamara says

      Tuesday, March 17, 2015 at 4:20 pm

      Thanks, Jen!:-)

      Reply
  3. Jennifer@decoratingdelirium says

    Tuesday, March 17, 2015 at 7:42 pm

    I love how they turned out and I can’t believe they only cost you $16. Nice tip about the Amazon shipping. Can’t wait to see your reveal!!

    Reply
    • Tamara says

      Wednesday, March 18, 2015 at 10:05 am

      🙂

      Reply
  4. Wendy says

    Wednesday, March 18, 2015 at 12:05 am

    Turned out great Tamara! Way to go!

    Reply
    • Tamara says

      Wednesday, March 18, 2015 at 10:04 am

      Thank you, Wendy! Miss you!

      Reply
  5. Linda says

    Wednesday, March 18, 2015 at 12:56 am

    Chairs look beautiful! Thanks for the reupholstering steps. Your dad gave an interesting Ancestry DNA kit for a gift. Made me curious of my background percentage breakdown. Would have thought the Scandinavian origin be the larger percentage; what a unique combination! 🙂

    Reply
    • Tamara says

      Wednesday, March 18, 2015 at 10:03 am

      Thanks, Linda! Yes, it’s amazing our saliva carries that much information about us! Pretty cool!:-)

      Reply
  6. Valerie says

    Wednesday, March 18, 2015 at 8:57 am

    Beautiful! Great job and very inspiring.

    Reply
    • Tamara says

      Wednesday, March 18, 2015 at 9:56 am

      Thank you, Valerie!

      Reply
  7. Gilly @ Colour Saturated Life says

    Saturday, March 21, 2015 at 11:06 pm

    Wow! You did an incredible job on these, you would never know they were from a thrift store.

    Reply
    • Tamara says

      Saturday, March 21, 2015 at 11:22 pm

      Thank you, Gilly!:-)

      Reply
  8. Judy says

    Sunday, March 22, 2015 at 5:29 am

    Great job, I like them better than the inspiration chairs, which to me now seem too dull and clunky. Your renovated ones look so graceful and beachy. Love the blue stripes!!! Judy

    Reply
    • Tamara says

      Sunday, March 22, 2015 at 10:00 am

      Thank you, Judy!!:-). Glad you got a beachy vibe– I’m definitely hoping the room ends up with a subtle coastal feel!:-)

      Reply
  9. Errolyn Hatch says

    Tuesday, March 24, 2015 at 10:42 am

    Great job on your chairs! Love the fabric, too. I have a chair that needs to be done–maybe now I’ll tackle it 🙂 Thanks!

    Reply
    • Tamara says

      Tuesday, March 24, 2015 at 11:15 am

      Thanks, Errolyn! You can totally do this!:-)

      Reply
  10. Krista @ the happy housie says

    Wednesday, March 25, 2015 at 10:17 am

    These turned out incredibly – fabulous job Tamara!! Thanks for sharing it with us at Work it Wednesday. We are featuring you this morning!
    ~Krista

    Reply
    • Tamara says

      Wednesday, March 25, 2015 at 12:16 pm

      Thank you so much for the feature, Krista, and for your awesome link up party every Wednesday!:-)

      Reply
  11. Barbara Olson says

    Saturday, March 28, 2015 at 11:45 am

    You did a great job of showing step by step how to do this project !! Loved your using the sheet. I think now I won’t be afraid to try this !

    Reply
    • Tamara says

      Saturday, March 28, 2015 at 5:15 pm

      Yay! So glad to hear it, Barbara!:-)

      Reply
  12. Lisa @ Shine Your Light says

    Sunday, March 29, 2015 at 9:20 am

    Tamara, wow! Your chairs came out so great! I have recovered dining chair seats before but never anything that required matching the pattern and sewing. I am so impressed at how you tackled this. The end result is so professional looking!! Thanks for sharing at Best of the Nest!

    Reply
    • Tamara says

      Sunday, March 29, 2015 at 10:58 am

      Thanks so much, Lisa! Love your Best of the Nest link up!:-)

      Reply
  13. Siobhan says

    Monday, April 13, 2015 at 7:32 pm

    Tamara, very impressive! Loved the tips and tutorial..from someone 100% Irish! We have to stick together…Siobhan.

    Reply
    • Tamara says

      Monday, April 13, 2015 at 7:34 pm

      That’s awesome, Siobhan!:-)

      Reply
  14. Katreena Drew says

    Sunday, April 19, 2015 at 8:37 pm

    Hi Tamara…
    Wow..So Happpy to find your link!
    I love What you have done with these beautiful ! Now chairs, of course they would of been someone’s pride and joy one day lol
    I’m excited to be able to see how to upcycle some chairs of my own.
    thank you for sharing,
    cheers Katreena

    Reply
    • Tamara says

      Sunday, April 19, 2015 at 11:31 pm

      Thank you, Katreena! Happy to hear you were inspired!

      Reply
  15. Darlene says

    Monday, May 4, 2015 at 9:27 am

    You did such an amazing job with these chairs!! Cheers to YOU! I don’t think I would have seen the potential and walked right past the green, ha.
    I have re upholstered before and I know how much work it entails. Great Job!
    Darlene
    http://www.BundleMeBaby.etsy.com

    Reply
    • Tamara says

      Monday, May 4, 2015 at 10:17 pm

      Thank you, Darlene!:-)

      Reply
  16. Ann-Kristin says

    Thursday, June 18, 2015 at 2:55 am

    Looks really great. Thanks for the idea 🙂

    Greetings from scandinavia

    Reply
    • Tamara says

      Thursday, June 18, 2015 at 8:46 am

      Greetings, Ann! Happy to have you here!

      Reply
  17. Barbara M says

    Saturday, September 26, 2015 at 10:02 am

    Love the finished pieces! I’m glad you didn’t remove the green vinyl. The tip about sheets is very helpful. Lovely chairs and a great tutorial.

    Reply
    • Tamara says

      Saturday, September 26, 2015 at 12:22 pm

      Thank you for your kind comment, Barbara!:-)

      Reply
  18. Polly says

    Monday, January 18, 2016 at 10:23 pm

    Nice job matching the stripes. Stripes can be very hard to work with on curvy surfaces but you did it & it looks great!! Thanks for sharing!! ?

    Reply
    • Tamara says

      Monday, January 18, 2016 at 11:03 pm

      Thanks, Polly!:-)

      Reply
  19. Megan says

    Saturday, February 20, 2016 at 9:32 pm

    Can you tell me the best type of fabric to use for high use chairs? I am reupholstering some family room chairs. Would you recommend upholstery grade Cotton? Microfiber? Chenille? Polyester? Most of the upholstery fabrics I have found are cotton or duck cloth. What did you ise

    Reply
  20. Pat says

    Wednesday, March 30, 2016 at 3:19 am

    Thank you for sharing Must try this on my chairs

    Reply
    • Tamara says

      Wednesday, March 30, 2016 at 8:28 am

      You are very welcome, Pat! Thanks for coming by!!:-)

      Reply
  21. Krista Singleton says

    Tuesday, May 17, 2016 at 9:24 am

    I love the chairs and the fabric! Do you remember what the fabric was called? I’m having trouble finding it on fabric.com.

    Reply
    • Tamara says

      Saturday, May 21, 2016 at 11:21 pm

      Hi Krista! I’m sorry I don’t remember what it was called…I looked for it on fabric.com too and couldn’t find it. I hate when that happens (it recently happened to me too)!:-( I hope you will find something you love just as much or more!!

      Reply

Leave a Reply Cancel reply

Your email address will not be published. Required fields are marked *

Hello and Welcome!! My name is Tamara and this is where I share my tips and tricks to creating a beautiful home! If you are new, feel free to start HERE.

More Blog Inspiration:-)

  • Icon Caroline on Design

    Close preview

    Loading...
  • Icon Centsational Girl

    Close preview

    Loading...
  • Icon Decorating Delirium

    Close preview

    Loading...
  • Icon Lauren Liess

    Close preview

    Loading...
  • Icon Life on Virginia Street

    Close preview

    Loading...
  • Icon Remodelaholic

    Close preview

    Loading...
  • Icon The Creativity Exchange

    Close preview

    Loading...
  • Icon Thrifty Decor Chick

    Close preview

    Loading...

Categories


Disclosure & Privacy Policy

You might also like

The Final Before & After of our Current Home

The Final Before & After of our Current Home

New Build Update-Paint, Lighting, and Floors oh My!

New Build Update-Paint, Lighting, and Floors oh My!

New Home Update

New Home Update

New Build Update- Cabinets are in!

New Build Update- Cabinets are in!

House Update–We Have Walls!

House Update–We Have Walls!

Join Me on Instagram!

[instagram-feed num=9 cols=9 showbutton=false]

Privacy

Copyright © 2022 · Savory theme by Restored 316