Provident Home Design

Decor, DIY, and Interior Design

  • HOME
  • ABOUT
    • About PHD
    • Contact Me
  • DIY PROJECTS
  • DESIGN 101
  • PAINT
  • HOME TOUR
  • DESIGN INSPO
  • DECOR TIPS

Love Your Kitchen Series- Adding Wood Trim

If you are new to this Series,  we have been focusing on inexpensive ways to upgrade your kitchen from builder boring to high-end custom. When you read the words ‘adding woodwork’ I hope you didn’t turn and run the other way! If you are at all tempted to let me tell you something first!!!

I grew up in a family that did not even own a drill. Even to this day I have never seen either of my parents hold any kind of home improvement tool (besides a screwdriver and a hammer).  My husband has ZERO experience or interest in anything DIY.

Are you still there??? Good, don’t leave yet. Woodwork makes a HUGE difference in the visual appeal of a space and it is something you can easily learn if you don’t already have experience with it.  I never did until a few years ago!

So who taught me to wainscot and crown mold?  My friend, google search did!:-)  I’ve learned how to do so many things by typing phrases like “how to install crown molding” into google search and then devouring every bit of tutorial and youtube demonstration I can get my eyes on. Then I just go for it–it’s like a mini adventure! There are usually some twist and turns in the road but the end result has always been worth the sometimes bumpy ride!

google


Here are some stylish wood detailing ideas for your kitchen that won’t break the bank and links to show you how to do them. Some only require wood glue so don’t worry if you are not up for learning carpentry just yet! I will start with the easiest and work up to what I would consider the hardest.
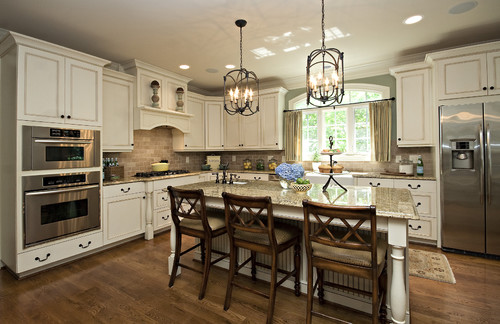
 

1.  Corbels


Casa Verde Design via Houzz


lettered cottage kitchen

via The Lettered Cottage


Mullet Cabinet via Houzz


Caroline Burke Designs & Associates, Inc. via Houzz


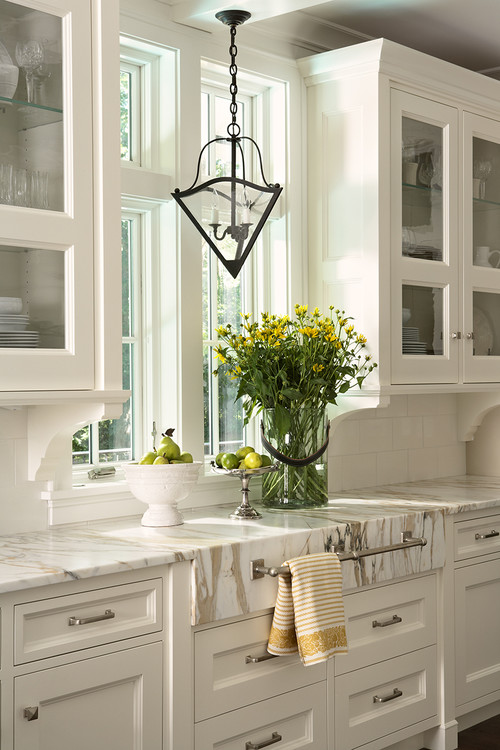
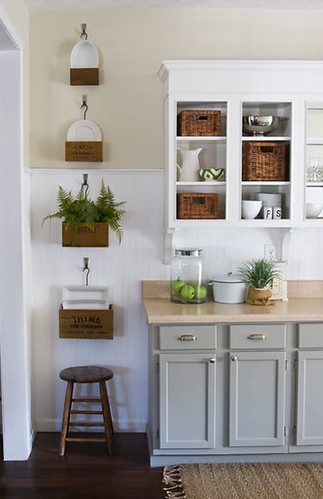
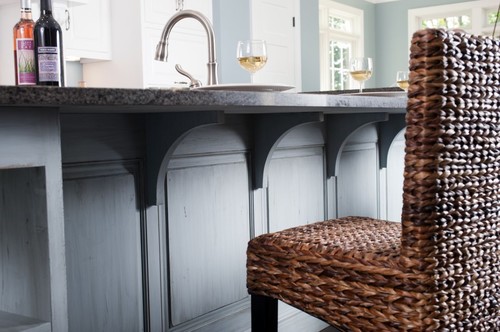
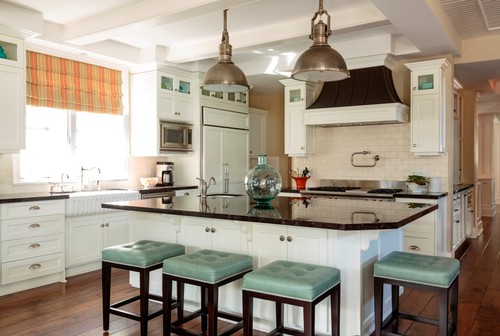
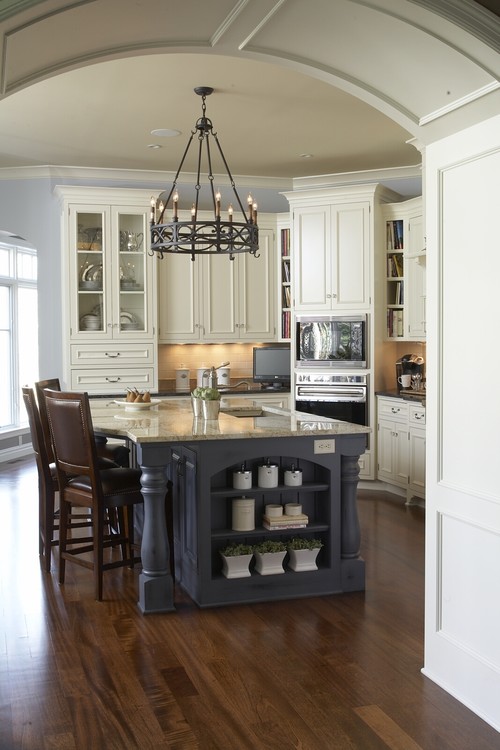
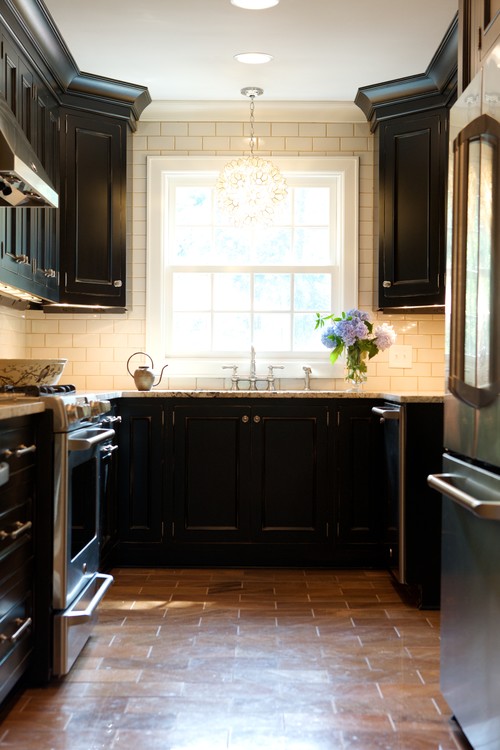
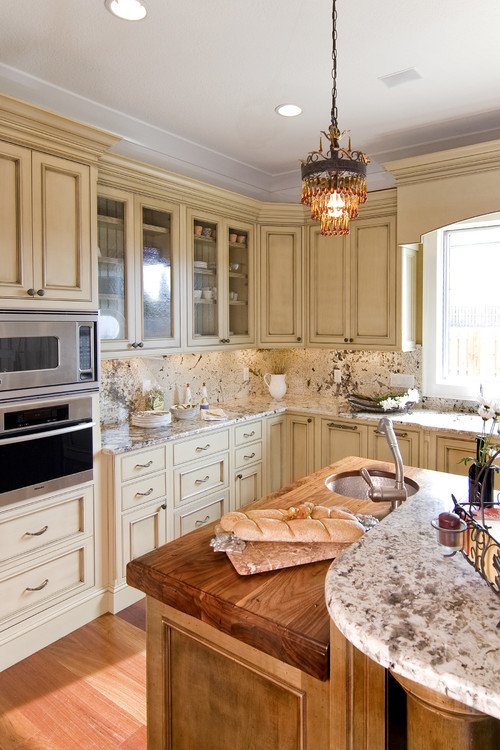
Corbels are most often placed under upper cabinets (like in the first two pictures) or under the island countertop (like in the last two pictures).  The larger ornate ones can run over $50 per corbel but the regular size that is pictured in all these photos above only costs $9 a piece.

corbel


As you can see in the picture above it comes with anchors and screws.  You will drill a hole, lightly tap in an anchor (the red thing), screw the screws into the anchors and hang the corbel on the screws.  If you are needing to drill into tile you will need to use a diamond drill bit to make the hole.
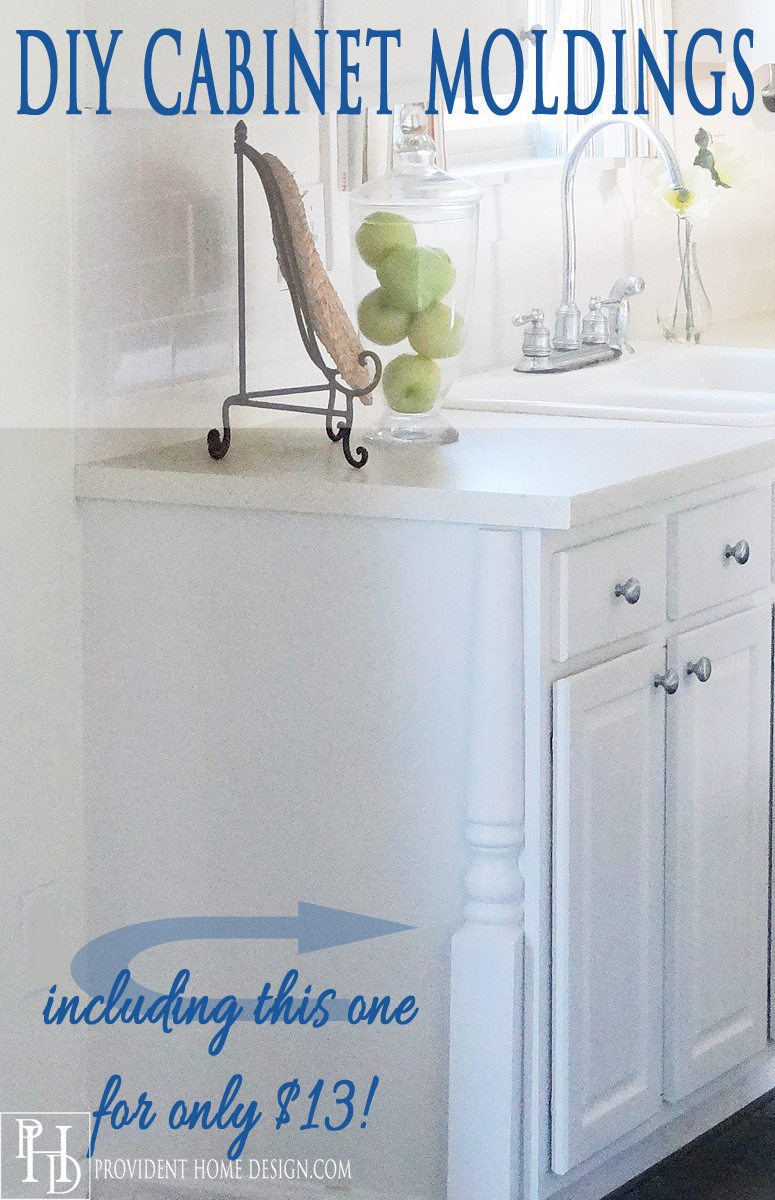
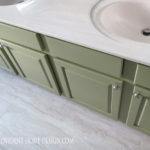
 

2. Corner Legs

One of my favorite ways you can customize lower cabinets is to add decorative legs to the fronts and sides of your cabinets or under your island like the examples below.
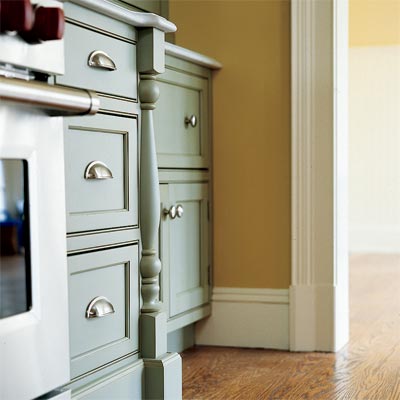
 

decorative corner post designed using kitchen cabinets

via This Old House


 Driggs Designs via Houzz


Decorative Leg


Wayzata Design Hendel Homes via Houzz


Did you know that stores like Home Depot and Lowes carry legs(sorry no prosthetics or leg lamps) and posts?  I discovered this one night as I enjoyed a quiet night out with myself at Home Depot.  As I perused the wood trim aisle the next aisle over had items like columns and railing replacements.  I combed through the different styles and noticed that one in particular was only half in diameter.  It looked as though it had been sliced right down the middle.

posts


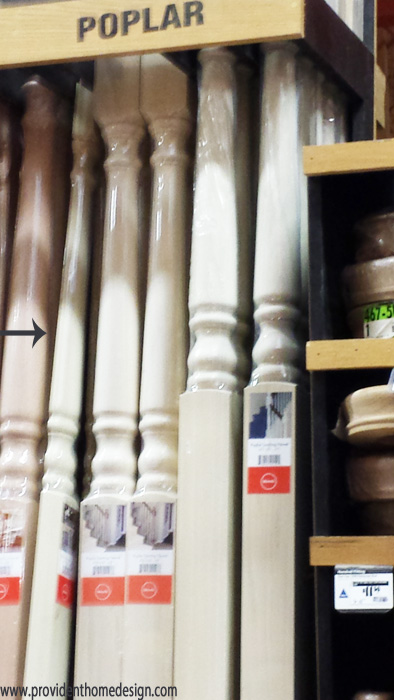
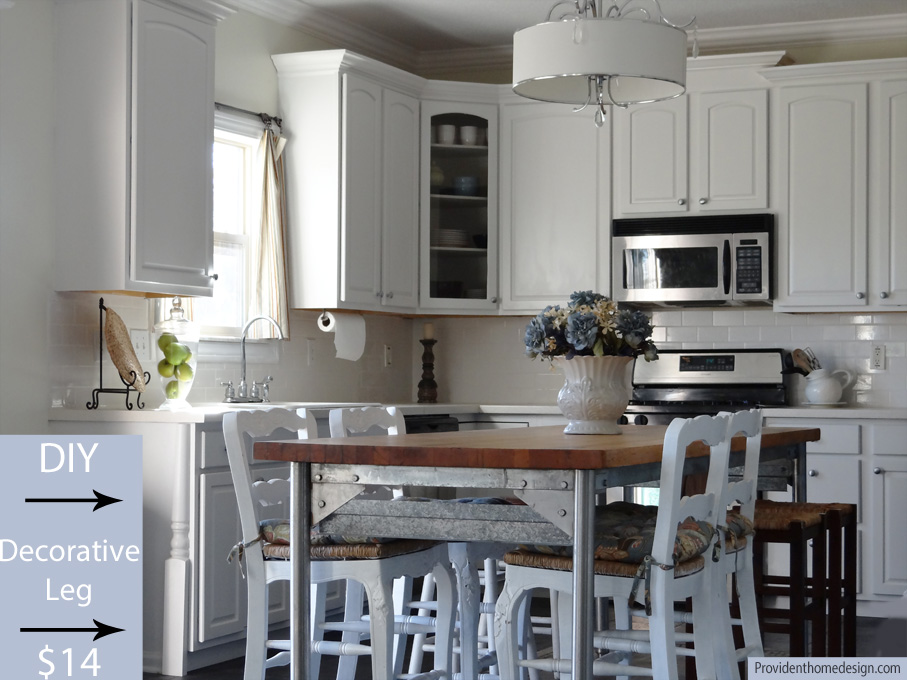
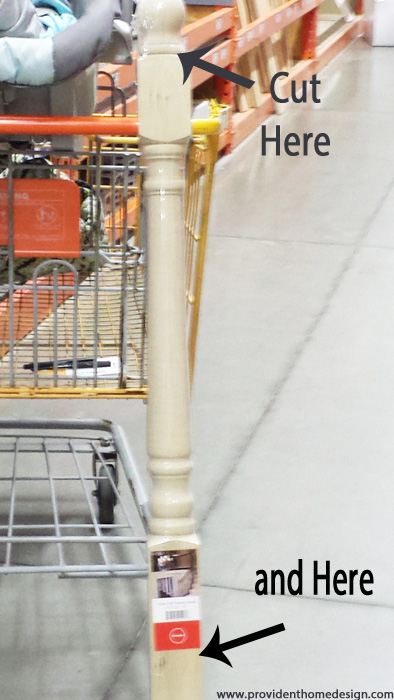
Then the light bulb went on!  I had always loved the look of a decorative leg but thought it was something you could only get from a very expensive cabinetry remodel.  For only $14 a piece I took two of them home to experiment.  I held the post up to the cabinet and marked off where I would need to cut.  I used my miter saw (I have a $115 that has worked well for me so far but you could also use a jig saw for $40 or a miter box and hand saw for $8) to cut the top of the pillar off.


decorative leg3

Since my countertops don’t hang over the sides very much I had to cut at the flattest part of the decorative molding.  If you have more of a overhang to your countertops then I would make the cuts more like the ones below.

decorative leg4


After I cut it I painted it the same color as my cabinets and used wood glue and putty to adhere it to the side of my cabinets.  It’s not perfect but I love the custom look it gives to my kitchen and for $28, I’ll take it!:-)

Decorative Leg

 3. Cornice Over a Sliding Door

I have an eat-in kitchen and a lovely(insert sarcasm) sliding door in that eat-in kitchen.  Although I love the light that the sliding door lets in I don’t like the look of a sliding door being in a kitchen.  It reminds me of kids coming in and out with muddy boots and so I’d rather it be in a mudroom (not my kitchen).  To make the cookie cutter sliding door a little less abrasive I made a cornice to go over the sliding door and then added trim above that to fancy it up even more.

Here is my Kitchen and Sliding Door Before

Family Room Fireplace


 and After with the Cornice (and lots of other DIYs)

cornice

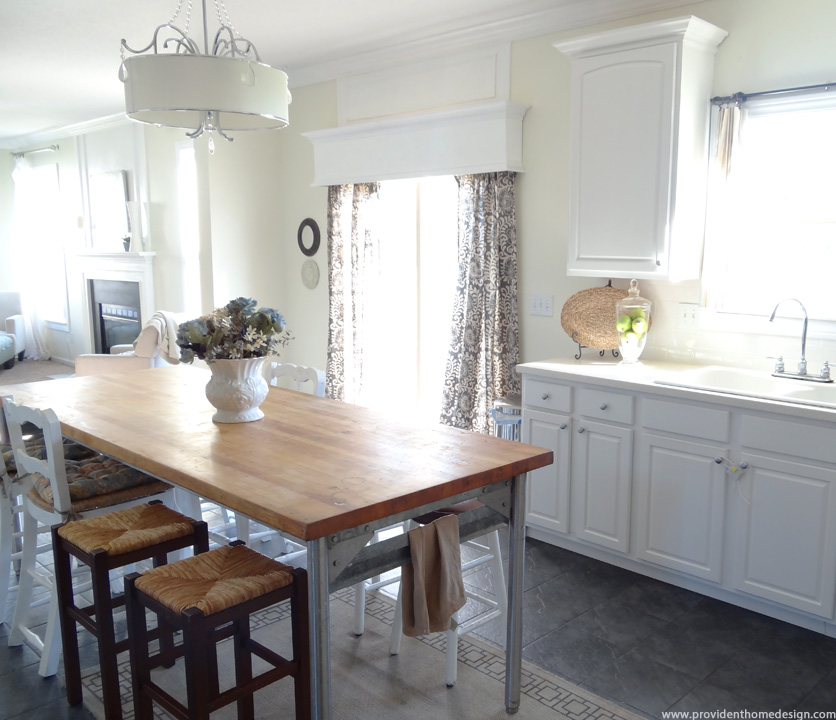
I used this tutorial from All Things Thrifty to make it.  It is a great step by step tutorial that I am confident even a novice DIY-er could do!


4.  Crown Molding

Crown molding on kitchen cabinets adds interest and distinction.

via Houzz


In Detail Interiors via Houzz


 Oakley Home Builders via Houzz


It is relatively inexpensive too if you do-it-yourself.  I added crown molding on my cabinets for around $40.  I’m not going to lie, it is a pain in the neck to do.  I learned through watching youtube videos and reading tutorials and by lots of trial and error.  Warning:  If you are a cusser then you may say some swear words as you are learning.  If you are not a cusser you may say some swear words as you are learning.;-)

Here are some good instructions for installing crown molding on kitchen cabinets, here and here.

As I’ve been writing this post I keep thinking up more and more ways woodwork could be used to update and customize a kitchen.  This truly could be the post that never ends.  But end it must, so hopefully you feel empowered to add woodwork to your kitchen!  The options are endless especially with a friend like, Google Search!;-)  What did we ever do with out him/her/it?:-)

Have a great one!

Signature

DIY Cabinet Moldings

Related Posts From the Blog:

  • MAD for PLAID: Christmas DecoratingMAD for PLAID: Christmas Decorating
  • Coastal Inspired DIYCoastal Inspired DIY
  • DIY Sparkling Pinecone OrnamentsDIY Sparkling Pinecone Ornaments
  • 11 Money-Saving Tips for Decorating Your Christmas Tree11 Money-Saving Tips for Decorating Your Christmas Tree
  • Love your Kitchen Series-BotanicalsLove your Kitchen Series-Botanicals
  • One Room Challenge- The Master and Girls’ Bedroom Makeover Week 1One Room Challenge- The Master and Girls’ Bedroom Makeover Week 1
  • Foyer and Hallway Makeover Reveal!Foyer and Hallway Makeover Reveal!
  • BIA Parade of Homes Preview & What’s Trending Right NowBIA Parade of Homes Preview & What’s Trending Right Now

budget decor// cabinets// DIY// kitchen// tutorials// woodwork12 Comments

« DIY Butterfly Wall Art
20+ Budget-Friendly Drapes »

Comments

  1. Renee L says

    Tuesday, November 4, 2014 at 12:10 pm

    I have a sliding door in my dining room as well as a window on the opposite wall. The dining room is open to the living room and kitchen so on one wall there is a window in the dining room and one in the living. In the living room I have curtains and I would like to add in the dining room. Do they all need to match, should I just add the valance over the sliding door? This has been so hard to figure out!

    Reply
    • Tamara says

      Tuesday, November 4, 2014 at 12:51 pm

      Hi Renee, thanks for your question! It’s probably been so hard to figure out because there really is no one right answer. There are several options that could work well. I personally lean to the non-matchy side of the spectrum. I can picture the cornice/valence over the sliding door and then if the living room curtains are patterned you could choose one of the colors from it and do a solid curtain on the dining room window. Or if the living room curtain is solid you could do a patterned curtain on the dining room window that has the color from the living room curtains in it. The goal is not that it all matches but that it flows. This post on flow and color repetition might really help, http://providenthomedesign.com/2014/03/31/design-101-flow-pt-2-color-repetition/. Also here are some great drape options, http://providenthomedesign.com/2014/04/22/25-stylish-budget-friendly-drapes/. Let me know if you have any further questions! Thanks, Renee!

      Reply
  2. Maureen Livingston says

    Tuesday, January 6, 2015 at 5:47 pm

    Hi, I love this post about trim and the kitchen. I got a drill for Christmas and have never used power tools. The only thing that scares me is that I have a soffet above my cabinets. The previous owners did the kitchen themselves and there is a big gap between the cabinets and the soffet. Is this a doable project?

    Reply
    • Tamara says

      Tuesday, January 6, 2015 at 6:18 pm

      Hi, Maureen, congrats on getting a drill! I’m excited for you to start using power tools. Your fear will turn to fun after a few projects!:-). From what you’ve said I’m picturing a piece of molding that lays flat would look good between the cabinets and soffit to hide the gap and then I can picture crown molding where the soffit and ceiling meet. Feel free to email me a picture to be sure I’m picturing what you described right!:-)

      Reply
  3. darlene says

    Thursday, June 4, 2015 at 2:49 pm

    I love your ideas for using trim molding to update a plain kitchen. I also like your writing style and sense of humor!!

    Reply
    • Tamara says

      Thursday, June 4, 2015 at 3:41 pm

      Thank you, Darlene! That means a lot!:-)

      Reply
  4. Malynda says

    Thursday, June 4, 2015 at 11:02 pm

    Great article! I’m curious where you purchased your crown molding?

    Reply
    • Tamara says

      Thursday, June 4, 2015 at 11:13 pm

      Hi Malynda! I’m pretty sure it was Lowe’s!

      Reply
  5. Jenna says

    Friday, April 22, 2016 at 11:09 pm

    Your kitchen is so pretty!!! What paint did you use in the kitchen and what paint is on the cabinets? We are moving and I would like to brighten up the kitchen and the dark wood kitchen cabinets with white but nervous on choosing the whites because I don’t want it to look like like too much white. Thoughts? Also did you paint your cabinets are we’re they white to begin with? Is that hard to do?

    Reply
    • Tamara says

      Saturday, April 23, 2016 at 11:50 pm

      Hi Jenna, thanks for your questions! My kitchen cabinets were originally dark (cherry). I used the Rustoleum Kitchen Cabinets Transformation kit to paint mine white. I wrote all about here, http://providenthomedesign.com/2014/02/07/rustoleum-kitchen-cabinets-transformations-review/. It is never fun painting kitchen cabinets but it has always been worth it!! You can check out the before and afters in my home tour here, http://providenthomedesign.com/home-tour/. Let me know if you have any other questions!!:-)

      Reply
  6. Patti says

    Thursday, August 1, 2019 at 11:25 am

    How is the high gloss counter holding up? Are there any special rituals to maintain it? Also, would you divulge what that counter is?

    Simply beautiful. I hope my kitchen can come close. Thank you for sharing.

    Reply

Leave a Reply Cancel reply

Your email address will not be published. Required fields are marked *

Hello and Welcome!! My name is Tamara and this is where I share my tips and tricks to creating a beautiful home! If you are new, feel free to start HERE.

More Blog Inspiration:-)

  • Icon Caroline on Design

    Close preview

    Loading...
  • Icon Centsational Girl

    Close preview

    Loading...
  • Icon Decorating Delirium

    Close preview

    Loading...
  • Icon Lauren Liess

    Close preview

    Loading...
  • Icon Life on Virginia Street

    Close preview

    Loading...
  • Icon Remodelaholic

    Close preview

    Loading...
  • Icon The Creativity Exchange

    Close preview

    Loading...
  • Icon Thrifty Decor Chick

    Close preview

    Loading...

Categories


Disclosure & Privacy Policy

You might also like

The Final Before & After of our Current Home

The Final Before & After of our Current Home

New Build Update-Paint, Lighting, and Floors oh My!

New Build Update-Paint, Lighting, and Floors oh My!

New Home Update

New Home Update

New Build Update- Cabinets are in!

New Build Update- Cabinets are in!

House Update–We Have Walls!

House Update–We Have Walls!

Join Me on Instagram!

[instagram-feed num=9 cols=9 showbutton=false]

Privacy

Copyright © 2022 · Savory theme by Restored 316