Provident Home Design

Decor, DIY, and Interior Design

  • HOME
  • ABOUT
    • About PHD
    • Contact Me
  • DIY PROJECTS
  • DESIGN 101
  • PAINT
  • HOME TOUR
  • DESIGN INSPO
  • DECOR TIPS

GET NOTIFIED VIA EMAIL WHEN THERE'S A NEW POST!

Beautiful Upholstered Headboard and Nailhead Trim Tutorial

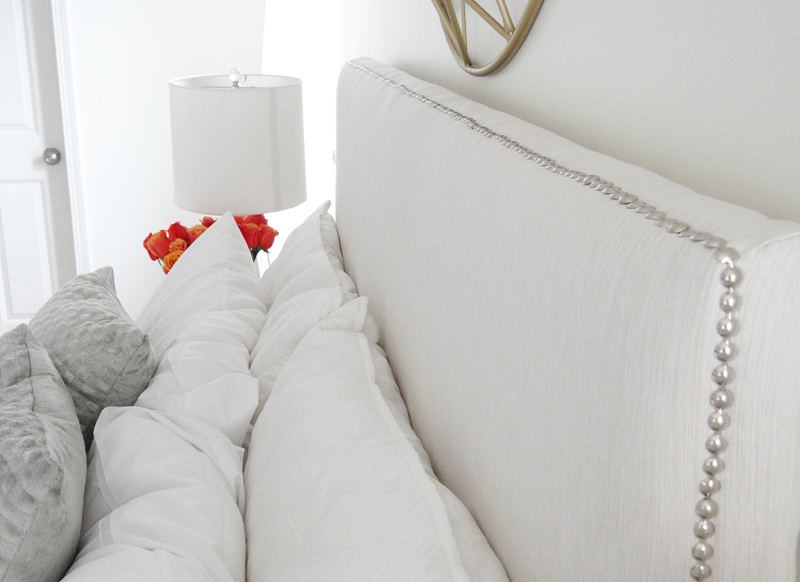
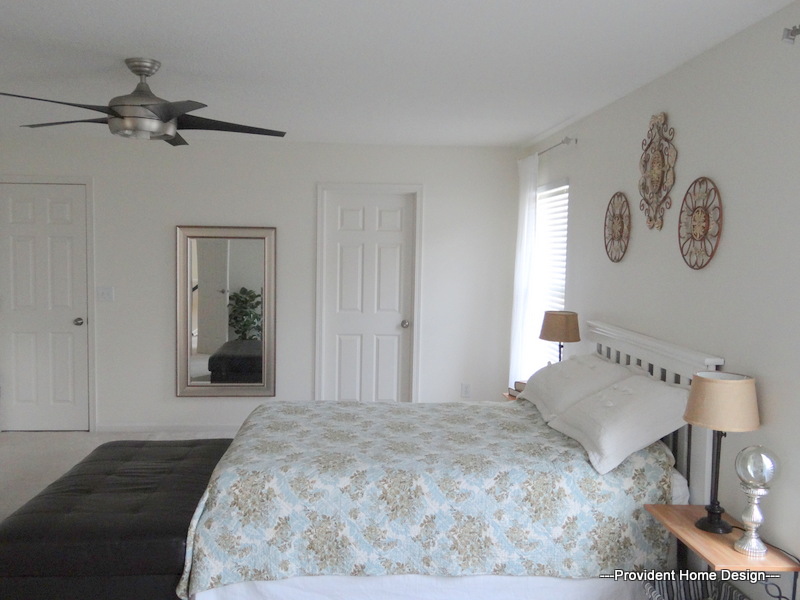
This past week I made a new headboard for my bed (as shown below)  and believe it or not it only cost $65 to make!

diy-headboard-tutorial

My husband and I had been going headboardless for over 6 months (I know, audible gasp)!:-)

There’s a backstory (if you don’t like backstories, no hard feelings, you can skim down to the section How to Make it ).  It all started when my husband and I began waking up achey and not fully rested.  It took a couple of weeks for us to realize that our once comfy, Deep Sleep Serta bed was no longer so comfy.

It was our first purchase together as a newly married couple 12 years ago (a $400 steal at Macy’s) and we sadly realized it was time to move on to a bigger and better bed.

After a ton of research on my part (I’m the researcher in the family) we decided on THIS gel memory foam mattress in soft and are back to sleeping like babies (the sound sleeping babies not the ones that keep you up all night).:-)  We love it! (affiliate links used in this post for your convenience).

The new taller mattress made my previous headboard look ridiculously puny.  I had bought it years ago at a garage sale for $5.

diy-headboard-before

It ended up looking good in my friend’s daughter’s bedroom makeover I’m working so you will see a reappearance of it in the future!

A long story to explain why we’ve been going headboardless!

I couldn’t decide whether to make a new one or buy one.

I had made two upholstered faux tufted headboards for my sons’ bedroom and a beadboard headboard for my daughter’s room but with other projects going on I seriously considered buying an upholstered headboard instead of making one.

It was tempting with amazing prices like THIS and THIS but none of these options had the height I was seeking in a headboard for my new taller bed.

So at last I decided to make one!

I tried a new method this time so I wanted to share the tutorial and a little video on furniture nailhead trimming (which can easily glam up any existing furniture you already have)!


HOW TO MAKE IT:

Step 1-  Purchase a 4′ x 8′ sheet of 1/2″ thick plywood and have them (Home Depot or Lowes) cut the piece of plywood to the width you want the headboard to be.  I was making it for our queen size bed so I had them cut it to 61 inches wide.

diy-headboard-14


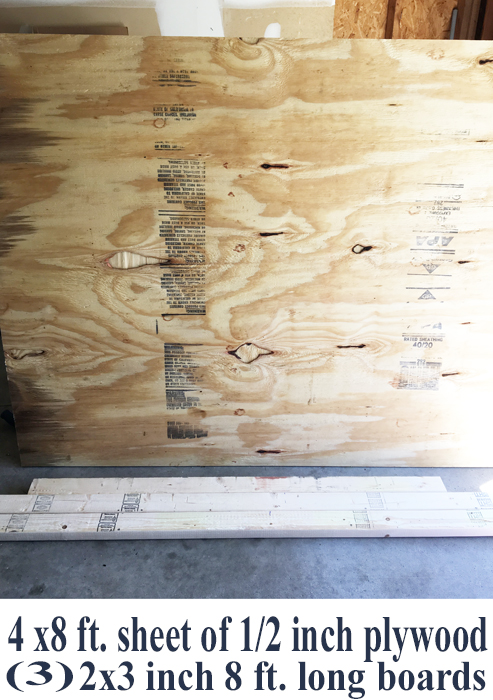
Also pick up (3) 2×3’s and have them cut 2 of the pieces to the height you want your headboard to be.  I had them cut 2 to 55 inches because that is how tall I wanted my headboard to be.

Have them cut the 3rd 2×3 to the width of the headboard minus 5 inches so for me that was 61-5= 56 inches.

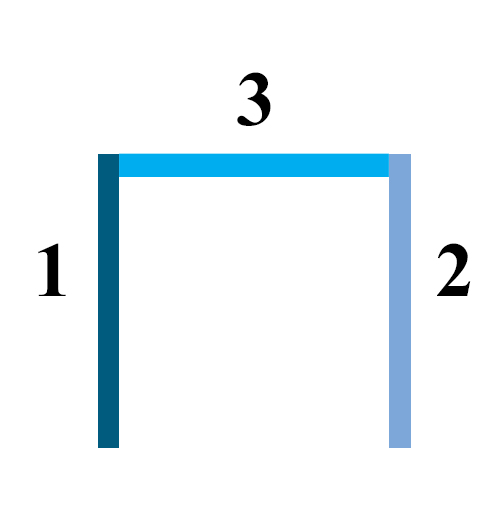
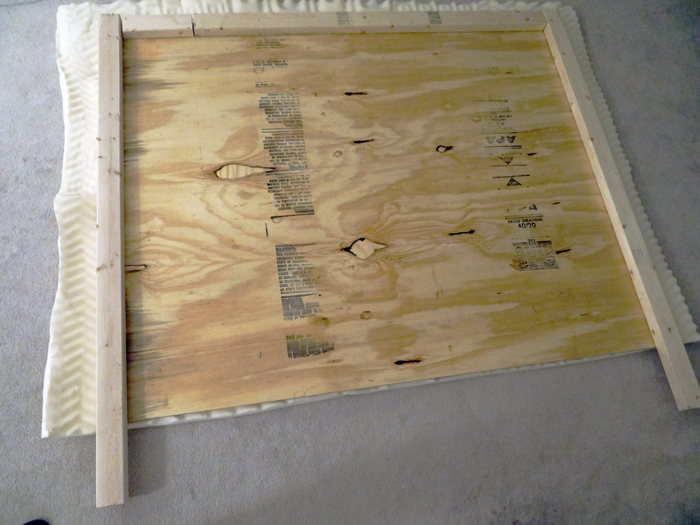
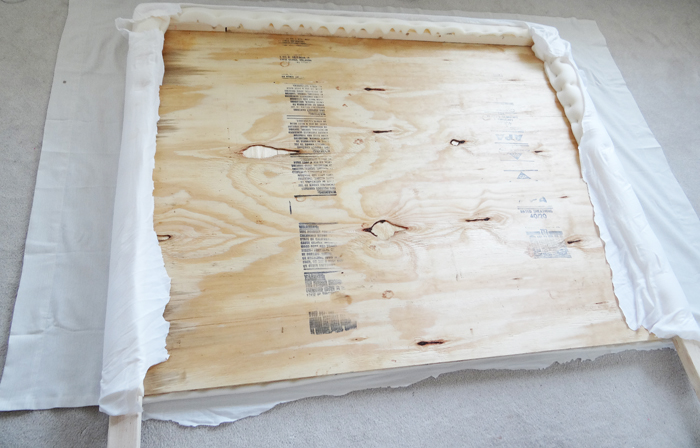
Step 2-  Lay the 2×3’s out in the position below.

diy-headboard-18

Apply wood glue to the tops of the 2×3’s as shown below.


diy-headboard-15


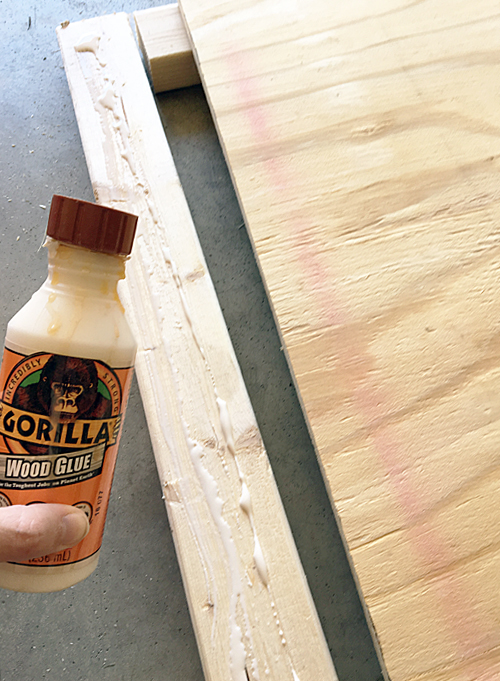
Lay the plywood on top of the 2×3’s and make sure that the edges of the plywood line up just right with the edges of the 2×3’s.

diy-headboard-16


diy-headboard-17


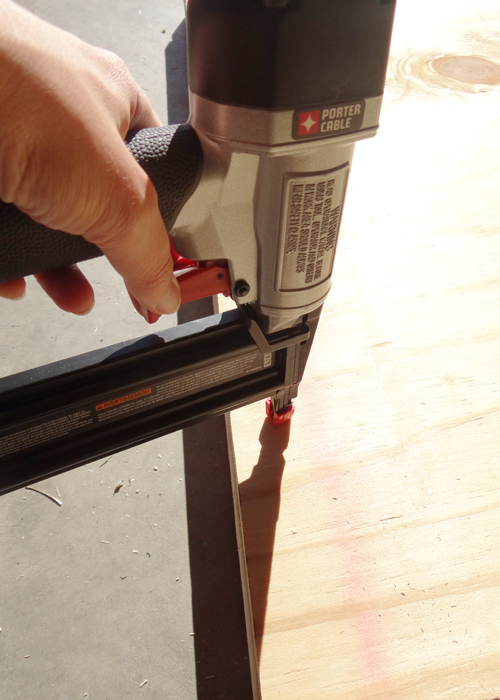
Step 3- Now nail the plywood to the 2×3’s to secure the headboard together (you can use a hammer and nails or a nailgun).

diy-headboard-2

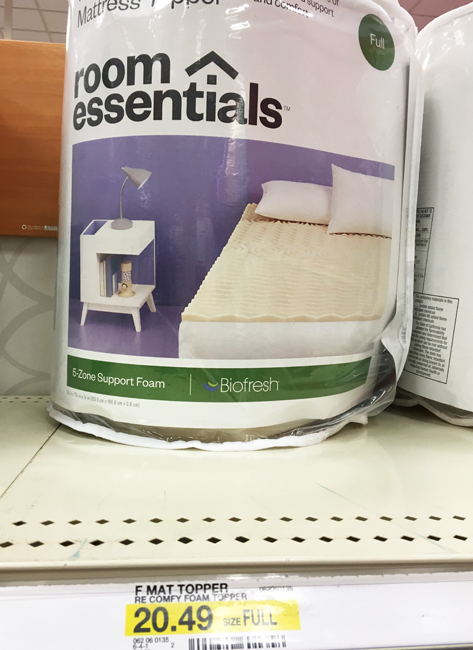
Step 4-   Now it’s time to make your headboard comfortable.  I bought a full size foam mattress topper from Target for $20.  If you are doing a twin size headboard you can buy a twin size foam topper.

diy-headboard-foam

Lay the headboard face down on the textured side of the mattress topper.

diy-headboard-3


Pull the foam topper taut and staple to the 2×3

diy-headboard-6


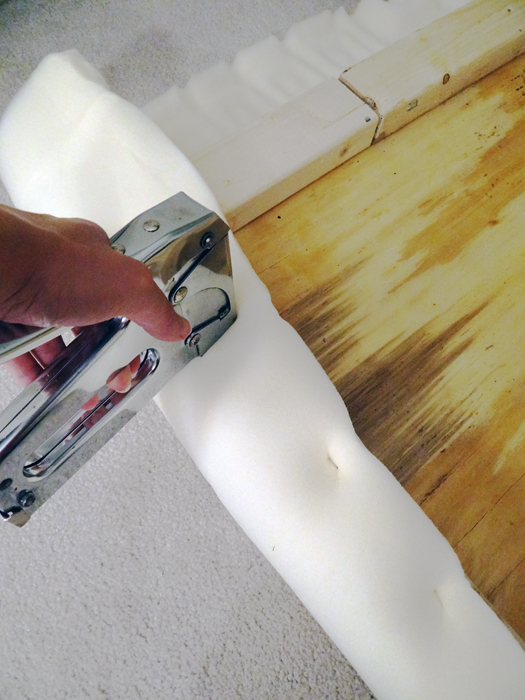
If there is excess foam staple to the inside of the 2×3 as well as shown below!

diy-headboard-9


For the corners fold down the inside foam and pull the outer corner over it and staple (a lot).diy-headboard-staple-down-corners


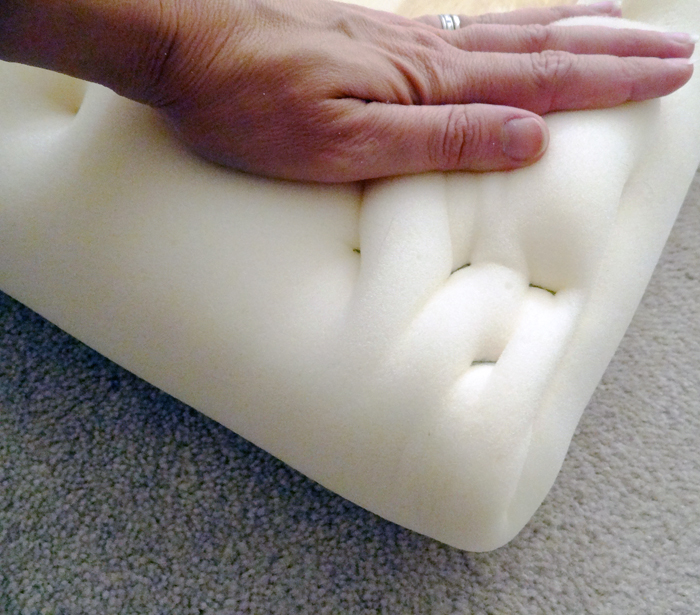
Step 5- If you are using a medium or dark color of fabric for your headboard than you can skip this step.  But if the fabric is light colored than you will want to use an inexpensive piece of fabric in between the foam and the outer fabric so the foam color doesn’t show through.

diy-haadboard-11

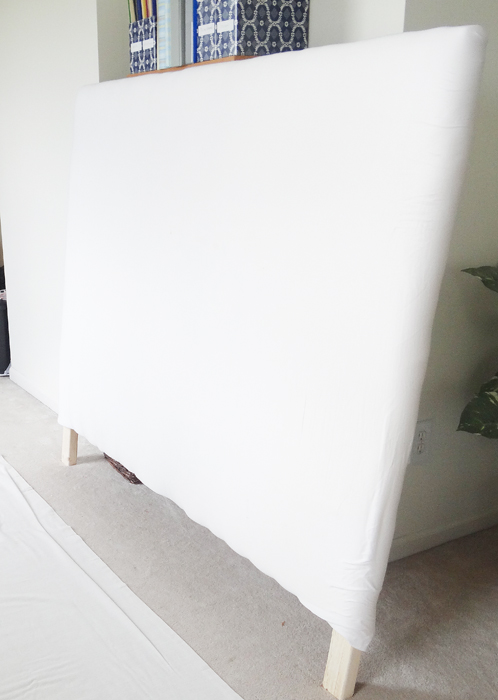
I just used an old white sheet and it worked great for blocking the yellow foam color.  Attach it the same way you attached the foam making sure to pull it as tight as you can on each side before stapling.


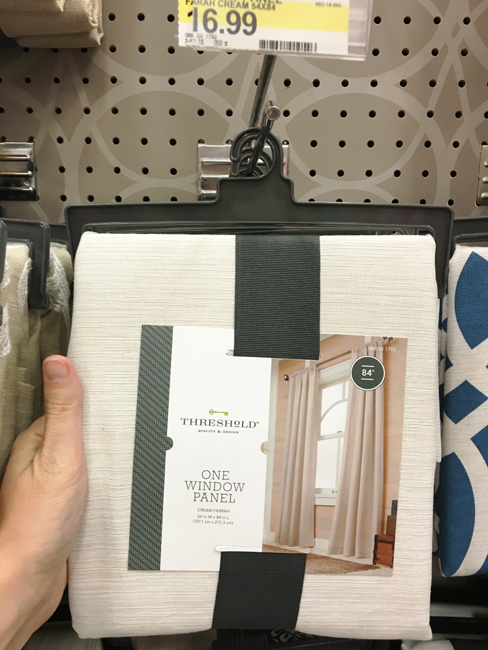
Step 6- For the final layer of fabric I used a window panel from Target.  A queen sized headboard needs at least 2 yards of fabric which can get expensive.

The drape panel I used was just the right look and size I was going for and for a good price ($16.99).

diy-headboard-fabric


Make sure to iron your fabric before you attach it to the headboard.

diy-headboard-7


When it’s all nice and wrinkle free lay it face down on the floor and place the headboard centered on top of it.

diy-headboard-10

Pull it tight on each end and staple.


On the corners tuck the outside corner in and pull the inside corner down and staple (as shown below).

diy-headboard-12


Step 7-  Nailhead trim is a great way to make furniture feel a little more fancy or polished (it’s like jewelry for furniture).  There are varying ways to add nailhead trim.  I think the easiest way is using the product below.

I bought it at Joann Fabrics.  It was $21 but I used a 40% mailer coupon so it was more like $14. It’s 5 yards of it so I think $14 is a very fair price (but you can get it even cheaper HERE which I will do next time).

diy-headboard-nail-trim


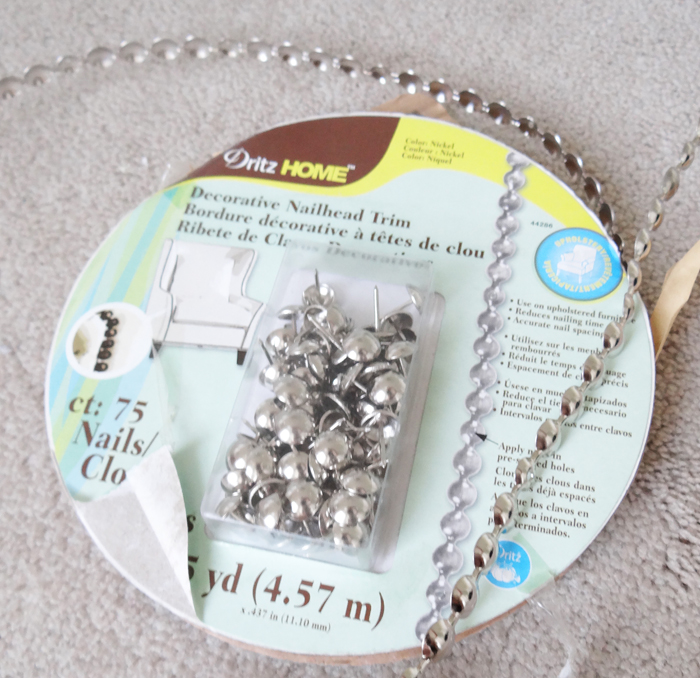
The nailhead trim already comes connected and then you hammer in a nailhead when you see a hole in the trim.  It’s kind of hard to explain so I took a little video so you could see it in action.:-)  Click HERE to view the video.

diy-headboard-installing-nail-trim

diy-headboard-nailtrim-photo


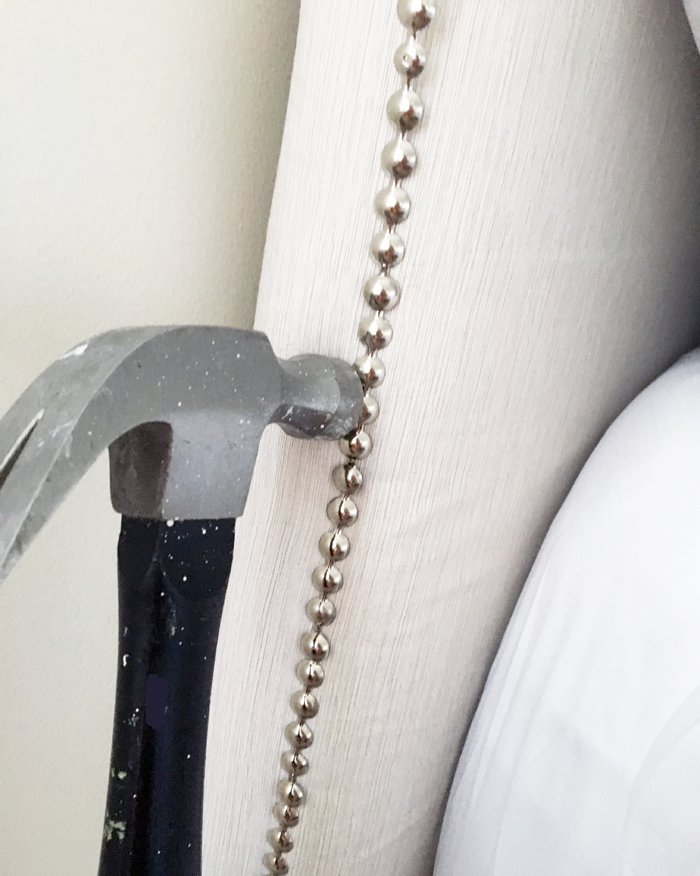
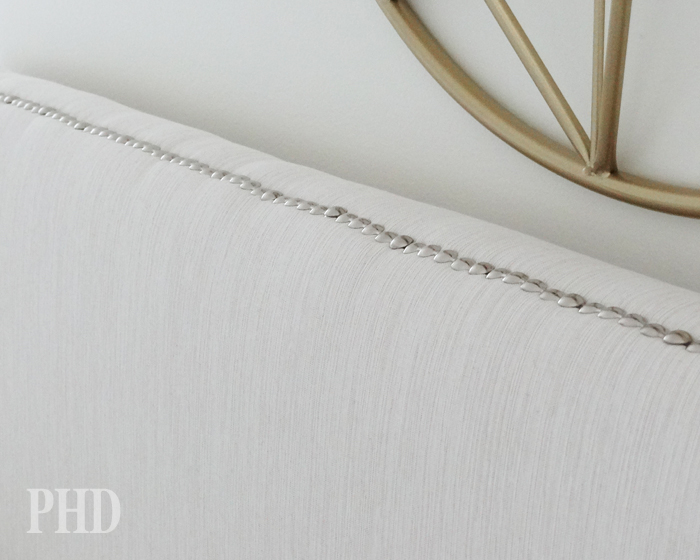
The nailhead trim is so easy to do and can really make any existing furniture look more expensive!

diy-headboard-after

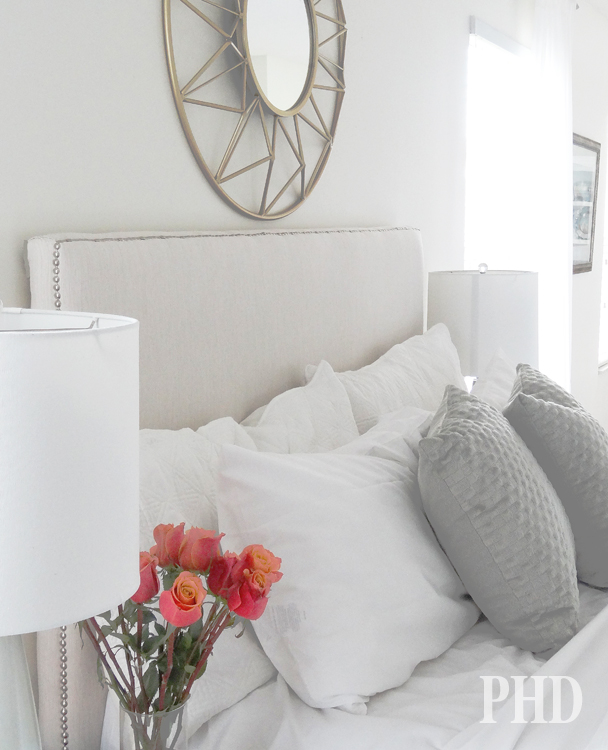
I’m really happy with how it turned out!  And feel so much more complete now that we aren’t going headboardless anymore…lol.

What have you guys been up to?  Are you working on any projects right now?  As always please let me know if you have any questions!!

I hope you have a wonderful rest of your week!!


Signature

beautiful-diy-upholstered-headboard-tutorial

the-secret-to-adding-nailhead-trim-the-easy-way


Related Posts From the Blog:

  • DIY Sparkling Pinecone OrnamentsDIY Sparkling Pinecone Ornaments
  • An Old Favorite Paint Color & A New Favorite Paint BrandAn Old Favorite Paint Color & A New Favorite Paint Brand
  • Makings of a Stylish Man CaveMakings of a Stylish Man Cave
  • Thursday 5 DIYThursday 5 DIY
  • 10 Simple Fall Decor Ideas10 Simple Fall Decor Ideas
  • Parade Of Homes Home Tour  #1Parade Of Homes Home Tour #1
  • Easy Spring Wreath and 11 Curb Appeal BoostersEasy Spring Wreath and 11 Curb Appeal Boosters
  • DIY Tabletop Christmas TreesDIY Tabletop Christmas Trees

before and afters// DIY// tutorials// woodwork26 Comments

Subscribe

GET NOTIFIED VIA EMAIL WHEN THERE IS A NEW POST!

« Outdoor Bench Makeover & Best $15 Sander Around
Design 101- 8 Tips to Becoming a Bookshelf Styling Pro »

Comments

  1. Kate says

    Wednesday, September 21, 2016 at 3:42 pm

    Ok. This is the easiest upholstered headboard tutorial I’ve ever seen! I’ve been wanting to make one for a long time but was worried I would screw it up. With the way you explained it and the materials, I think I can do this! Thanks so much for this post! Can’t wait to get started 🙂

    Reply
    • Tamara says

      Wednesday, September 21, 2016 at 3:54 pm

      You can totally do this, Kate!!:-)

      Reply
  2. Sally says

    Wednesday, September 21, 2016 at 4:25 pm

    Your headboard looks great, so rich looking! I appreciate your thorough and easy to understand tutorial as well. I also appreciate your thriftiness, the curtain panel is genius. Love it!!

    Reply
    • Tamara says

      Wednesday, September 21, 2016 at 4:43 pm

      Thank you for the kind words, Sally! 🙂

      Reply
  3. Bonnie says

    Wednesday, September 21, 2016 at 5:32 pm

    That is such a pretty headboard. Good job!!

    Reply
    • Tamara says

      Wednesday, September 21, 2016 at 7:48 pm

      Thanks so much, Bonnie!:-)

      Reply
  4. laura says

    Wednesday, September 21, 2016 at 5:33 pm

    so tailored and clean. How did you decide where on the edge to install the nailhead trim?

    Reply
    • Tamara says

      Wednesday, September 21, 2016 at 7:24 pm

      Hi, Laura, great question! I took my left thumb and pressed along the edge. When I felt the very edge I place the nailhead trim with my right hand directly next to the edge. Before I place a nailhead in to be hammered I would recheck with my fingers to make sure it was still right by the edge. That’s how I did it but there are various other placements the nailhead trim could go. I meant to suggest in the post that it may be helpful to look around at Pottery Barn or other places that sell upholstered headboards to view other nailhead trim placements options. Thanks for the question, Laura!:-)

      Reply
  5. Colleen says

    Wednesday, September 21, 2016 at 6:45 pm

    Wow! Your headboard looks amazing! Thank you for sharing such great instructions. My daughter’s room could use a makeover and I just might tackle a headboard for her.

    Reply
    • Tamara says

      Wednesday, September 21, 2016 at 7:48 pm

      Awesome, Colleen!:-) When I went to Target to look for a curtain panel there were so many cute patterned ones that I thought would be so fun for a kids headboard.

      Reply
  6. Kelly H says

    Thursday, September 22, 2016 at 8:47 am

    Such a pretty headboard! How did you attach it to the bed?

    Reply
    • Tamara says

      Thursday, September 22, 2016 at 10:20 am

      Great question, Kelly! I haven’t attached the headboard to the bed frame and will likely not need to. With most purchased headboards the headboard part is top heavy (it’s on long skinny legs and only appears above the mattress) so needs to be attached. I built the headboard part so that it goes almost all the way down to the floor. I just pushed the bed all the way up against the headboard and it has held well. If you would like to attach in you could get a few short, fat screws to put through the the holes on the bed frame and screw into the bottom of the headboard (two on each side would be sufficient). Hope this helps!:-)

      Reply
  7. wadii says

    Wednesday, September 28, 2016 at 6:59 pm

    Hello Tamara!
    the result is stupifiant, I congratulate your new headboard I appreciated the simplicity and sobriety of the idea that seems at the same time delicate.
    you can also attach it in the wall by splice mid wood. 🙂

    Reply
  8. Jamie Hall says

    Thursday, September 29, 2016 at 4:33 pm

    Tamara! You came up on my Pinterest feed and I hopped over here. Beautiful job on the headboard and your house! LOVE IT! I am so happy that you found this “space” and doing so well in it. Side note: did I read correctly that you were walking a puppy? Did you finally cave in? 😉

    Reply
    • Tamara says

      Thursday, September 29, 2016 at 7:07 pm

      Lol, Jamie, yes believe it or not we have a puppy! We got a golden doodle and she is 5.5 months with lots of energy. We got a kitten at the same time so it’s been pretty crazy around here. Feel free to send any dog advice my way…this is new territory for me and I know you are a pro! Love ya!

      Reply
      • Jamie Hall says

        Tuesday, October 25, 2016 at 11:55 am

        Aw, a full house is a loved house! She’s going to be big dog! I thought you’d get more of a lap dog 😉 Try the bell training so she can ring it when she needs to go out. Love all the wonderful projects you’ve done! Just beautiful work! Love you, too, and we need to plan another visit! <3

        Reply
  9. Wanderluster says

    Friday, September 30, 2016 at 10:09 pm

    it’s so nice 🙂 We have been headboard less… let’s see, we had a headboard when we first got married, I think we got it at a garage sale, and then we sold it to move and we have not had one for the last three years! We 6 months is nothing 😉

    Yours is nice though, and I bet it didn’t take too much time. Project I’ve been working on lately: adjusting my front door so it suits our house a little better. that means plywood paneling and paint and I love how it turned out. I love projects.

    https://wanderlustingbydesign.com/2016/09/29/making-an-eh-door-the-door/

    Reply
  10. Amy says

    Friday, October 7, 2016 at 12:01 am

    Ambitious! Would have never thought of taking a plain piece of wood and make it so lovely. Love the nail trim: I refinished one of my chairs and put each tack in one at a time. What a time saving secret to find out about the nail trim you used. Hope you are doing great!

    Reply
  11. Nancy Miller says

    Saturday, October 22, 2016 at 6:55 pm

    Good job on the headboard! good information for those thinking of making one. Just FYI. . . in the photo in this post (of your friends use of your old headboard), there are 3 circular decorative pieces hanging above that headboard. They are hung too high. The lower two should hang with the center at about eye level, or maybe just slightly lower. The upper one should be lowered accordingly. I am an artist, hang gallery walls and exhibits, have done interior design and am offering this just for your information. When hanging in any room, a general rule of thumb is to hang with the center of the artwork at about eye level. If one is hanging several pieces on a wall, it is helpful to start in the center of the grouping and hang with the first piece about the same place. the center of the piece at eye level. then move to from one side to the other and above and below, working back and forth. This works for asymmetrical arrangements and symmetrical arrangements. If one is working with a n asymmetrical arrangement there should be some variation of the space between the pieces. Hope this makes sense! Nancy

    Reply
  12. Stephan says

    Wednesday, September 13, 2017 at 2:29 am

    I can now proceed with redoing my current headboard with CONFIDENCE thanks to YOU!!!! This is perfect!
    Thank you, thank you!!!

    Reply
    • Tamara says

      Wednesday, September 13, 2017 at 9:53 am

      Happy to have been a help!:-)

      Reply
  13. Stephanie Pereyra says

    Thursday, November 9, 2017 at 3:40 pm

    I love it, thanks! Question, where is the mirror above the bed from? LOVE IT!

    Reply
    • Tamara says

      Thursday, November 9, 2017 at 4:06 pm

      Hi Stephanie! Thanks for the question! The mirror is from Homegoods. I love Homegoods mirror they are stylish and so reasonably priced!

      Reply
  14. Sherry Cooney says

    Sunday, April 22, 2018 at 2:50 pm

    Hi this is great what you did with your head board project. I had done one myself using my old existing wood head board and covered it with foam and a old white sheet and slipped a duvet over with a different pattern on each side ( making this reversible). Cut the bottom off and hemmed it and a little adjusting on some angles my head board had and I put ties on the bottom and now I can remove and wash if needed. I am looking to redo my head board but cant find a duvet that I like so I too have been looking at curtains. I am happy to see that I wasn’t being silly about that idea. My thought was to buy a lined curtain so I could use the liner to cover the back of the board. Thoughts?

    Reply
    • Tamara says

      Sunday, April 22, 2018 at 10:27 pm

      Hi Sherry! How clever to use a duvet cover! Yes, I think the lined curtain would work well and is a great idea! Thanks for sharing your ideas!!:-)

      Reply

Leave a Reply Cancel reply

Your email address will not be published. Required fields are marked *

Hello and Welcome!! My name is Tamara and this is where I share my tips and tricks to creating a beautiful home! If you are new, feel free to start HERE.

Subscribe

Get notified via email when there's a new post!

Join me on Instagram!

[instagram-feed]

More Blog Inspiration:-)

  • Icon Caroline on Design

    Close preview

    Loading...
  • Icon Centsational Girl

    Close preview

    Loading...
  • Icon Decorating Delirium

    Close preview

    Loading...
  • Icon Lauren Liess

    Close preview

    Loading...
  • Icon Life on Virginia Street

    Close preview

    Loading...
  • Icon Remodelaholic

    Close preview

    Loading...
  • Icon The Creativity Exchange

    Close preview

    Loading...
  • Icon Thrifty Decor Chick

    Close preview

    Loading...

Categories


Disclosure & Privacy Policy

You might also like

The Final Before & After of our Current Home

The Final Before & After of our Current Home

New Build Update-Paint, Lighting, and Floors oh My!

New Build Update-Paint, Lighting, and Floors oh My!

New Home Update

New Home Update

New Build Update- Cabinets are in!

New Build Update- Cabinets are in!

House Update–We Have Walls!

House Update–We Have Walls!

Join Me on Instagram!

[instagram-feed num=9 cols=9 showbutton=false]

Privacy

Copyright © 2021 · Savory theme by Restored 316

Enter your name and email to get my weekly post sent to your inbox... it's FREE!
Want to learn more about DIY, decorating, and making your home beautiful? Sign up below!
Your information will *never* be shared or sold to a 3rd party.