Hello!! I hope you’ve all had a great week! As you know I am in the middle of a handful projects right now (and in a variety of rooms).
This week I unexpectedly added another room to my project list! My youngest son’s crib broke last week! We were planning on moving him to a big boy bed in the next couple of months anyways so instead of trying to fix it we decided to go ahead and make the transition.
The timing actually worked out well! My friend Erin (you can view her gorgeous home tour, Here) and I are taking an online interior design course. In the course we have to design a bedroom as one of our assignments. I have been working on my friend, Lolly’s, master bedroom (which we only have one thing left to do–build a sliding barn door).
And Erin is now helping me turn my son’s nursery into a “big boy’s” room.
Here is a little mood board Erin put together for his room.
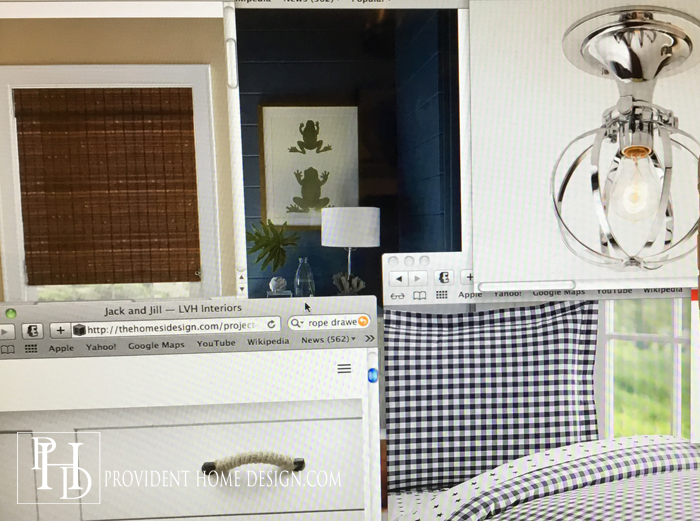
I love how it is looking so far and can’t wait to show you once it is all said and done!
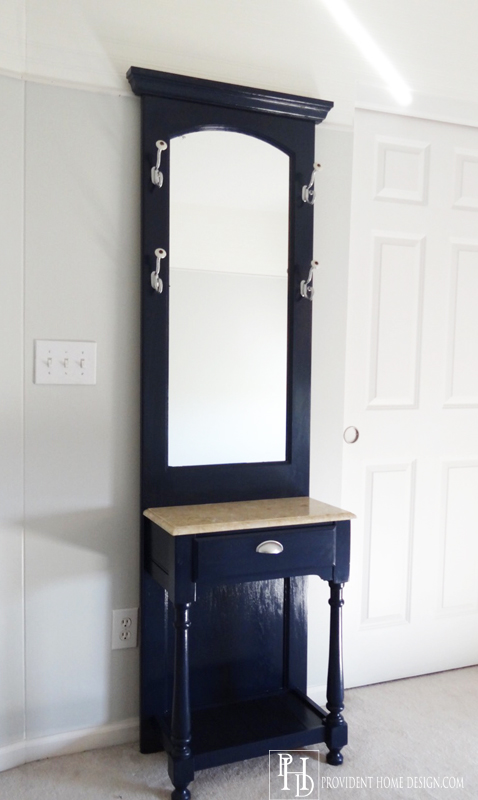
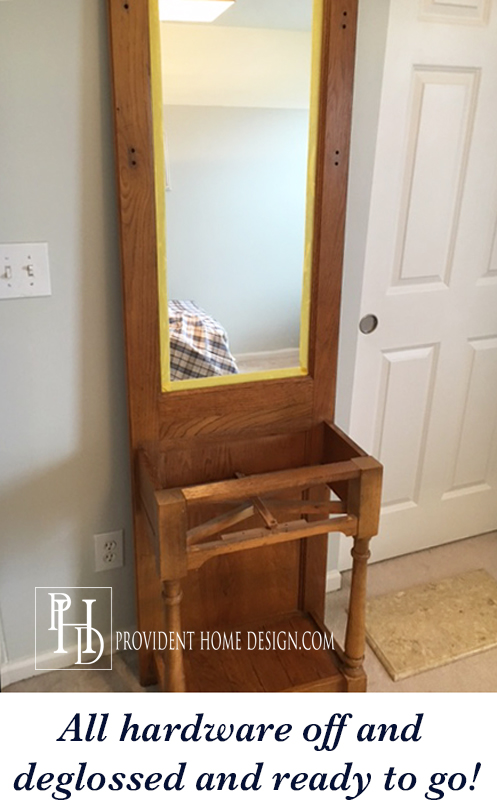
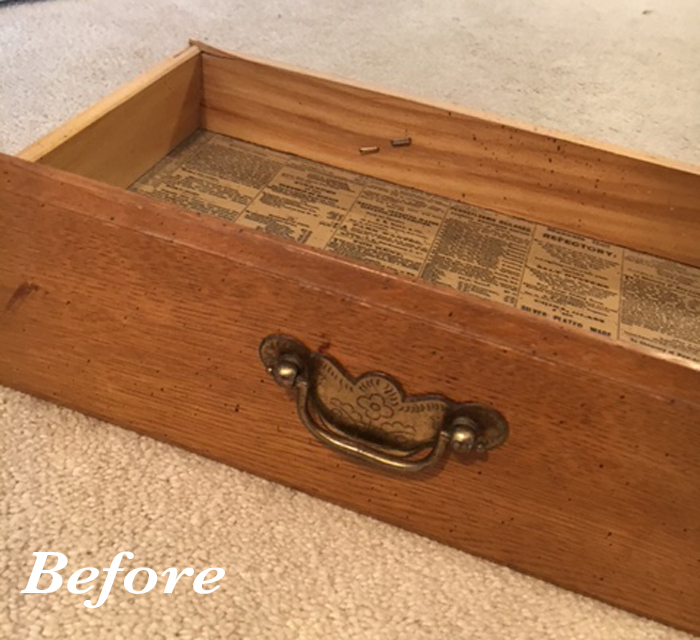
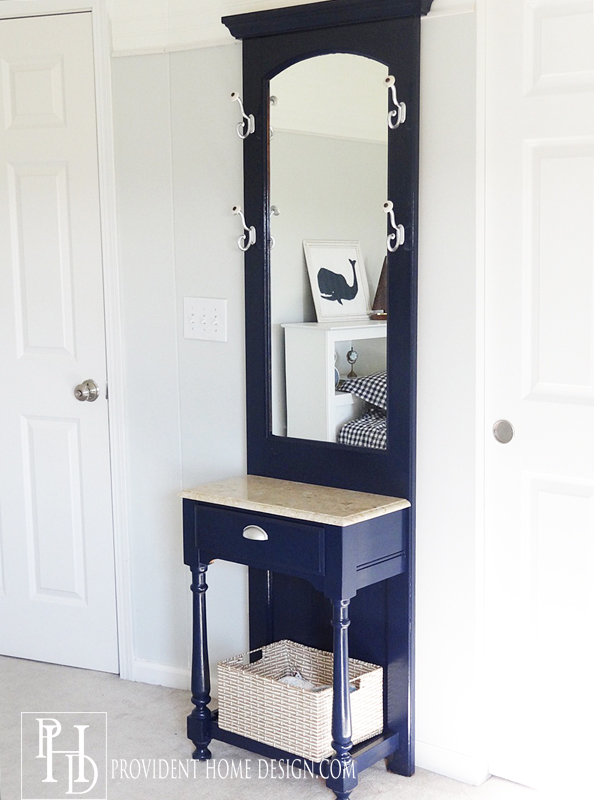
One of the projects I did this week for his room is paint the “hall tree”. The hall tree is an old, wood piece of furniture I got about four years ago free from a woman at church who was moving (pictured below).
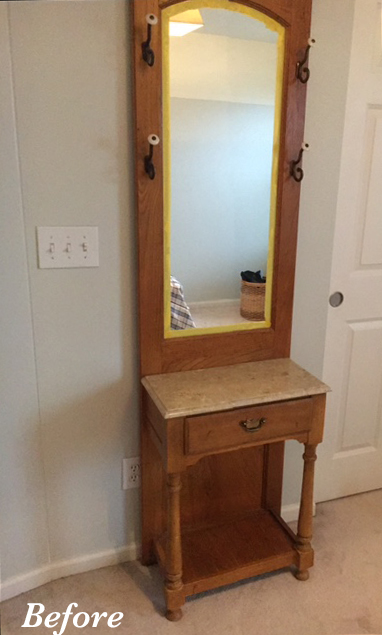
At that time we didn’t have our last child yet so we were using the room as a guest bedroom.
I like how the mirror helps this tiny room feel a little bigger and the hooks come in handy too so I kept it in the room once it became the nursery.
I still like the “hall tree” but I was ready to give it a makeover for my son’s “big boy” bedroom.
Here are the results!

And here’s how I did it!
Supplies
TSP or TSP Substitute
Deglosser or Sanding Block
Foam Roller
Foam Brush
Behr Hi-Gloss Indoor/Outdoor Enamel
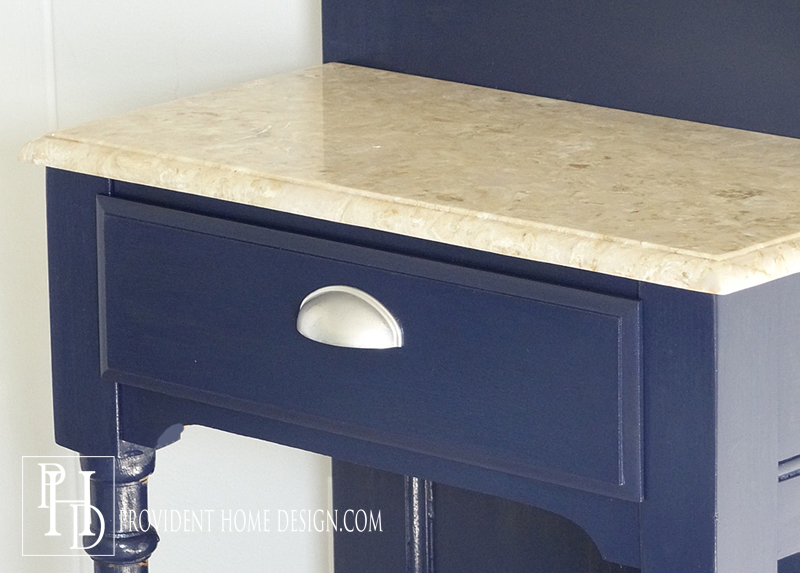
(My paint color is Benjamin Moore Old Navy)
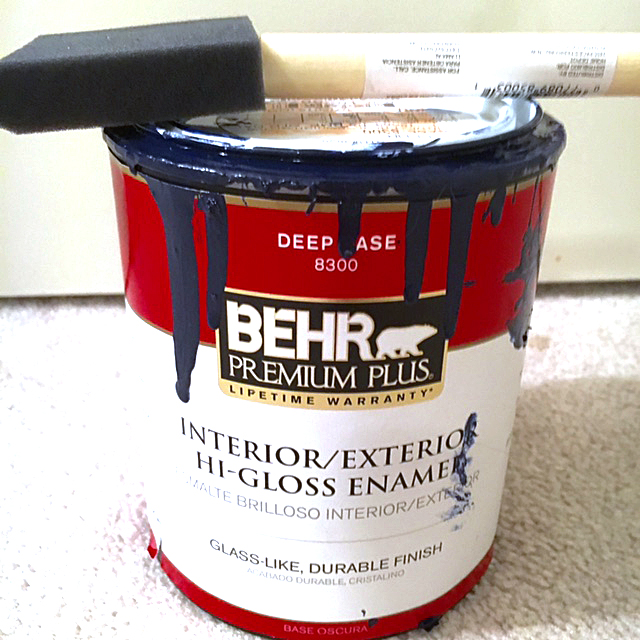
Note: I only got a quart size and hardly used any of it. A little bit of this stuff goes a long way!
How to Paint an Old Wood Piece of Furniture
1. Clean the piece of furniture thoroughly with TSP or Krud Kutter made especially for paint prep.
2. Either lightly sand with sandpaper OR use a deglosser. I used a deglosser that I had left over from painting my kitchen cabinets.
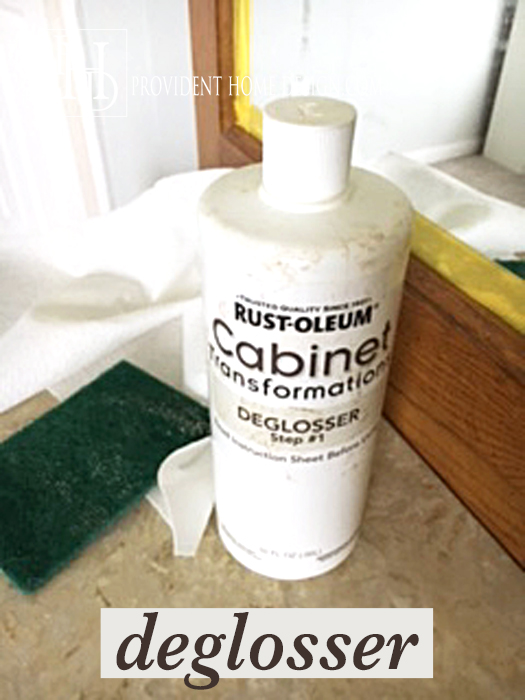
Just pour deglosser on a scouring pad and push into the wood moving the pad back and forth. Then go over the area with a rag or paper towel to pull off of the the varnish (don’t be alarmed if the wood doesn’t look much different after deglossing…it’s normal).
3. Take off drawers and all hardware on the piece of furniture. I took off the hooks, and the drawer, and the marble top came off. Tape off areas that you don’t want painted that cannot be removed (like a mirror).
Also, make sure to put newspaper or a drop cloth (or old sheet) under the piece of furniture to prevent floors getting paint on them (I learned this the hard way).
4, Using a foam roller (and a foam brush for the smaller areas) paint the furniture piece with a thin coat making sure to go in the direction of the wood grain.
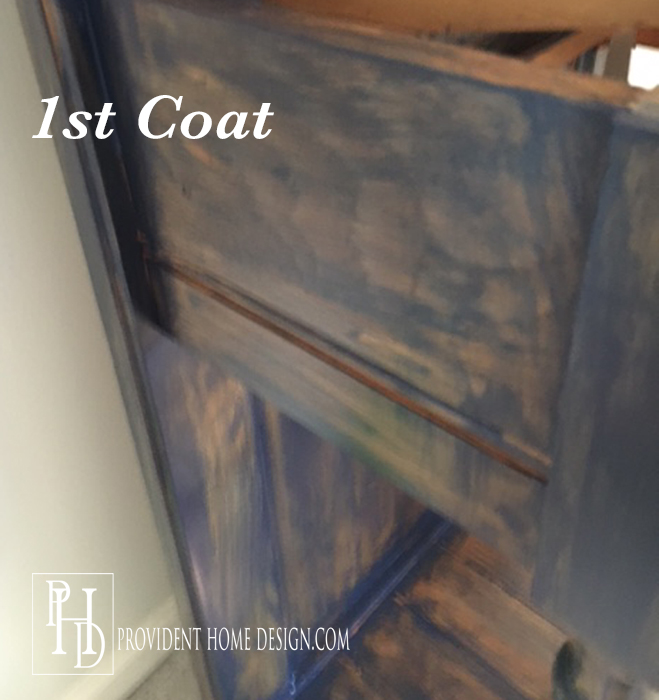
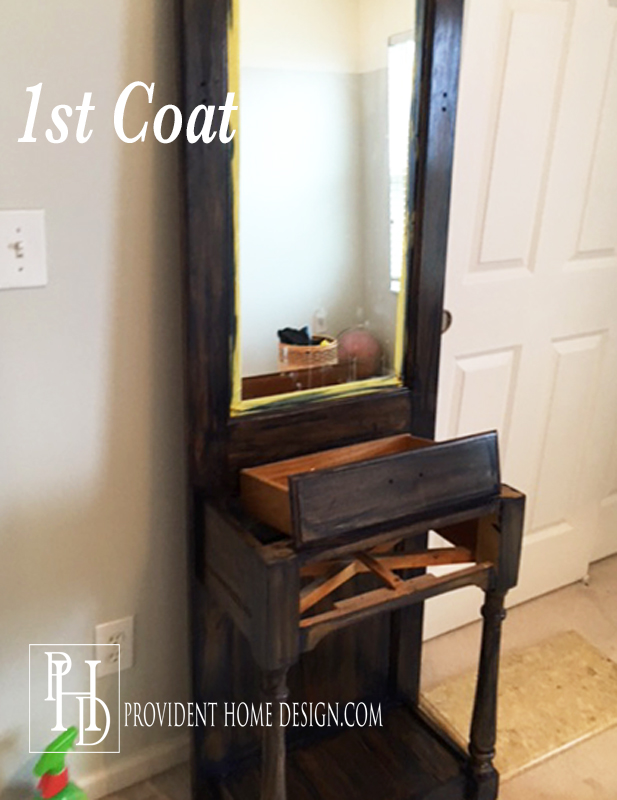
Warning: It looks horrible after the first coat!! If after the first coat it looks so bad that you want to hide under your covers in the fetal position and cry uncontrollably that means you are right on track.:-)
Let the first coat dry for a couple of hours or until the directions on the paint can states.
5. Apply a second coat to the piece of furniture in the same manner as the first coat.

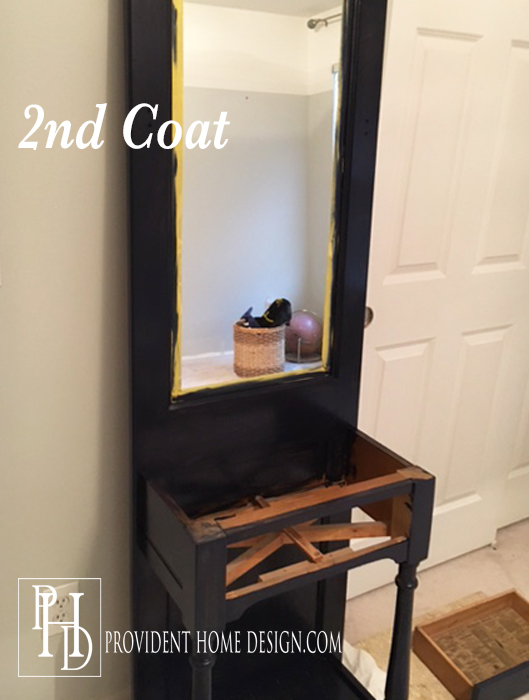
With the second coat you will see improvement in coverage but it will won’t be pretty. Let it dry again.
6. Apply third coat in the same manner as the first two coats.
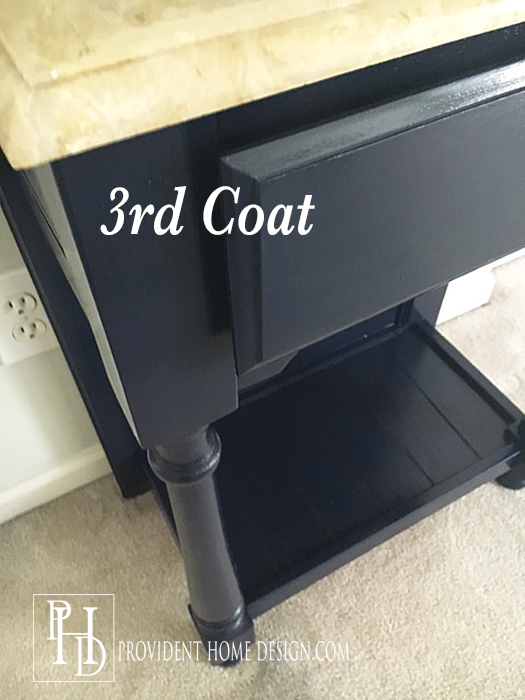
With this coat you should see full coverage and and no more streak marks. Let dry completely. You may want to wait a few days before putting back on the hardware and drawers to prevent damage to the paint (it can take up to 7 days for the paint to cure completely).
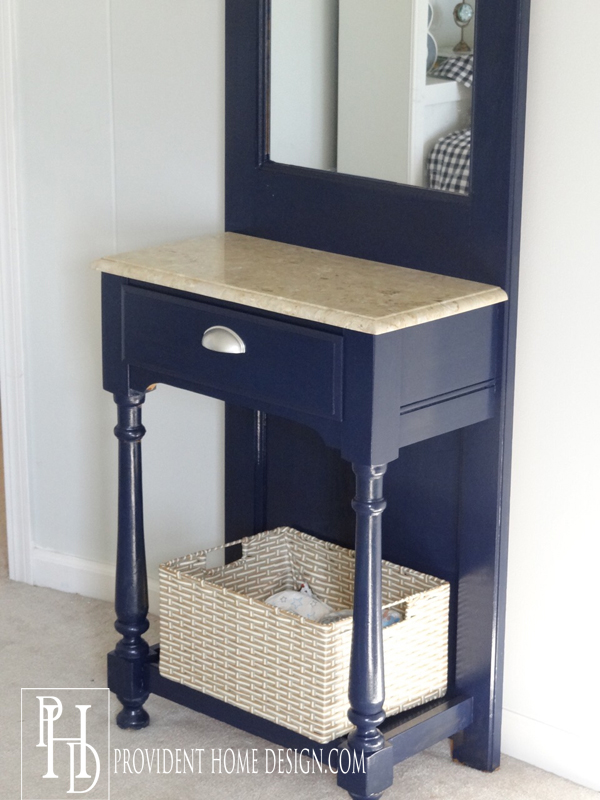
7.(Optional) Update hardware. To make the piece feel like it fit style wise in the room I decided to change up the hardware.
I replaced the old drawer pull with a simple cup pull.
The original hooks were a dirty brass. I wrapped the knobs on the top of the hooks with tape and then sprayed them silver to match the drawer pull.
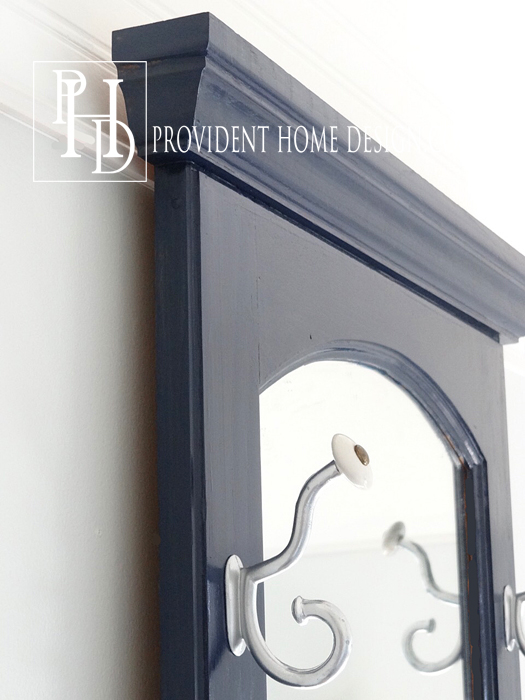
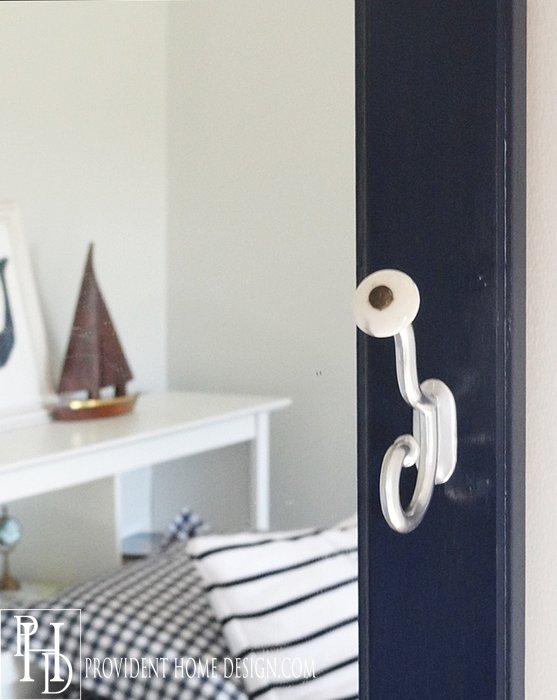
You can see a sneak peek of what’s going on in the room so far in the reflection of the mirror.:-)
So what do you think? Do you have an old wooden piece of furniture that needs new life breathed into it via paint? If you don’t have one now keep this in mind when you are thrifting or see an old piece of furniture on the side of the road or on Craigslist.
A nice glossy coat (or 2 or 3) can do wonders! As always let me know if you have any questions and thanks for being here!!!:-)

Feel free to pin for later!

Related Posts From the Blog:
 Tool Time with Tamara- Air Compressor and Nail Gun Kit
 The Look for Less and a Bathroom Update!
 Love Your Kitchen Series- Unique Lighting
 Pantone’s 2017 Color of the Year
 The Trick to Growing Grass & Porch Update
 How to Add Woodwork Above the Mantle/Fireplace
 Home Decorating Goals for the New Year!
 New Build Update-Paint, Lighting, and Floors oh My!