In homes built across America the builder-basic bathroom vanity light consists of a light coined, the “hollywood light”.
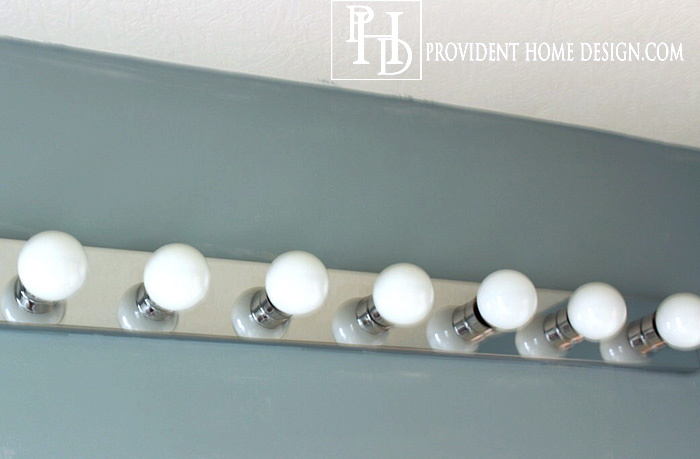
Although they give off a great amount of light they aren’t what I would call elegant or stylish! When trying to achieve the look of the following bathrooms you can imagine how the “hollywood light” would get in the way of getting the same look!
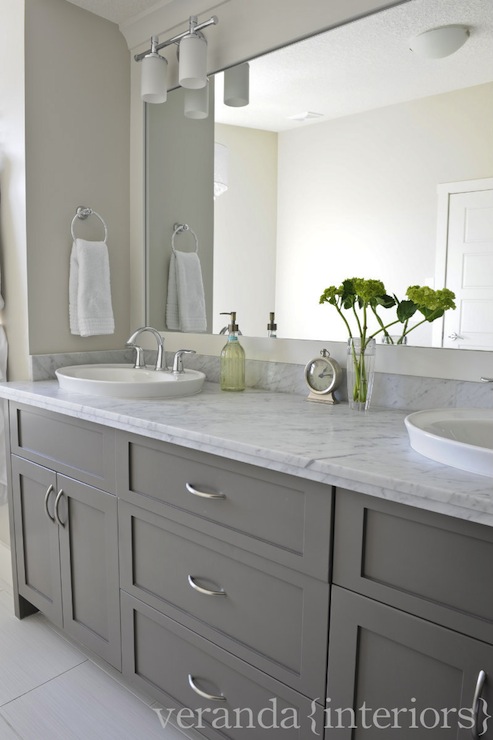
Veranda Interiors via decorpad
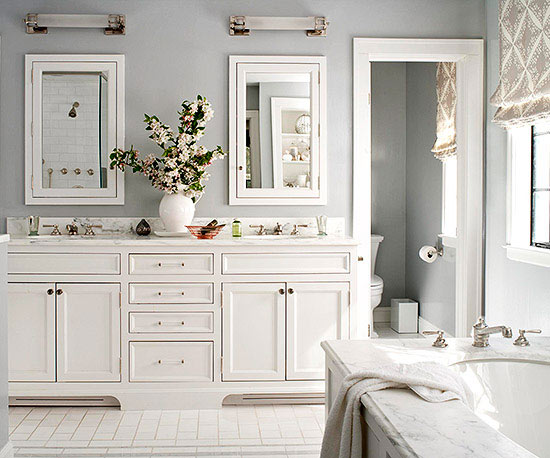
via BHG
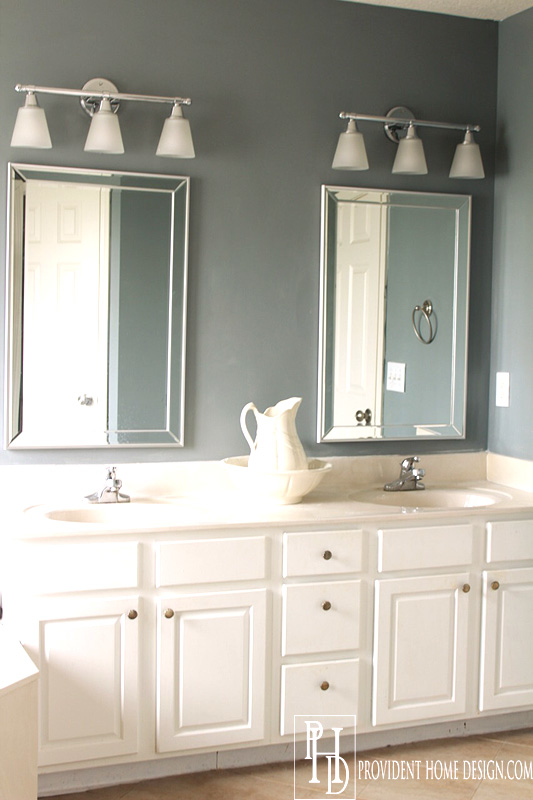
For the past 4 years (since we moved into our house) we have had a large 8 bulb hollywood light in our master bathroom that has been a bit of an eyesore.

I made sure our hollywood light didn’t show up in my home tour because I felt like it ruined the look (sneaky, I know).:-)
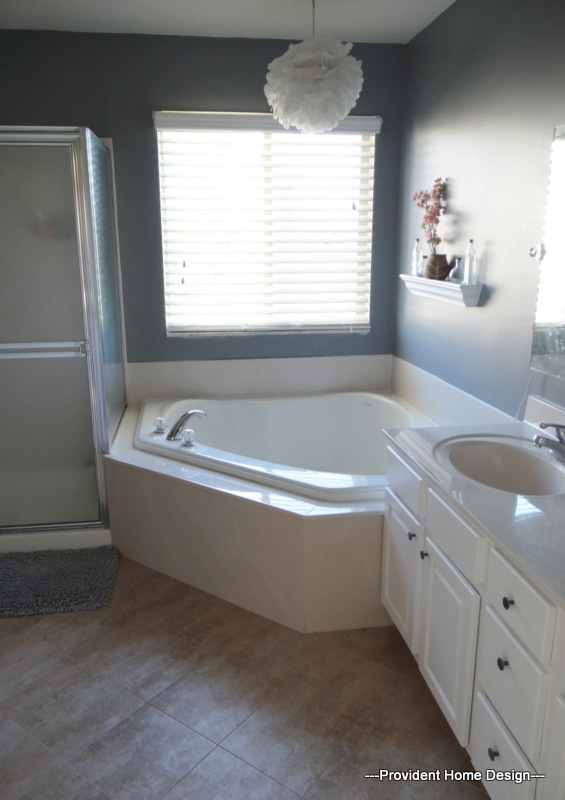
As I mentioned in a previous post I found some pretty Pottery Barn look-a-like vanity lights at Home Depot for just $29.99 a piece. I really didn’t want to have to pay an electrician $200+ to change the hollywood light into two over the mirror lights.
So, I googled and researched how to replace one vanity light with two and I was surprised that I could only find one very basic tutorial with no pictures. Not having much experience with electrical work and not having any in-depth tutorials available I reluctantly decided we would have to hire out.
So after putting it off for a year or so we finally recently hired an electrician to do it. Our electrician was kind enough to let me take pictures of the process so I could share it with you (and hopefully save you $200+ doing it yourself)! I apologize in advance for the grainy iPad pictures!
Also, affiliates links of supplies used for this project are included in this post for your convenience.:-)
How To Replace a Hollywood Light with Two Vanity Lights
1. Extremely Important! Shut off all of the power to your bathroom. You will need to bring in a work light since the power will be off in the room. Tip: Plug sink holes so loose screws and other debris won’t fall in.
(Optional) Remove your mirror(s) and use painters tape to mark where the top and center of the mirror resides so you can center your lights.
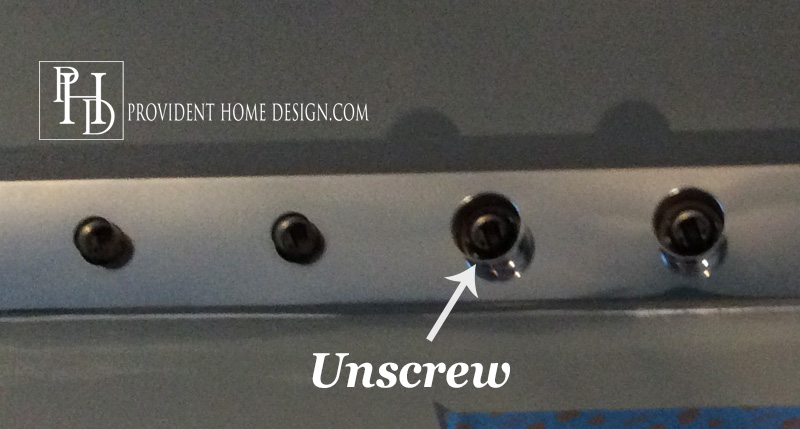
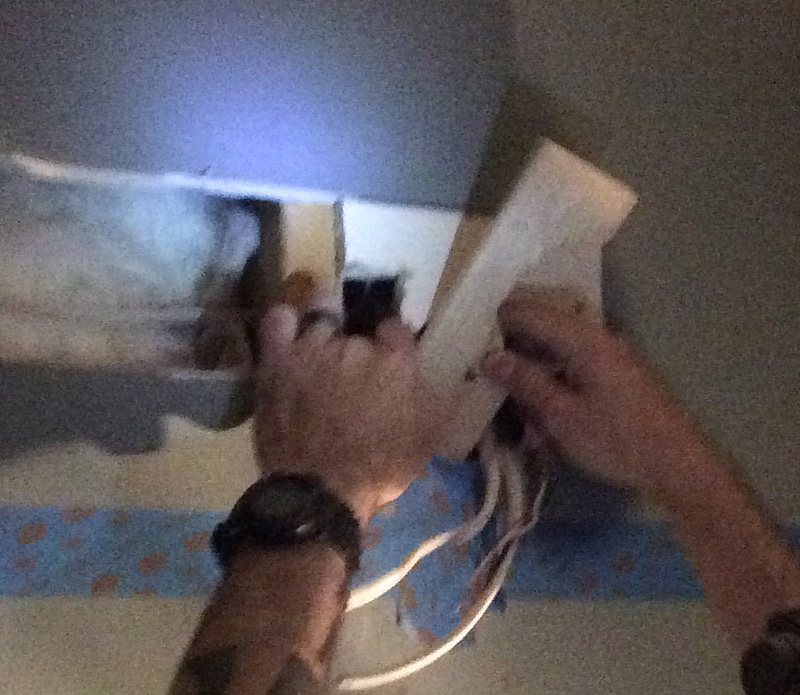
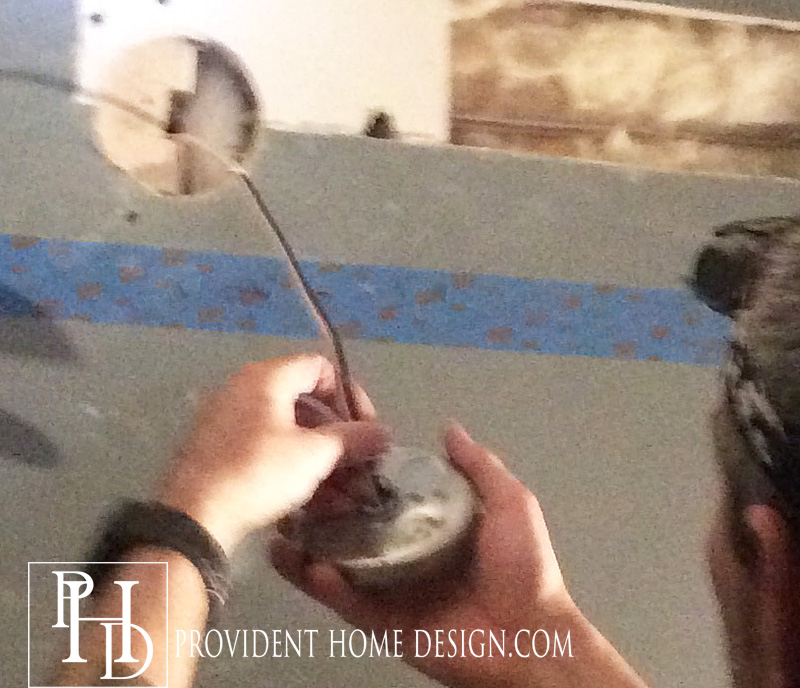
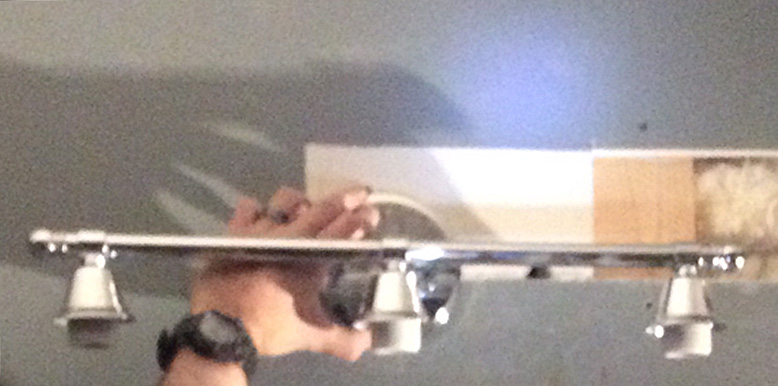
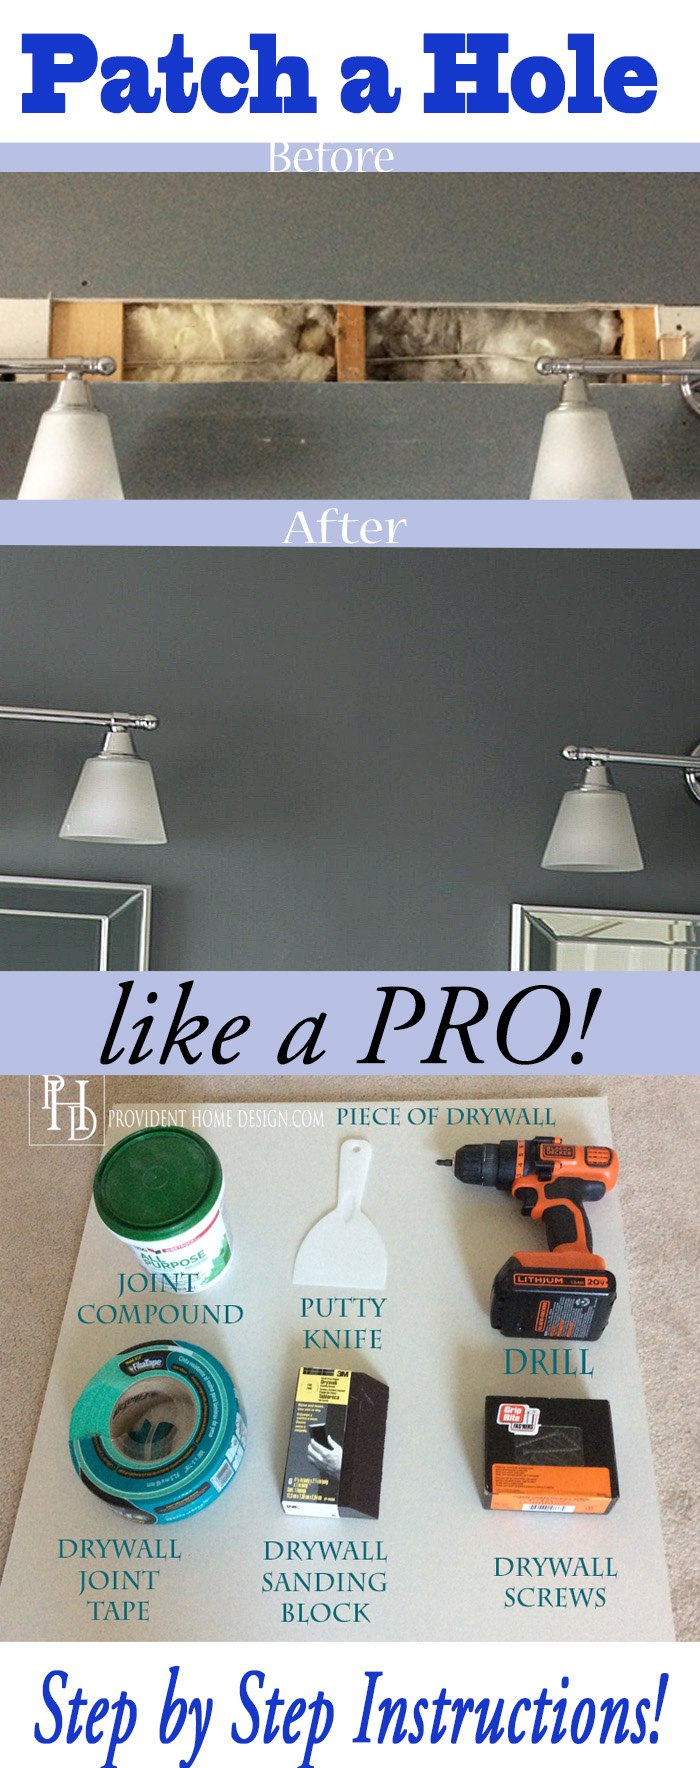
2. Remove the Hollywood light by taking the bulbs out and then unscrewing the sockets they were in (as seen below).
Then take off the wire nuts and untwist the wires from each other.
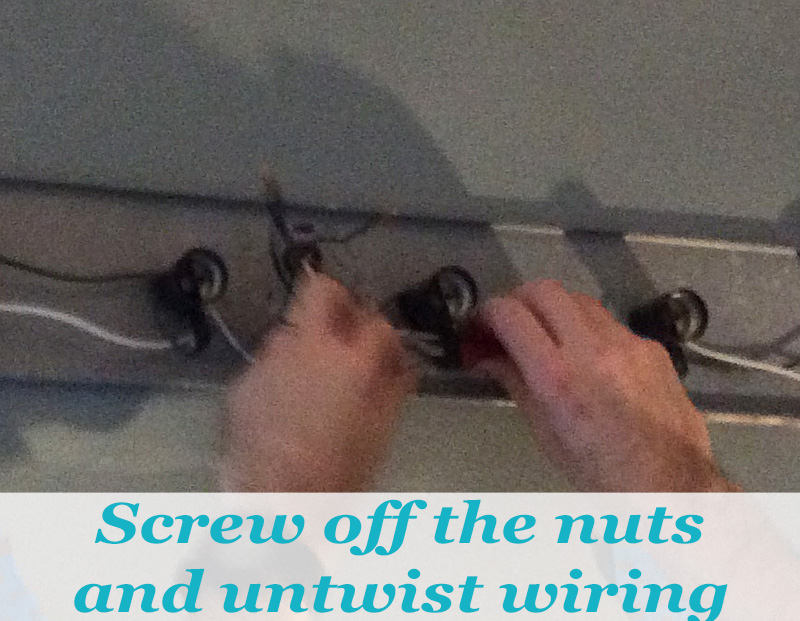
You can see in the picture below on the left that the wires from the wall are no longer connected to the wires from the light fixture.
Unscrew the base plate.
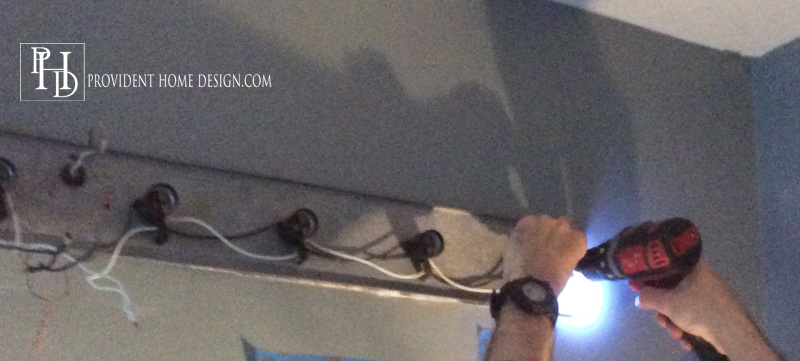
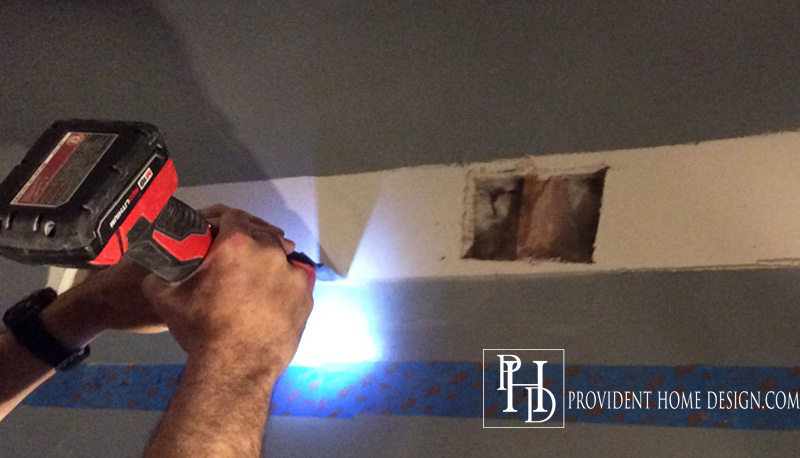
3, Make holes for the light fixtures. My electrician used a hole saw attachment on his drill. You could also trace around your junction box and then cut the circle out with a drywall utility saw.

Either way make sure you cut carefully (don’t push too hard) because you never know what’s behind the wall (e.g.: plumbing). We found a random extra wire behind one of the holes.
Also make sure you center the middle of the circle to the center of the mirror if you are placing light fixtures above corresponding mirrors.
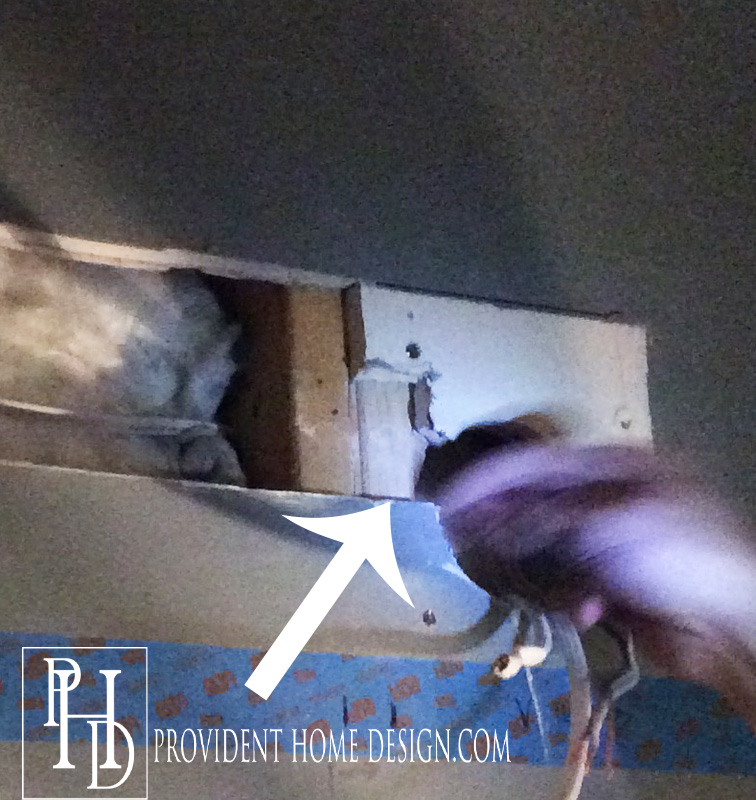
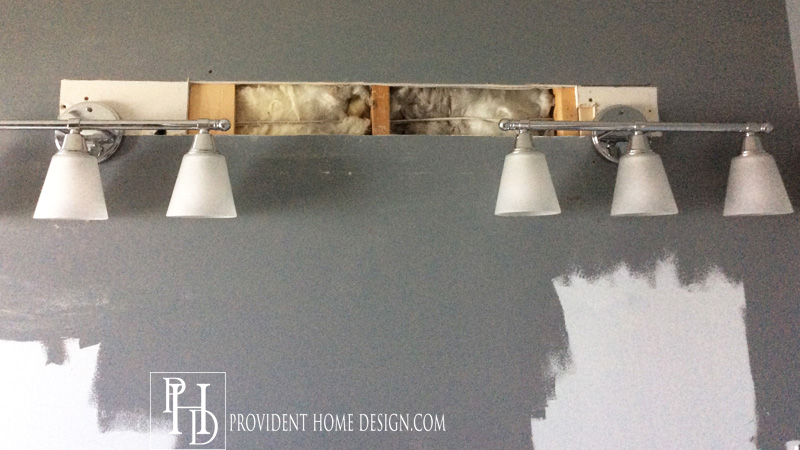
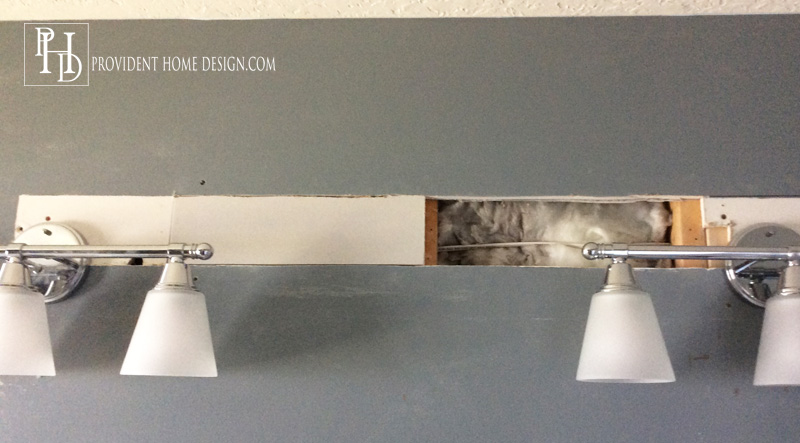
4. Okay don’t let this part freak you out (it terrified me at first)! Cut out a large chunk of drywall in between the holes you just made. Why you may ask? It is easier to run the wire between the two holes this way. And you are going to have to patch the middle hole where the original hollywood light was anyway.
AND it is actually easier to get a nice patch job by taking the whole section out and replacing it versus cutting the dry wall in random places. It made sense in this case to cut following the lines of where the hollywood light use to be (as seen below).
You could use a drywall saw to cut it out or what my electrician use was an oscillating tool (as seen above).
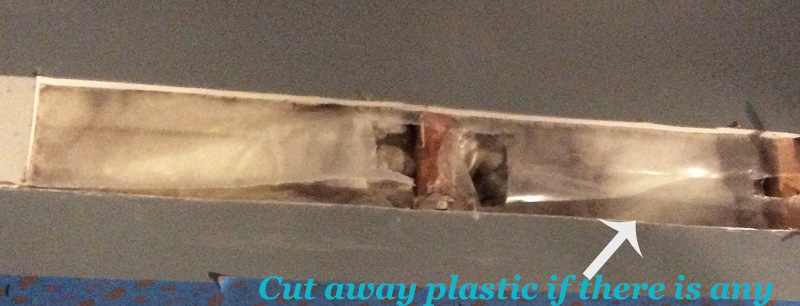
Tip: Once the drywall is off there may be a piece of plastic. If so, just cut it off.
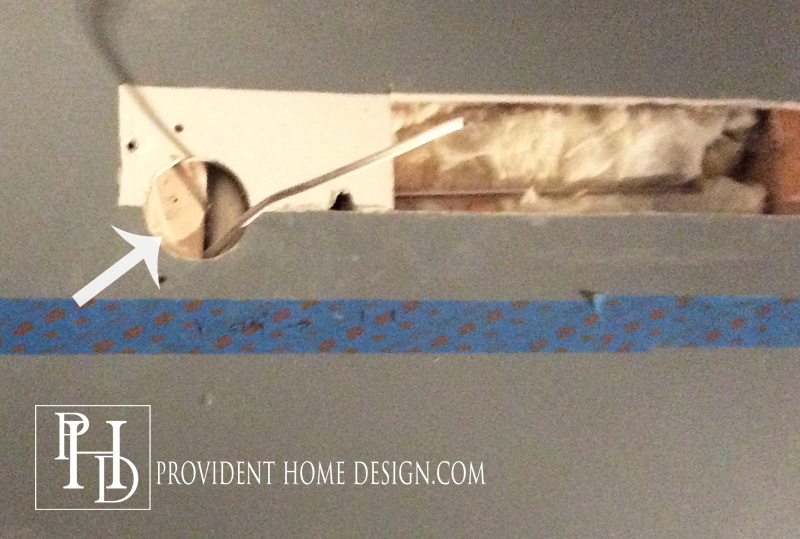
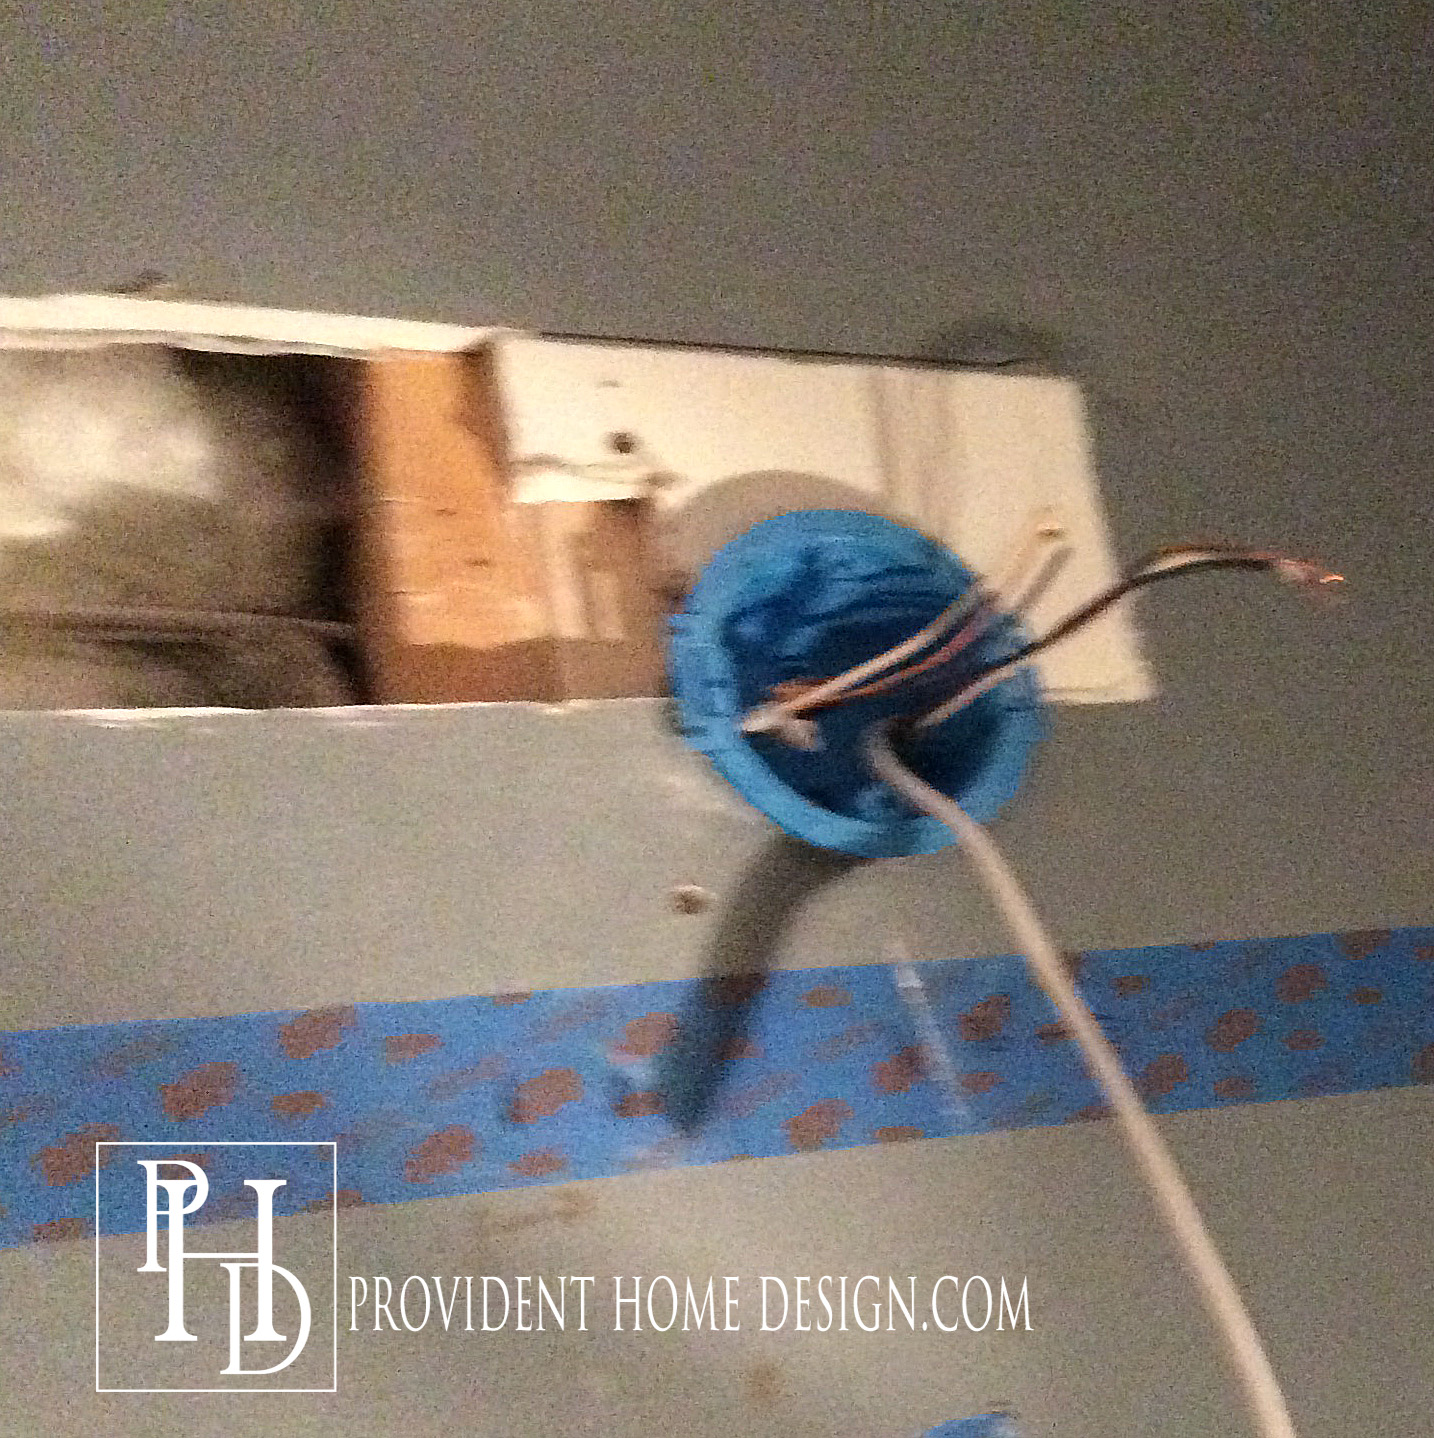
Pull the wires from the center of the wall to one of the side holes. We pulled them to the right hole (as can be seen in the next photo).
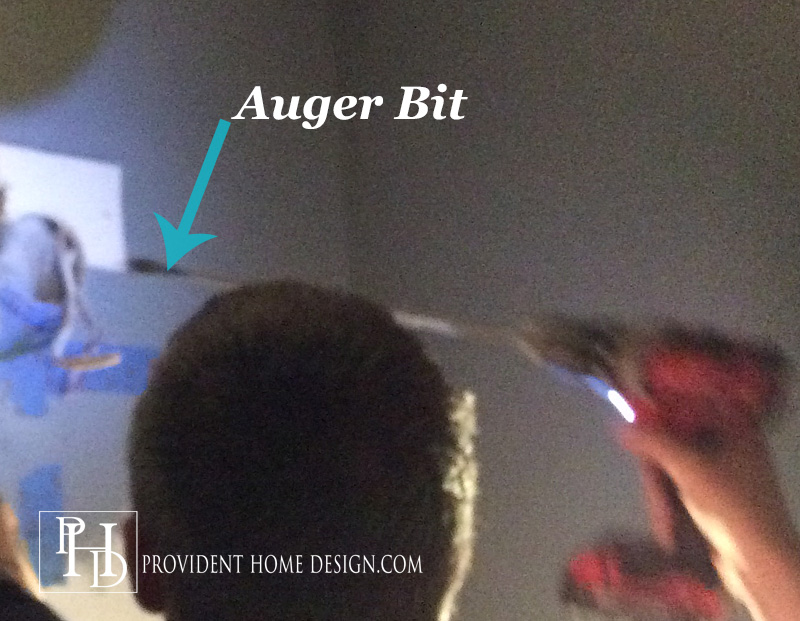
5. Next my electrician used a 3/4″ auger bit to drill holes in the middle of each stud.
6. Pull a Romex 14 gauge wire cable through the holes you made in the studs so that the wire is sticking out of both end holes (6-8 inches sticking out on each side).
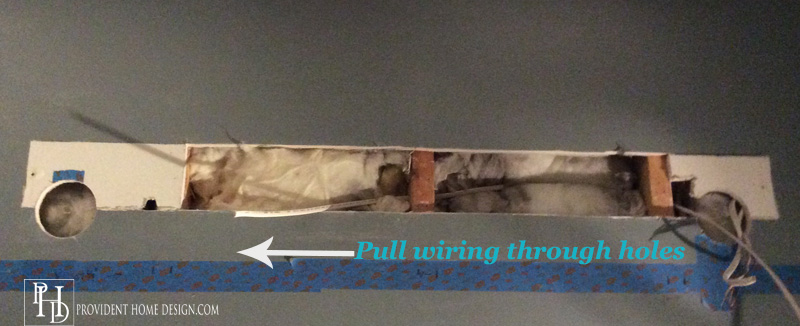
When you are done with this step it should look similar to the photo below (except remember I had a random extra wire in my wall…so you should have one wire hanging out of one of the holes and 2 wires hanging out of the other).

7. Next we are going to add junction boxes to our holes but first you may have to add some wood supports behind or around the holes.
To the hole on the right the electrician put a scrap 1×3 piece of wood through the hole…
and secured it next to the stud with drywall screws which screwed through the drywall and into the 1×3 (can you see the screw above and below the arrow in the photo below). This hole received a normal junction box.
Whereas the hole of the left could not have a normal junction box because partially behind it was a large plumbing apparatus. In situations like this you can use a box called a pancake box that is very shallow in depth.
Because he was using a pancake box he installed a 1×3 scrap piece of wood directly behind the hole for the pancake box to be screwed into.
Tip: If you are afraid you are going to drop the piece of 1×3 in the hole then you can first screw a screw a little bit into the piece of wood for something easier to hold onto while you position the wood.
Now strip the wire and pull it through the back of the pancake box.
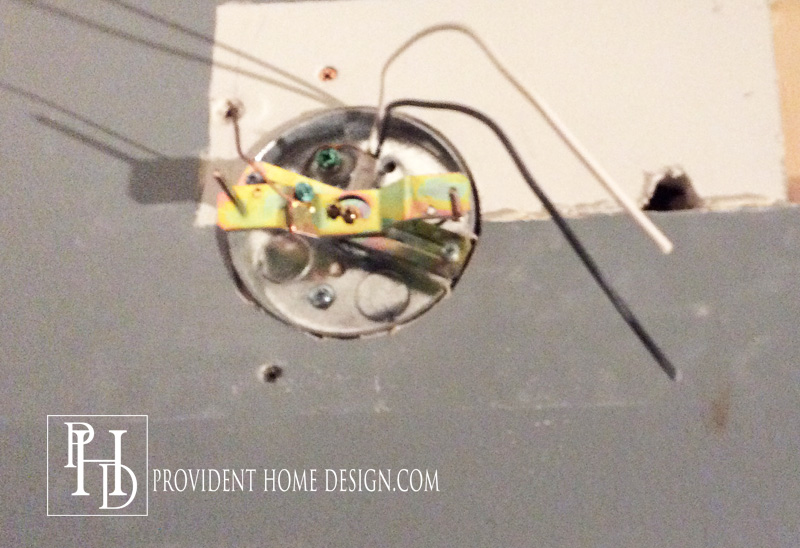
For the normal junction box remove the “knockout holes” on the box. you will be pulling the two different wires through different holes in the junction box.

It will look something like the photo below except two sets of wires instead of three.
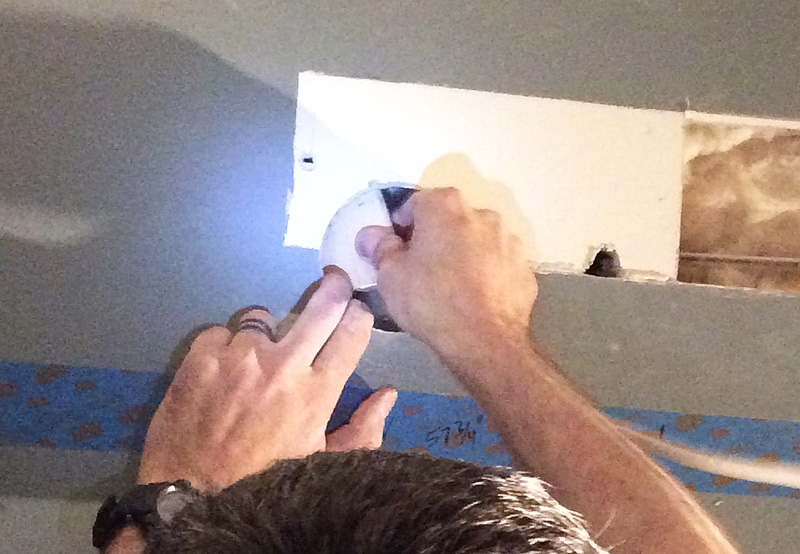
8. Attach new light fixtures. Specific directions for doing this should be included in the box your new lights come in.
Start by installing the mounting hardware. Then wrap the copper grounding wire around the green screw.
With a wire stripper remove two inches of sheathing from each end of the cable and 1/2-inch of insulation from the black and white wires inside the cable.
For the box with two wire cables do the following (for the box with one wire cable do the following except there won’t be an extra wires from the original wire cable).
Place the tips of the black wire from the original cable, the black wire from the new cable, and the black wire from one of the new light fixtures together. Twist them several times with a pair of pliers. Slide a plastic wire nut over the wire tips and twist to secure it on.
Connect the white wires in the same way. Connect the grounding copper wire from the original wiring to the grounding wire from the new wiring with a wire nut and stuff all of the the wiring into the electrical box.
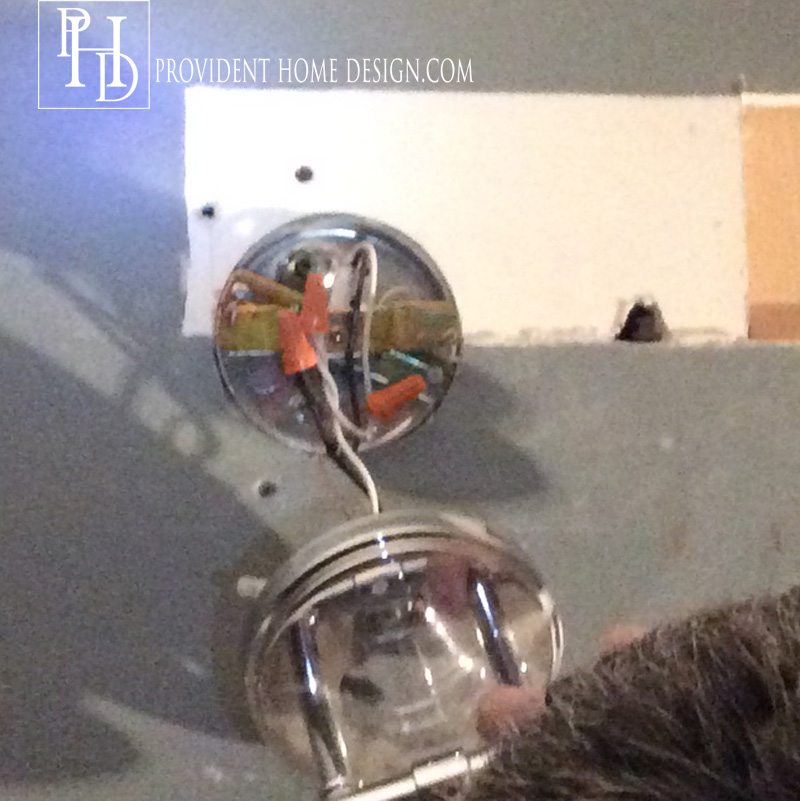
Place the fixture against the wall and screw it in.
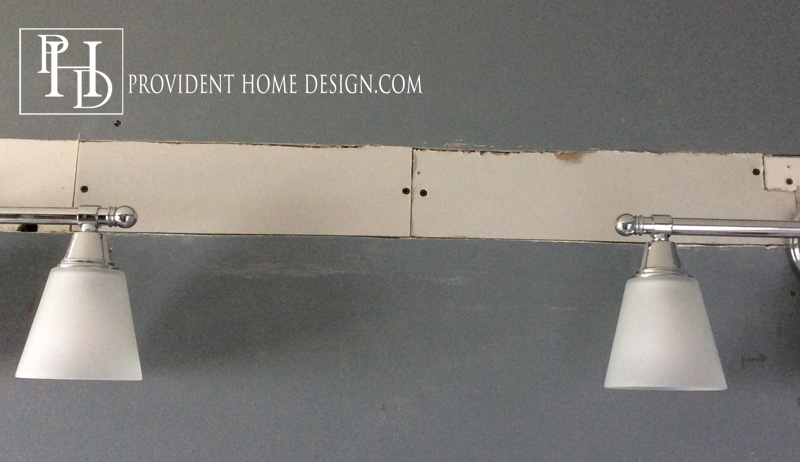
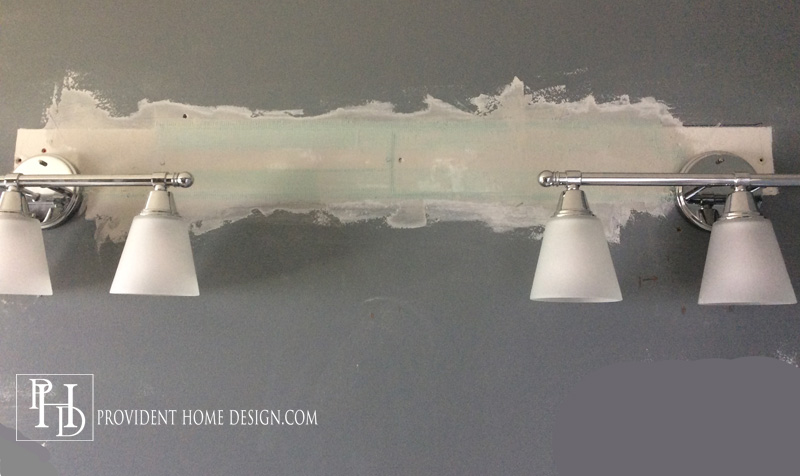
We agreed before the electrician came that I would do the patching of the mega hole. So when the electrician left the bathroom looked like this.
I won’t lie, I was a bit discouraged (I may even have wanted to cry)! But the next day I put on my big girl panties and went to the store and got the supplies!
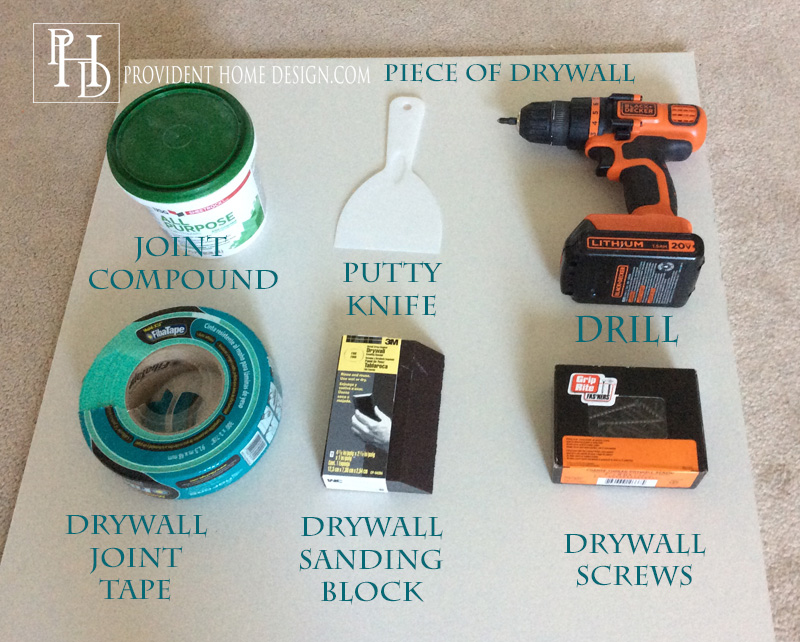
How to Patch a Hole in the Wall
I got most of the supplies below in the drywall aisle at Home Depot. The drywall screws were in the screw aisle.
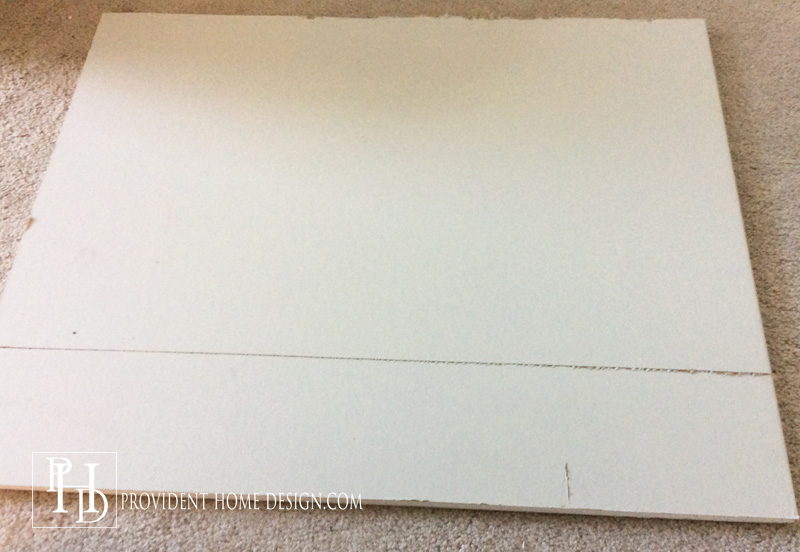
- Measure your hole in the wall and cut the drywall to that size. I bought a 2’x2′ piece of drywall so it was not long enough to do in one piece so I filled the hole in two separate pieces of drywall.
Tip: To easily cut drywall use a straight edge (I used the straight edge of my previous vanity light fixture) and using the corner of a sharp putty knife press firmly into the drywall pulling your knife against your straight edge.
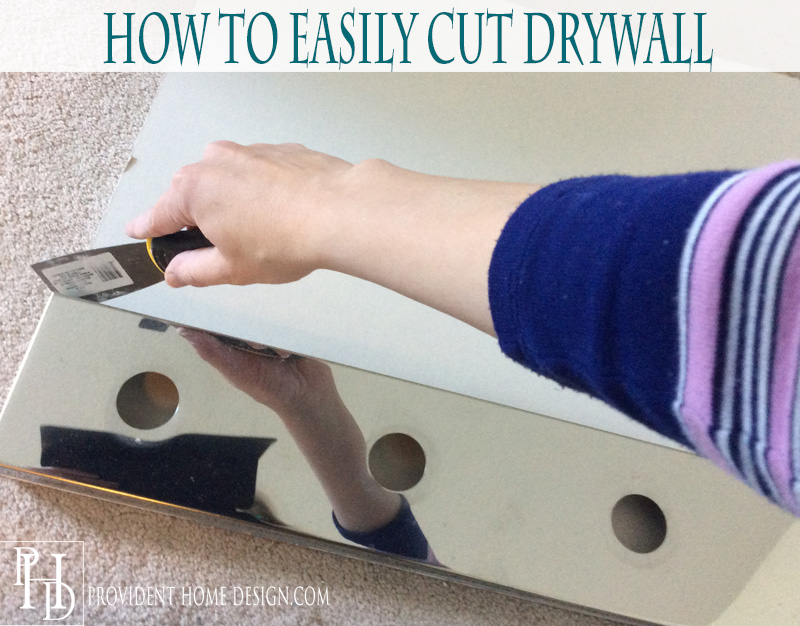
After pulling the knife through a couple of times it will look similar to the photo below. Now muster up any amount of aggression you can and slam the drywall against your knee at the cut mark and it should break easily and cleanly apart at the cut mark.
And if you don’t first succeed try, try again!:-)
2. Install the new piece of drywall.
I of course had the wood studs to screw the drywall into but if you don’t have something to screw the new drywall into see step #7 in the above section to learn how to add a wood support behind your hole.
After getting your drywall piece up and hole covered screw the drywall into the wood supports with drywall screws.
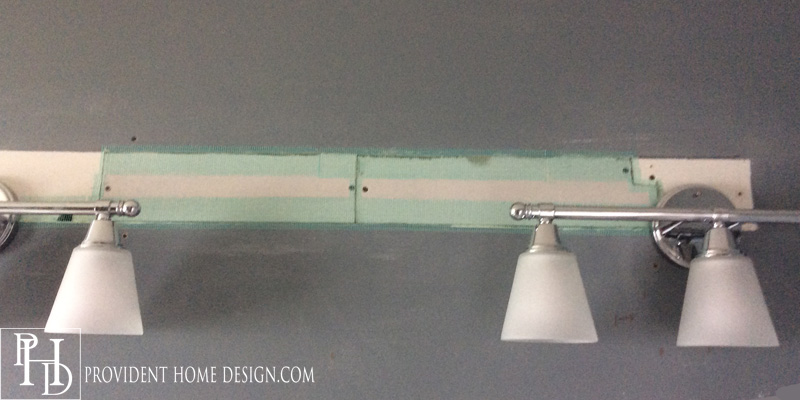
3. Next use drywall wall joint compound tape (I got the fibatape moisture resistant kind since it was a bathroom) and tape all around the seams of the new piece of drywall (as shown below).
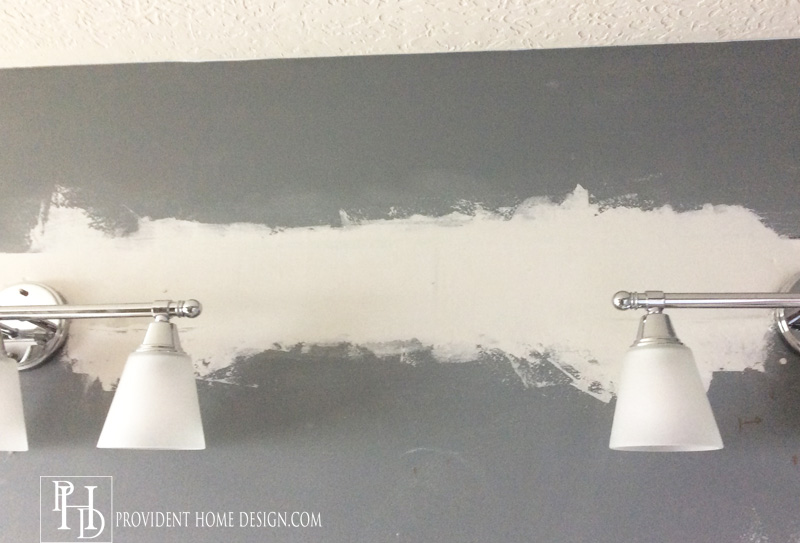
4. Apply joint compound. With a putty knife apply a thin coat of joint compound to the whole area. Be sure to smooth it out as you go! Once it is all smoothed out let it dry for at least 2 hours or as the package says.
After the first coat is dry lightly sand with a drywall sanding block (this creates a bit of dust so you may want to use a mask to protect yourself).
Once it feels smooth and you’ve wiped the dust away add another thin layer of joint compound to the whole area. Smooth it out as much as you can as you go and let dry.
Once dry sand lightly again. Two coats with a third coat in only a couple of small spots was all I needed to get the results below.
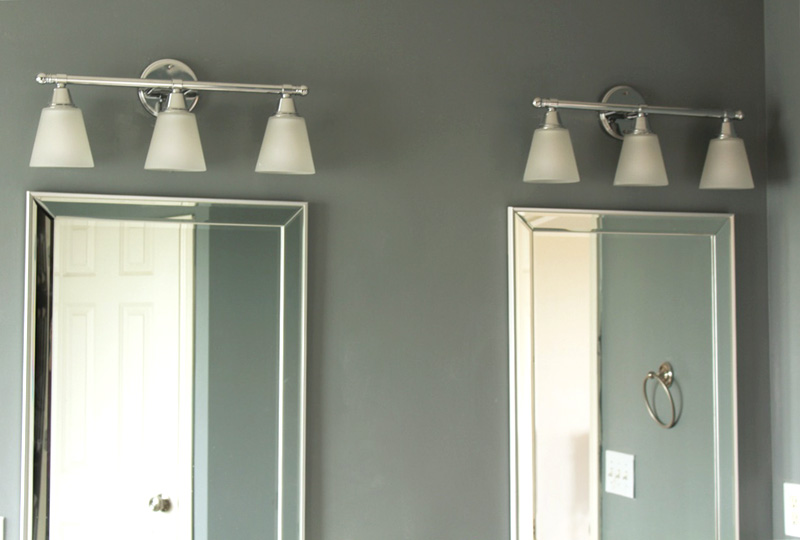
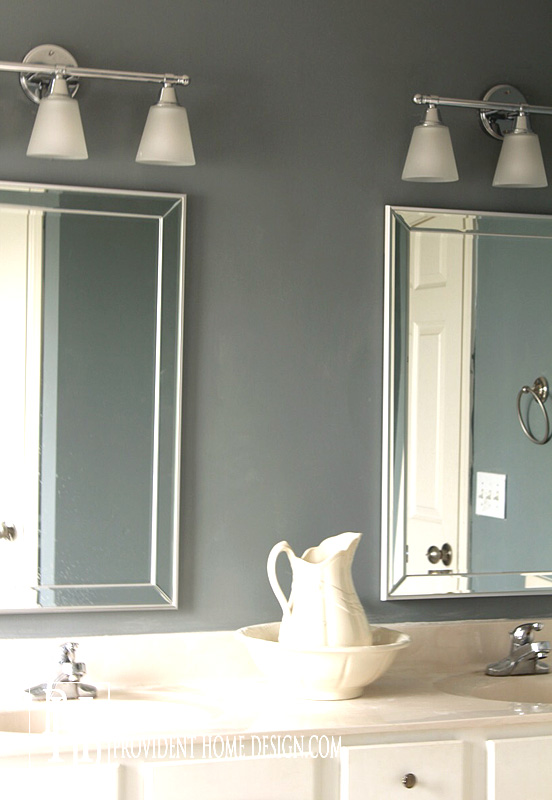
5. Pat yourself on your back and paint it to match the rest of your wall! Here are my afters!
Well this was a mega marathon post! I’m impressed if you made it through the whole thing–that kind of persistence is going to get you far in life!:-) Let me know if you have any questions! Don’t be bashful!
Thanks for being here! Till next time,

Feel free to pin these for later!!

Related Posts From the Blog:
 Color Quiz- Fun & Informative
 10 High-End Wall Art Look-Alikes for Under $10
 To Create Your Own Artwork or Not to Create Your Own Artwork?
 Interview with Interior Designer, Lauren Liess!!!!
 Beat up Table Turned Beautiful Farmhouse Table
 Pina Colada Cupcakes & More
 Easy Dresser Makeover + Progress in the Bedroom
 DIY Faux Tufted Headboard