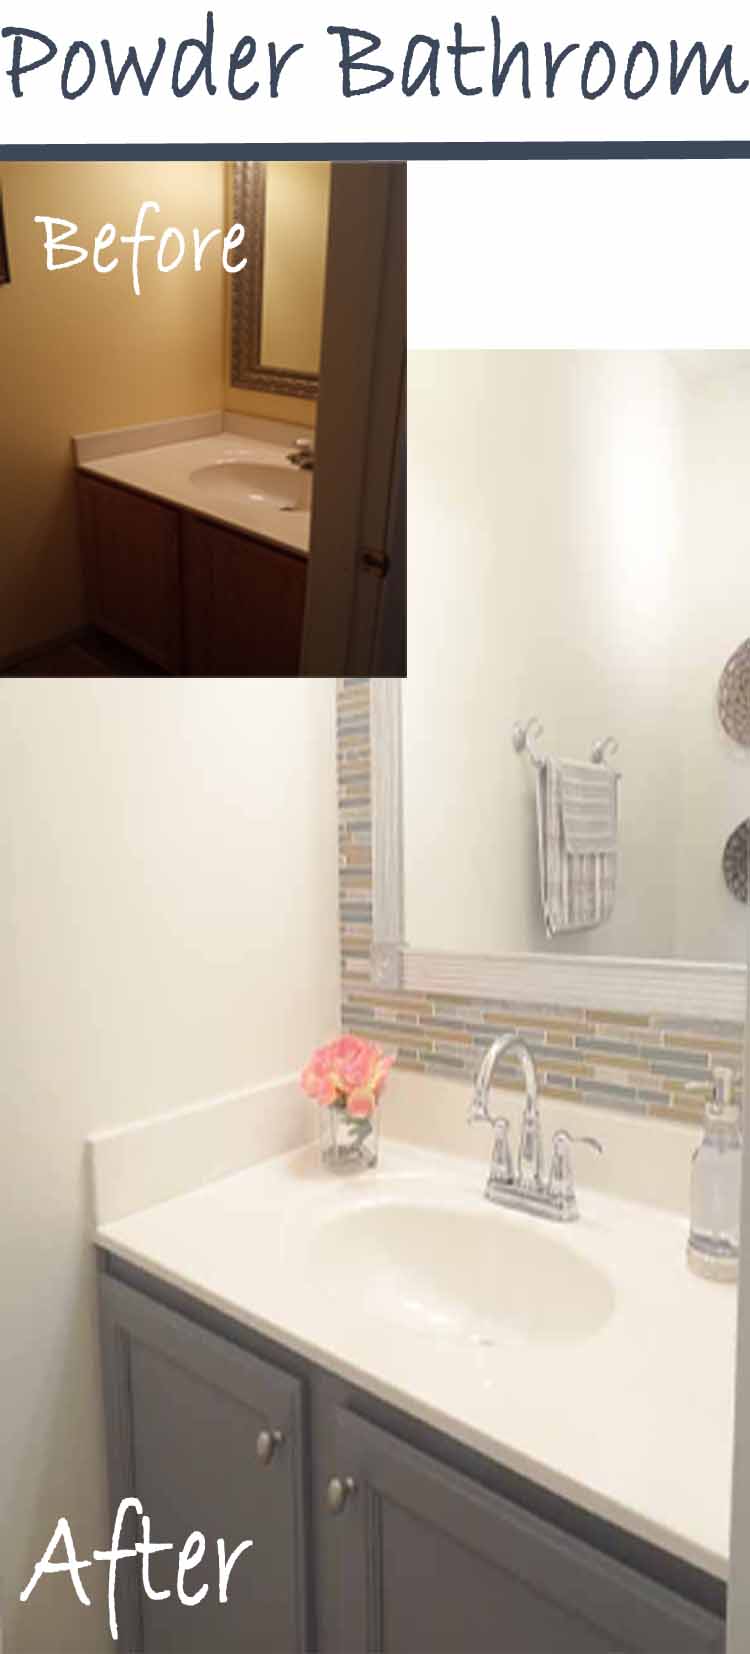
Hello! I excited to share my friend Lolly’s powder bathroom makeover today. We started working on it a few weeks ago with the attempts to make it a bit more up-to-date and stylish.
Lolly gave me free reigns on the designing front which was fun and she did all the hard work DIY-ing. I definitely got the long end the stick.:-)
So here are the Before and Afters:
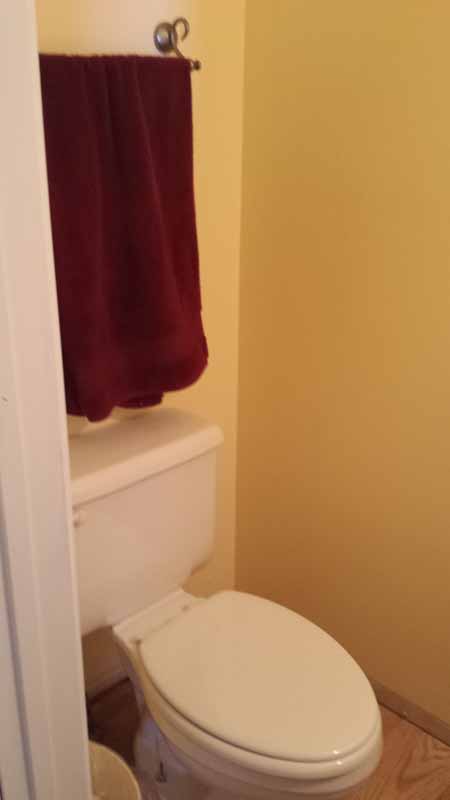
Before- Looking straight in from the hall

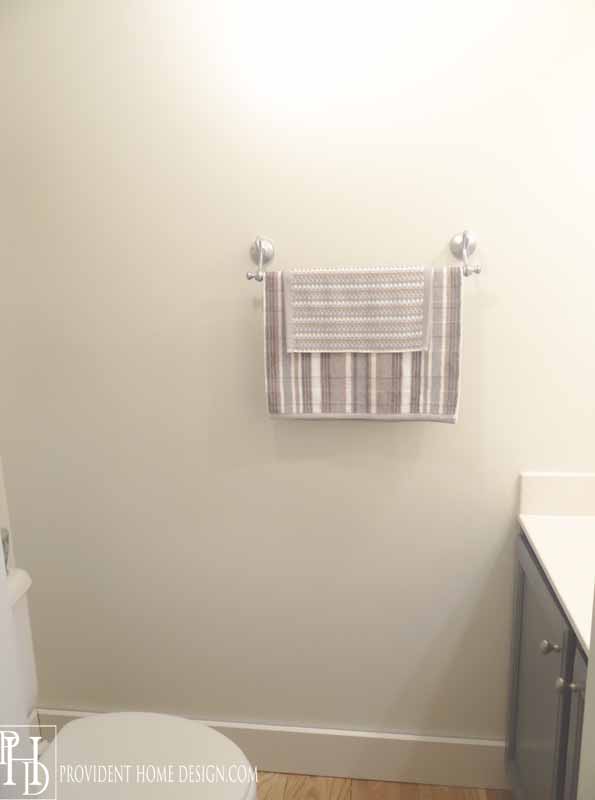
After
Before

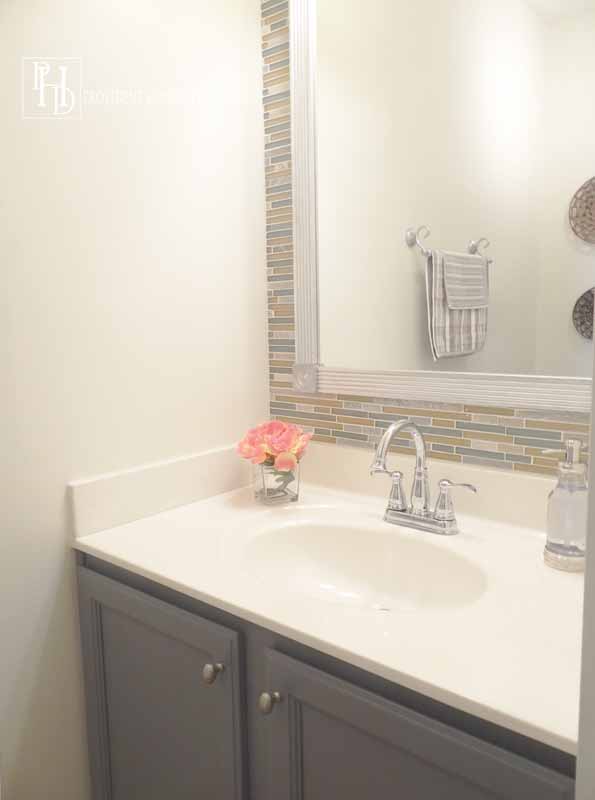
After
Before
After
Big change, right? So what did we do?
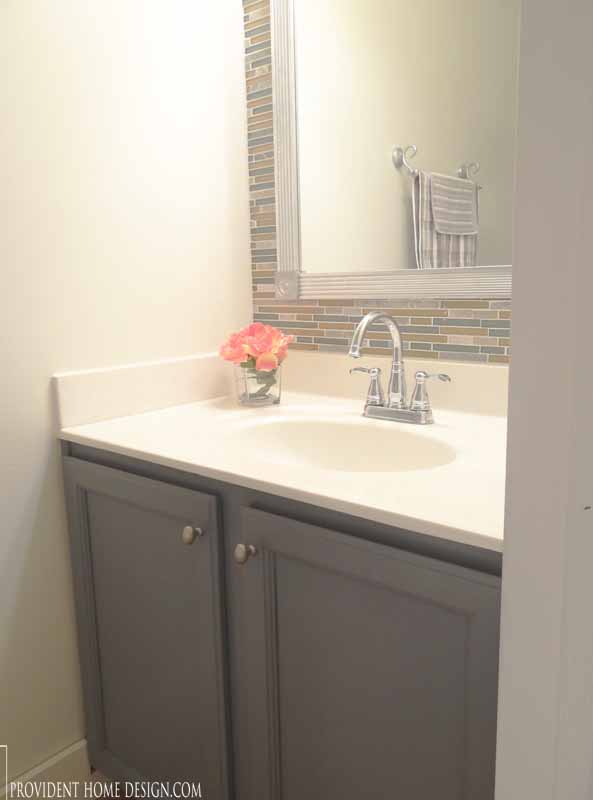
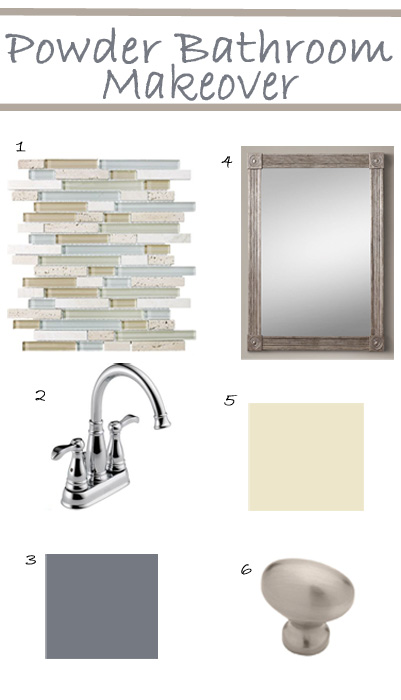
First thing Lolly did was paint her bathroom walls Valspar Decadent. I would describe Valspar Decadent as a cream with gray undertones. We knew painting the walls a lighter color would be important in helping the tight space feel more spacious.
Next Lolly moved her towel bar from the back wall to the side wall as it made more sense to have it closer to the sink. But before re-installing we gave it a new chrome metallic sheen with the same spray paint used on the DIY mirror.
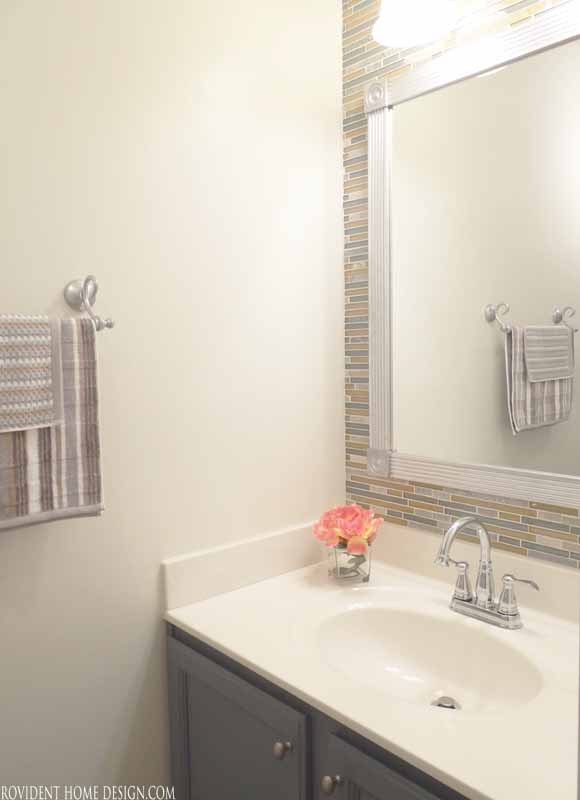
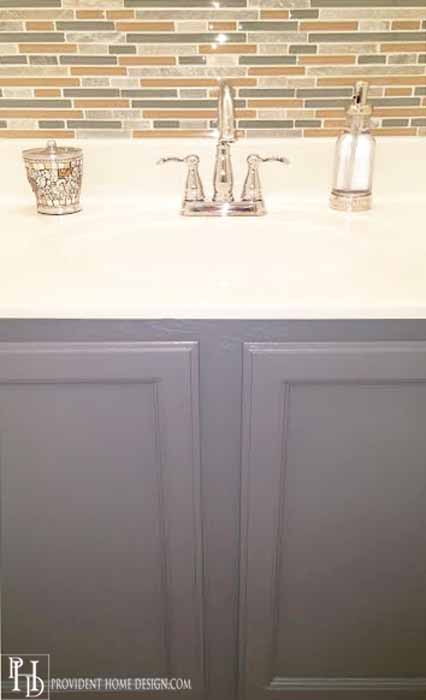
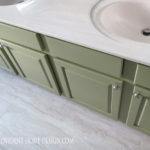
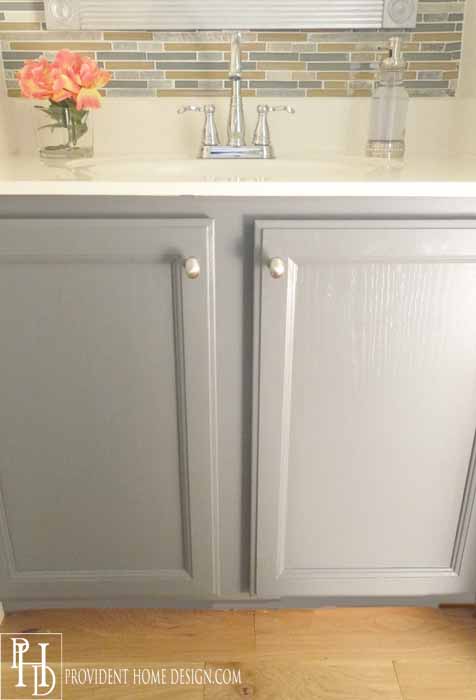
Then Lolly painted her cabinets Behr Liquid Mercury which definitely falls under the slate blue/gray family (tutorial for painting bathroom vanities HERE).
I’ve been crushing on this color for bathroom vanities ever since I saw it in a Restoration Hardware catalog. This wasn’t the photo but it is the color I love.
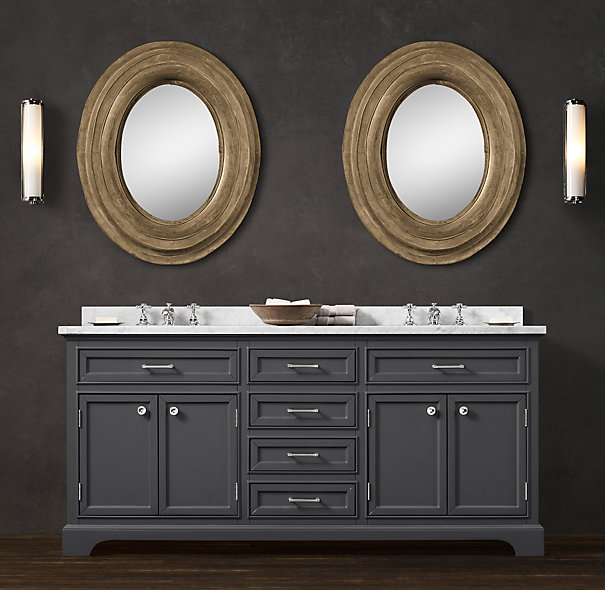
via RH.com
After the cabinets were dry she added lovely oval shaped knobs to the cabinet doors by drilling holes in the cabinet doors and then screwing the knobs in (this is a very simple and inexpensive way to add some personality to your bathroom vanity). The knobs were only $2.59 a piece.
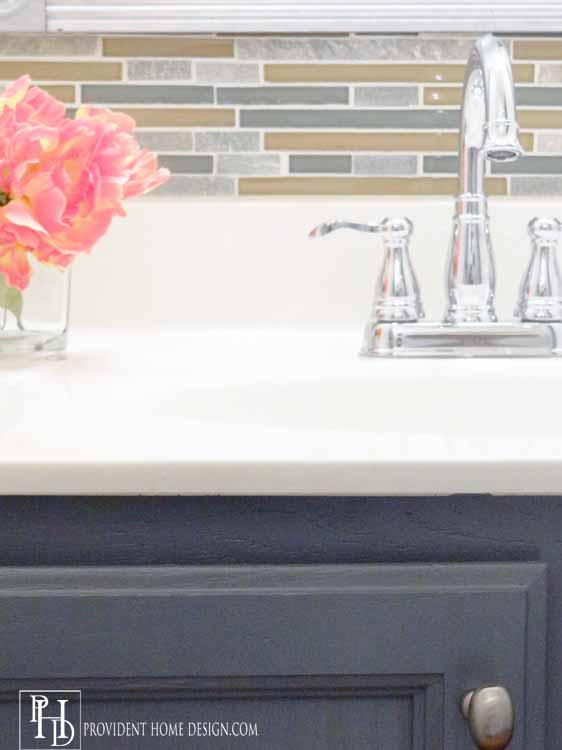
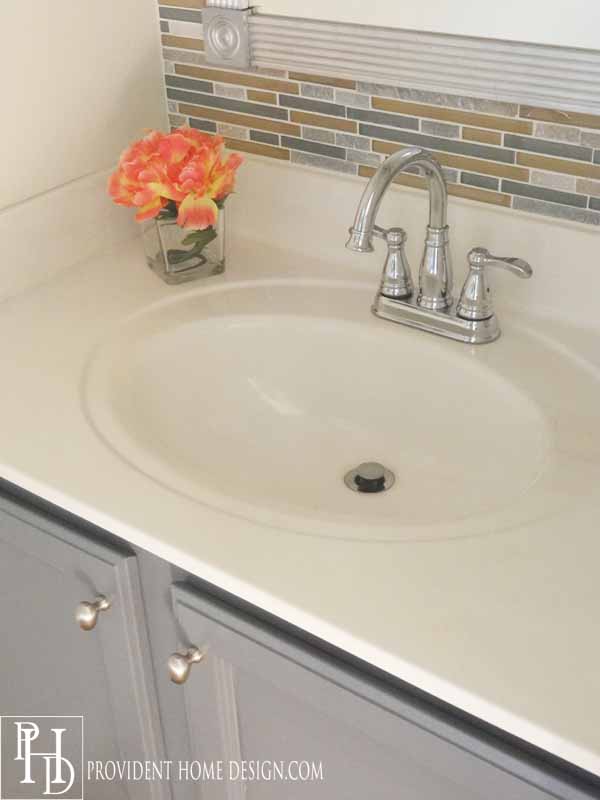
Lolly’s powder bathroom had the basic builder faux crystal faucet fixture and I just knew once it was replaced with something less basic that it would make a world of difference and it did!
I suggested she look for a gooseneck shaped faucet and she came back with this beautiful Delta faucet for only $68. And thanks to her hubby, Doug, for installing it!

Next she added a glass and stone mosaic tile backsplash all the way from the sink to the ceiling. This was a backsplash I found on clearance for $1.84 a sqft. at Home Depot a couple of months ago.
She did a great job and please believe when I say you could do this too! Here is my step by step backsplash tutorial if you are interested.
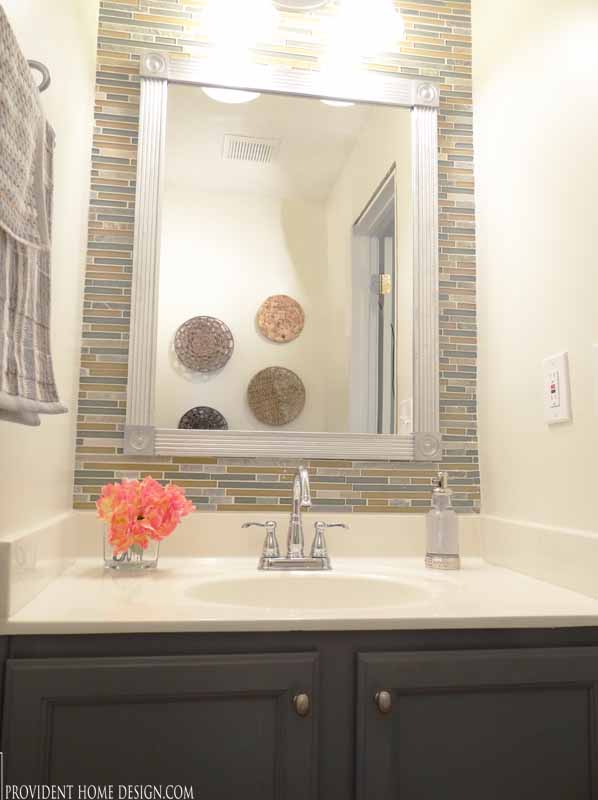
The DIY mirror is a Restoration Hardware knockoff. Their version is on sale for $739. Our version only cost $35 to make. Tutorial to come!
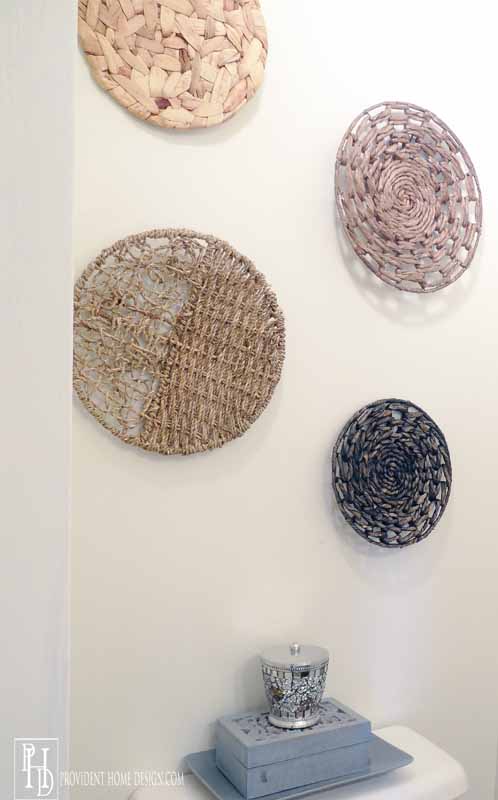
Lastly we accessorized with some new hand towels, a pretty soap dispenser, and the basket weave wall art–all from Homegoods and all inexpensive.:-)
We purchased the vase and flowers from the Dollar tree for a whopping $2. I love how the orange flowers pop against the slate blue cabinets!
I’m really happy with how it turned out and more importantly Lolly is too!:-)
Here are some sources from the bathroom makeover if you are interested. The tile is the closest I could find to what we used and of course the mirror tutorial will be coming soon. Update: Here is the link to the Restoration Hardware Knockoff Mirror.
Please let me know if you have any questions!! And as always thanks for being here!;-)

[jetpack_subscription_form]
Related Posts From the Blog:
 How to Paint a Bathroom Vanity like a Professional
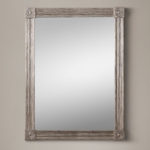 Restoration Hardware Knockoff Mirror
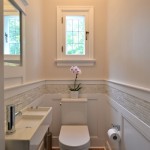 Powder Bathroom Makeover Reveal
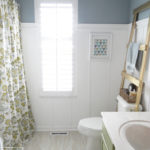 Kids and Guest Bathroom Reveal
 10 Steps to a High-end Kitchen on a Low-end Budget
 How to Replace a Hollywood Light with 2 Vanity Lights & How to Patch a Hole in the Wall like a Pro
 Painting Wood Furniture (without sanding or priming)!
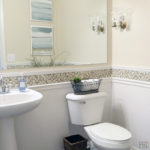 When Mirrors Fall Down