It was probably about a year ago that a friend was getting rid of some Restoration Hardware Catalogs and asked me if I wanted them. Me being the design lover that I am said, yes! I love to study spaces and furniture and all things décor.
I knew Restoration Hardware was way out of my league price wise but I’m always looking for ways to get a high-end look on a low-end budget and this means searching high-end products for inspiration!
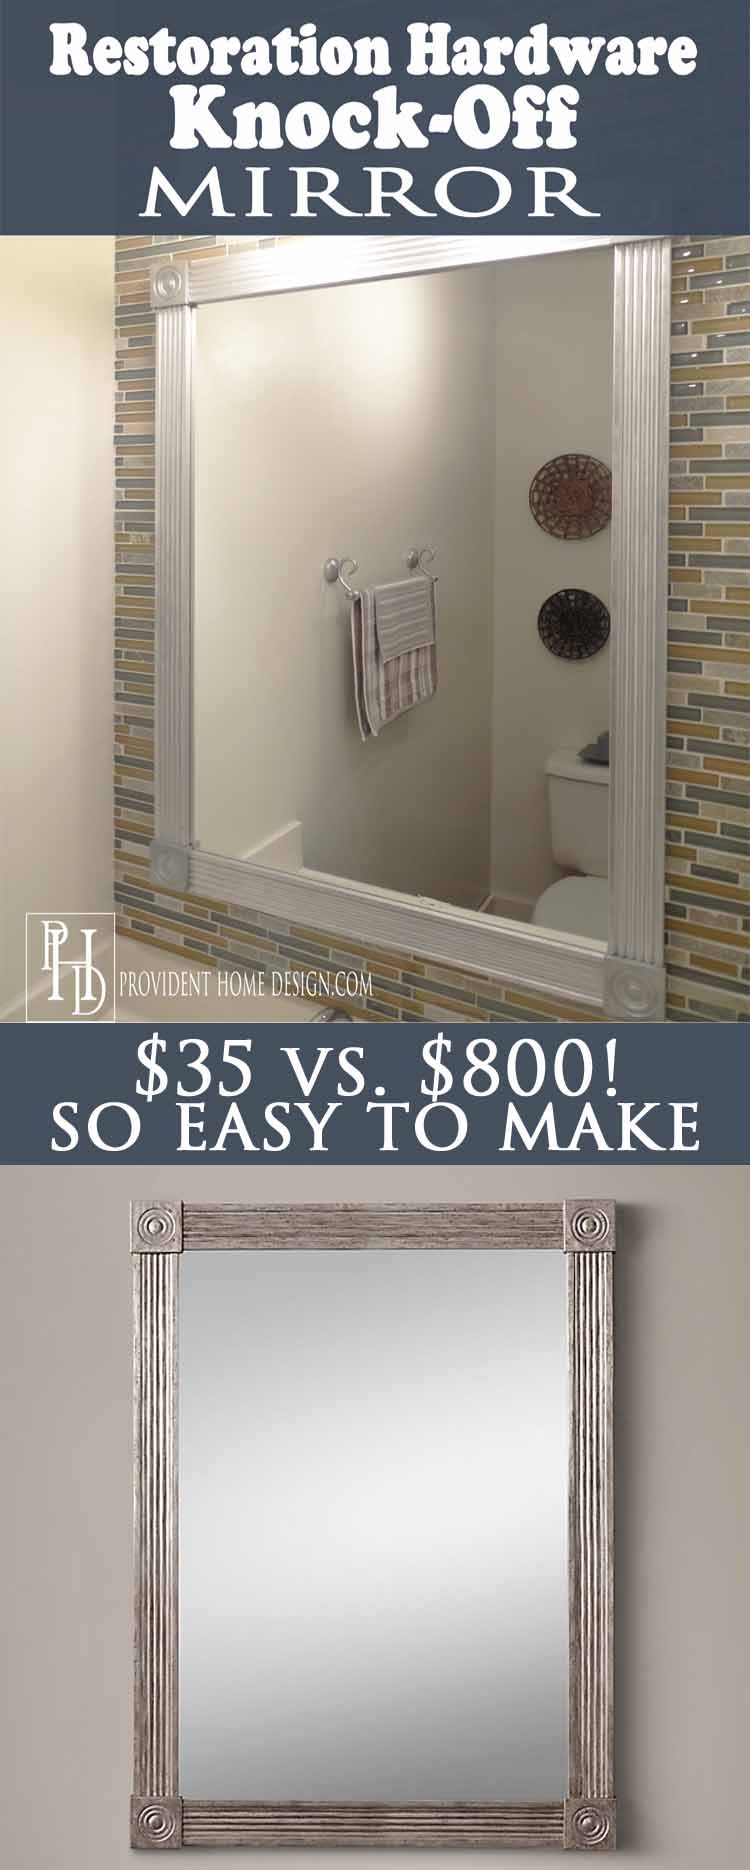
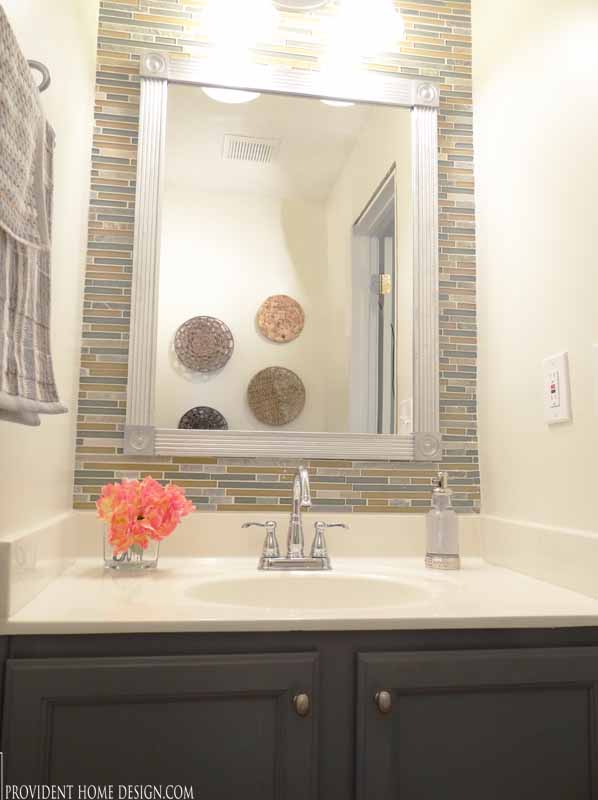
I loved the clean lines of this classic Restoration Hardware mirror and immediately thought of a way I could replicate the look for A LOT less.

The price of this Restoration Hardware mirror is on sale right now for $739. My version costs under $40 and is easy to make. Big difference, right?
So when I recently helped a friend makeover her powder bathroom I finally put my knockoff idea into reality and I’m so happy with the results!
This is a great beginner’s project because it doesn’t require any special tools. Any cuts made can be done at the store when you purchase the wood or with a hand saw and miter box.
The first step is deciding what size of mirror you want to make. We measured the wall space above the sink in my friend’s bathroom and decided that a 28″x36″ mirror would look best.
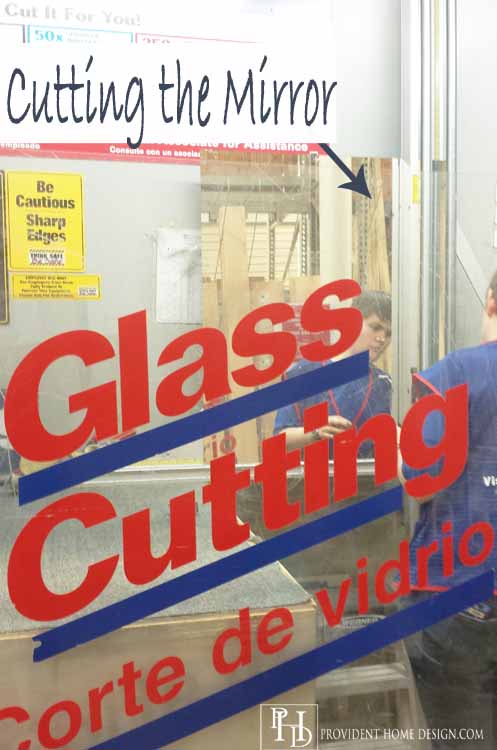
The next step is to go to the Lowe’s Glass Cutting Station (Home Depot doesn’t have one) which is located next to the wood trim aisle at my local Lowe’s.
Below is their price sheet for glass and mirror. This is also where I got my glass when I installed glass in one of my kitchen cabinet doors.
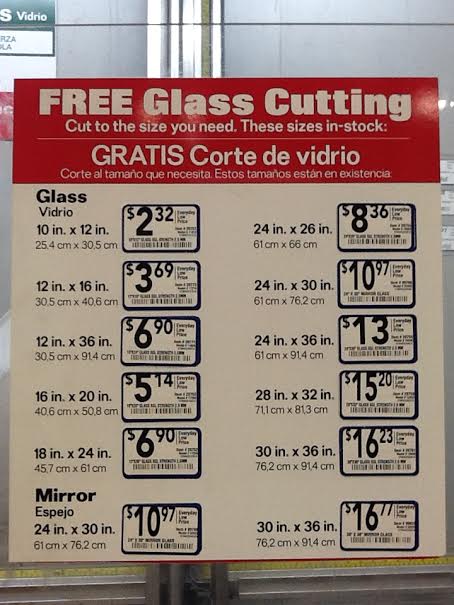
We purchased the 30in. x 36in. size for $16.77 and had them cut it down to 28in. x 36 in.
The next step is to purchase the wood. Many home improvement stores will sell fluted window casing sets which will contain all the wood items you need, as seen below.
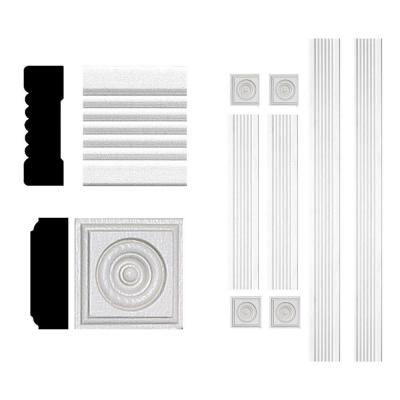
via Home Depot
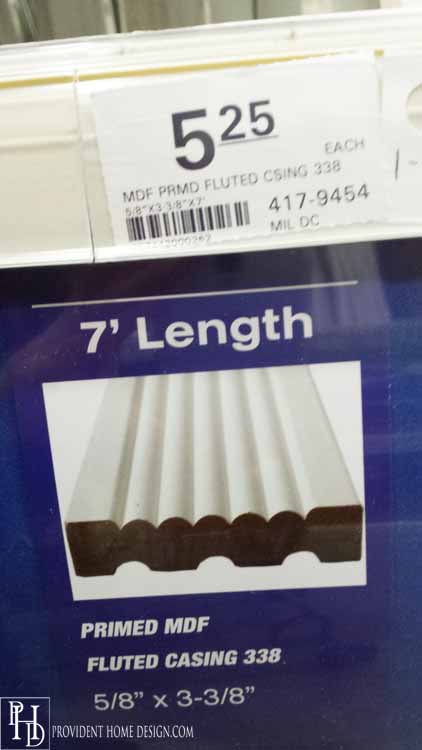
I ended up just buying it all separately. I bought (2) 7ft mdf fluted casings and 4 rosettes which are also in the wood trim aisle (the width of the trim was 2-1/4inch). All the wood came to a total of about $15.
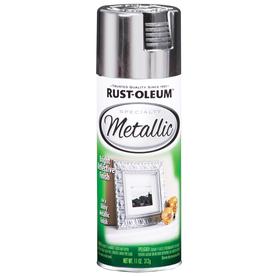
After cutting my fluted wood trim to the right lengths I spray painted all the wood trim metallic silver. You could paint it whatever your heart desires!
Note: To know what to cut the length and width of the fluted trim it should work to measure the length of the mirror and then minus 4 -7/8 inches and for the width to measure the width of the mirror minus 4 -7/8 inches.
Next I set the rosettes in the corners and the fluted trim pieces flush against the sides of the mirror.
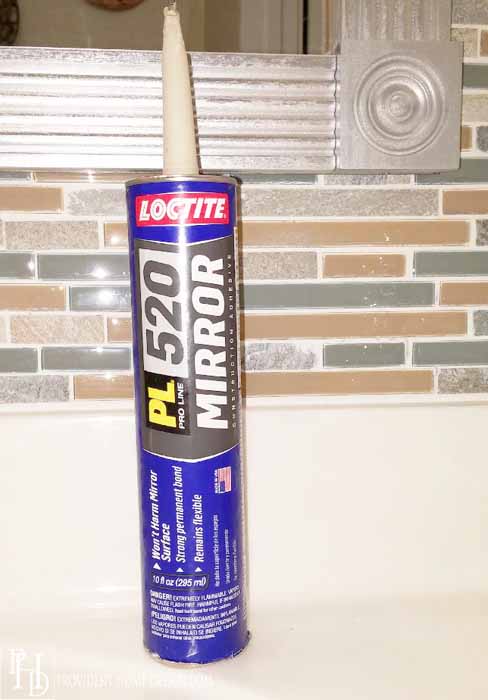
Carefully remove one trim piece at a time, adding mirror mastic adhesive to the mirror and putting the trim piece back on top of the mirror mastic making sure the adhesive doesn’t spread onto the center of the mirror and making sure the side of the fluted trim is flush with the edge of the mirror.
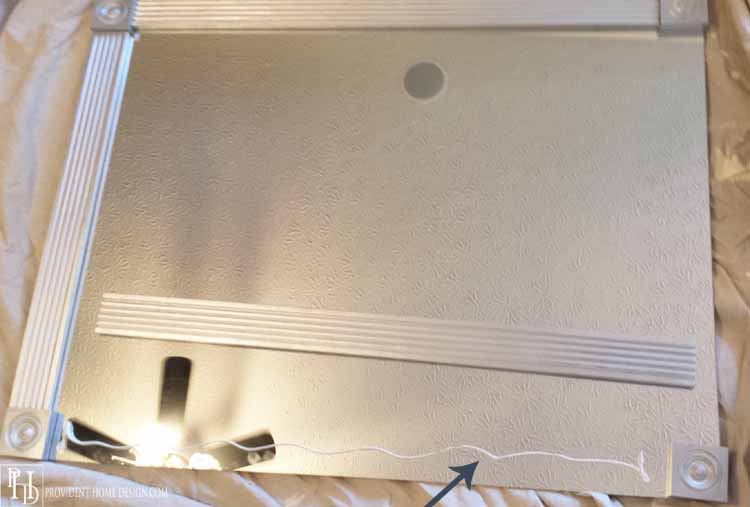
When the sides have all been glued down then add a glob of mirror mastic to each of the corners of the mirror and place the rosettes carefully on top.
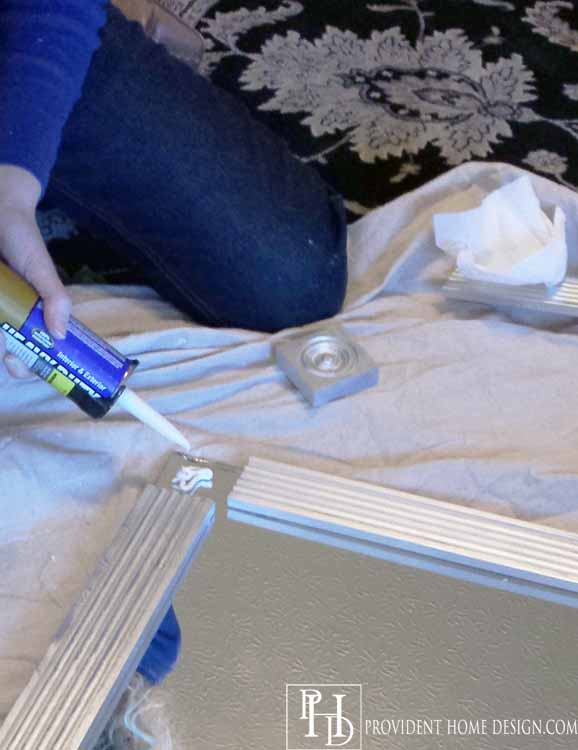
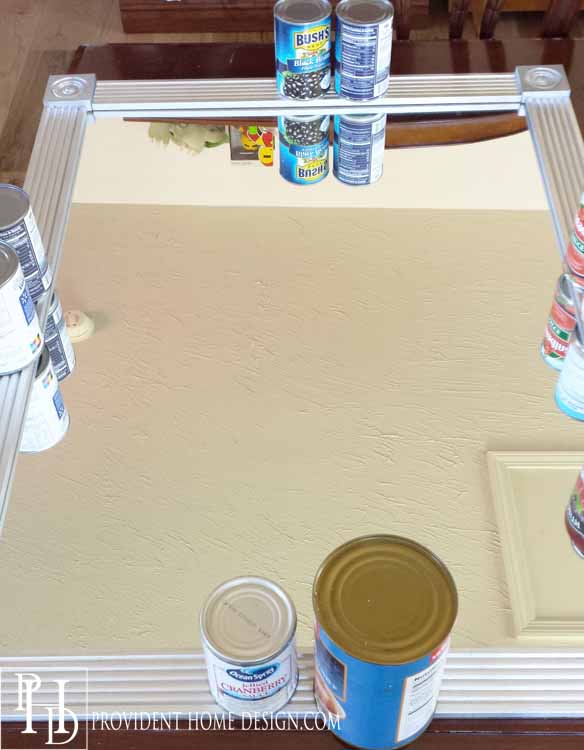
Now that the trim pieces are all in place make sure the wood trim is sitting flat against the mirror. We noticed that some of our trim pieces were bowing up so we placed some cans on top to ensure the trim adhered correctly to the mirror.
Leave the mirror untouched for 24 hours. After the 24 hours you are ready to install the mirror!
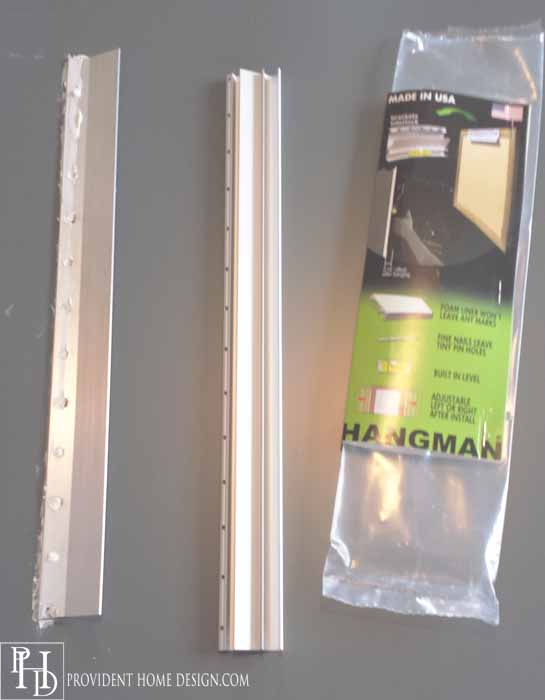
There are various ways you could hang the mirror. One option is to adhere it directly to the wall. We chose to use a cleat hanging system called Hangman which you can buy at most home improvement stores.
Next using the mirror mastic adhere the hanging system to the back of the mirror (making sure it is level) and let it dry the specified amount of time.

My friend, Lolly, screwed a 12×12 piece of wood to the middle of her wall before tiling the wall and then tiled around it.

She used the mirror mastic to adhere the other part of the hanging system to the board again making sure it was level and letting it dry the appropriate amount of time.
Note: Make sure you measure out where you want the mirror to hang on the wall because that will determine where you glue the hanging system.
Then just join the two cleats together and, VOILA, you have yourself an awesome new mirror that you made yourself!
Let me know if you have any questions! I’ll be back with a couple more DIYs next week! I hope you have a great rest of the week!