Provident Home Design

Decor, DIY, and Interior Design

  • HOME
  • ABOUT
    • About PHD
    • Contact Me
  • DIY PROJECTS
  • DESIGN 101
  • PAINT
  • HOME TOUR
  • DESIGN INSPO
  • DECOR TIPS

GET NOTIFIED VIA EMAIL WHEN THERE'S A NEW POST!

My Rustic Christmas Mantel & A DIY Pallet Project

It was about this time last year that I received a Ballard Design catalog in the mail which inspired my Rustic Mantel DIY. It was the photo below found on the front cover to be exact!

Inspiration photo for Pallet Project


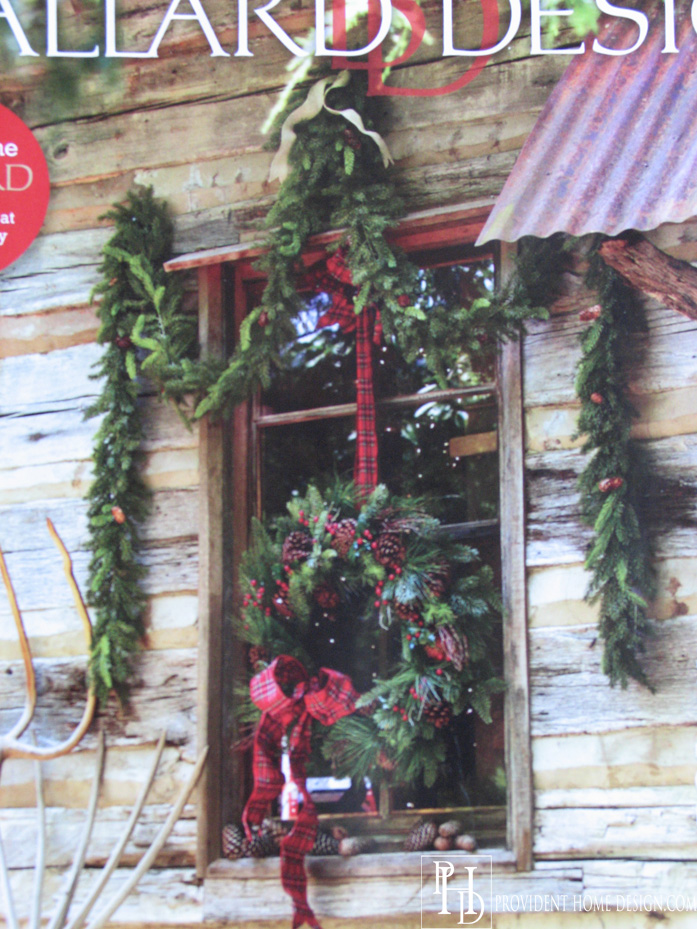
I loved the cozy cabin feel and wanted to create a similar ambiance in my family room for the Holidays! But, how??

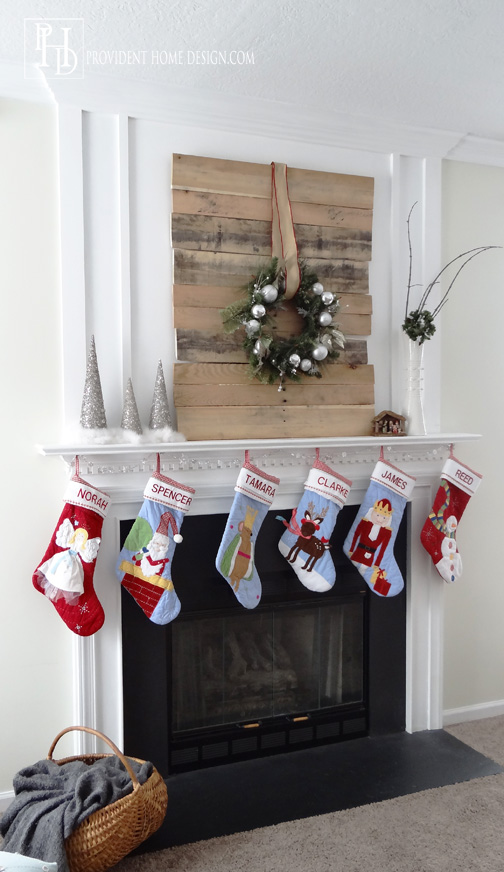
The idea came to use a pallet. I had seen loads of pallet projects and had always loved the idea of doing one given the “free” nature of pallets.

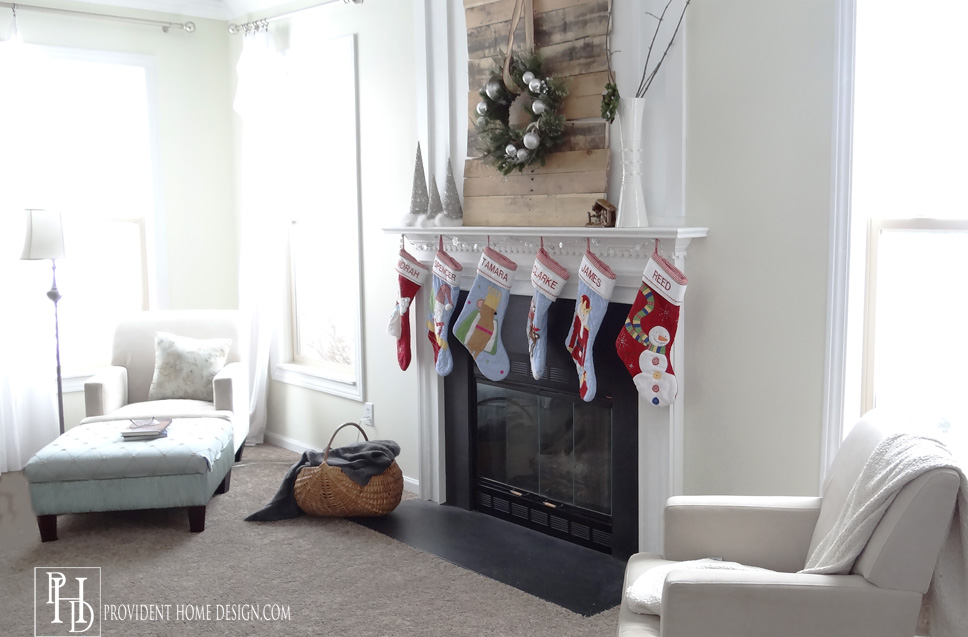
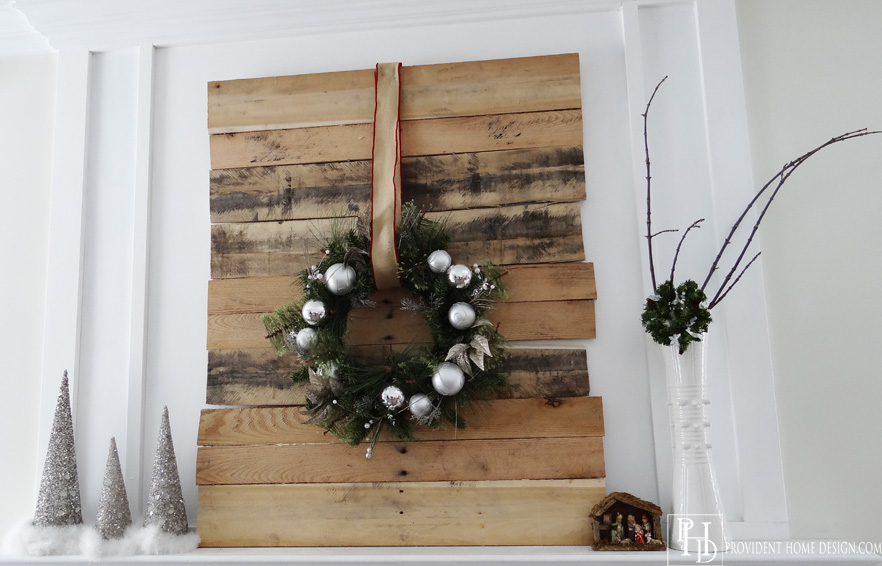
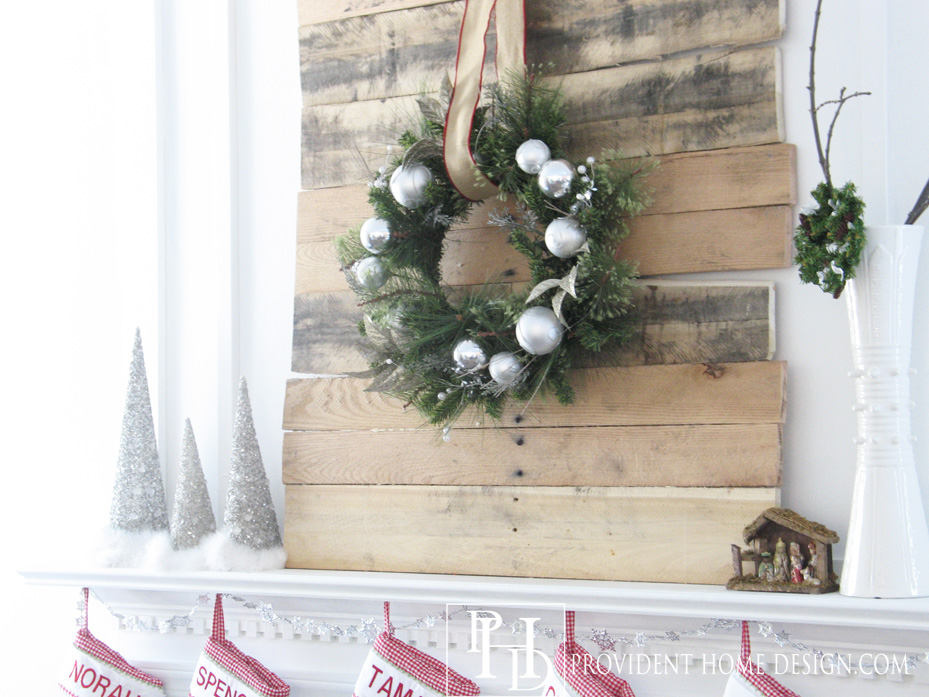
Here are the results!

Christmas Pallet DIY Idea


Christmas Pallet Decor


Christmas Rustic Mantle DIY


Christmas Mantle Pallet DIY


Christmas Pallet Project--Rustic Mantle Decor


This pallet project is fairly easy (the hardest part is probably locating a pallet). I found my pallet behind a strip of stores. It was leaned up against a dumpster 100 feet f rom the back door of the store. It was obviously being thrown away.

pallet

There is almost always a back alley behind stores where the trucks go to deliver new products. When I drive back there I often see pallets discarded behind stores. Just be sure to ask first before taking one!

Craigslist is also a great place to look for free pallets. Under the “for sale” category there is a “free” section with a search box. When I entered the word “pallets” seven options came up.

Once you secure your pallet you can simply deconstruct the pallet with a saw. I used my $40 jig saw that has come in handy for lots of projects but you could also use a hand saw.

use jigsaw to cut pallet_edited-1

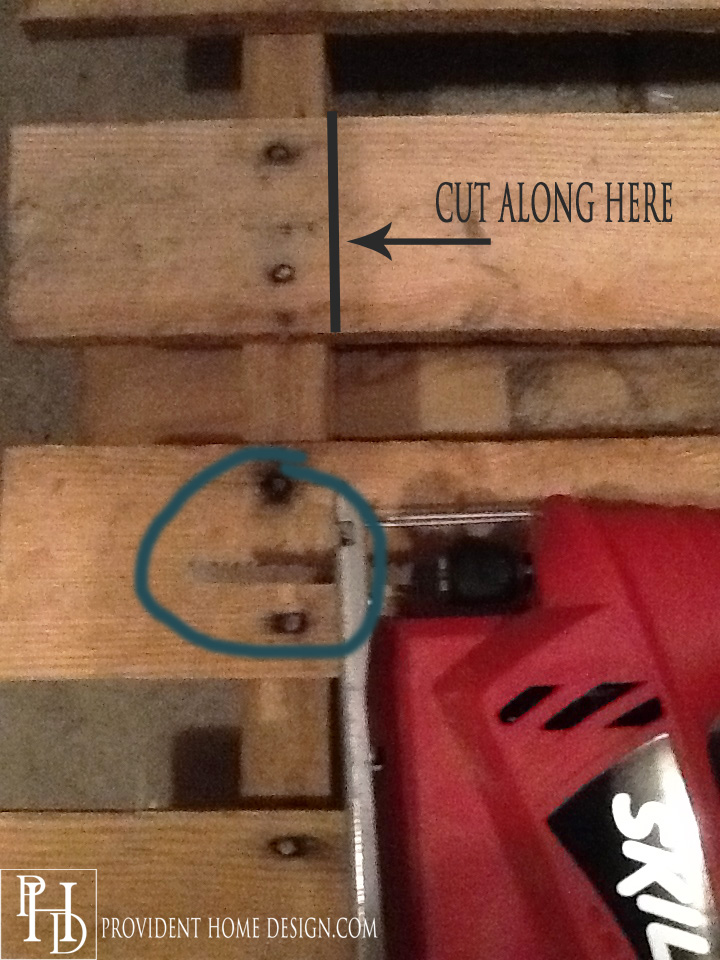
Another method is using a back of a hammer or a pry bar to pry the pallet apart.

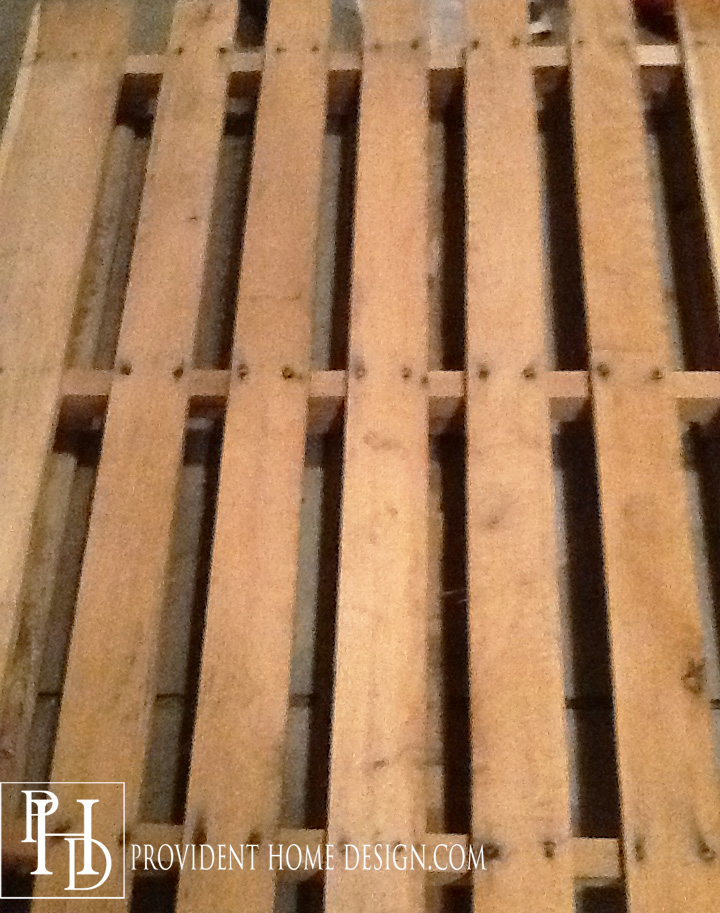
Once apart simply line the boards up (like below).  I then used two 1×3 pieces of wood that I had in my scrap pile. You can purchase a 8ft. pine 1×2 or 1×3 for under $4. Then cut the 8ft  1×2 (or 1×3) into two pieces that are long enough to touch all of the boards in the row.

How to Build a Pallet Decor Backdrop

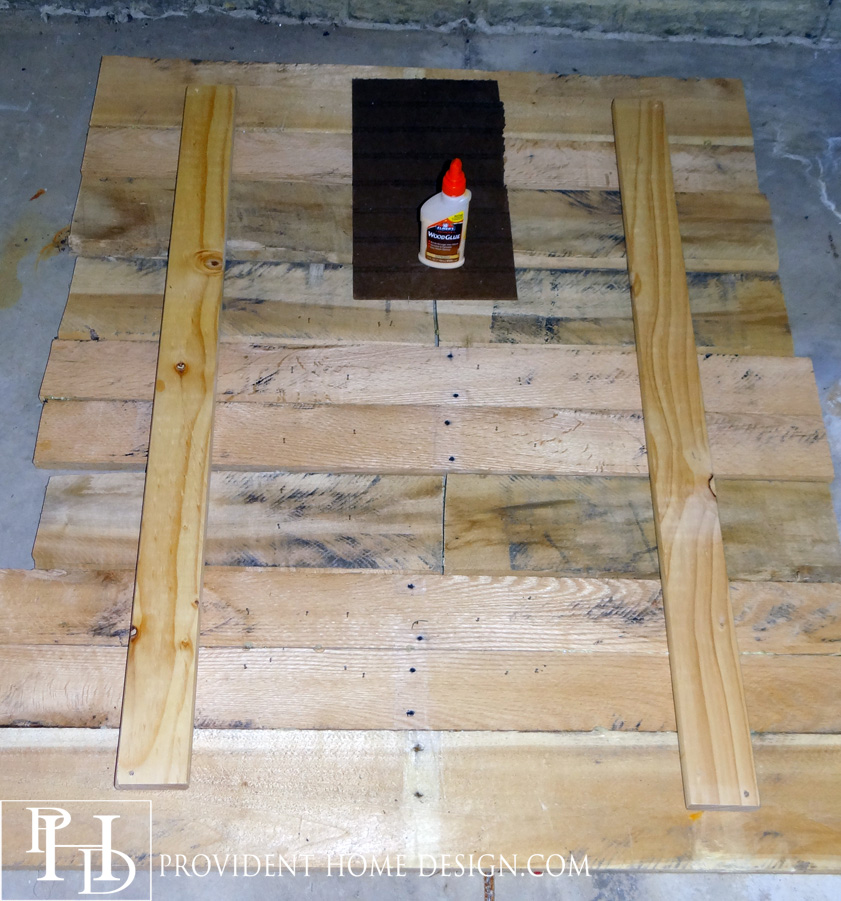
Apply a long line of wood glue or Liquid Nails to both pieces of pine and turn them over onto the pallet boards. Leave untouched to dry and harden for 24 hours.

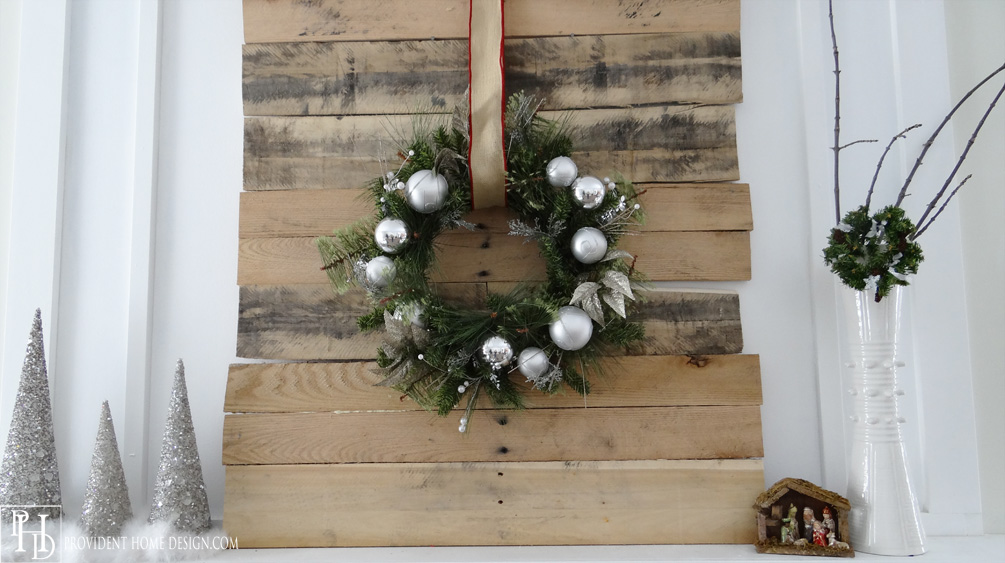
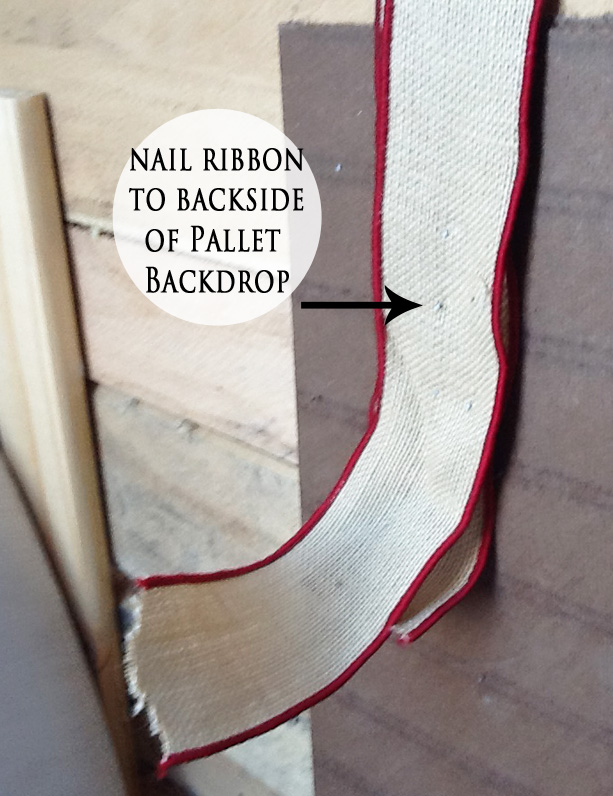
Now your rustic backdrop is done! Before putting it up on the mantel I hung a wreath from some thick decorative ribbon and nailed it to the back of the pallet backdrop.

Christmas Pallet DIY 2


Lastly, I placed the rustic pallet decor up on the mantel.  You may need a second set of hands if you make a large one because it can be pretty heavy.  Mine ended up being about 45 1/2 inches tall and 31 1/2 inches wide and I barely got it up there by myself (and I’m really strong):-).

DIY Christmas Pallet Decor


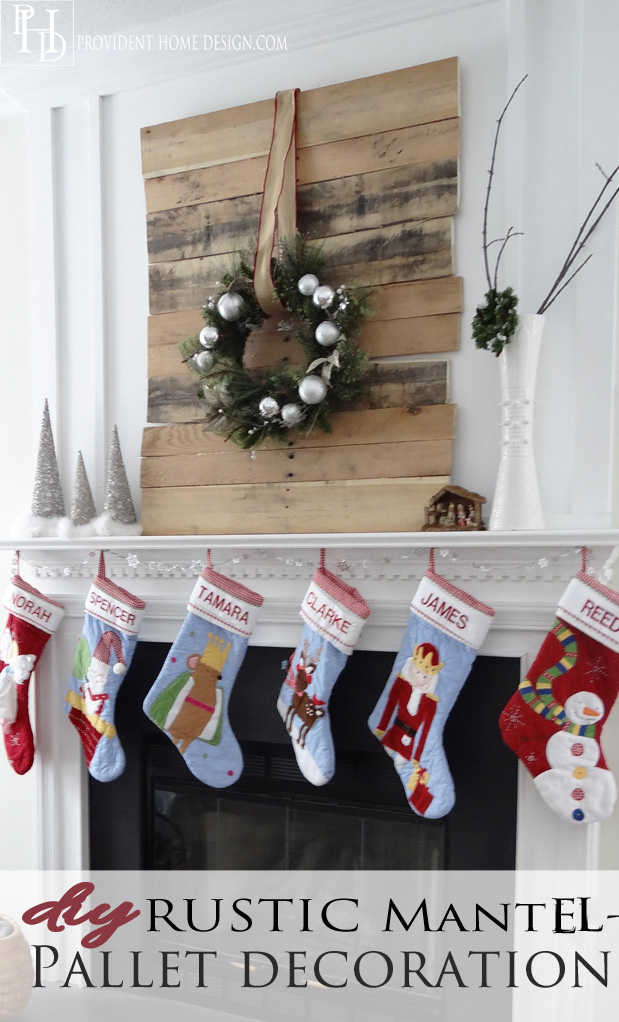
I’m looking forward to putting this rustic ensemble up again this year.  It exudes a cozy winter cabin vibe and makes me happy.  I hope you enjoyed this DIY!  As always let me know if you have any questions!!:-)

Signature

Related Posts From the Blog:

  • Beautiful Upholstered Headboard and Nailhead Trim TutorialBeautiful Upholstered Headboard and Nailhead Trim Tutorial
  • 11 Money-Saving Tips for Decorating Your Christmas Tree11 Money-Saving Tips for Decorating Your Christmas Tree
  • Painting Cabinets with Chalk PaintPainting Cabinets with Chalk Paint
  • DIY Pedestal Side TableDIY Pedestal Side Table
  • Parade Of Homes Home Tour  #1Parade Of Homes Home Tour #1
  • Gersby Bookcase IKEA HackGersby Bookcase IKEA Hack
  • How to Install a Tile Backsplash Pt. 2How to Install a Tile Backsplash Pt. 2
  • More Spray Paint MagicMore Spray Paint Magic

budget decor// decorating// DIY// holiday// inspiration// money saving tips// tutorials// wall art// woodwork9 Comments

Subscribe

GET NOTIFIED VIA EMAIL WHEN THERE IS A NEW POST!

« Warm Wishes- Easy Crockpot Chili & 12 Cozy Spaces to Inspire
Favorite Interior Designers Series – Martha O’Hara Interiors »

Comments

  1. Decorating Delirium says

    Sunday, November 23, 2014 at 11:21 pm

    I love your reconstructed pallet. It is the perfect backdrop for your beautiful wreath!

    Reply
    • Tamara says

      Monday, November 24, 2014 at 8:58 am

      Thank you, Jennifer!:-)

      Reply
  2. lindivs says

    Monday, November 24, 2014 at 5:36 pm

    This is beautiful Tamara! Love the silver trees too (I assume you made them also!). Thank you so much for sharing 🙂

    Reply
    • Tamara says

      Monday, November 24, 2014 at 5:47 pm

      You are welcome! I actually bought the silver trees after Christmas one year when they were 80% off. I love how they sparkle!:-)

      Reply
  3. dwellinginhappiness says

    Monday, November 24, 2014 at 10:18 pm

    I love this! So pretty!! I’m such a pallet fan, I’m always thinking of what else I can do!! I might need to make something like this for my Christmas decor, too! 🙂

    Reply
    • Tamara says

      Monday, November 24, 2014 at 10:26 pm

      Hi Amanda! Just hopped over to your blog and love your rustic arrow string wall art. So cute and creative! Thanks for stopping by today!!

      Reply
  4. Pam @ Simple Details says

    Sunday, November 30, 2014 at 8:29 pm

    Perfectly rustic and cozy, Tamara! great tutorial, you made it look so easy and straight forward1 Thanks for sharing at Best of the Nest!

    Reply
    • Tamara says

      Sunday, November 30, 2014 at 10:43 pm

      Thank you, Pam! Thanks for having me!!:-)

      Reply

Leave a Reply Cancel reply

Your email address will not be published. Required fields are marked *

Hello and Welcome!! My name is Tamara and this is where I share my tips and tricks to creating a beautiful home! If you are new, feel free to start HERE.

Subscribe

Get notified via email when there's a new post!

Join me on Instagram!

[instagram-feed]

More Blog Inspiration:-)

  • Icon Caroline on Design

    Close preview

    Loading...
  • Icon Centsational Girl

    Close preview

    Loading...
  • Icon Decorating Delirium

    Close preview

    Loading...
  • Icon Lauren Liess

    Close preview

    Loading...
  • Icon Life on Virginia Street

    Close preview

    Loading...
  • Icon Remodelaholic

    Close preview

    Loading...
  • Icon The Creativity Exchange

    Close preview

    Loading...
  • Icon Thrifty Decor Chick

    Close preview

    Loading...

Categories


Disclosure & Privacy Policy

You might also like

The Final Before & After of our Current Home

The Final Before & After of our Current Home

New Build Update-Paint, Lighting, and Floors oh My!

New Build Update-Paint, Lighting, and Floors oh My!

New Home Update

New Home Update

New Build Update- Cabinets are in!

New Build Update- Cabinets are in!

House Update–We Have Walls!

House Update–We Have Walls!

Join Me on Instagram!

[instagram-feed num=9 cols=9 showbutton=false]

Privacy

Copyright © 2021 · Savory theme by Restored 316

Enter your name and email to get my weekly post sent to your inbox... it's FREE!
Want to learn more about DIY, decorating, and making your home beautiful? Sign up below!
Your information will *never* be shared or sold to a 3rd party.