My goal is to do Design 101 posts monthly. It’s hard for me to believe that it’s already been a month since I wrote the first Design 101 post on Layers! Time flies when you’re having fun.
So when people talk about flow in design they are referring to two aspects of the word. First, the functionality of the space and how it is used on a regular basis. For example, when you are cooking in your kitchen, are you able to get to and from the refrigerator, pantry, and stove without a lot of obstacles in your way? Functional flow speaks to our need to be able to use the spaces in our home without constant barriers or challenges that make it difficult.
The other aspect of flow is purely aesthetic. It is talking about how the eye responds to the visual scape of your home. When you are looking in a room, or lets say you are standing in a place in your house where you can see into more than one room at a time (like in a hallway or foyer), does you eye move easily around the space or are there distractions to the eye making the eye’s surveying more choppy and confused. I will touch on this one in Design 101- Flow (Pt-2)!
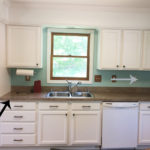
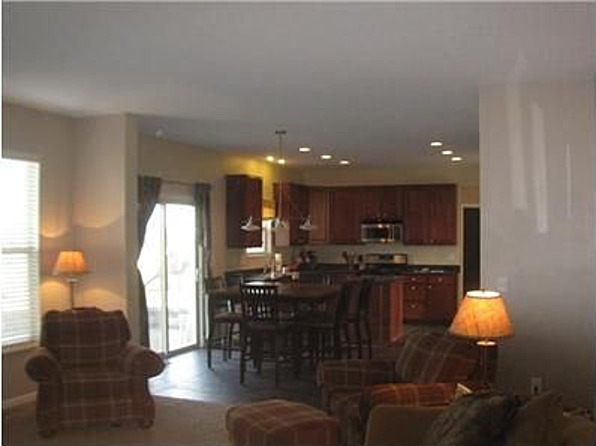
First, lets explore functional flow in more detail. When we came to look at our house before we bought it, I knew I was going to have to figure out a way to do the kitchen table differently. As you can see below there was an island and then a kitchen table and then the family room. I knew I wanted to have a long table and the way the kitchen was set up the table would have to go horizontally blocking flow to the family room and the sliding glass door (hence the outside).
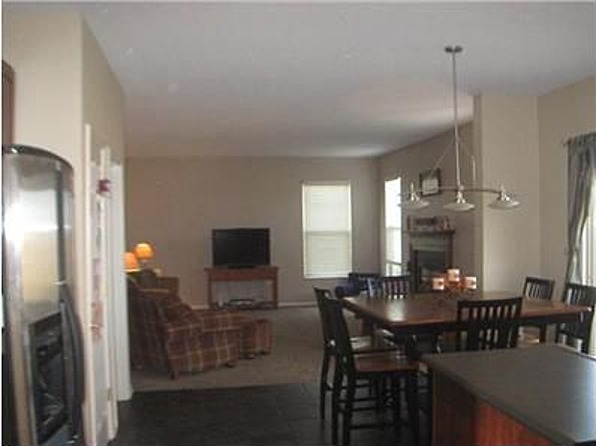
You can see better in the picture below that even with the previous owners square table the chairs came up pretty close to the sliding glass door.
Functionally this wouldn’t work for our family. We have a big backyard and very energetic children that need to be running around in that big backyard! My plan for the space was for the children to be able to come in and out of the sliding glass doors without any obstructions in the way, such as chairs. I also expected that in the winter the area would get filled up with boots and coats and other wet apparel after playing outside in the snow.
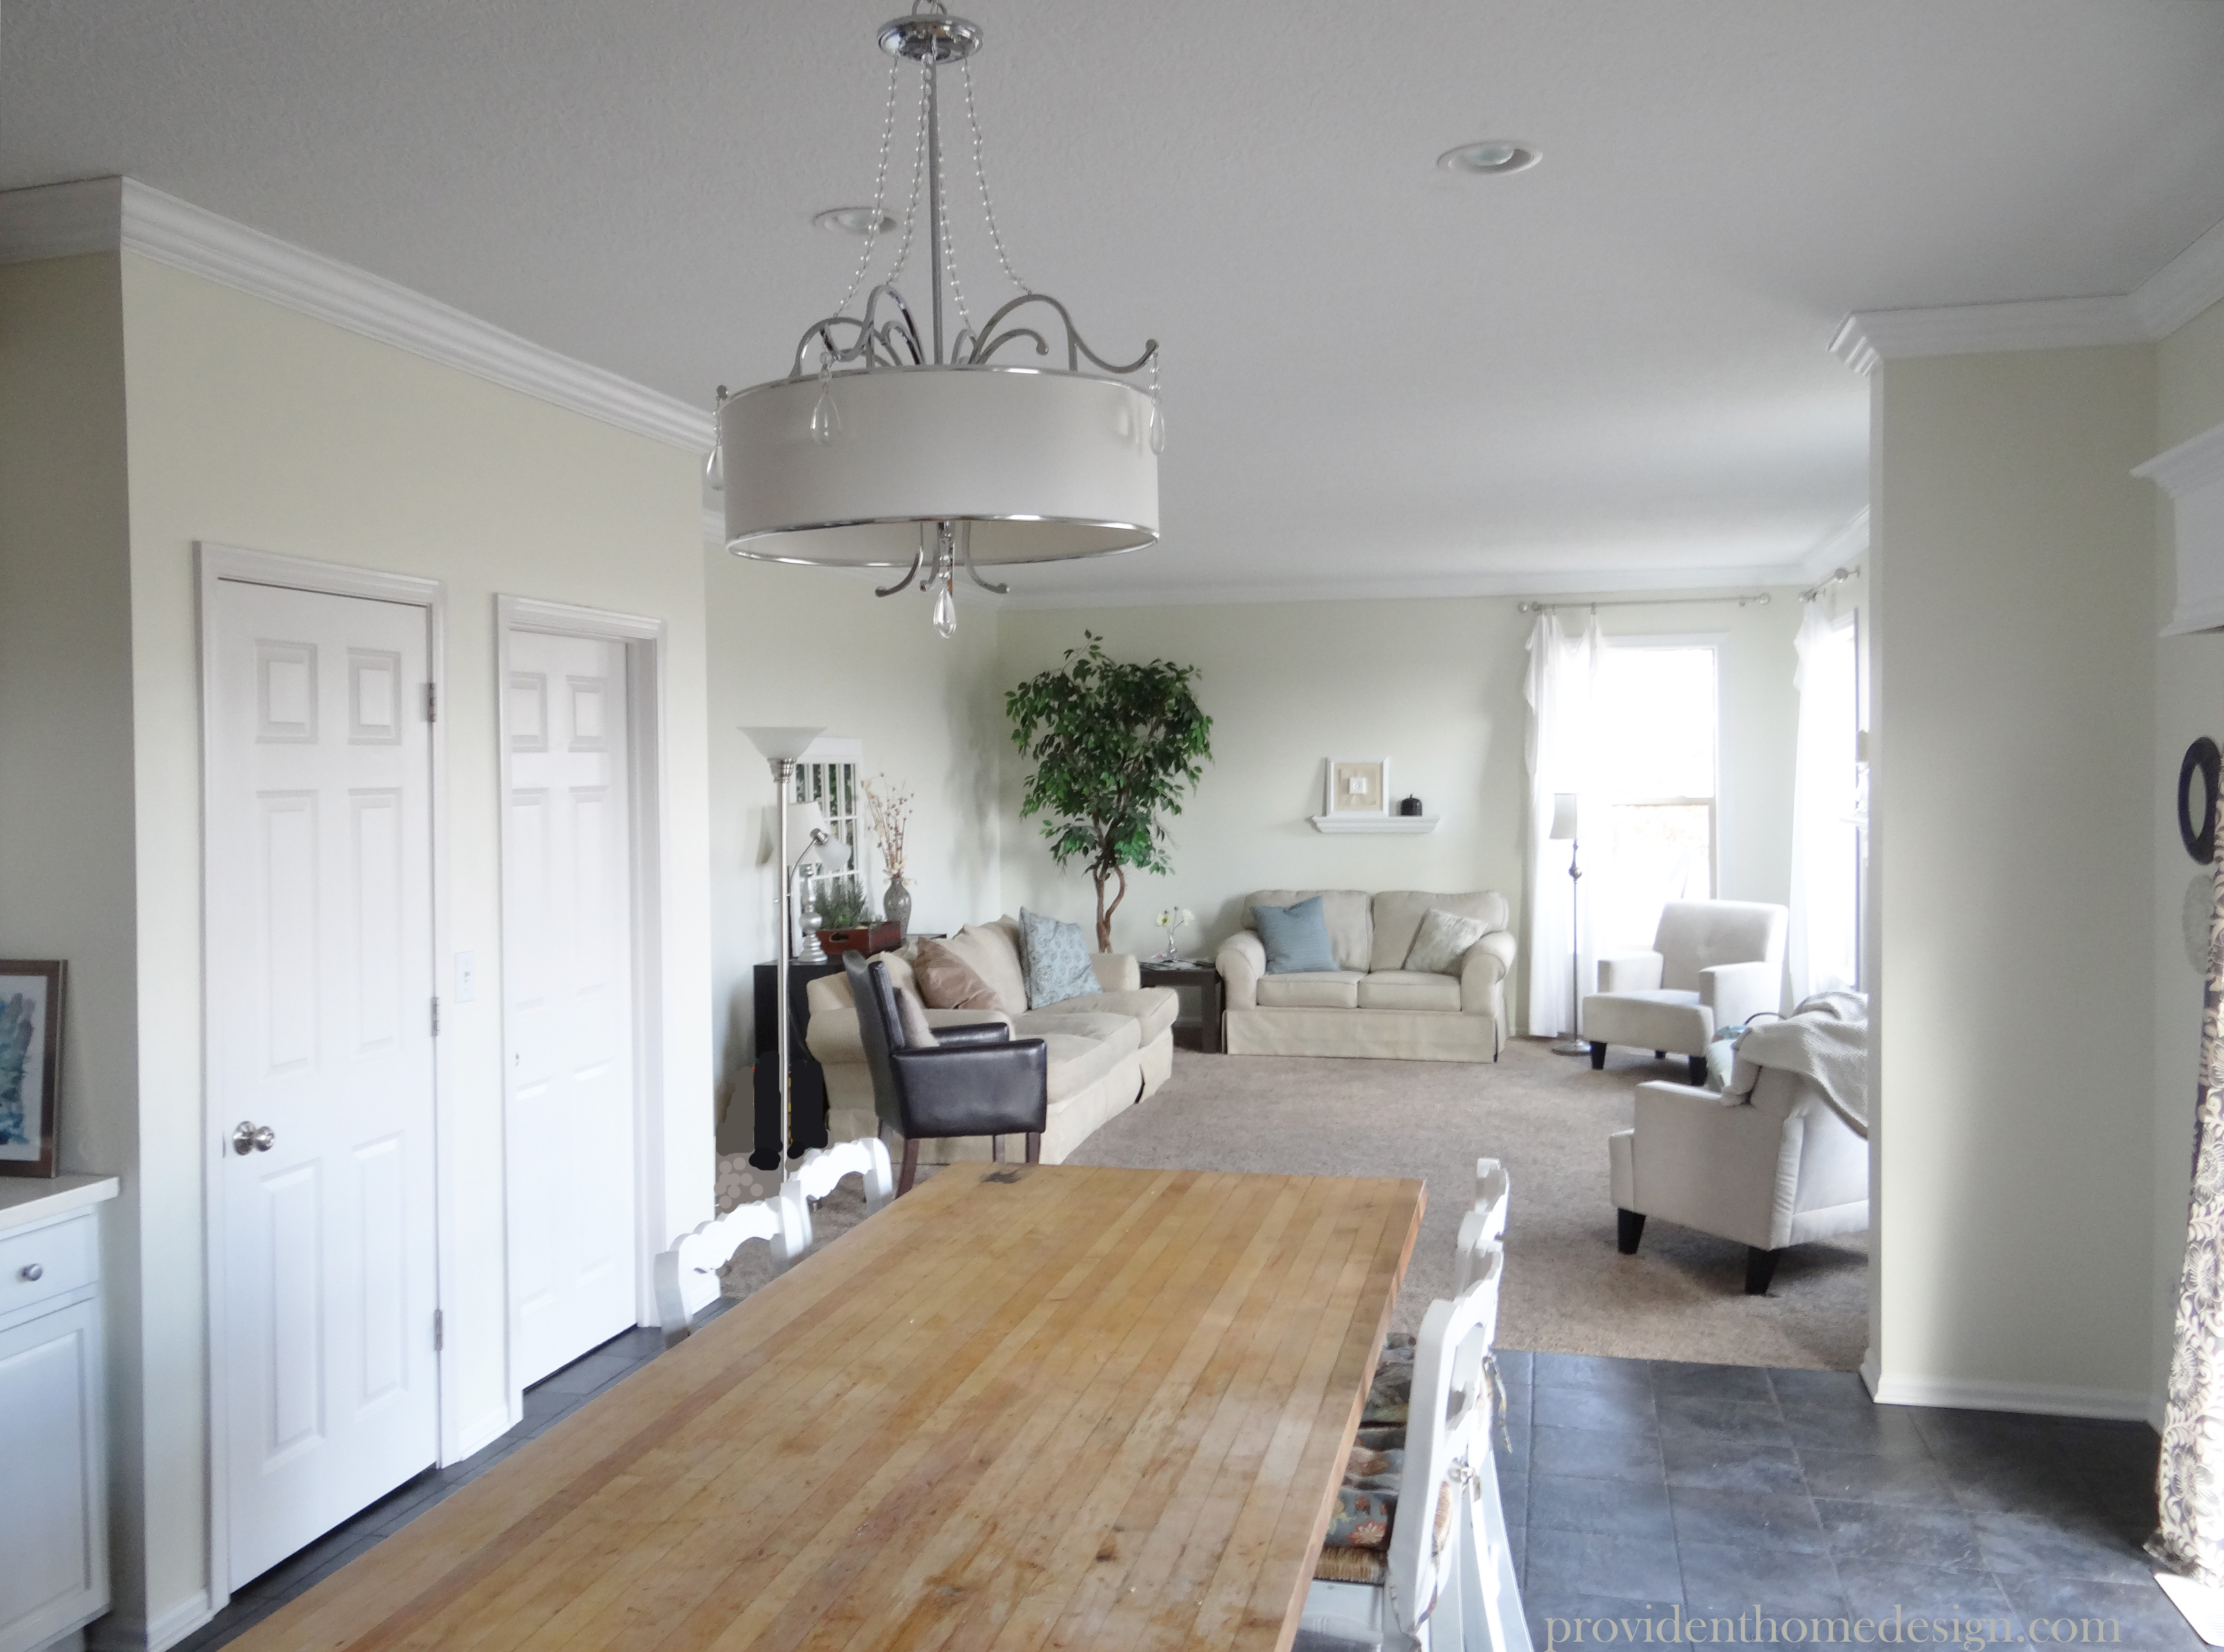
So to address this flow problem we decided to take out the island (which is now in the garage and holds my tools and miter saw) and to purchase a long, counter-height table that could act as a table and an island workspace.
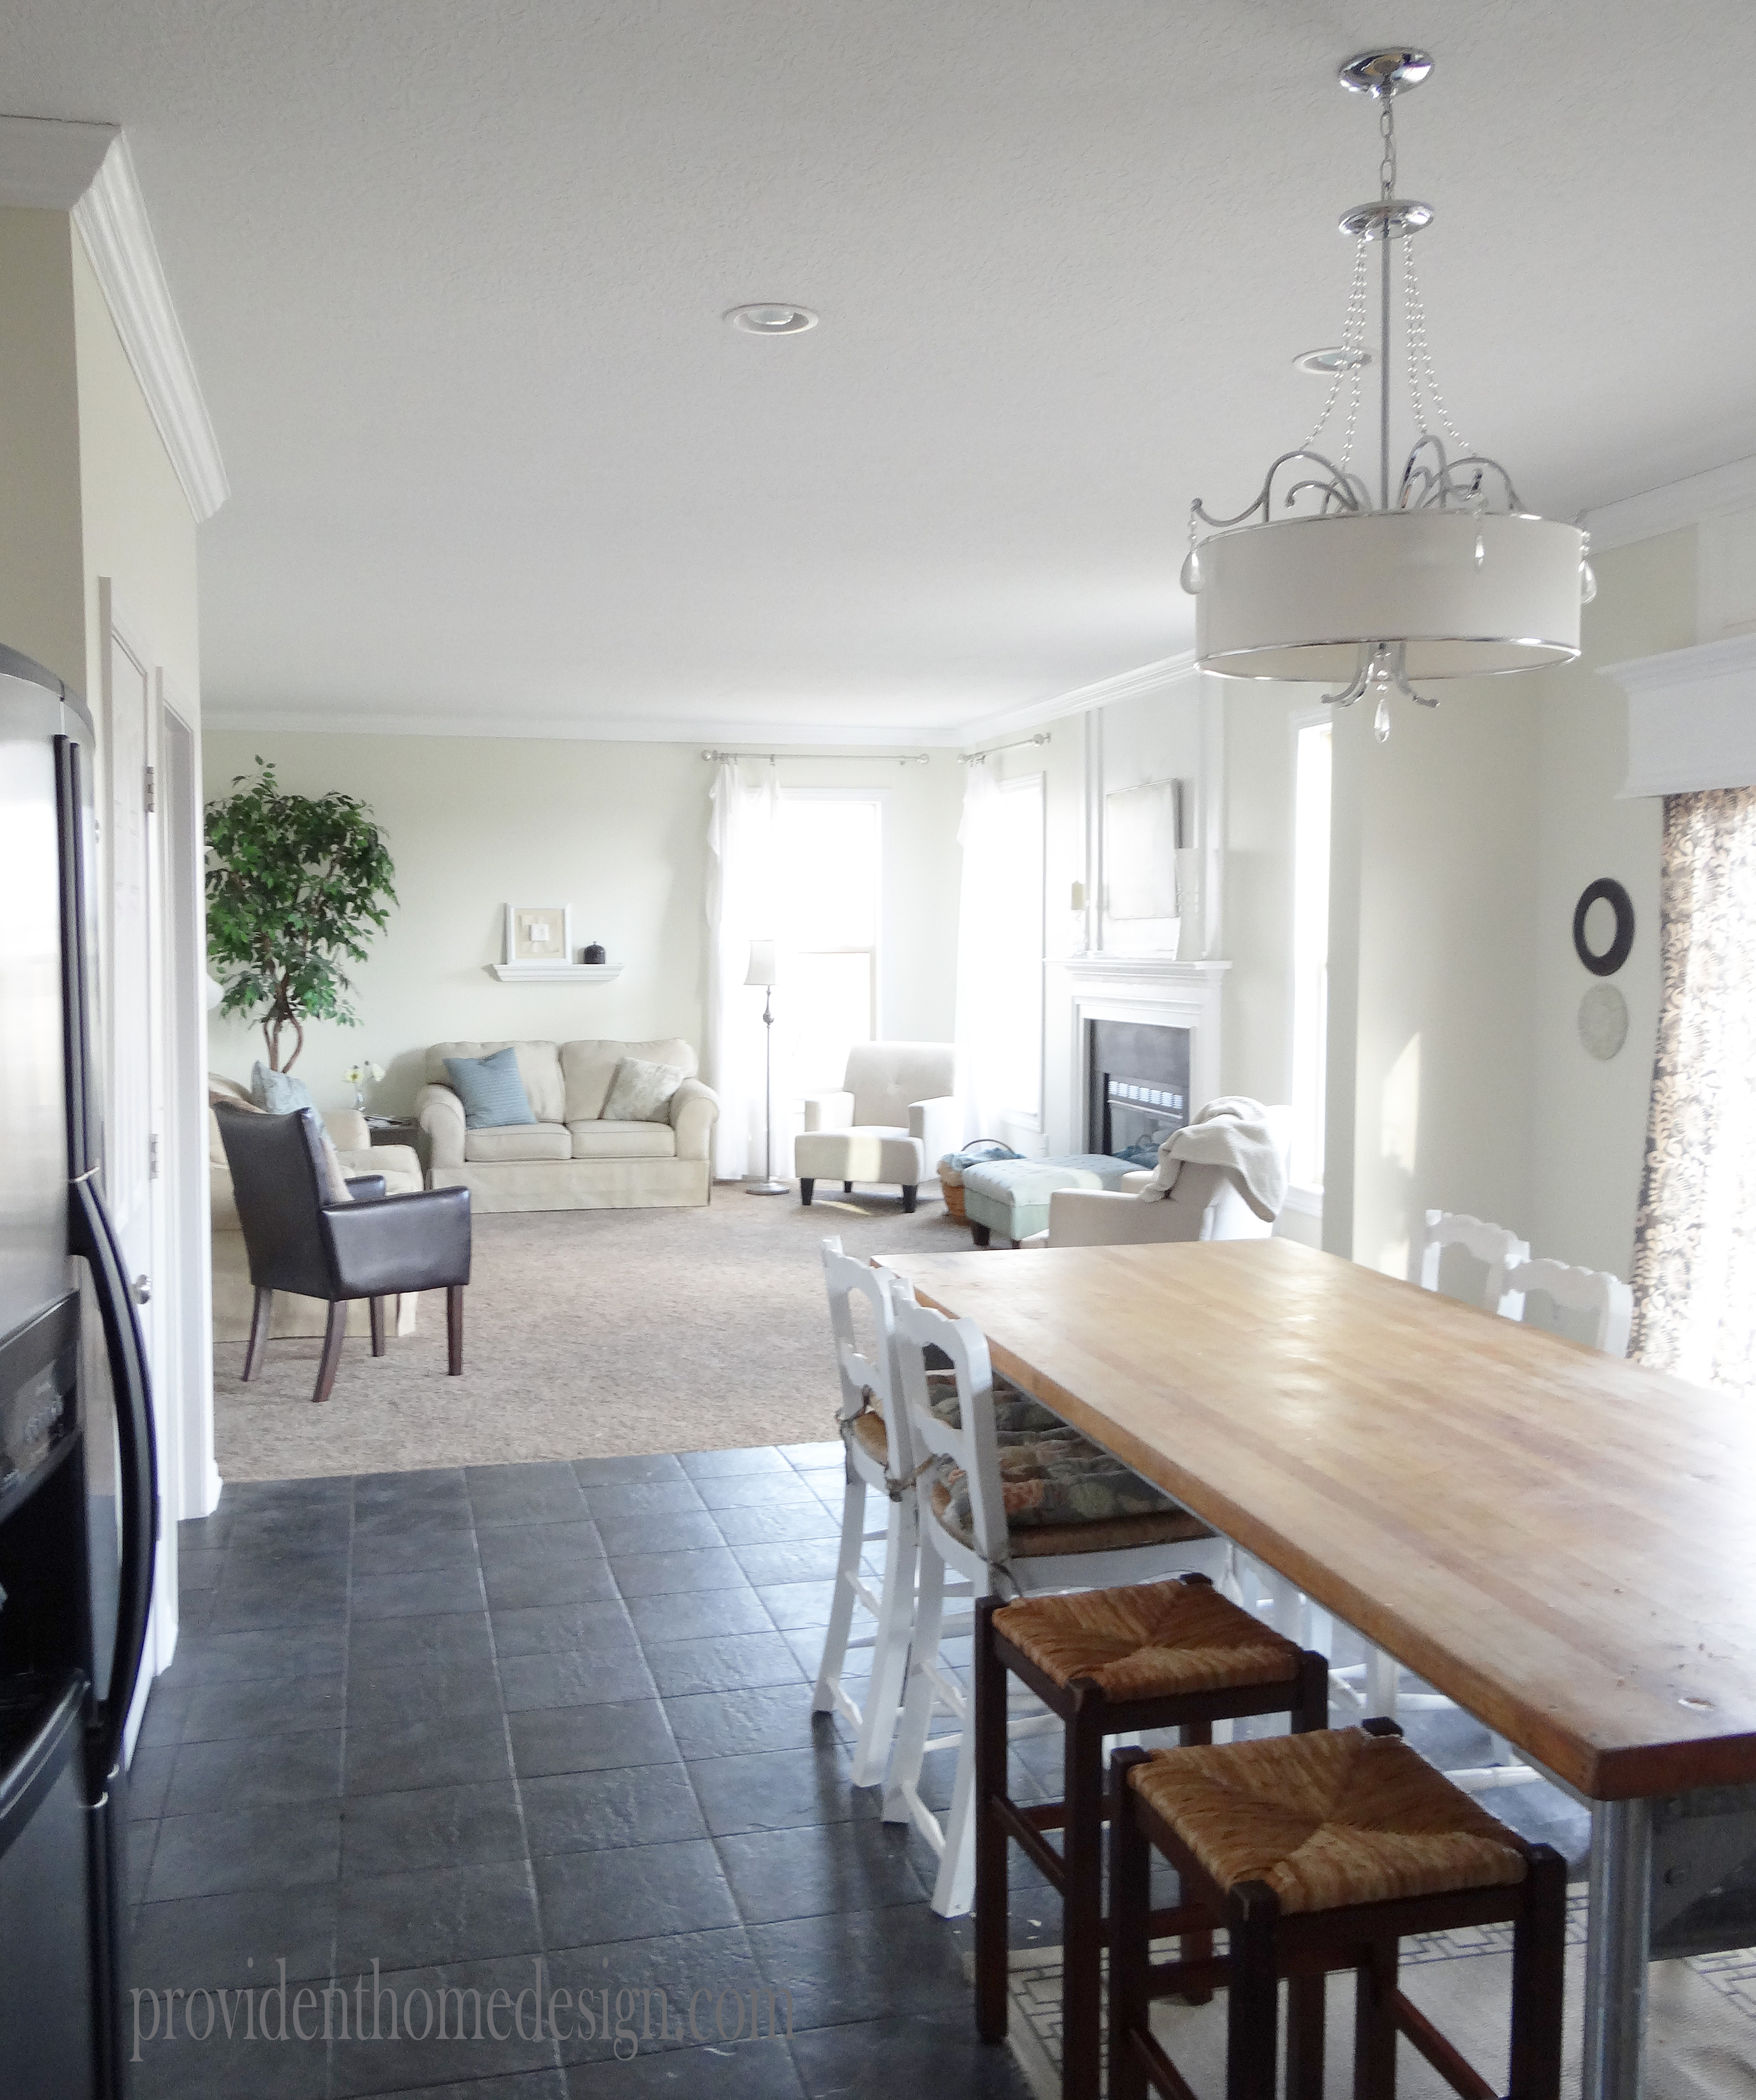
Look how much more space there is by the sliding glass doors now!
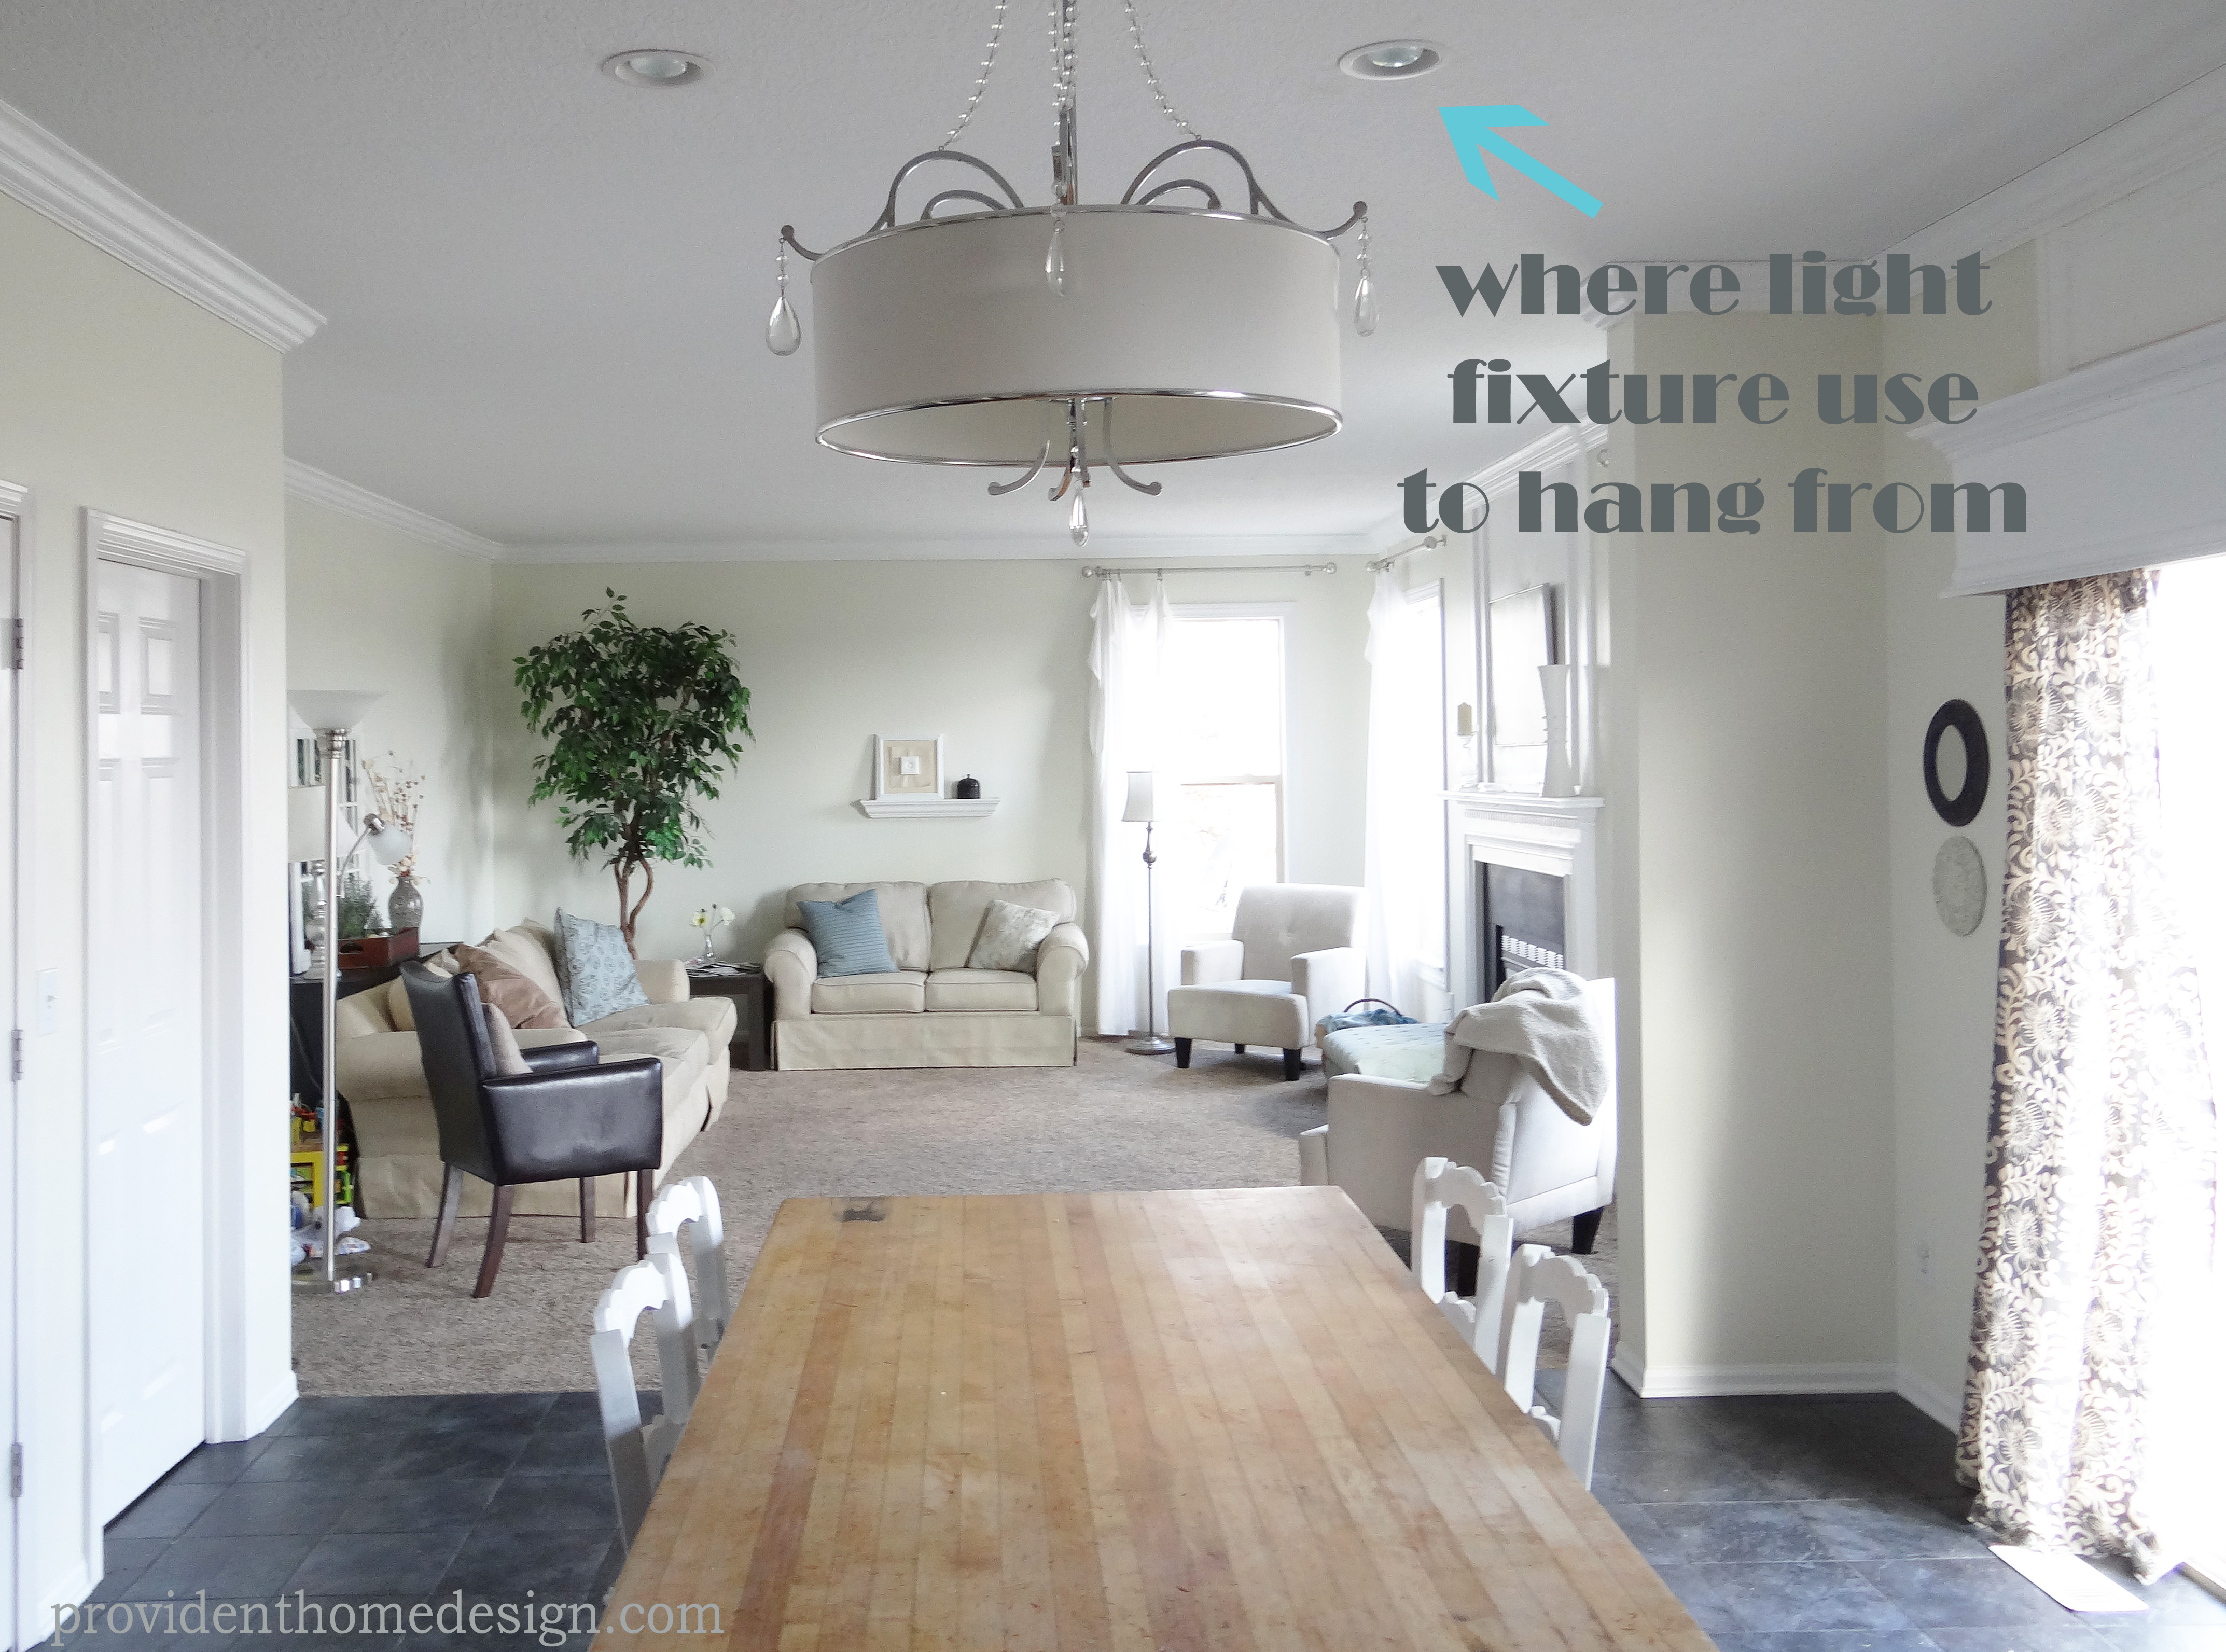
Functional flow improvements can range from easy to difficult and inexpensive to very expensive. We did have to hire someone to change where the old light hung and to put in a can light instead, as well as one parallel to it. Additionally, we had them create a new wire that ran centered to the middle of our long table so I could hang the chandelier. The cost of hiring someone to do this ran around $150, Which was more than I wanted to spend but I guess compared to taking out walls and other larger functional flow solutions, isn’t too bad.
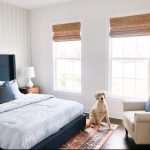
Often, however, creating better functional flow is as easy as moving around some furniture. This was the case in a friend’s kids’ room. My friend, Kelli, had asked me to come give her a little decorating/design guidance with her kids’ room. She has enough rooms so that her kids could have their own rooms but they wanted to sleep in the same room. So, she ended up just plopping their beds side by side and as she put it, just lined furniture up against the wall where it would fit.
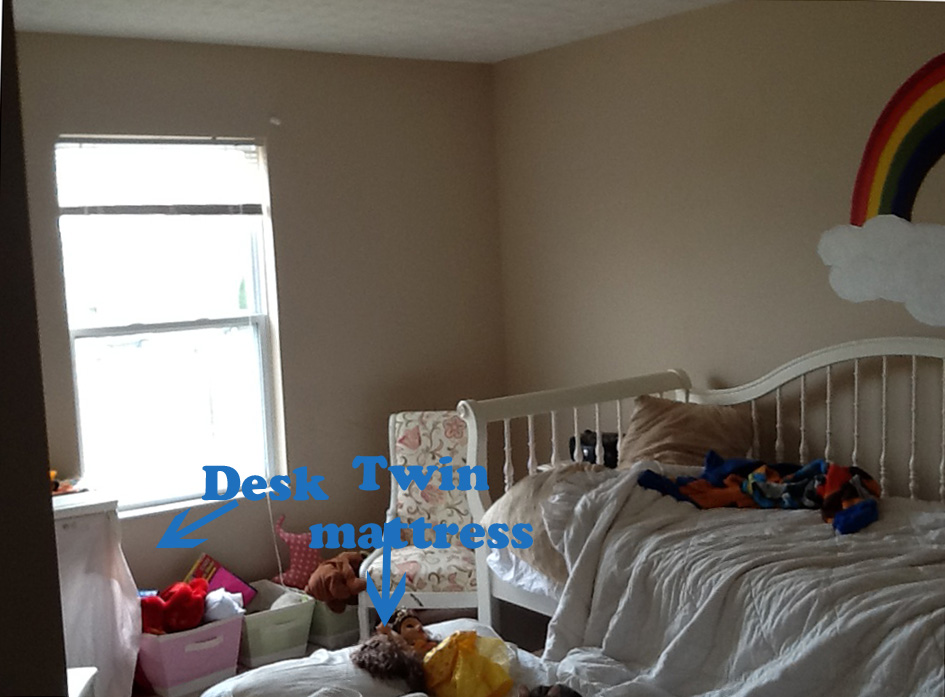
It was obvious to me that there were major functional flow issues going on in this room. On the wall across from the bed was a dresser so there was a very narrow pathway to get to the desk, toy bins, window, and chair. I asked her if the beds needed to be side by side and she said no. So we broke up the beds to opposing walls and brought the desk, toys bins, and chair out from the back of the room. It was very simple and you can imagine how much better they can maneuver around the room and you can see how much better the room flows aesthetically too!
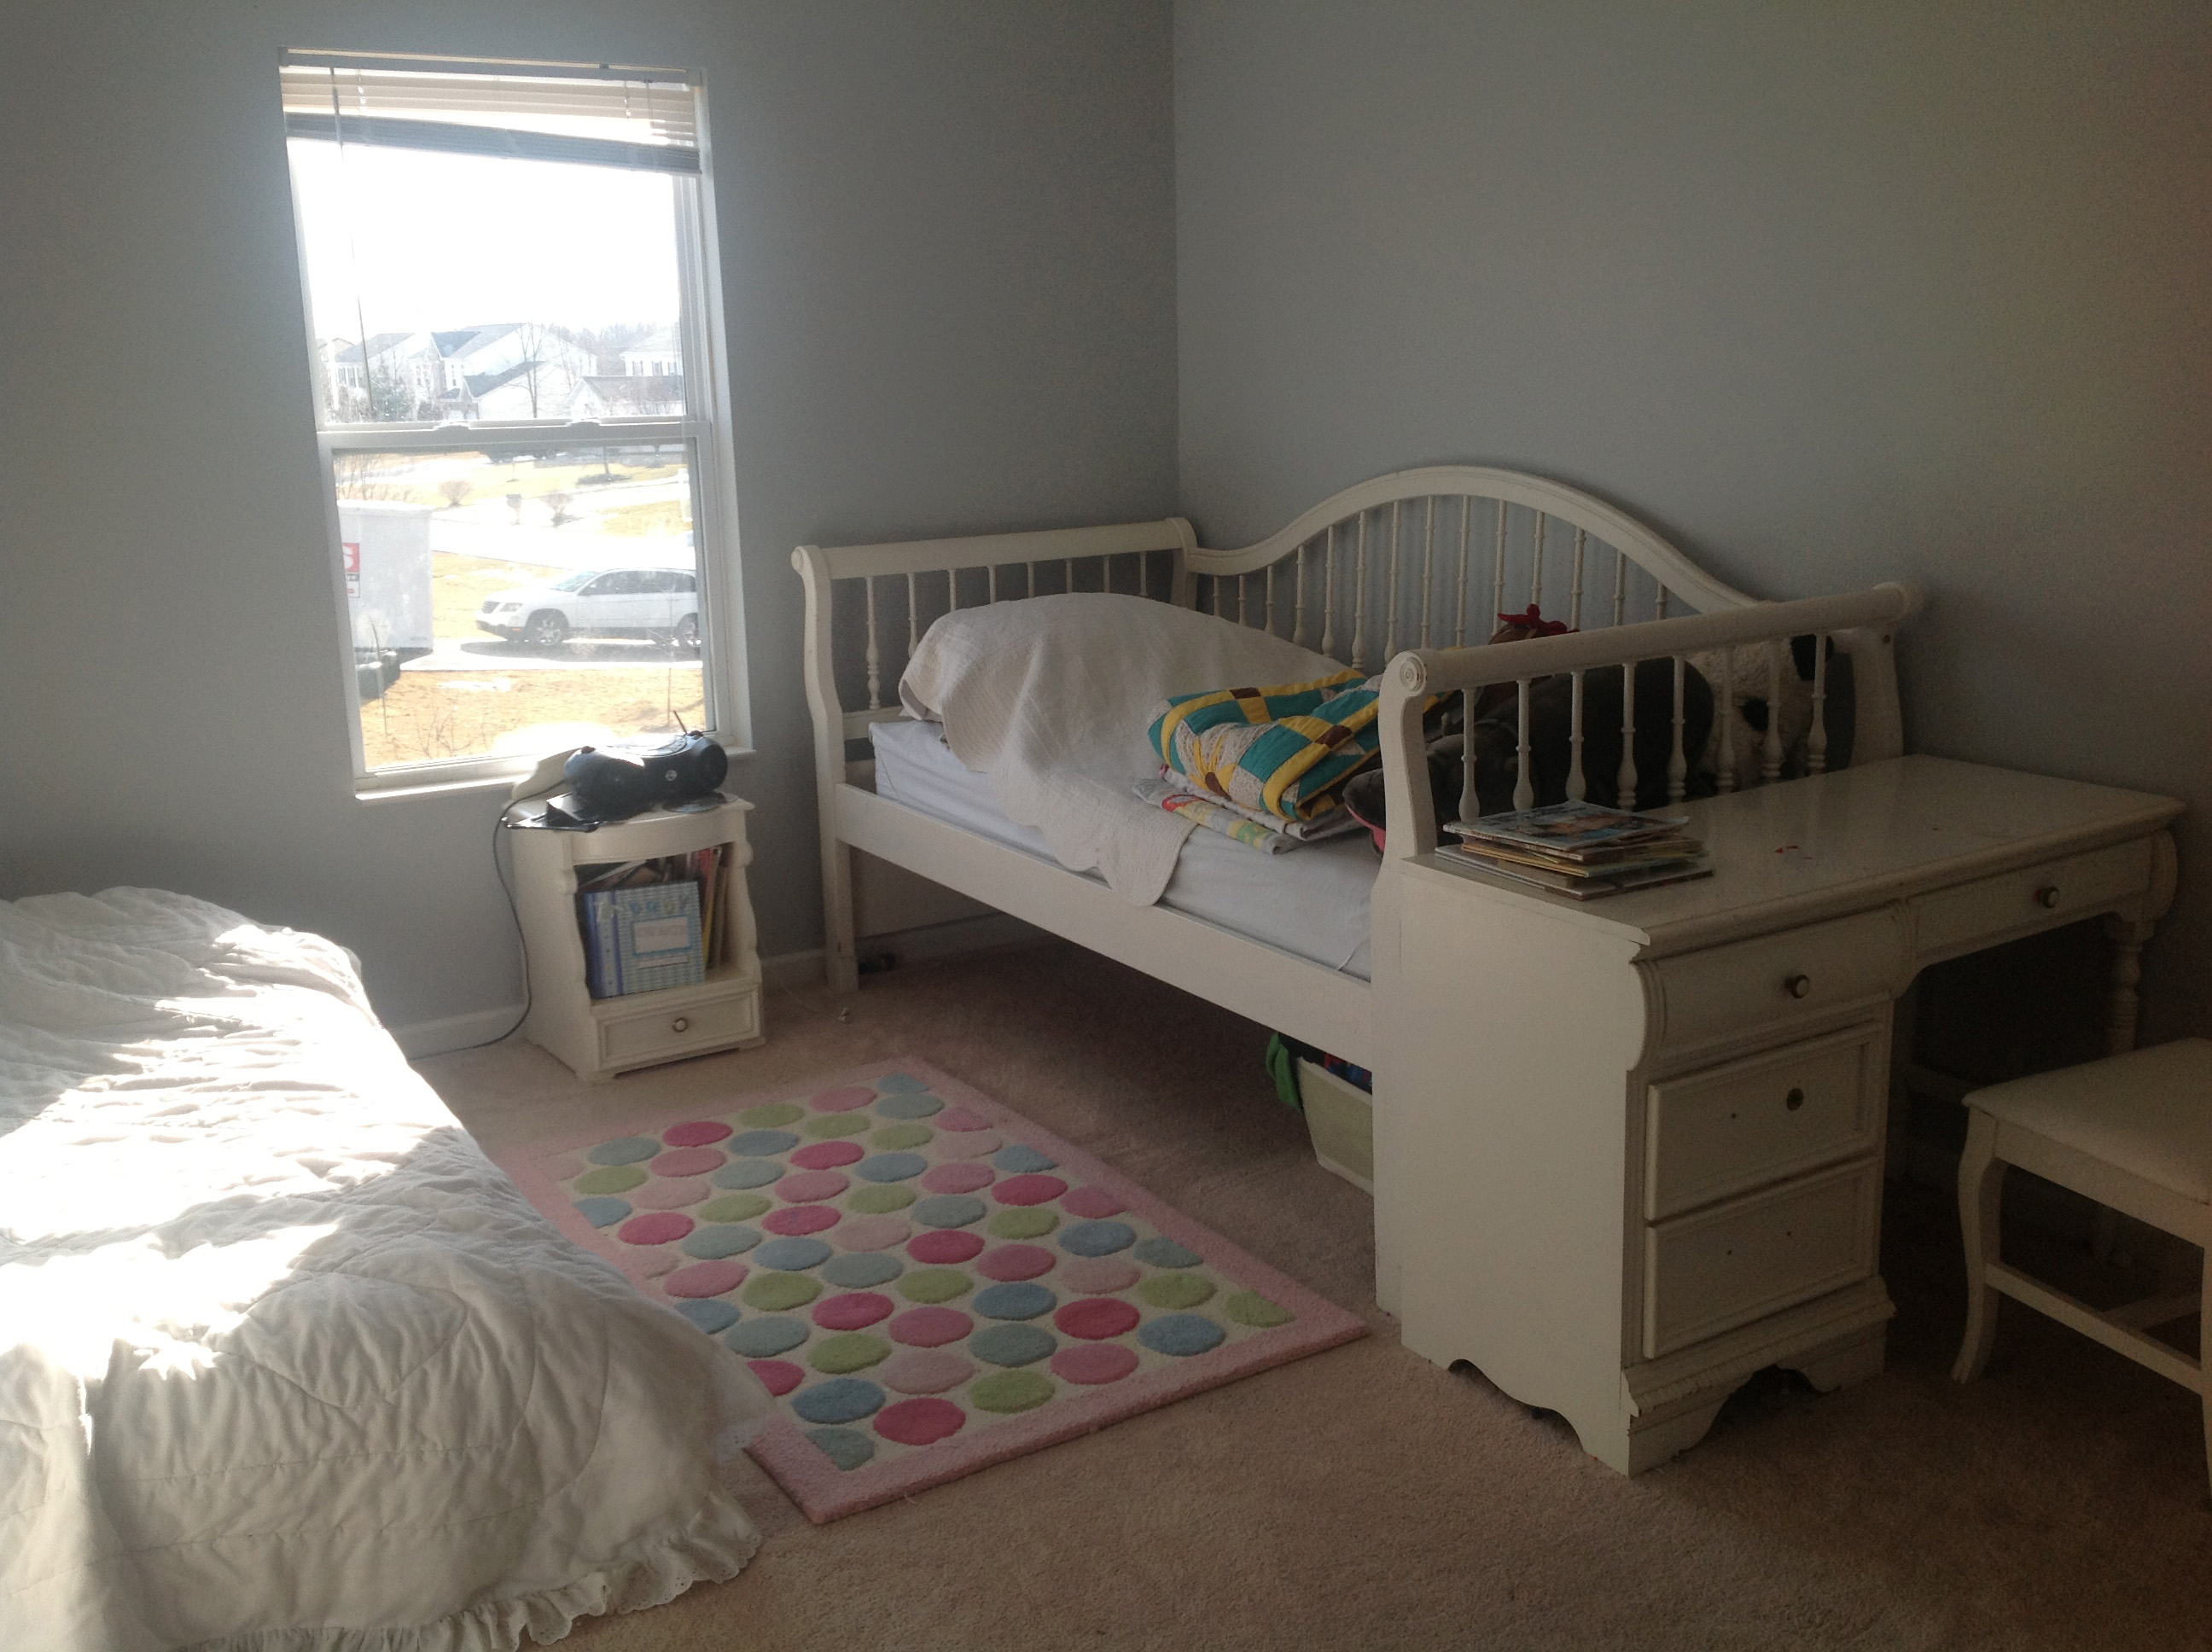
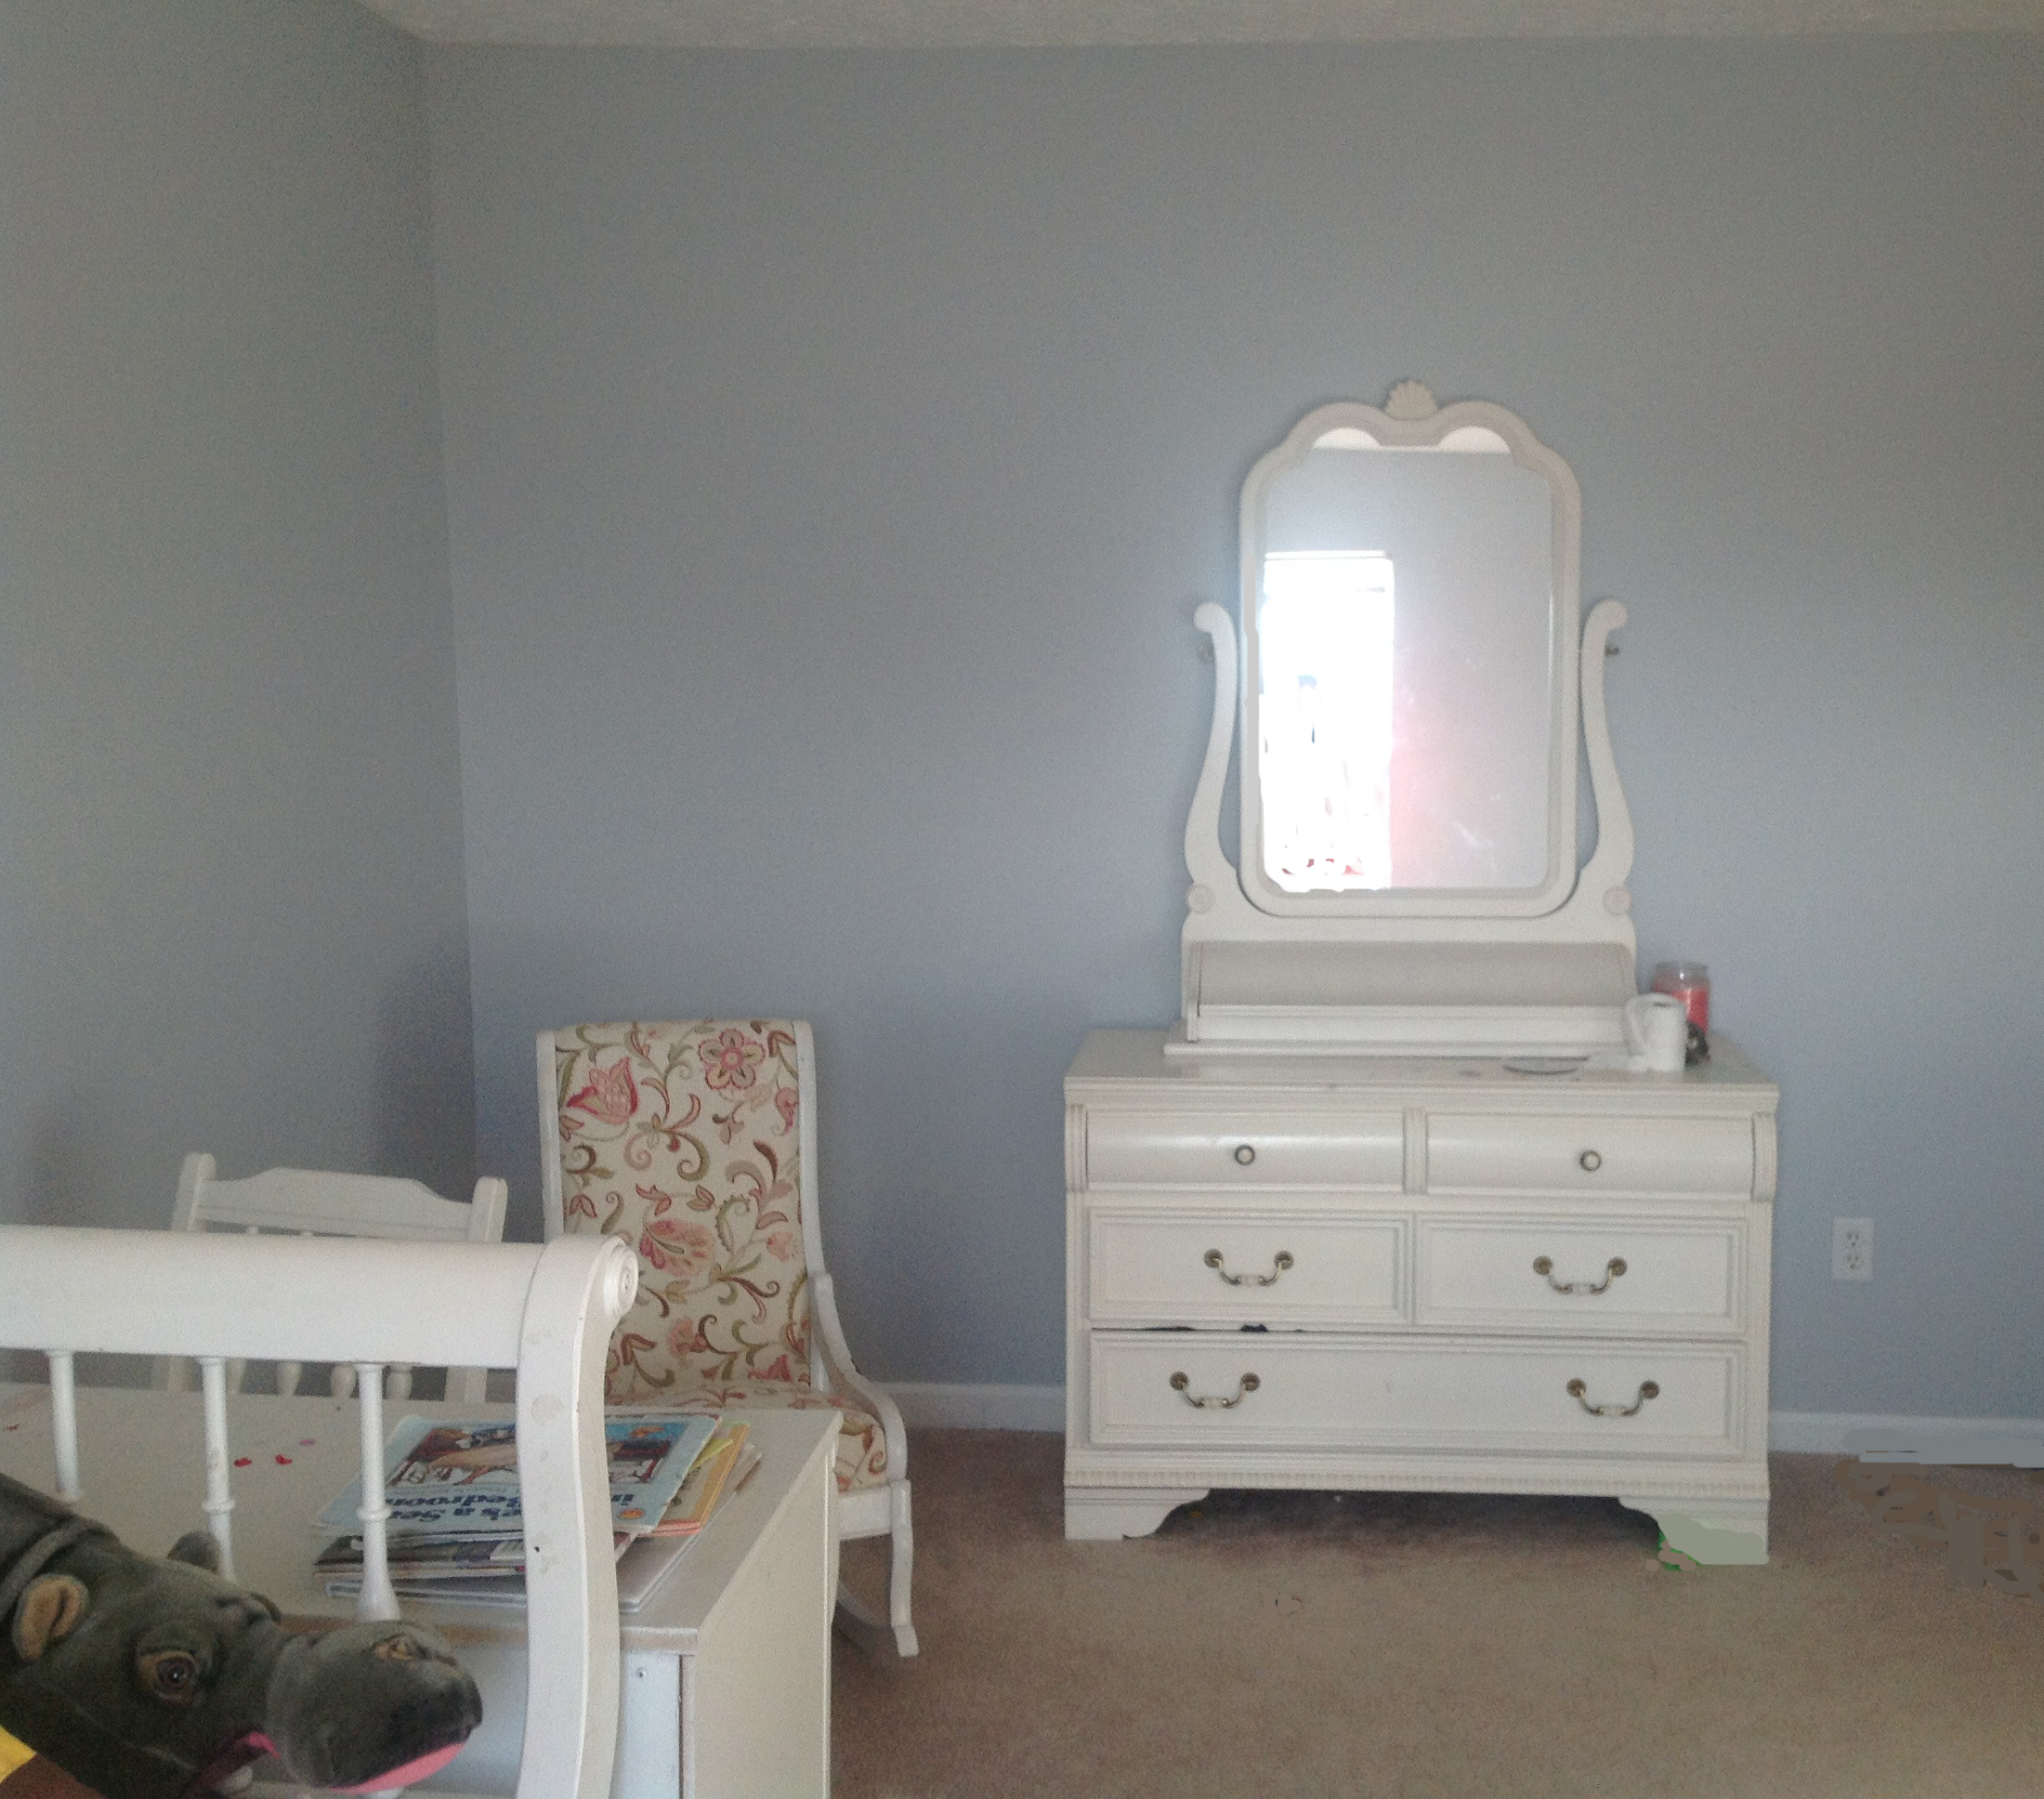
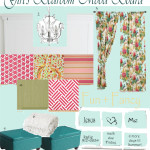
We created a moodboard (inspiration board) to capture the vision for the room. Kelli, will be slowly implementing the plan. After moving the furniture around she painted the room Benjamin Moore White Stone. Isn’t it looking great so far! Good work, Kelli! 😉
So are there spaces in your home that aren’t flowing for you functionally? I would suggest taking a little walk through your home and ask yourself if the spaces are functioning in an ideal way for you and your family. If not pinpoint what the obstacle(s) is and possible methods for resolving the issue. Many times these issues are simple fixes that free up time, space, and frustration for you and those living with you. So, I hope you feel like you’ve learned something about functional flow and that you now feel inspired to spin happily around your home singing, not The Hills are Alive, but…