Provident Home Design

Decor, DIY, and Interior Design

  • HOME
  • ABOUT
    • About PHD
    • Contact Me
  • DIY PROJECTS
  • DESIGN 101
  • PAINT
  • HOME TOUR
  • DESIGN INSPO
  • DECOR TIPS

DIY Plantation Shutters

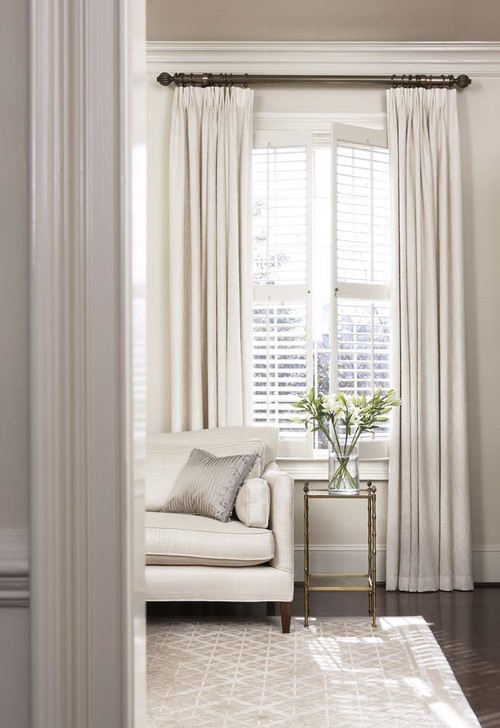
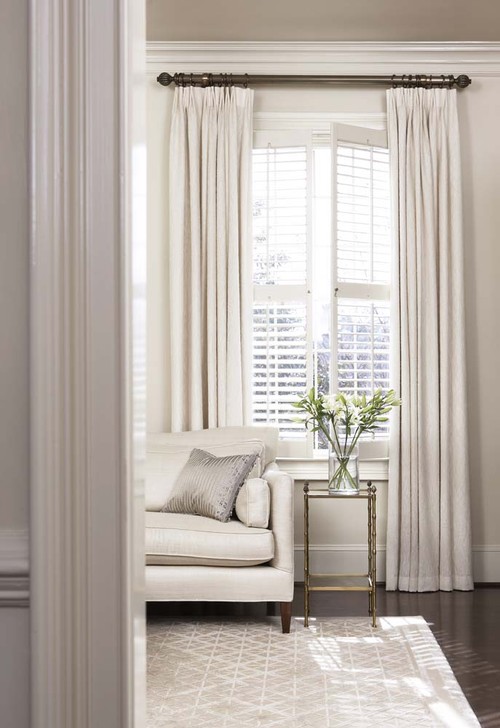
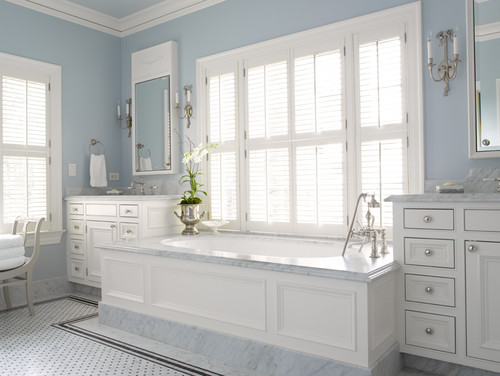
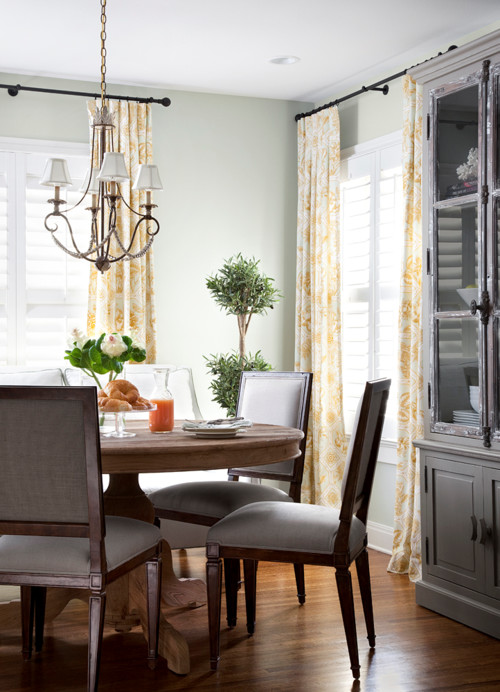
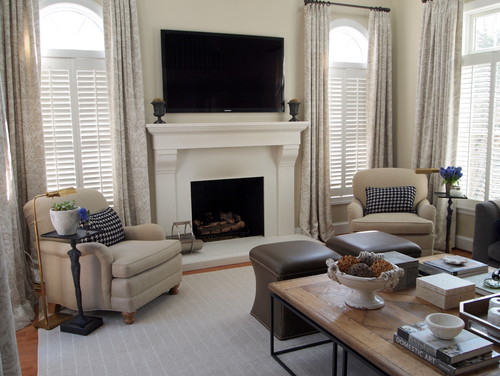
 I’ve admired plantation shutters from afar for years! They are classy, streamlined, and effortlessly beautiful.

via Houzz


Conard Romano Architects via Houzz


Andrea Schumacher Interiors via Houzz


 Frederick + Frederick Architects via Houzz


Heather Scott Home & Design via Houzz


Elizabeth Reich via Houzz


Rikki Snyder via Houzz

My southern grandmother use to tell my grandfather (regarding other women) that he could look but not touch. From the moment I laid eyes on plantation shutters I was in love but when I learned of their hefty price tag it sadly became a ‘look but not touch’ scenario for me!

You better believe I searched for budget friendly options though!:-)  For the size of my kids’ bathroom window (22 3/4 in. x 58 1/2 in.) even the ‘budget’ plantation shutters I researched  cost an upwards of $260 to $300 for the shutter!

Some websites sell do-it-yourself kits where you receive the materials ready to be constructed and then you put them together.  I thought that these kits may be reasonably priced but after filling out a couple of online quote forms I discovered that they were almost as expensive as the already made ‘budget’ options.

So off and on over the past couple years I’ve researched how to build them myself.  I haven’t come across any other blogs or diy-ers who have attempted this feat so I had to dig a lot deeper.  Today I will share with you all I have learned and show you how I built my own plantation shutters.

How to Make Plantation Shutters Tutorial


One of the most helpful resources that I located during my research is the website www.shuttercutter.com.  HERE they have a free tool to help you know how to measure your window(s) correctly and what your cut list should be.

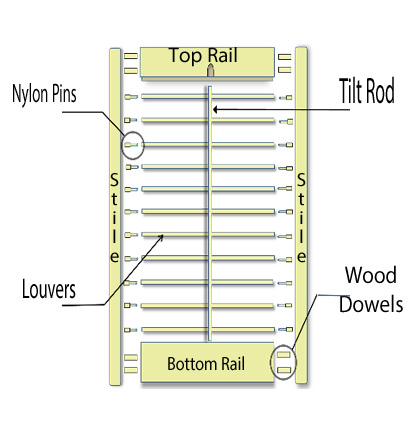
They also provide Shutter 101 basics such as the diagram below as well as definitions and explanations for each shutter term (Note:  It is helpful to be familiar with the terms below before reading on).


Plantation Shutter

via Shuttercutter.com

Lastly, they sell all the materials needed to make your own plantation shutters at the most fair prices out there!  (Note:  I am not being paid or compensated in any way for this opinion just sharing a resource that helped me in building my plantation shutter).

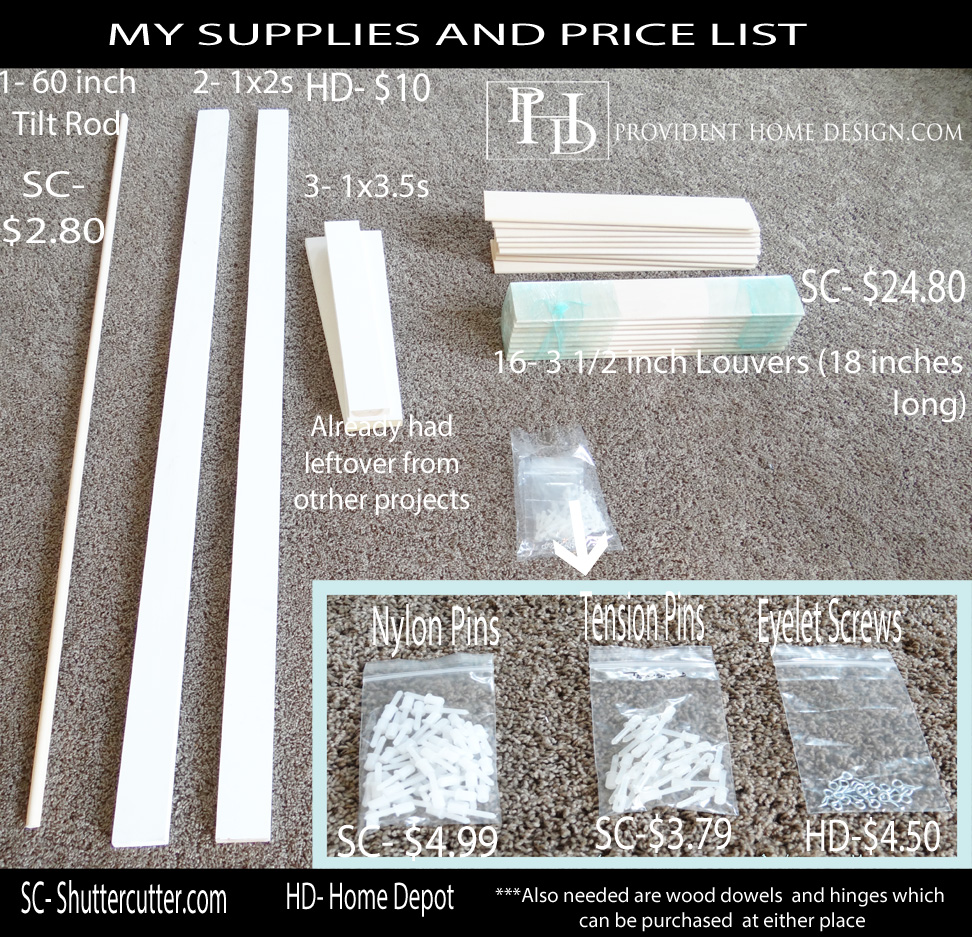
Below is the supply list for my particular shutter.

Plantations Shutter Supplies and Prices


It is important to note that I wanted my particular shutter to have a divider rail.  Because the shutter was for the bathroom I wanted a top section and a bottom section.  The bottom section I would keep closed for privacy and the top I would always keep open for natural light.  To simplify this DIY don’t use a divider rail just have the slats all controlled by one tilt rod.


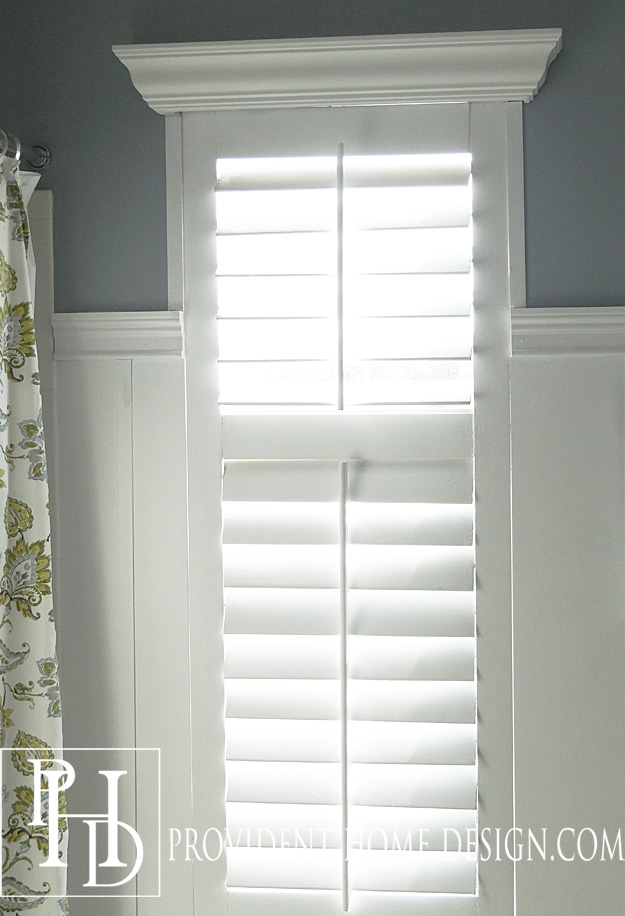
DIY Plantation Shutters


Also I only used one shutter panel to cover the whole window.  If you are using two or more panels to cover your window you may want to buy a rabbeted stile from shuttercutter.com that allows the panels to connect seamlessly (preventing light from bleeding in).  I did not need to so I just bought wood for the stiles from Home Depot since it would be a little bit less expensive.


THIS IS HOW YOU DO IT: 

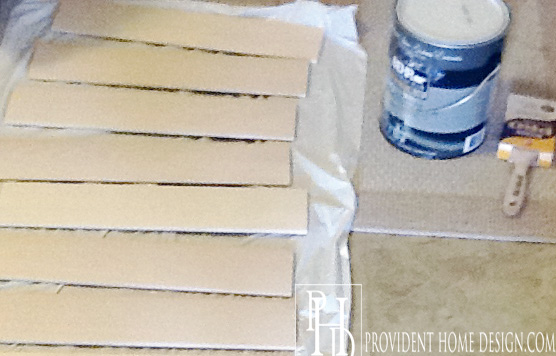
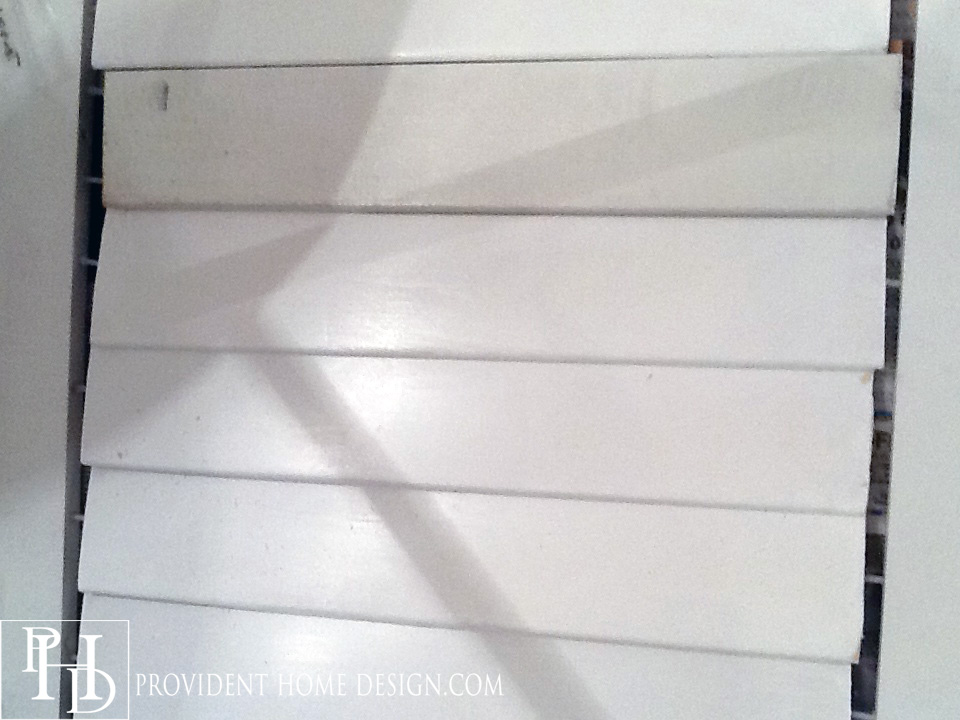
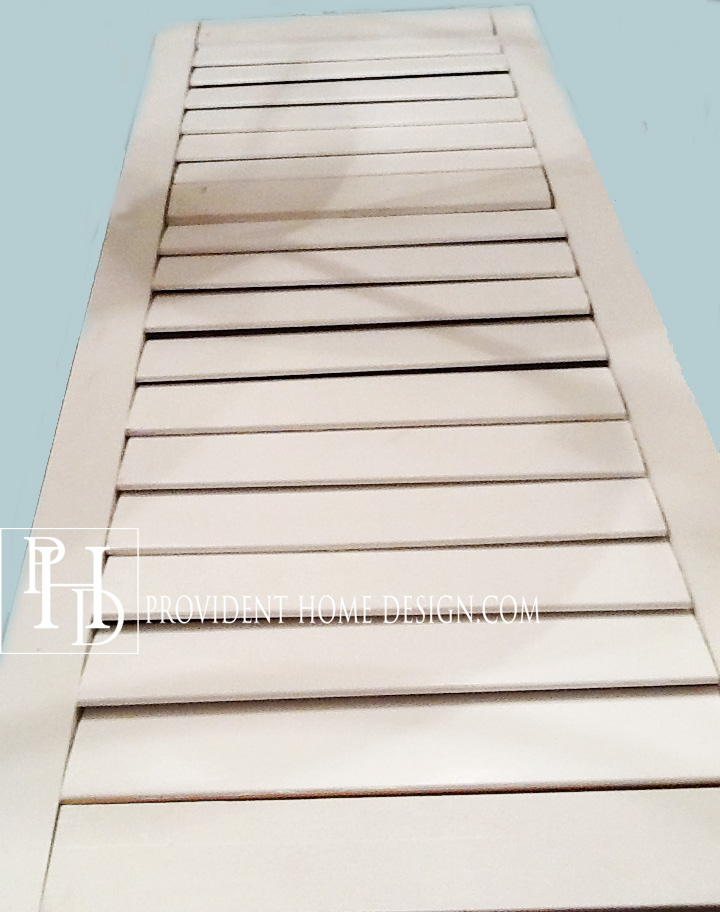
1.  The first thing I did was paint the basswood louvers I ordered.  They have the option to come primed but I decided to cut costs and do it myself.  This would also be a good time to paint your stiles, rails, and tilt rod.

Painting Louvers


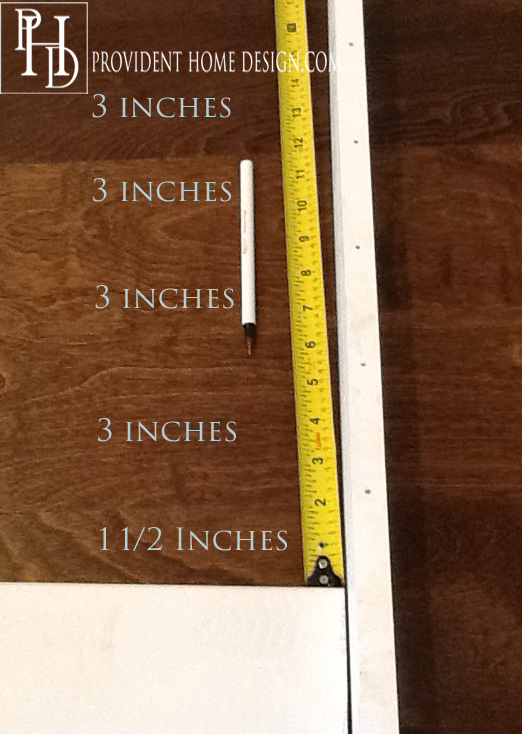
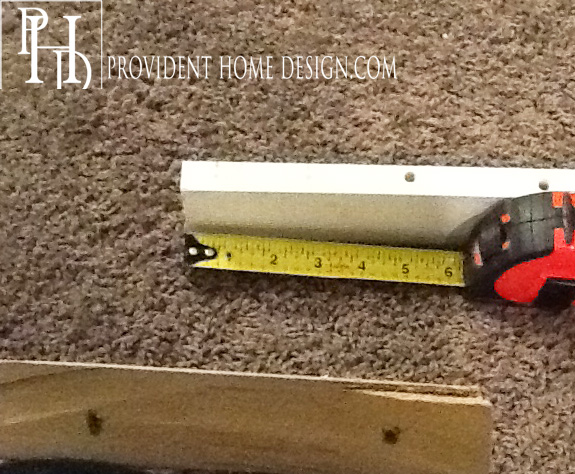
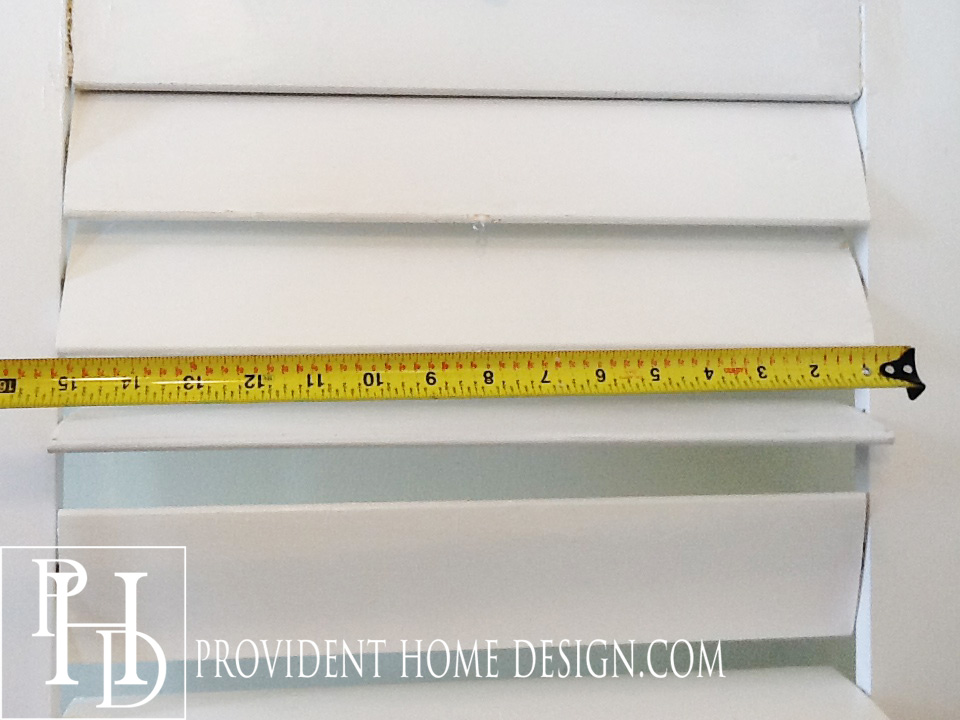
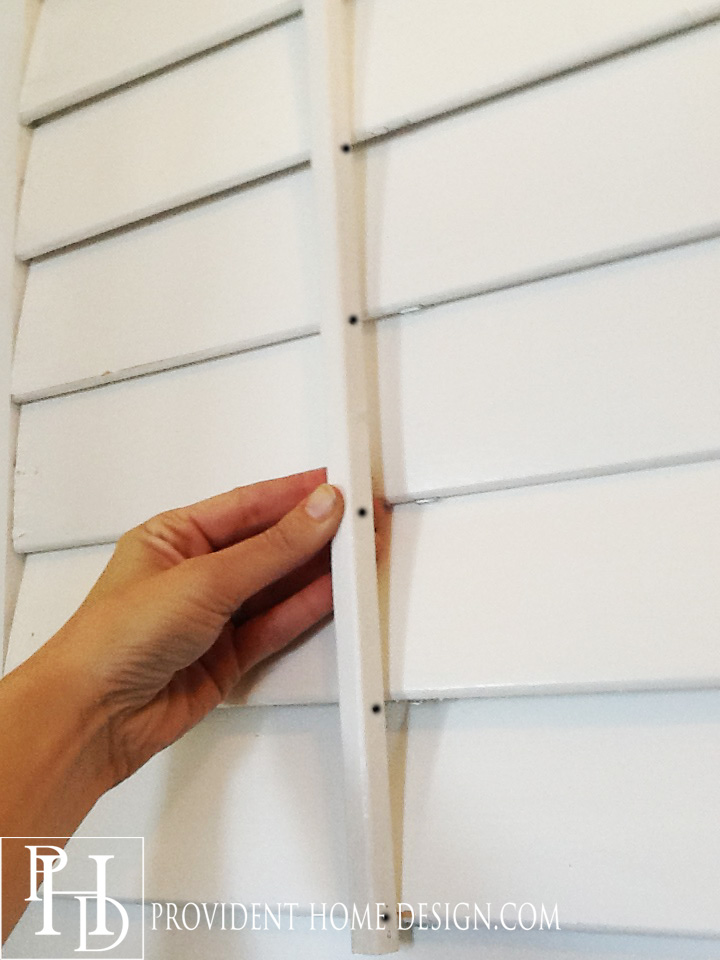
2.  Next I measured and marked where the holes would go on the stiles (the vertical rails).  Measure up from the bottom rail 1 1/2 inches and then 3 inches between every hole.  2 1/2 inch louvers are spaced 2 inches apart , 3 1/2 inch louvers 3 inches apart and, 4 1/2 inch louvers 4 inches apart.

How to Make a DIY Plantation Shutter


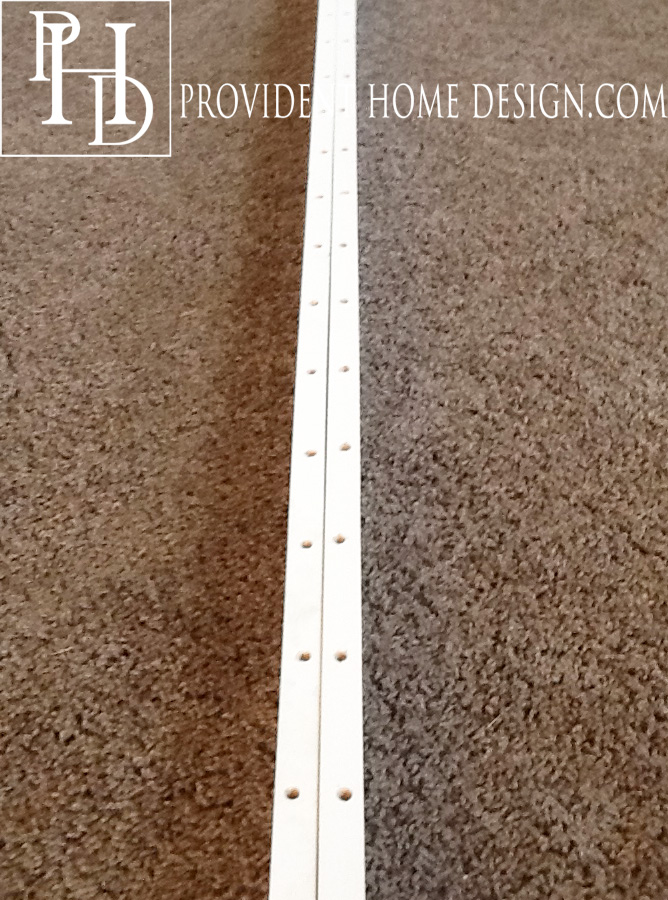
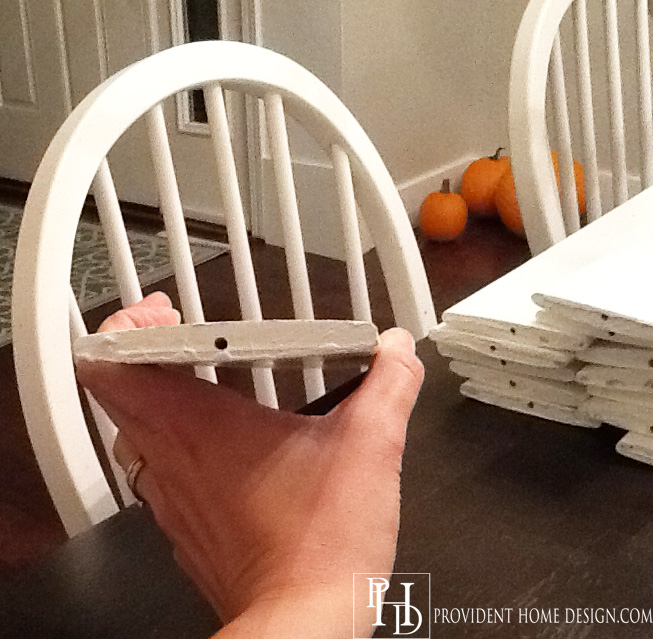
3.  Once I marked both insides of the stiles I put them up to each other to make sure they lined up exactly!  I’m not a perfectionist but with plantation shutters you have to be precise for them to look right so try to be a precise as humanly possible.  After making sure the marks on the two stiles line up, make holes where the marks are using a 5/32 drill bit.

How to Build Plantation Shutters Yourself - Copy


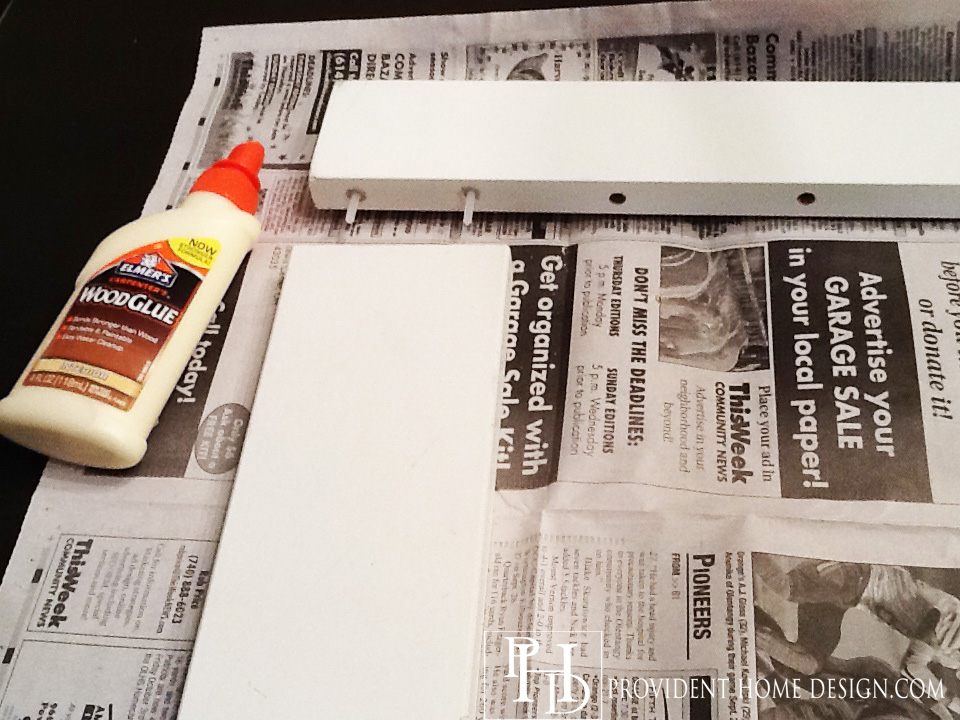
4.  Then go back and make the holes for the bottom rails and top rails and divider rails (if you have any).  In the diagram on shuttercutter.com they use 2 inch wooden dowels to connect the rails to the stiles.  In retrospect I wish I had as well.  Instead I knew I would have extra tension pins and thought I would just use those to connect the rails to the stiles.  I will explain later what happened but for now use two wood dowels instead of tension pins as shown below.

Measuring for Plantation shutters

Connecting Stile and Rails - Copy

5.  Now that the rails are connected to one of the stiles place the nylon and tension pins into that stile.  Tension pins should be used in 25-30% of the holes.  So if you have 16 louvers 4-6 of them should contain a tension pins and the rest nylon pins.

Building Plantation Shutters - Copy

6.  Now measure and mark a dot on the center of both ends of each louver.  Drill a hole on the dot with a 9/16 drill bit.

How to Connect louvers to Plantation shutters - Copy


7.  Slip the louvers onto the nylon and tension pins so that they are connected.

How to install louvers to plantation shutters - Copy


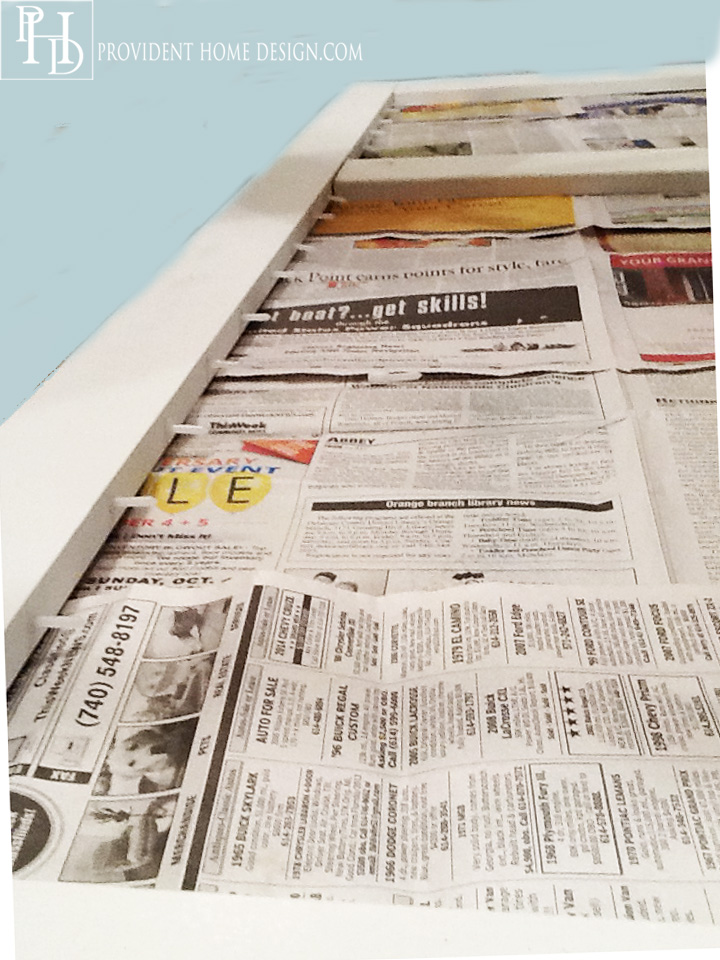
8.  Next is the trickiest part and it may be helpful to have another set of hands.  Place tension and nylon pins into the other stile.  Make sure that the tension pins are in the same number hole as on the other stile.  Now move the stile with pins sticking out close to the side of the louvers without a stile.  Match the stile up to the correct place.  Now starting from the top one by one manually shift the pins from the stile to the louver so that each louver is connected to both stiles.  In order to do this neither stile will be flush with the louvers (as shown below)

How to Make Plantation Shutters


9.  Make sure all of the pins are at least a little bit in both sides of the louver holes.  Then on the count of 3 (and with an extra set of hands) push the stiles towards each other so that the pins go all the way into the louvers and the louvers and stiles become flush against each other as shown below.

How to DIY Plantation Shutters - Copy


10.  Now we will be getting the louvers ready for the tilt rod.  To do this measure and mark the center bottom of each louver.  Drill a hole with a 1/16 drill bit and screw in an eyelet screw.

Building Plantation Shutters with moveable Louvers - Copy


11.  Next cut the tilt rod to size and hold it up to the shutters where it would lay when the shutters are closed.  Then turn the rod on its side and place a dot on the back of the rod exactly where it meets the eyelet screw on the louver.  Note:  Before using eyelet screws I tried employing staples in the louvers but they kept falling out, hence, the photo below shows staples on the louvers.  Just pretend they are eyelet screws.

Building Plantation Shutters that have a Tilt Rod - Copy


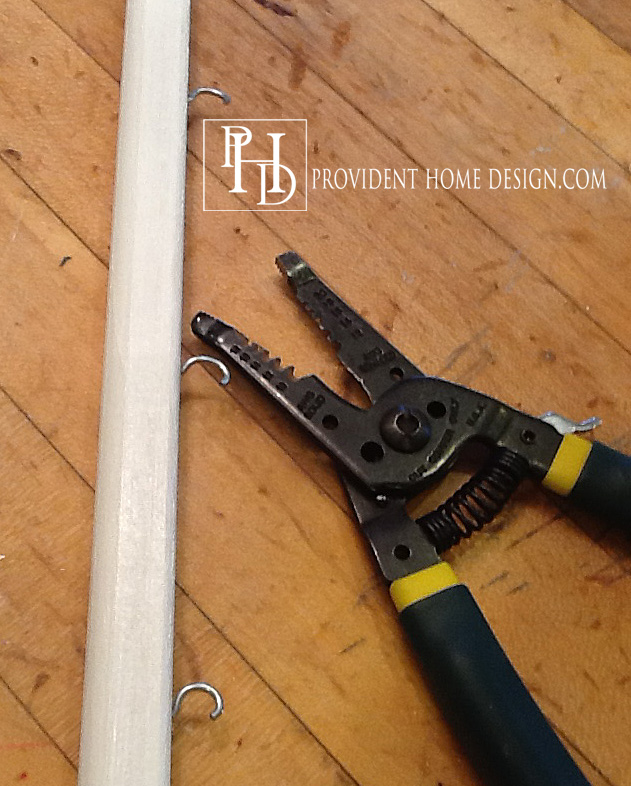
12.  Next with your 1/16 drill bit drill a hole in the rod where the it is marked and screw in the remaining eyelet screws.  Then with needle nose pliers or the tip of wire cutters pull the eyelet screws open as shown below.

How to Attach a Tilt Rod - Copy


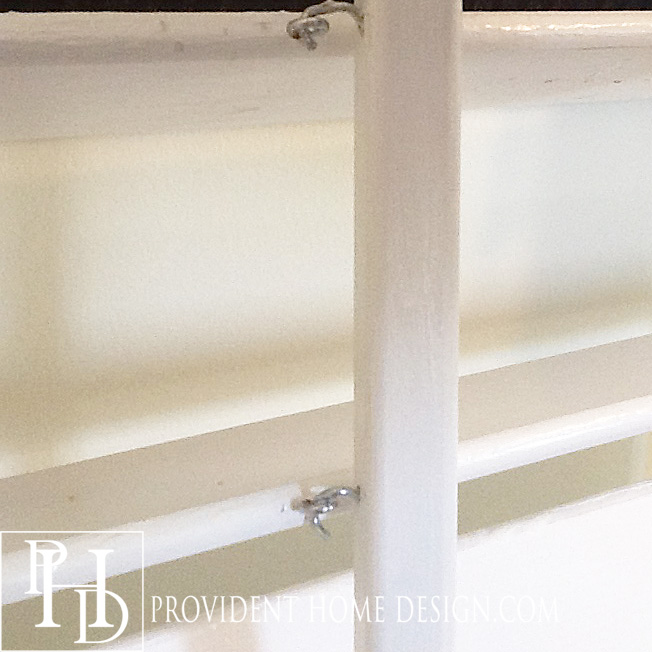
13.  Next starting from the top one by one connect the tilt rod eyelet screw to the corresponding louver eyelet screw.  Then close the eyelets on the rod with the needle nose pliers as best you can.

How to Install a Tilt Rod to Make Plantation Shutters - Copy


14.  Okay so this is where we need to come back to the 2 inch wooden dowels conversation.  If you remember from the diagram at the beginning shuttercutter.com recommended using 2 inch wooden dowels to connect the rails and the stiles together.

I wish I would have made the holes for the wooden dowels and then filled them with wood glue and pushed the rail and stile together and let it sit for 24 hours before adding the louvers.  Then after the louvers were added do the same thing for the other stile in joining the rails.

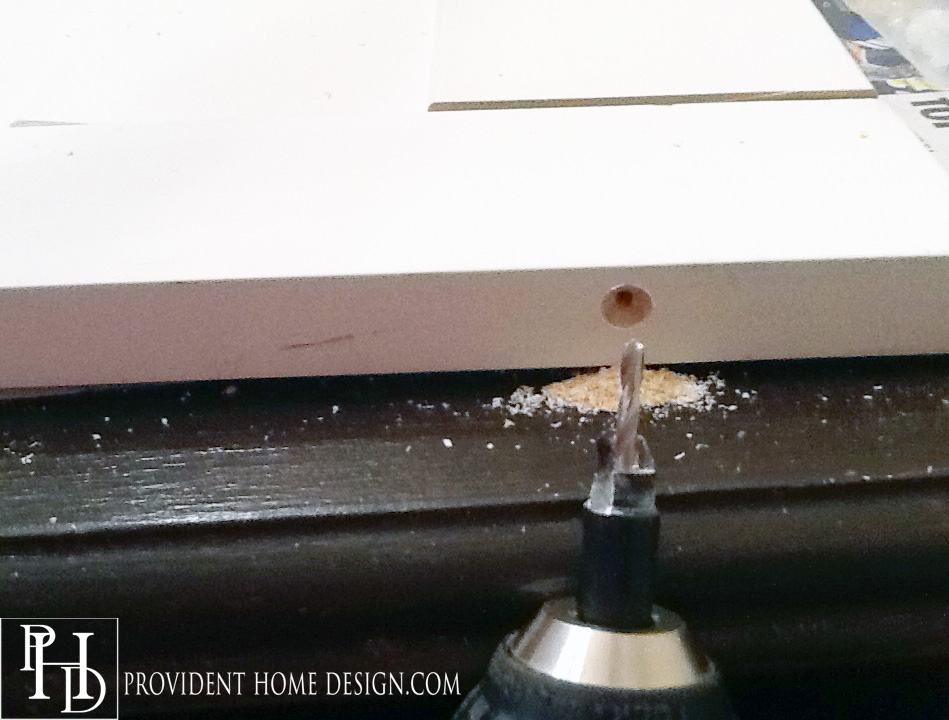
Instead I used tension pin to connect the rails and stiles.  I didn’t feel this connection was sturdy enough so using a countersink drill bit I drilled a hole into the outside of the stile where the stile meets the rail and screwed a 3 1/2 inch screw into it.  The counter sink drill bit allows the screw head to go all the way into the wood so that it is flush with the wood and doesn’t stick out at all.

The problem I had with this method is that when I drilled the screw in the rail and stile kept separating at the last minute. I asked my hubby to push the pieces of wood together while I drilled but it still wouldn’t stay tightly fit together.

How to Secure Stile and Rails

I used white caulking to fill in the small gaps between the rails and stiles and it looked great.  However, the problem came when fitting the shutter to the window sill.  I had thankfully left a 1/4 gap for the hinges but since the rails and stiles would not screw in all the way together the shutter was about 1/4 wider than planned.  Hence, the plantation shutter fits so snugly into the window sill that there is no room for the hinge hardware.

So, my plantation shutters will have to be manually removed if I ever need to get access to the window (which realistically won’t be happening unless there is a fire and we need to jump out that particular window because heaven knows I won’t be cleaning that window ever anytime soon and if I need to open the window I will be sticking my fingers through the shades like a crazy lady trying to shimmy the darn thing up so I don’t have to take the whole shutter off)!:-)

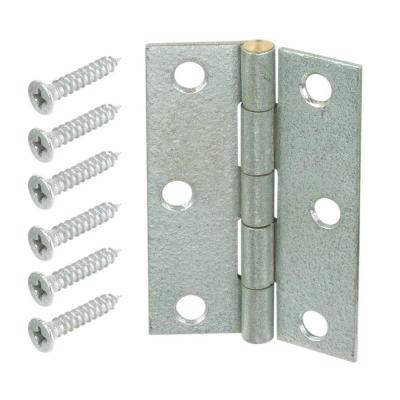
Do yourself a favor and use wood dowels and glue to connect the rails and stiles.  Shuttercutter.com has some great hinge options as well as home depot who sells this 2 1/2 inch narrow utility hinge in a 2-pack for $4.37.  This is what I had bought and now will be returning.

Installing plantation shutters

For more mounting info click HERE

I’ve been so happy with how the plantation shutters turned out and it has allowed the room to receive an abundance of natural light.  I won’t lie it was a lot of work especially with doing all the preliminary research!  But as with 95% of my DIYs I can look back and say it was worth it.  And heck if you’ve made it this far in the post it shows you have what it takes to get through anything!;-)  You can do it!
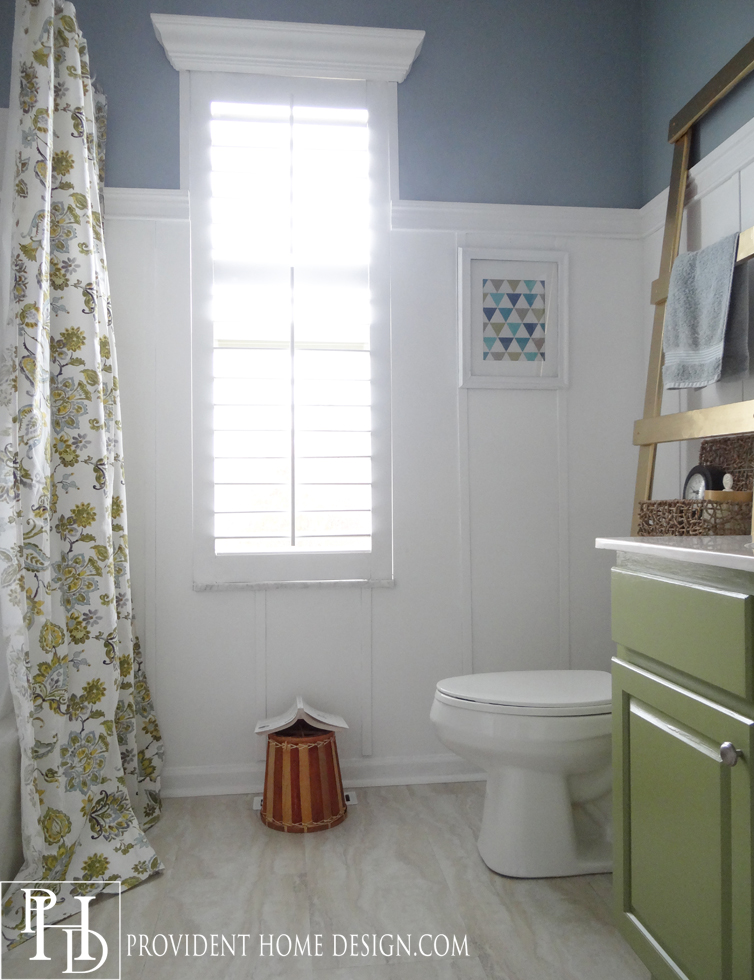
Kids Bathroom Blue and GreenDid you miss my kids/ guest bathroom makeover? Click, HERE.

As always let me know if you have any questions and I will do my best to answer them!  Have a great weekend!

Signature

How to Make Plantation Shutters Tutorial

Related Posts From the Blog:

  • DIY Floating BenchDIY Floating Bench
  • Budget-Friendly Home Decor FabricBudget-Friendly Home Decor Fabric
  • Navy & White You Feel So RightNavy & White You Feel So Right
  • How to Install Shiplap & Finished Wall Storage System (ORC Week 3)How to Install Shiplap & Finished Wall Storage System (ORC Week 3)
  • My Rustic Christmas Mantel & A DIY Pallet ProjectMy Rustic Christmas Mantel & A DIY Pallet Project
  • Ballard Designs Knockoff PaintingsBallard Designs Knockoff Paintings
  • Design 101-Flow Pt.2 & Color RepetitionDesign 101-Flow Pt.2 & Color Repetition
  • New Build- Laundry Room/Mudroom RevealNew Build- Laundry Room/Mudroom Reveal

budget decor// decorating// DIY// money saving tips// tutorials// window treatments// woodwork90 Comments

« Kids and Guest Bathroom Reveal
Decorative Ladders in Design »

Comments

  1. Sarah says

    Friday, October 31, 2014 at 7:57 pm

    What?!? I can’t believe you built your own! So impressive!

    Reply
    • Tamara says

      Friday, October 31, 2014 at 9:25 pm

      Ha,thanks Sarah! It requires some patience and persistence but really anyone could do it!

      Reply
  2. Shelley @ Calypso in the Country says

    Saturday, November 1, 2014 at 8:37 am

    I am beyond impressed with this project! I have plantation shutters in my office and a couple bathrooms so I know how much money you saved. Wow…nice job!
    Shelley

    Reply
    • Tamara says

      Saturday, November 1, 2014 at 9:53 am

      Shelley, how lucky you are! Aren’t plantation shutters beautiful! And so very functional!

      Reply
  3. Kristina says

    Monday, November 3, 2014 at 2:47 pm

    Wow! You are awesome! In the last few weeks we have had 3 estimates for plantation shutters for 3 windows only. I knew they were costly, but holy cow. Your shutter looks incredible, and I am not going to show my husband this post, because he will want to do it too!

    Reply
    • Tamara says

      Monday, November 3, 2014 at 3:34 pm

      Lol, Kristina, it will be our little secret!;-)

      Reply
  4. Kathryn says

    Tuesday, November 4, 2014 at 2:49 pm

    Please make this pinnable thanks

    Reply
    • Tamara says

      Tuesday, November 4, 2014 at 3:31 pm

      Thanks for asking, Kathryn! There should be a place to pin at the end of the post right above the comment section. Here is a link to a pin from the post that you can repin, http://www.pinterest.com/pin/327425835383510094/. Let me know if you have any problem with it. Thanks!:-)

      Reply
  5. Wendy says

    Friday, November 7, 2014 at 10:35 am

    Wow! That is amazing! They turned out great!

    Reply
    • Tamara says

      Friday, November 7, 2014 at 8:15 pm

      Thanks, Wendy! I appreciate you stopping by!

      Reply
  6. pam says

    Wednesday, November 12, 2014 at 8:01 am

    i saw this post on tater tots and jello glad i did i’am going to make them always wanted them. yours looks great!!! thanks for taking the time to make this post and for sharing

    Reply
    • Tamara says

      Wednesday, November 12, 2014 at 8:08 am

      You’re welcome, Pam!:&-)

      Reply
  7. Debbie says

    Wednesday, November 12, 2014 at 1:06 pm

    Thanks for sharing. They are beautiful!

    Reply
    • Tamara says

      Wednesday, November 12, 2014 at 1:54 pm

      Thank you for being coming by today, Debbie!

      Reply
  8. Lisa E says

    Friday, November 21, 2014 at 9:10 am

    Over from YHL Forums. Seriously impressed! I would never have even thought to attempt this. Still probably won’t, ha! Great job!

    Reply
    • Tamara says

      Friday, November 21, 2014 at 9:44 am

      Lol, Lisa! That’s okay but if you ever decide you want to you will know how! :-). Thank you for visiting today!:-)

      Reply
  9. Jennifer @ Decorated Chaos says

    Thursday, November 27, 2014 at 11:37 am

    This is a very cool tutorial. I would have never thought to make them, versus buying them. I just might have to try this in my bathroom!

    Reply
    • Tamara says

      Thursday, November 27, 2014 at 6:30 pm

      Thank you, Jennifer. If you end up making it I’d love to hear about it!

      Reply
  10. Darryl says

    Friday, November 28, 2014 at 4:45 am

    Is Shutter Cutters still in business??
    I have phoned at different times of the day and the answering machine says the mail box is full??

    Reply
    • Tamara says

      Friday, November 28, 2014 at 10:36 am

      Hi Darryl. Yes, I’m pretty sure they are still in business. I remember the same thing happened when I tried to call. I ended up going ahead and making the order online and my items came well packaged and in a quick amount of time. I did notice on their website there is a form you can submit where you can ask them to call you. It is on the “contact us” page. I would give that a try! Good luck!

      Reply
  11. Beth at secondhandmom.com says

    Monday, December 29, 2014 at 6:26 am

    Wow. I am impressed. Just found your blog. Glad I did. Hmmmm… Hubby may have a new project. Lol. Thanks for sharing.

    Reply
    • Tamara says

      Monday, December 29, 2014 at 8:43 am

      Lol, Beth! I’m sure he’s going to love that!

      Reply
  12. isaiah Snell says

    Saturday, January 17, 2015 at 8:41 am

    I cannot WAIT to try this!!! I wanted these for so long but I had a house fire and the new place I got was mainly for the property and it had a decent mobile home on it but at 22,000 for a home of any kind and 5 acres with over 200 of 4wheeling and hunting area all around us I will not complain..lol…but just trying to make it a little nicer and cozier while we start our building process is hard because you def do not want to put a lot of money into a place you know you will not be at to much longer but do not want to be embarrassed to have people stop in either!!! lol TY for this!!

    Reply
    • Tamara says

      Saturday, January 17, 2015 at 9:00 am

      You are welcome, Isaiah! I am so sorry to hear about your house fire!! The plantation shutters will definitely make your new place nicer and cozier! Excited for you!

      Reply
  13. thehandymansdaughter says

    Monday, March 9, 2015 at 1:09 pm

    Love these! We have a few windows with ugly aluminum shades that are always partially closed. I would love to put these in instead!

    Reply
  14. farmmama says

    Monday, March 9, 2015 at 3:12 pm

    Living here in the south..these will be just perfect!! I have two larger south-west facing windows that like to kill us in the afternoons! The glare! In the summer the heat!! I am definitely going to try this! I thank you thank you thank you!!

    Reply
  15. Nancy says

    Thursday, March 26, 2015 at 5:19 pm

    Wow! I am so glad I found this! Have you made any more?

    Reply
    • Tamara says

      Thursday, March 26, 2015 at 5:41 pm

      Hi, Nancy! Nope, all my other windows have coverings I like but I would do it again!:-)

      Reply
  16. eliana says

    Thursday, March 26, 2015 at 7:45 pm

    How much did it cost you to make them yourself?

    Reply
    • Tamara says

      Thursday, March 26, 2015 at 7:53 pm

      Hello, Ellana! It cost roughly $60 to make the one for my kids’ bathroom window.

      Reply
  17. Lorie says

    Saturday, March 28, 2015 at 1:06 am

    Looks gorgeous! If I go slow I think I can do it!! Thanks…again.

    Reply
    • Tamara says

      Saturday, March 28, 2015 at 9:35 am

      You are so welcome, Lorie!:-). Yes, going slow on this project is a good thing…I think I went at about a snails pace.:-)

      Reply
  18. audrey says

    Friday, May 15, 2015 at 6:08 pm

    If there is a tutorial hall of fame. You are in it!ll

    Reply
    • Tamara says

      Friday, May 15, 2015 at 6:18 pm

      Lol…thanks for such a nice compliment, Audrey!:-)

      Reply
  19. Holleigh says

    Tuesday, May 19, 2015 at 1:41 am

    I came across this on Pinterest and this is one of the BEST pins I’ve ever seen! I’d googled for this in the past and thankfully this popped up in my feed. I’d lost hope that this was possible because of budget restrictions.

    If you don’t mind me asking, when did you make your purchase from ShutterCutter? The reason I ask is because on their youtube instructional video, a couple commenters thought that ShutterCutter was not in business anymore. I sure hope that they are!

    Thank you so much Tamara! This is the best…. literally!

    Reply
    • Tamara says

      Tuesday, May 19, 2015 at 9:06 am

      Hi Holleigh! Thanks for your kind compliment!:-). I bought the materials from shuttercutter in October 2014. I just visited their website and it looks updated and like they are still very much in business! I’m not sure why the commenters thought they were not in business but it definitely looks like they are in business! Happy plantation shutter building!!:-)

      Reply
  20. Jennifer Medley says

    Saturday, June 13, 2015 at 4:47 pm

    Your shutters look fantastic. What was the total cost of the one bathroom shutter? About how many hours of time did it take for the project?

    thank you
    Jennifer M

    Reply
    • Tamara says

      Saturday, June 13, 2015 at 9:14 pm

      Hi, Jennifer, thanks for your questions! The one bathroom shutter came to a total cost of about $60 which may sound like a lot but when I got price quotes for “budget” shutters for this size nothing came in under $260. It’s hard to say how much time it took because I worked on it mostly when the kids went to bed each night. If I had to guess I would say maybe 5-6 hours?? If you end of DIY-ing them let me know how it goes!

      Reply
  21. Val says

    Sunday, June 21, 2015 at 4:33 pm

    Hi Tamara, I’ve just found your blog and can’t stop reading it, have more than 20 tabs open in my browser with different articles of your and am torn apart which one to read first 🙂 What an amazing blog!
    How did you drill all these holes exactly where they are supposed to be and keeping them perpendicular to the surface? Especially the ones in the louvers for the eyelet screws (I am failing to imagine this with the louvers already assembled). Did you use any jig?
    Thank you for the wonderful blog! Have you ever considered writing a book?

    Reply
    • Tamara says

      Sunday, June 21, 2015 at 5:32 pm

      Hi, Val! Thank you so much for the kind compliment!!:-) I didn’t use a jig. I just worked very carefully, being sure to measure concisely and to mark the spot where to drill concisely. I’m not a perfectionist but on this project I had to make myself be super exact. I found it easier to drill the holes on the louvers once they were attached to the stiles because I could lean the shutter against the wall and work on it head on. I measured and marked where each hole should be then turned the louver opened horizontally as straight as I could and came in with the drill as straight as I could. Hope this helped you visualize it a little better!!

      Reply
      • Val says

        Sunday, June 21, 2015 at 6:58 pm

        Wow, you must have a steady hand 🙂 Great job! Tank you!

        Reply
        • Tamara says

          Sunday, June 21, 2015 at 9:11 pm

          Anytime, Val!

          Reply
  22. Katie - creativeblinds.com says

    Saturday, August 15, 2015 at 11:32 pm

    It’s quite detailed steps. The final result is wonderful and mind-blowing. I feel more satisfied if I can successfully do it and perhaps you feel the same.

    Reply
  23. Yogesh says

    Tuesday, August 18, 2015 at 11:24 am

    So wonderful…Thanks a lot for the info…
    I got to know a lot…I needed a guideline on this for a sample…Thanks again

    Reply
    • Tamara says

      Tuesday, August 18, 2015 at 11:35 am

      You are very welcome, Yogesh!:-)

      Reply
  24. Betsy D Dean says

    Sunday, August 30, 2015 at 2:58 am

    I just come across your post. This the only DIY plantation shutter tutorial I have ever seen!!! Wow, am I impressed. I don’t know if I will ever attempt to actually make them but I’d like to think that I could if I followed your tutorial. Thank you for all your research & time in making this post available to others.

    Reply
    • Tamara says

      Sunday, August 30, 2015 at 9:27 am

      You are very welcome, Betsy!:-). Thank you for coming by!!!

      Reply
  25. Teresa says

    Thursday, September 3, 2015 at 1:01 pm

    Thank you so much for your tuitorial. Your shutter looks wonderful, and after reading your post, I think I can do it. I have a new front door, called for a price for a shutter for a 29×52 window, and was qoted $400.00. Thank you so much for doing all of the research for the rest of us!

    Reply
  26. Mary Ruth says

    Saturday, October 3, 2015 at 2:18 pm

    We have had directions for years, never had time to do the project.. but, now retired.. we might try it, your Pinterest photo had the link to this site and I am glad I came to check it out! GREAT explanation and thanks so much for the motivation and photos! I feel I could do this!!!
    Thanks for breaking this down and simplifying it to take the ‘mystery’ out of making a shutter!

    Reply
    • Tamara says

      Saturday, October 3, 2015 at 4:00 pm

      You are so very welcome, Mary Ruth! Thanks for being here!:-)

      Reply
      • Mary Ruth says

        Saturday, October 3, 2015 at 6:47 pm

        Been doing research and discussed with husband. I am sure we will try this one after we are finished with final phase of kitchen remodeled. So happy I found your DIY project!

        Reply
  27. Martha Felgar says

    Monday, October 12, 2015 at 7:30 am

    Well, I have looked, and looked for plantation shutters for my oddly sized windows. You have inspired me! I am going to try it, will let you know how they turn out.

    Reply
  28. Lynette Snow says

    Tuesday, November 3, 2015 at 10:50 am

    Oh thank you for posting this! I have been wanting plantation shutters in a room with 2 large windows, but I didn’t know how to purchase ones that would match my baseboards and board and batten. Now I do..and can do it for so much cheaper! This is my next project.

    Reply
    • Tamara says

      Tuesday, November 3, 2015 at 11:59 pm

      Excited for you, Lynette!!

      Reply
  29. Rex says

    Wednesday, February 10, 2016 at 8:56 pm

    Hi, just an update. The shuttercutter.com site still has a closed for thanksgiving message on the website, and when i try the phone number it says voicemail is full. I am sad about this. If anyone comes across another resource for getting pre cut wood parts, please do update the thread !!!

    Reply
    • Tamara says

      Wednesday, February 10, 2016 at 10:06 pm

      Hi, Rex, thanks so much for the update! I had no idea. I just sent them a message…I’ll let you know if I hear anything back and will be looking around for other possibilities!

      Reply
  30. Mary Ruth says

    Thursday, February 11, 2016 at 10:11 am

    http://www.shuttercutter.com/ IS WORKING TODAY, just went there up and running!

    Reply
    • Rex says

      Tuesday, February 16, 2016 at 11:24 am

      Hi, yes, sorry I should have been more detailed…. the main website is up/workimg.. however when i click on the MATERIALS page (I believe that initiates the order process?) the out for Thanksgiving message pops up. I emailed them – – maybe they just haven’t done maintenance on that specific webpage. Will see if they get back to my email too 🙂 i just sent one as well. Fingers crossed, i know its a family biz, hope all is O.K. with them.

      Reply
      • Daniel says

        Saturday, March 12, 2016 at 5:16 pm

        Very sad news. The website has been updated and there is an illness in the family. They are looking for someone to purchase their company so perhaps it will reopen soon.

        Reply
        • Tamara says

          Saturday, March 12, 2016 at 6:17 pm

          Thank you for the update, Daniel!!

          Reply
    • Phil says

      Wednesday, April 19, 2017 at 1:26 pm

      Just a heads up for anyone doing research. I was able to purchase materials from shuttercutter.com’s website. HOWEVER, I never received any kind of order confirmation via email or anything else. I called after a week and was able to talk to someone, who then emailed me a confirmation, and told me it normally takes 3-4 weeks to ship. This seemed kind of long because it’s just raw materials, but I said ok. 4 weeks later with no updates, I called them and after a couple of tries was able to get ahold of someone who said my order was shipping at the end of the week. I said ok. 2 weeks later, after no updates, and several unanswered calls, voicemails, and emails, I filed a chargeback with my cc company and ordered from somewhere else. 2 weeks later, I get a shipping notification from FedEx that shuttercutter has shipped my order (9 weeks after placing it). I emailed shuttercutter through their webpage, which likely won’t get answered, and told them I had already ordered from somewhere else and would be refusing shipment. All in all, I’ve had a horrible experience with shuttercutter.com.

      The 2nd company I ordered from was customshutters.guru. They are set up on amazon, so I ordered through amazon just in case I ran into the same runaround I had with shuttercutter, but it was the exact opposite. They shipped my stuff the very next day, and I have already received and built my shutters (before I even received the shipping confirmation from shuttercutter.com). I can’t recommend customshutters.guru enough. Unfortunately, my experience with shuttercutter.com was horrible.

      Reply
      • Tamara says

        Wednesday, April 19, 2017 at 7:32 pm

        Thank you for sharing your experience, Phil!!

        Reply
  31. Lexis says

    Sunday, March 20, 2016 at 4:19 pm

    Has anyone found another resource for supplies? I would love to make these.

    Reply
    • Tamara says

      Tuesday, March 22, 2016 at 11:38 pm

      Hi Lexis! I have found a couple of other websites that sell shutter parts. This one, http://www.rockler.com/basswood-traditional-or-plantation-shutter-slats-16-length?utm_source=google&utm_medium=cpc&utm_term=&utm_content=pla&utm_campaign=PL&sid=V9146&gclid=COzVzK3u1csCFYsCaQod8ywFFw seems to have decent louvers and this one, http://www.shuttermedic.com/build-a-shutter.htm seems to have the other parts like louver pins etc. I hope this helps and I will continue the search for a company like Shutter Cutter that has it all!:-)

      Reply
      • Mike G. says

        Saturday, September 24, 2016 at 12:05 am

        If anyone is still looking for a supplier of plantation shutter parts and supplies, try this site: http://www.customshutters.guru . They are based in Houston, Texas and a pleasure to deal with. Very similar materials and prices
        to those available at Shutter Cutters.

        Reply
        • Tamara says

          Saturday, September 24, 2016 at 12:28 am

          Thanks for the recommendation, Mike! ?

          Reply
  32. Joyce says

    Thursday, December 29, 2016 at 6:50 am

    Oh my gosh! I don’t know how you got your head around that project. How detailed and precise you had to be.. and how professional looking it turned out ? I take my diy hat off to you sista!

    Reply
    • Tamara says

      Thursday, December 29, 2016 at 7:43 pm

      Thanks, Joyce!:-) it sure took some research but I’m really happy with how it all turned out!:-)

      Reply
  33. Mrs. Dominguez says

    Saturday, January 7, 2017 at 9:33 pm

    Yellow drapes where can I purchase them they are lovely?

    Reply
    • Tamara says

      Saturday, January 7, 2017 at 9:49 pm

      Hi there! I don’t know the exact source of the yellow drapes but here are some similar ones to check out http://amzn.to/2jgeJEZ and http://amzn.to/2j41qbG (affiliate links). Thanks for the question!

      Reply
  34. Susan says

    Sunday, January 29, 2017 at 9:26 pm

    This is going to be soooooo helpful! Thank-you, thank-you, thank-you!!! I am very grateful for all your research and your step-by-step instructions. I have only just started researching diy plantation and was lucky to come across your post via Pinterest (will definitely be repinning it!).

    I need to make shutters for 6 old wooden sash windows that make up the upper wall of my front porch. I am on a budget and was planning to make the louvres myself from 2x4s using my table saw because I will need dozens of them! They look to be about 1/4″ thick but it’s hard to tell from the photos. Do you know if they have to be made from specific types of wood?

    Thanks so much for posting this. ?

    Susan

    Reply
  35. HappyVegan says

    Monday, April 24, 2017 at 9:01 pm

    No wonder they are so expensive! That is a lot of steps for the little things. I am impressed. I’d need coffee, vodka, and more coffee. Oh, and someone to make the shutters, can’t forget that! 😉

    Reply
  36. Mariano says

    Sunday, August 13, 2017 at 11:51 pm

    What kind of wood are the stiles and rails? I know you bought the rails at Home Depot, but just wanted to make sure on the wood.

    Reply
    • Tamara says

      Saturday, August 19, 2017 at 10:04 am

      I am pretty sure they are pre-primed pine!

      Reply
  37. Donald Wood says

    Tuesday, October 31, 2017 at 7:23 pm

    This was great and very informative! Just what I needed and thanks for the necessary links. I appreciated the humor toward the end.

    Reply
  38. Ivalee Harris says

    Tuesday, January 23, 2018 at 5:12 pm

    Thank you, thank you thank you, a fantastic job, I was researching diy plantation shutter and was lucky to come across your post via Pinterest too. I’ve been look to make my own for years but didn’t know how. I found a supplier here in the UK, so going to give it a try. I am going to cheat and used a Louvre door.

    Reply
    • Tamara says

      Friday, January 26, 2018 at 9:50 pm

      Awesome, Ivalee!! I’m excited for you!

      Reply
  39. Mariano says

    Friday, February 9, 2018 at 7:53 pm

    One more question. Is the actual thickness of the rails(ones you bought at HD) ….Is it 3/4 or 1 inch thick? Thank you!

    Reply
  40. art says

    Friday, March 16, 2018 at 5:45 am

    Admiring the hard work you put into your site and detailed information you provide.
    It’s good to come across a blog every once in a while that isn’t
    the same unwanted rehashed information. Wonderful read!
    I’ve bookmarked your site and I’m adding your RSS feeds to my Google account.

    Reply
    • Tamara says

      Friday, March 16, 2018 at 9:37 am

      Thank you for the kind compliments, Art!!:-)

      Reply
  41. Maria Huntsman says

    Sunday, May 20, 2018 at 9:08 pm

    Hi. I love your blog. I have a question. How did you do the white wall? Is it just the wall with some pieces if wood? Or a whole piece if wood? I lived it and would like to make something similar for my bathroom. There isn’t a link on the post where I can find how you did it. I hope you read my comment. Thank you so much.

    Reply
    • Tamara says

      Monday, May 21, 2018 at 10:18 am

      Hi Maria! Thank you! I haven’t done a tutorial on the wall treatment in the kids bathroom but I’ve had people ask so I should do one!:-) I basically painted the wall white in a semi gloss white paint. Then I bought some trim from Lowes. The vertical strips are latiice trim pieces. They are about 1.5 inches wide and very thin but you could use any trim you want. The vertical piece is a casing piece of trim but again you can use any trim you like. Then I used a level to make sure the wood pieces are placed at straight angles and nailed them in with my nail gun and painted them the same white semi gloss as the wall. Hope this helps!!

      Reply
  42. Maryanne says

    Friday, July 27, 2018 at 12:21 am

    I have loved shutters forever so I’m glad to find your post. Do you know how much depth you need on a window to install a shutter. I have Anderson’s that have VERY little depth so I wonder how this would work. Can you provide a close up of how you mounted your shutters.
    Your detailed post is very much appreciated.

    Reply
  43. jeff says

    Wednesday, February 27, 2019 at 10:11 pm

    Outstanding!
    Learn from my mistake. when painting make sure you do not use latex paint. you want something that is not ‘sticky’ when it dries or you will have problems. trust me. Polyurethane or oil based is best, or ask your paint supplier and let them know what you are doing.

    Reply
  44. Australian Plantation Shutters says

    Monday, April 8, 2019 at 3:12 am

    Hi Tamara

    Thank you for this step by step guide. Hope these DIY plantation shutter ideas helps make my home look classy and elegant.

    Keep up the good work dear 🙂

    Reply
  45. Stephanie says

    Tuesday, October 22, 2019 at 5:00 pm

    It seems the Shuttercutter company no longer exists and the website is for sale.

    Reply
  46. Suzanne says

    Sunday, November 8, 2020 at 4:00 am

    Hi Tamara!
    I guess I’m a little late to this post.
    First, Your shutters are lovely! I’ve always wanted to try this. However, every tutorial I’ve seen requires so many tools! Yours is much more helpful for the average DIY person.

    Second, I see you respond to questions from your viewers. Thank you for this. There are so many sites with tutorials where they don’t bother to answer people’s questions!

    Lastly, The question I have is why both tension pins and nylon pins need to be used? Can it be one or the other? Also, I saw a tutorial where short aluminum rivet pins were used. These seem kind of long, but are thin enough that I imagine the ends could be snipped off. Do you think this would work? Also, I have a bunch of 1/4” plywood left from a faux Shiplap project I did, and I’m wondering what you think about using this to make my own louvers? Thank you in advance for your time!

    Reply

Leave a Reply Cancel reply

Your email address will not be published. Required fields are marked *

Hello and Welcome!! My name is Tamara and this is where I share my tips and tricks to creating a beautiful home! If you are new, feel free to start HERE.

More Blog Inspiration:-)

  • Icon Caroline on Design

    Close preview

    Loading...
  • Icon Centsational Girl

    Close preview

    Loading...
  • Icon Decorating Delirium

    Close preview

    Loading...
  • Icon Lauren Liess

    Close preview

    Loading...
  • Icon Life on Virginia Street

    Close preview

    Loading...
  • Icon Remodelaholic

    Close preview

    Loading...
  • Icon The Creativity Exchange

    Close preview

    Loading...
  • Icon Thrifty Decor Chick

    Close preview

    Loading...

Categories


Disclosure & Privacy Policy

You might also like

The Final Before & After of our Current Home

The Final Before & After of our Current Home

New Build Update-Paint, Lighting, and Floors oh My!

New Build Update-Paint, Lighting, and Floors oh My!

New Home Update

New Home Update

New Build Update- Cabinets are in!

New Build Update- Cabinets are in!

House Update–We Have Walls!

House Update–We Have Walls!

Join Me on Instagram!

[instagram-feed num=9 cols=9 showbutton=false]

Privacy

Copyright © 2022 · Savory theme by Restored 316