Provident Home Design

Decor, DIY, and Interior Design

  • HOME
  • ABOUT
    • About PHD
    • Contact Me
  • DIY PROJECTS
  • DESIGN 101
  • PAINT
  • HOME TOUR
  • DESIGN INSPO
  • DECOR TIPS

GET NOTIFIED VIA EMAIL WHEN THERE'S A NEW POST!

Making a Case for Window Casings

Happy long weekend Everyone!

I know my title for this post could be interpreted in two different ways so let me clarify.  Today we are not talking about making a physical case to store your window casings (trim) in.  I am sharing a step by step tutorial on how to case a window and why I think you should definitely consider doing this project!:-)


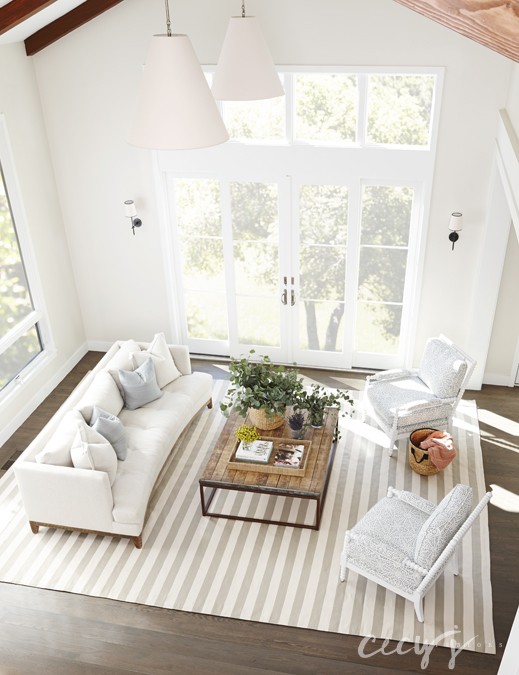
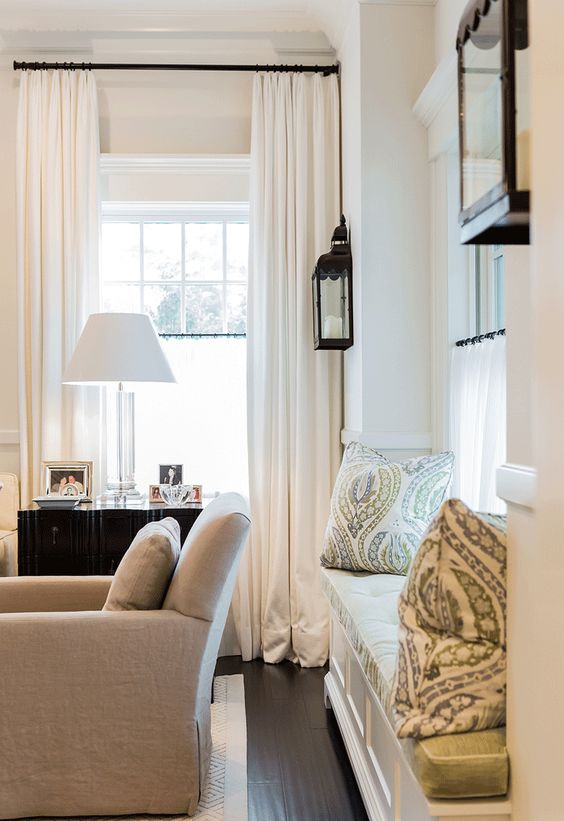
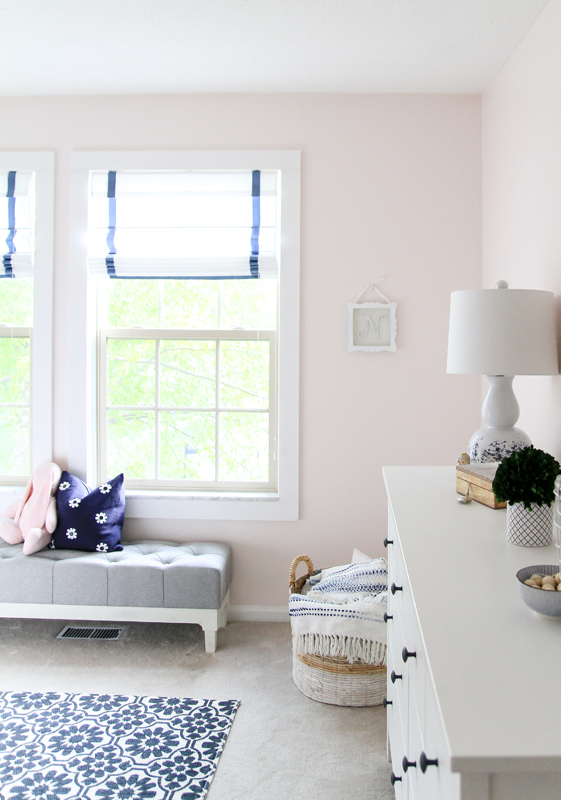
In preparing for this post I looked through all of the interiors I have saved on Pinterest and in my idea books on Houzz and almost every single window (about 95%) had white trim work  (casing) around the windows!

I found this extremely interesting considering most homes these days are not built with window casings (I assume it’s a way for builders to save money)!

Cecyj Interiors

via Cecyj Interiors


How to Case Windows Bedroom Example

via Alice Lane Home

How to Case a Window Living Room Example

via Brookes and Hill


There is a saying in interior design that states ‘design is in the details’ and this rings true for window casings!  Window casings although small in visual weight make a huge impact in the overall feel of room.

They make a room feel more cohesive, more full of character, and more expensive.

This past Spring when I made over my daughter’s room and my master bedroom in 6 weeks I was tempted to forego adding window casings to my master bedroom because I was running out of time (and energy).

I told myself it wouldn’t make that much difference since the walls are so light and I will have drapes covering the sides of the window…the casings won’t even be noticeable I rationalized.

Thankfully a design-loving friend encouraged me to do it anyway and I’m so glad I did because although it may have been a small detail it did make a big difference!


Window Casing in My Master Bedroom

Master Bedroom After


Window Casings In My Daughter’s Room

Girl's Bedroom ORC Week 6


So, have a convinced you yet that window casings (if you don’t have them already) will make a big difference in the beauty and character of your home?:-)  I’ve been slowly adding them to my home over the past 5 years (I have 3 rooms left).

The price of this DIY varies but averages around $15 per window and you don’t even have to own a saw.

I’m going to walk you through—How To Add Window Casings to Your Windows (which I did this past week in our TV  media room that I’m in the process of refreshing).

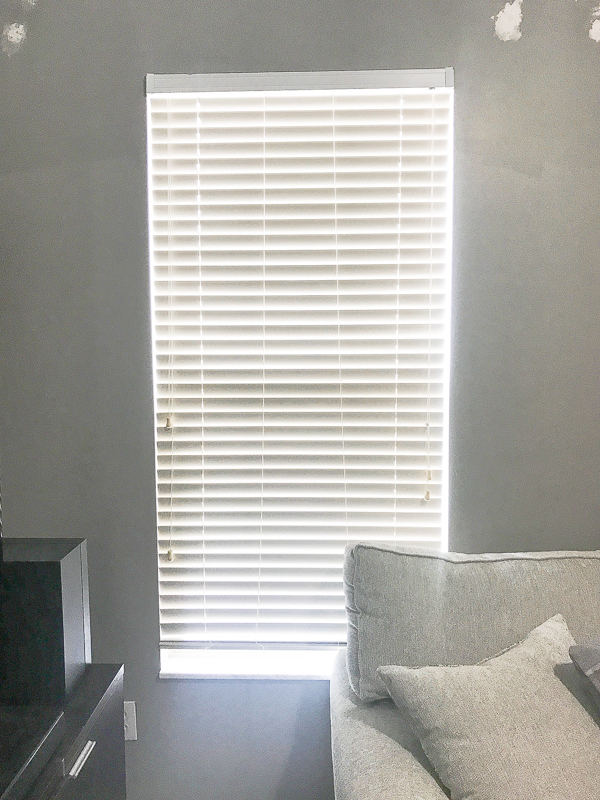
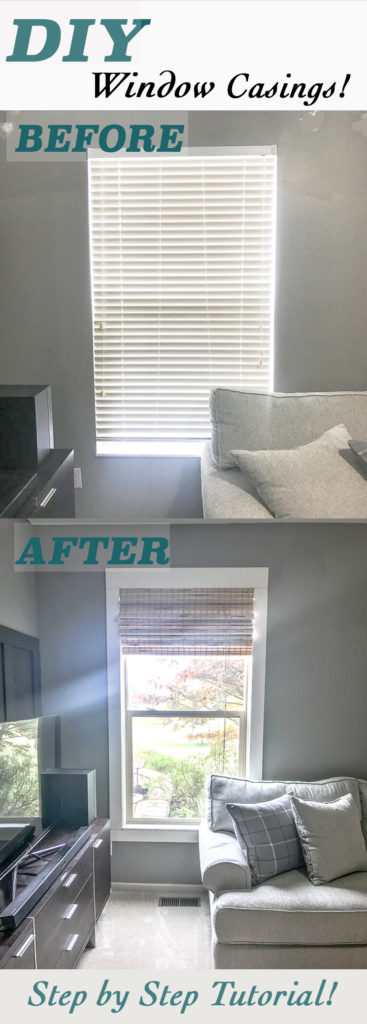
Here is the Before without window casings (the white marks on top are where I patched the holes in the wall after taking down the curtain rod).

How to Case a Window Before


STEP 1:  Get the Wood Trim.  With a measuring tape measure the width and length of your window.  My window was 35 inches wide by 68 inches long.

For the side pieces of trim I used 1×4’s and for the top piece I used a 1×6.

For window casings I love using Lowes pre-primed pine wood that they keep at the end cap of their trim aisle.  It comes in 16ft. and 8ft. lengths.

How to Case a Window Trim


For my window size I only needed one 16ft long of the 1×4 and one 8ft of the 1×6.

Now to determine what measurement to cut the trim.  Professionals install window casings 1/4 inch out from the window sill to account for contraction in the wood due to temperature changes.

So to get the bottom and top piece measurement you will do the following formula:

The width of the window sill (35 inches for me) + 1/4 inch allowance on each side (1/2 inch) + the 3.5 inch width of the trim being used on each side of the window (7 inches)= 42.5 inches

Note:  Although you would think 1×4’s are 4 inches wide they are actually only 3.5 inches wide and 1×6’s are only 5.5 inches wide.

For the measurements for the side pieces you will do the following formula:

The length of the window sill (68 inches for me) + 1/4 inch allowance on each side (1/2 inch)= 70.5 inches


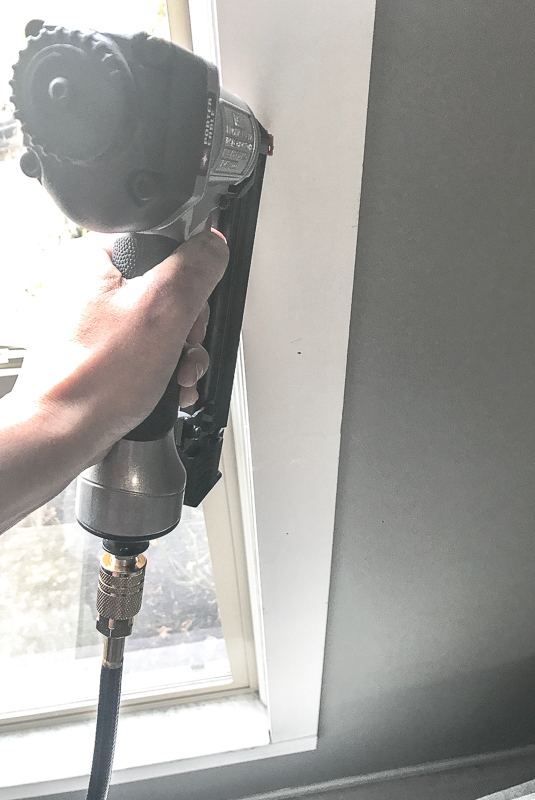
STEP 2:  Nail in the Bottom Piece of Wood.    Center the bottom piece of wood under the window and nail it in.

How to Case a Window Step 1


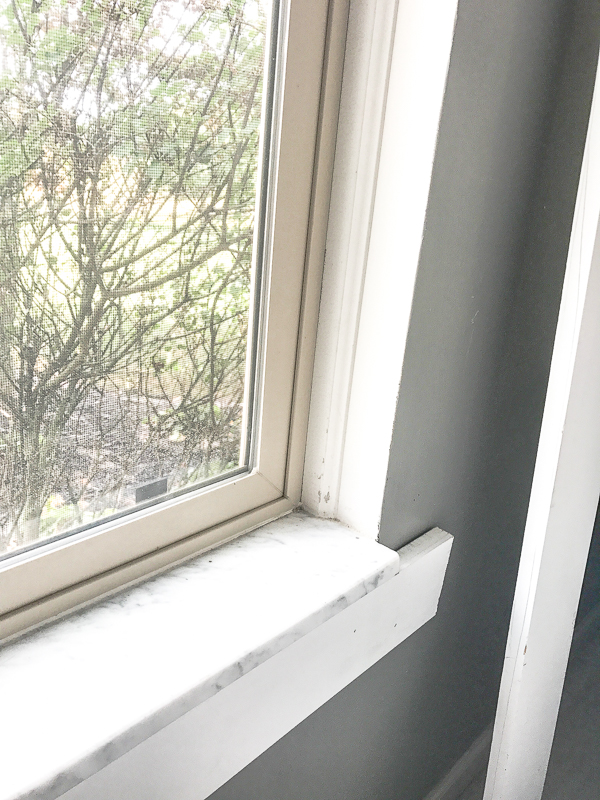
If you measured correctly there should be 1/4 of an inch plus the width of the trim hang over on each wide of the window sill.

How to Case a Window Step 1 pic 2

Hint:  Although you can use a hammer and nails it is quicker and easier to use a nail gun.  Here is a tutorial (complete with video) showing you how to use a nail gun.


STEP 3:  One at a time place the side trim pieces on top of the bottom piece hang over making sure the outer side is flush with the edge of the bottom piece of wood and that there in a 1/4 inch space between the window sill edge and the trim edge..  Then nail into place.

How to Case a Window Step 2


Hint:  You can use a level to make sure they are vertically straight.

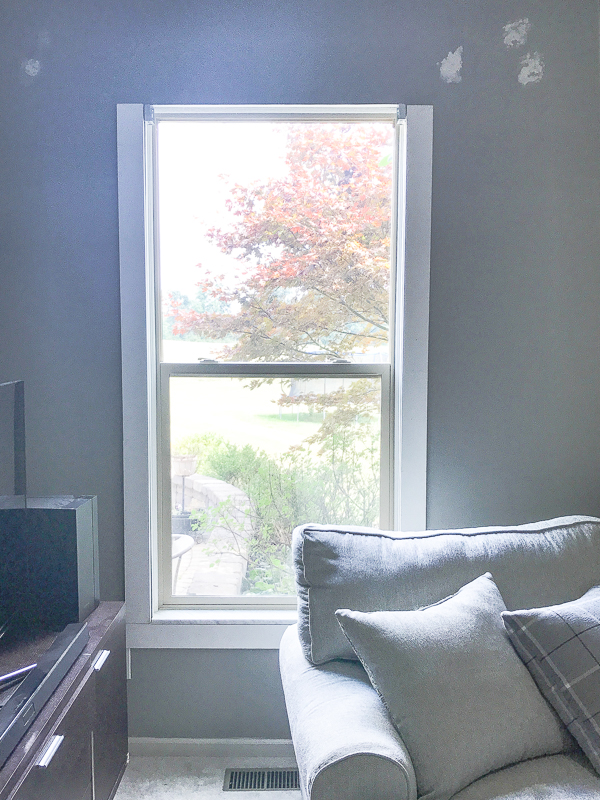
Here’s how it should look so far–good but bald on top!:-)

How to Case a Window Step 3


STEP 4:  Nail in the Top Piece of Wood.  The top piece of wood should sit flush with the outside edges of the side trim and if possible also have a 1/4 inch space between the window sill the the trim edge.


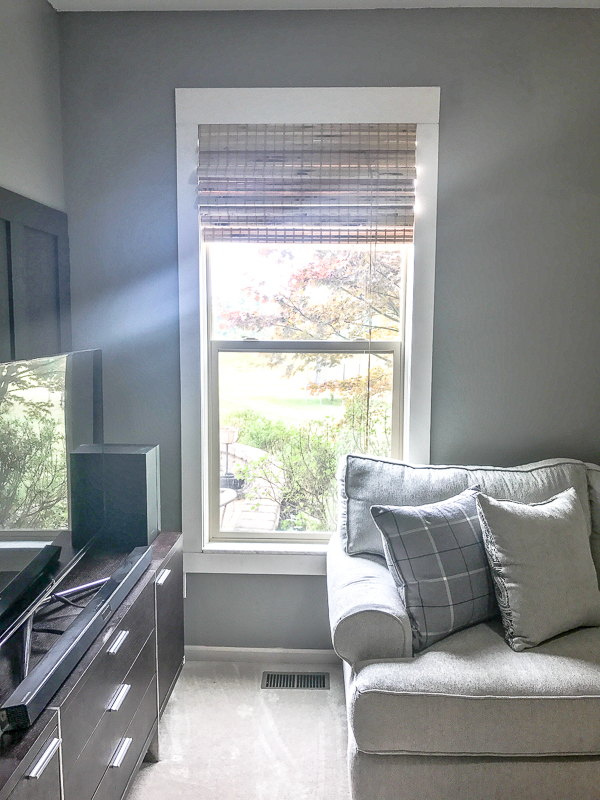
STEP 5:  Apply Caulk and Paint.  Apply thin amount of caulk along inner and outer sides of the trim and gently press in with slightly wet finger.  Lastly paint.  I love using Behr’s Ultra Pure White in Semi-gloss for window casings.

How to Case a Window After


I also switched out our blinds with this wooden roman shade.


Big difference, right?


I will be sure to show you the media room after when I’m done with the refresh!:-)

Let me know if you have any questions about installing window casings and thank you for following along!!

Have a great rest of your weekend!


Related Posts From the Blog:

  • How to Put Glass in Cabinet DoorsHow to Put Glass in Cabinet Doors
  • Blog Tour and BaseboardsBlog Tour and Baseboards
  • Painting Wood Furniture (without sanding or priming)!Painting Wood Furniture (without sanding or priming)!
  • Affordable Solutions for Organizing your HomeAffordable Solutions for Organizing your Home
  • Friday 5 DIYFriday 5 DIY
  • 2018 BIA Parade of Homes Sneak Peek2018 BIA Parade of Homes Sneak Peek
  • Ready, Set, Go Garage Sale-ingReady, Set, Go Garage Sale-ing
  • Pantone’s 2015 Color of the YearPantone’s 2015 Color of the Year

before and afters// budget decor// decorating// DIY// tutorials// window treatments// woodwork10 Comments

Subscribe

GET NOTIFIED VIA EMAIL WHEN THERE IS A NEW POST!

« The Easiest Way to Add Brick to Your Home
Interview with Organizing Guru, Jane Stoller! »

Comments

  1. Alba says

    Sunday, September 3, 2017 at 1:54 am

    Hello! It seems like you used straight cut pieces. Our were they talented/ beveled? It looks great!

    Reply
    • Tamara says

      Sunday, September 3, 2017 at 10:16 pm

      Hi Alba! Yep, just straight cuts!:-)

      Reply
  2. Dudie Sipe says

    Sunday, September 3, 2017 at 8:18 am

    I have to say, I’ve NEVER seen a window without window casings. Didn’t even know such a thing existed. You did a wonderful job, and it looks stunning!

    Reply
    • Tamara says

      Sunday, September 3, 2017 at 10:19 pm

      Hi, Dudie, that’s interesting! I wonder if it makes a difference where you live geographically? I’m in Ohio…what area do you live in?

      Reply
    • Val says

      Saturday, September 9, 2017 at 7:05 am

      Come to UK, you’ll see a lot of them here. Only the old (period) houses still have them – of course, if the owners preserved them through the years.

      Reply
  3. Charolette says

    Sunday, September 3, 2017 at 9:09 am

    Great idea!! I see what MY windows need! Question…is the sill at the bottom of the window made of wood or is it marble, etc. The picture looks like stone, but I am not sure. Why not paint before you nail up around the window? Thanks!

    Reply
    • Tamara says

      Sunday, September 3, 2017 at 10:24 pm

      Hi Charolette! I believe that it is cultured marble. You can totally paint the wood trim before you install it. I like to wait till after it’s installed because there will be nail holes that will need to be painted over anyways. Great questions!

      Reply
  4. shootmyhouseblog says

    Wednesday, September 6, 2017 at 11:28 pm

    massive difference and it looks relatively easy. awesome!

    Reply
  5. Val says

    Saturday, September 9, 2017 at 7:12 am

    Tamara, you might be my lost sister 🙂 I have a special folder “windows” in my idea book, and all the windows there have one or another sort of trim around them. Thank you for the post! I am planning to do something similar to all the windows in my house. The technology is going to defer though, as the walls are solid masonry (I wish I could just nail something to the wall).

    Reply
    • Tamara says

      Saturday, September 9, 2017 at 9:18 am

      How fun to think that I might have a long lost sister, Val!:-) I wish you luck in figuring out how to install your casings!!

      Reply

Leave a Reply Cancel reply

Your email address will not be published. Required fields are marked *

Hello and Welcome!! My name is Tamara and this is where I share my tips and tricks to creating a beautiful home! If you are new, feel free to start HERE.

Subscribe

Get notified via email when there's a new post!

Join me on Instagram!

[instagram-feed]

More Blog Inspiration:-)

  • Icon Caroline on Design

    Close preview

    Loading...
  • Icon Centsational Girl

    Close preview

    Loading...
  • Icon Decorating Delirium

    Close preview

    Loading...
  • Icon Lauren Liess

    Close preview

    Loading...
  • Icon Life on Virginia Street

    Close preview

    Loading...
  • Icon Remodelaholic

    Close preview

    Loading...
  • Icon The Creativity Exchange

    Close preview

    Loading...
  • Icon Thrifty Decor Chick

    Close preview

    Loading...

Categories


Disclosure & Privacy Policy

You might also like

The Final Before & After of our Current Home

The Final Before & After of our Current Home

New Build Update-Paint, Lighting, and Floors oh My!

New Build Update-Paint, Lighting, and Floors oh My!

New Home Update

New Home Update

New Build Update- Cabinets are in!

New Build Update- Cabinets are in!

House Update–We Have Walls!

House Update–We Have Walls!

Join Me on Instagram!

[instagram-feed num=9 cols=9 showbutton=false]

Privacy

Copyright © 2021 · Savory theme by Restored 316

Enter your name and email to get my weekly post sent to your inbox... it's FREE!
Want to learn more about DIY, decorating, and making your home beautiful? Sign up below!
Your information will *never* be shared or sold to a 3rd party.