Provident Home Design

Decor, DIY, and Interior Design

  • HOME
  • ABOUT
    • About PHD
    • Contact Me
  • DIY PROJECTS
  • DESIGN 101
  • PAINT
  • HOME TOUR
  • DESIGN INSPO
  • DECOR TIPS

GET NOTIFIED VIA EMAIL WHEN THERE'S A NEW POST!

Laundry Makeover Gone Glam

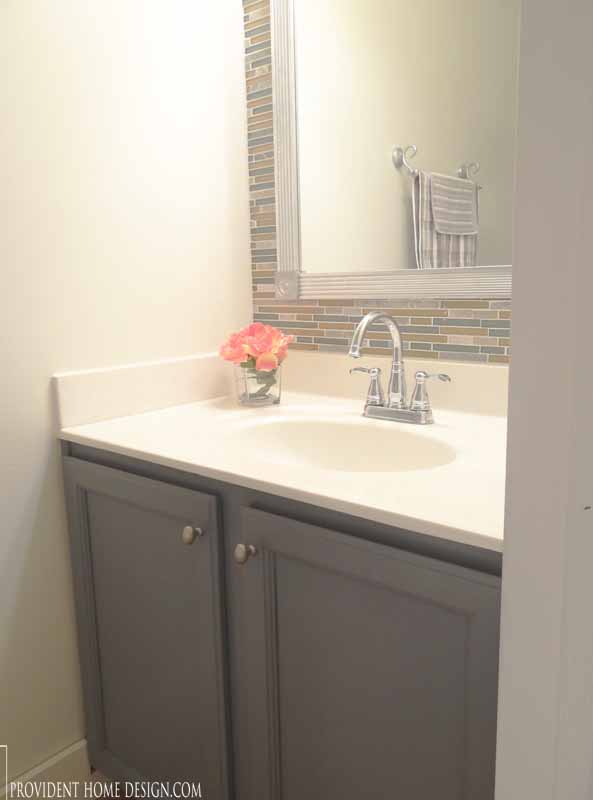
You may remember when I helped my friend, Lolly, makeover her powder bathroom (if not see post, Here).


Powder Bathroom on a Budget

Well, we’ve been at it again!  This time re-working her laundry room.

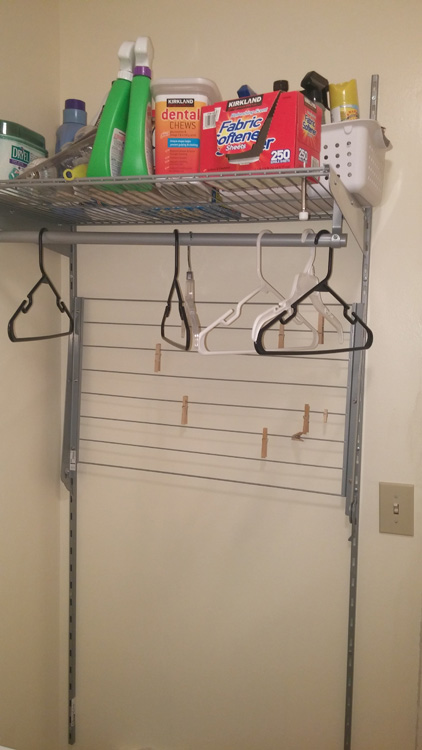
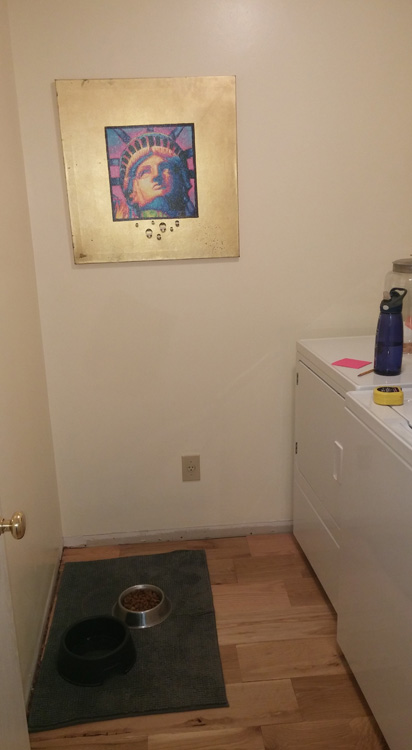
Her laundry room was somewhat functional with an IKEA wall shelf but she felt she needed more storage space…

Before Photo of Laundry

and didn’t like twisting to hang things up on the side wall.  She preferred to have her storage and hanging rod above the washer and dryer and her laundry and dog supplies behind closed doors.

Before Laundry 1

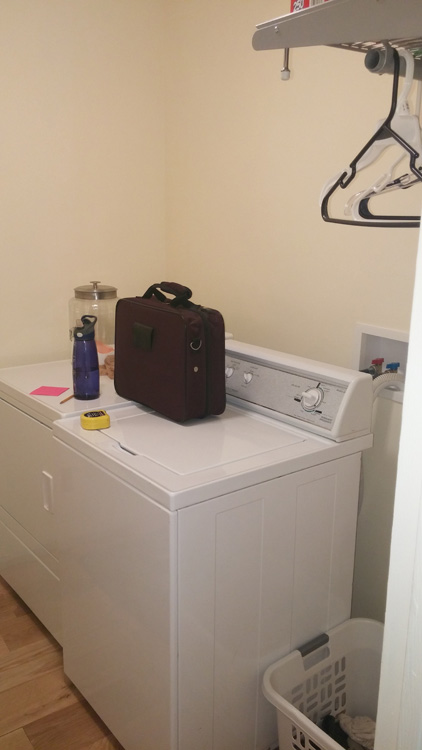
Additionally, it was evident to me that we needed to create a more space efficient and aesthetically pleasing dog feeding system.

Before Laundry

All this while infusing Lolly’s desired style of decorating coined, “rustic glam”.  I’m happy to say we achieved all of the above criteria!!

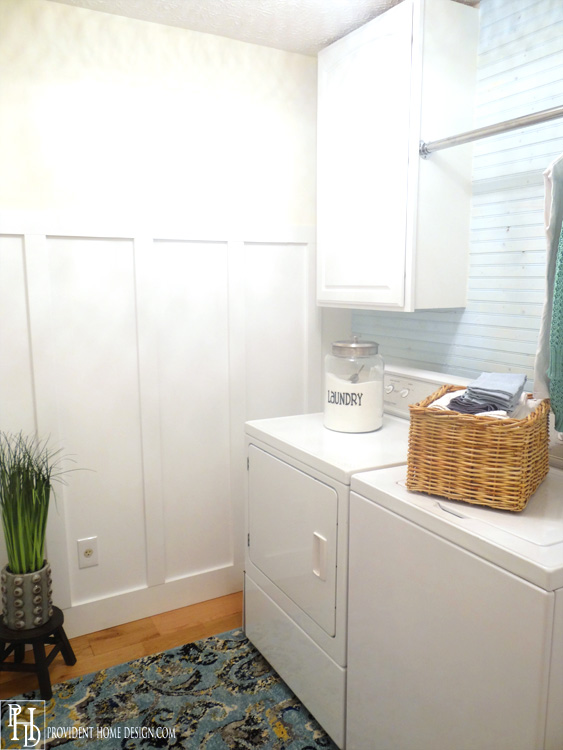
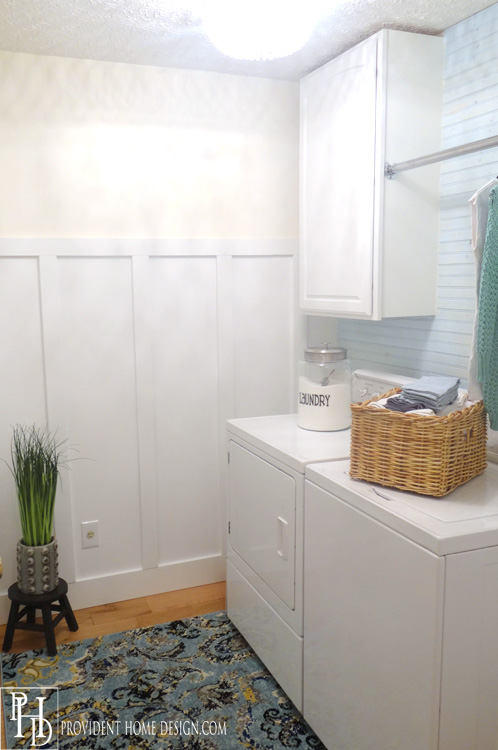
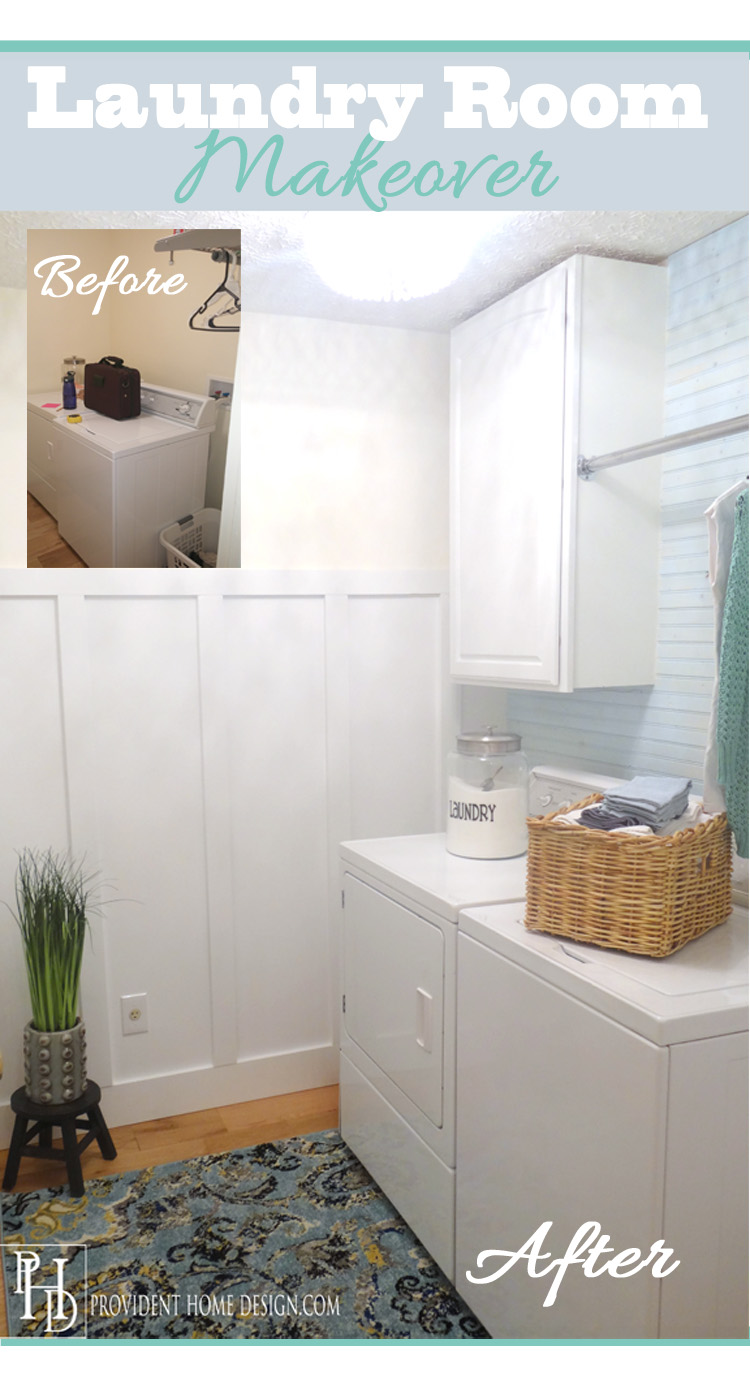
Here is Lolly’s new and improved laundry room!  What do you think??

Laundry Room Makeover After

Laundry Room

Laundry Room After

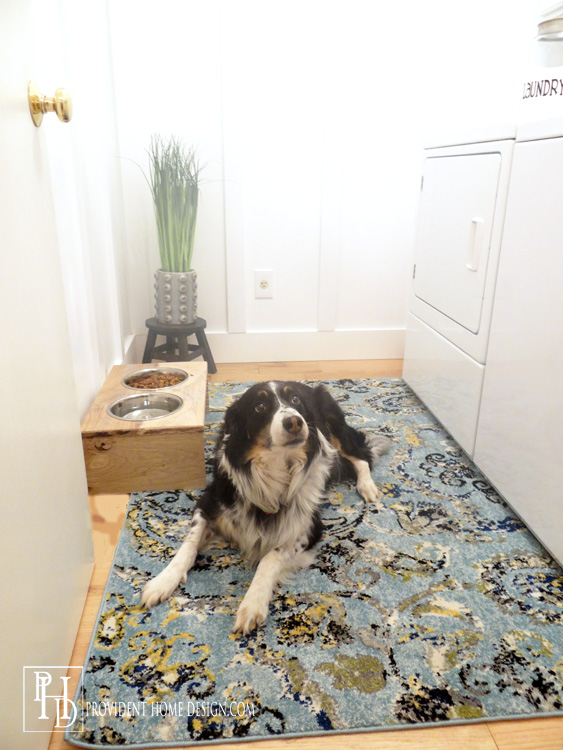
Even her sweet K9, Cole, seems pleased with the transformation.:-)

Laundry Room Dog Approved

So what did we (I did the designing work and she and her hubby did the DIY work) do?

First she added board and batten to 3 walls of the room (tutorial to come).

Laundry Makeover Reveal

Before the washer and dryer were pushed against the far side of the wall so next we brought the washer and dryer to the center of the wall.

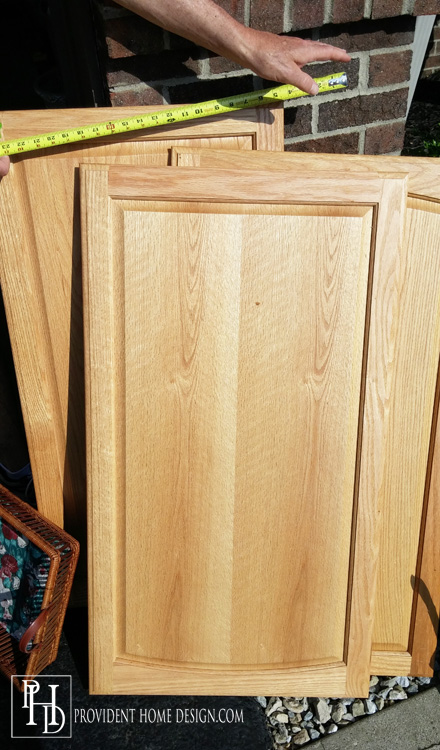
Lolly really wanted cabinets for storage and had looked at stores and on Craigslist for possible budget friendly options but without success.  When Lolly sent me this picture in a text of some 42 inch tall cabinet doors for $4 at a garage sale I said, YES, get them!

Cabinet Door for Laundry Room

With help from a church missionary who used to work at a cabinet shop, she and her husband made the cabinet boxes for the door fronts (tutorial to come).  They did a great job didn’t they?

Budget Laundry Room

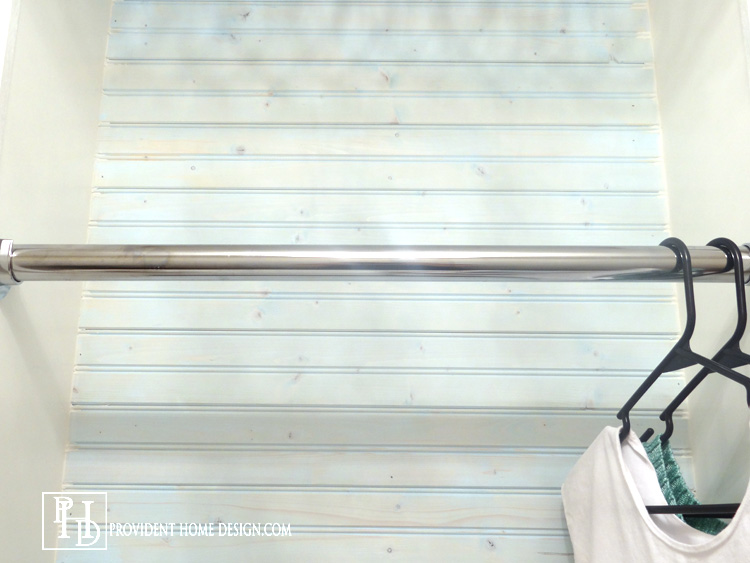
To add a bit of a rustic feel and for some textural interest we added a tongue and groove(y) beadboard backsplash that went all the way up to the ceiling.  The packs were on sale at Menard’s for $7 and we used only used 2 packs.

Laundry Room Bead Board Backsplash

For a pop of color we “whitewashed” the bead board in Behr’s Silent Breeze.  If you haven’t whitewashed before it’s super easy you just mix 1 part paint to 1 part water and brush it on (we only did one coat).

Laundry Room Backsplash

Money Saving Tip:  If you are just doing a small project like this you can buy a sample size of paint for $3.  1 cup of water mixed with 1 cup of paint was all we needed for this job!

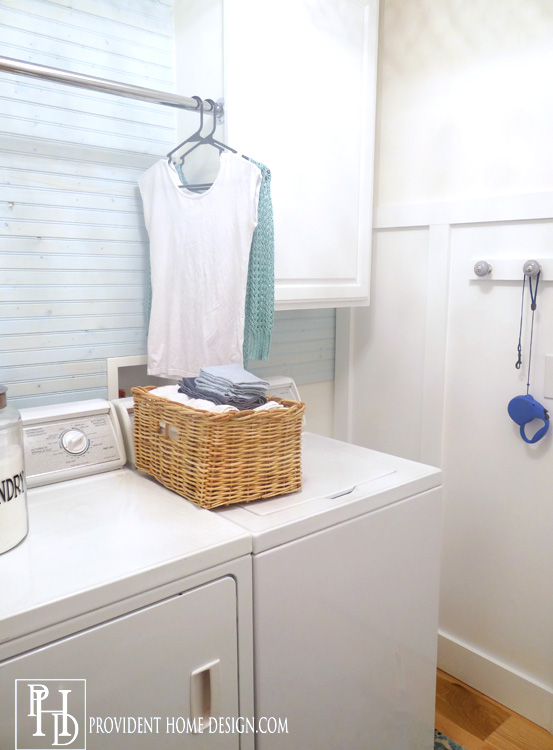
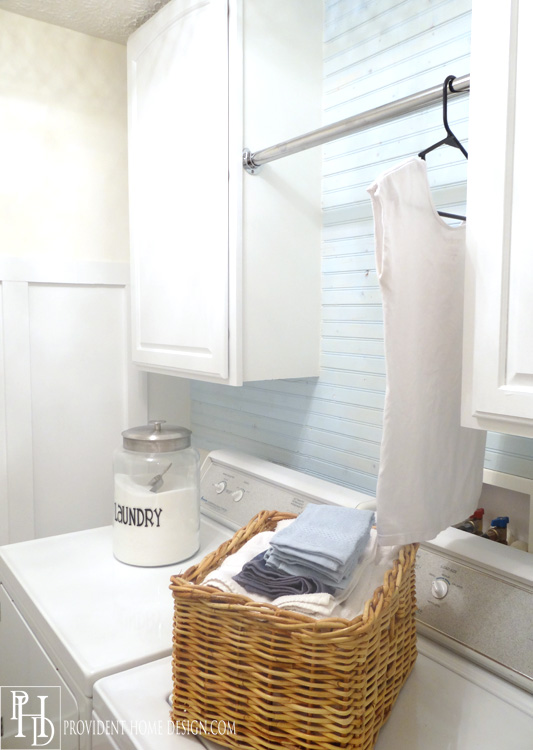
Lolly definitely wanted a place to hang clothes and so I chose to separate the cabinets and have a pole going in between the cabinets.  She bought the pole/pipe at home depot and got it cut to size there.  I think the pole and hanging hardware came to around $20.

Laundry Room After

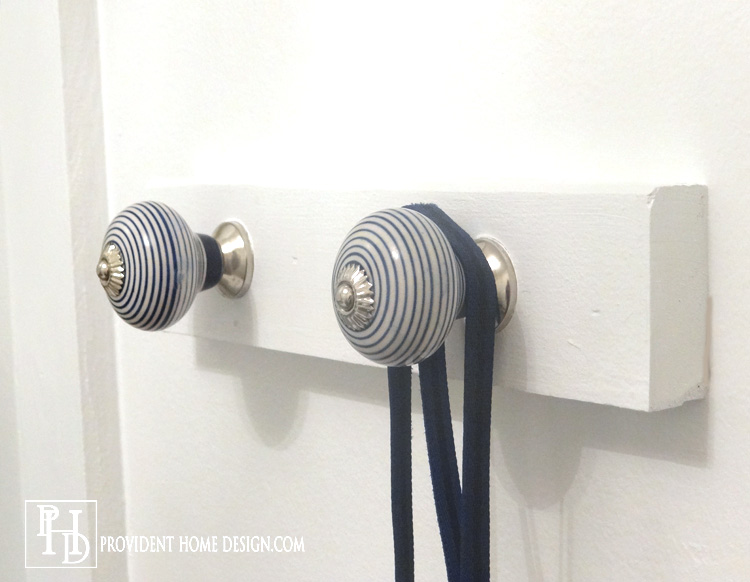
On the wall by the door where the Ikea shelves used to be we hung a 12 inch board with a couple of cute decorative knobs we found at Homegoods.

Knobs for Laundry Room

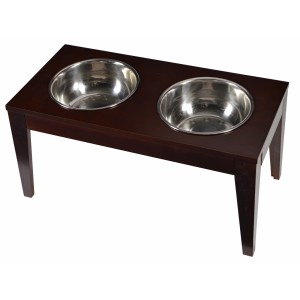
As for the dog dish solution I suggested making a pretty dog food feeder.  I love this one but it sells for $60.

Raised-Wooden-Pet-Feeder-Diner-Set-f7a05327-7e8b-421c-9e0d-1faf471e3f82

via Overstock

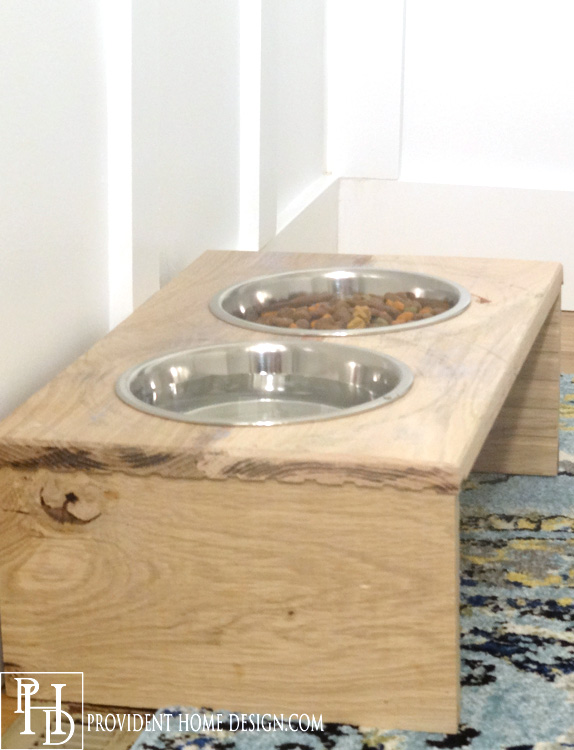
Lolly’s husband made this one for only $10!  I think it looks great with the clean lines and rustic feel of the room.

Wood Dog Food Tray

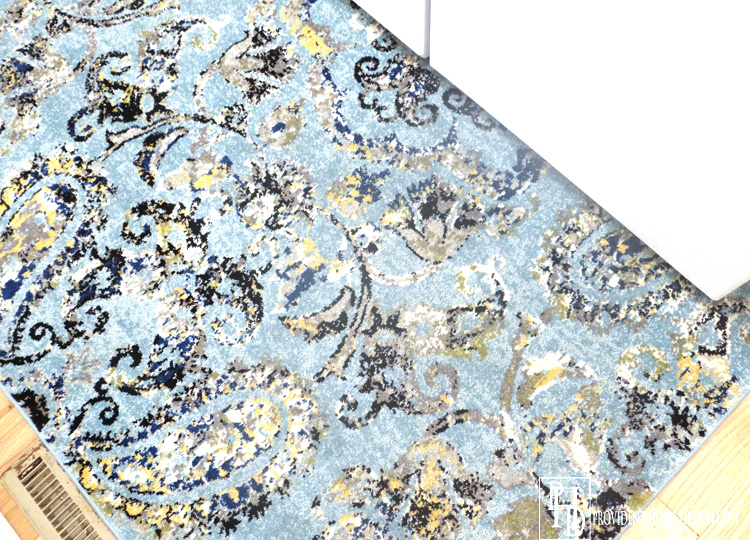
I wrote all about where I got the rug, Here.  We ended up cutting the rug in half and each taking a half (I now have the same rug in my laundry room).:-)

Rug for Laundry Room

I wasn’t sure how the rug would cut but we used an exacto knife with a “carpet blade”, turned the rug over, measured and drew a straight line and it cut like buttah (clarification butter not butt, uh).:-)  Seriously it was SO smooth and easy!

Just an FYI if you ever want to cut a rug, Home Depot does sell self-adhesive binding tape for around $6 that you can put on the side of the rug that has been cut.  They only have brown and red in stock at our Home Depot so since our cut edge is hidden safely under the washer and dryer we decided not to bind.

At last we get to talk about the most glamorous part of the laundry makeover, her beautiful ceiling light!

Glamorous Laundry Light Fixture

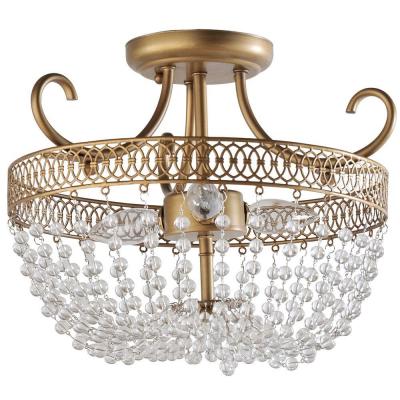
Before she had a two bulb, frosted “boob” light.  I knew we would need to replace with something that was more light and airy and glamorous and that it needed to be under $65.  Light fixtures can be ridiculously expensive but thankfully we found this one for only $56!

Inexpensive Semi-Flush Mount Light Fixture

via Home Depot

It gives off tons of glorious light (I’m a sucker for a generously lit space)!!  Although I like the finish the light fixture comes in I felt it wasn’t the right finish for Lolly’s laundry room so we spray painted the hardware in silver/chrome before attaching the beads and hanging it.

And there you have it, Friends, a happily ever after laundry room!:-)

Laundry Room Makeover on a Budget!

A huge thanks to Lolly for letting me have some design fun and for letting me share it with you all!  If you liked this makeover feel free to pin or share it too!

Till next time!:-)

Signature

[jetpack_subscription_form]
Related Posts From the Blog:

  • Laundry Room Makeover Reveal!Laundry Room Makeover Reveal!
  • A Powder Bathroom Makeover for LollyA Powder Bathroom Makeover for Lolly
  • Restoration Hardware Knockoff MirrorRestoration Hardware Knockoff Mirror
  • New Build- Boys Room/ Guest Bedroom RevealNew Build- Boys Room/ Guest Bedroom Reveal
  • My Living Room Makeover Reveal!My Living Room Makeover Reveal!
  • When Mirrors Fall DownWhen Mirrors Fall Down
  • How to Install Shiplap & Finished Wall Storage System (ORC Week 3)How to Install Shiplap & Finished Wall Storage System (ORC Week 3)
  • Peel and Stick, Removable Wallpaper Options!Peel and Stick, Removable Wallpaper Options!

Uncategorized10 Comments

Subscribe

GET NOTIFIED VIA EMAIL WHEN THERE IS A NEW POST!

« My nuLoom Rug Crush
How to Paint Stair Railings like a Boss »

Comments

  1. Val says

    Friday, July 10, 2015 at 3:54 am

    It looks absolutely great! The only thing I would change if it was my laundry room would be to leave the appliences where they were and add a tall cabinet between the washing machine and the wall. Maybe it is because the houses in UK are generally smaller and I tend to use every inch 🙂 But the design is stunning and this post came just in time, thank you Tamara! I am going to show it to my partner, who I am trying to persuade that we need a laundry room more than a second shower room 🙂

    Reply
    • Tamara says

      Friday, July 10, 2015 at 8:58 am

      Thank you, Val! I wish you the best of luck in your persuasion endeavors!!:-)

      Reply
  2. Susan Hardman says

    Friday, July 10, 2015 at 8:20 am

    You are truly the makeover queen! It is so much fun to see all of your fantastic design ideas materialize…what a fun way to start the day!
    Sue H

    Reply
    • Tamara says

      Friday, July 10, 2015 at 8:47 am

      Thank you, Sue!:-) We need to catch up soon!!

      Reply
  3. Wendy says

    Friday, July 10, 2015 at 10:32 am

    Fantastic Tamara! You and lolly are quite the duo! It turned out beautiful! Oh how I wish you were nearby to consort with me on my new home!

    Reply
    • Tamara says

      Friday, July 10, 2015 at 11:26 am

      Oh how I wish you were nearby too, Wendy! I was just thinking yesterday how I would love to see what you’ve done so far!!

      Reply
  4. April R @Uncookie Cutter says

    Tuesday, September 8, 2015 at 11:21 am

    Gorgeous! I love how it turned out, I need to redo mine so badly!!!

    Reply
    • Tamara says

      Tuesday, September 8, 2015 at 2:10 pm

      Thank you, April!:-)

      Reply
  5. Amy Cochran says

    Friday, November 27, 2015 at 7:41 pm

    Looks amazing!! I need you to come help me do this to mine now!! 😉

    Reply
    • Tamara says

      Friday, November 27, 2015 at 10:13 pm

      I would LOVE to Amy!:-)

      Reply

Leave a Reply Cancel reply

Your email address will not be published. Required fields are marked *

Hello and Welcome!! My name is Tamara and this is where I share my tips and tricks to creating a beautiful home! If you are new, feel free to start HERE.

Subscribe

Get notified via email when there's a new post!

Join me on Instagram!

Load More...Follow on Instagram

More Blog Inspiration:-)

  • Icon Caroline on Design

    Close preview

    Loading...
  • Icon Centsational Girl

    Close preview

    Loading...
  • Icon Decorating Delirium

    Close preview

    Loading...
  • Icon Lauren Liess

    Close preview

    Loading...
  • Icon Life on Virginia Street

    Close preview

    Loading...
  • Icon Remodelaholic

    Close preview

    Loading...
  • Icon The Creativity Exchange

    Close preview

    Loading...
  • Icon Thrifty Decor Chick

    Close preview

    Loading...

Categories


Disclosure & Privacy Policy

You might also like

New Build Update-Paint, Lighting, and Floors oh My!

New Build Update-Paint, Lighting, and Floors oh My!

New Home Update

New Home Update

New Build Update- Cabinets are in!

New Build Update- Cabinets are in!

House Update–We Have Walls!

House Update–We Have Walls!

How to Paint Furniture to look Bleached out and House Update

How to Paint Furniture to look Bleached out and House Update

Join Me on Instagram!

Follow on Instagram

Copyright © 2019 · Savory theme by Restored 316

Enter your name and email to get my weekly post sent to your inbox... it's FREE!
Want to learn more about DIY, decorating, and making your home beautiful? Sign up below!
Your information will *never* be shared or sold to a 3rd party.