I’ve been busy, busy, busy this week working in the yard. There is always so much to do outside after a long winter–weeding, mulching, watering, and raking leaves (yes, I have learned if you don’t rake your leaves all the way in the fall they will still be waiting for you come Spring).:-(
But alas I am making progress and it is fun to see how a little (or a lot of effort) in the yard goes along way.
I have even taken a stab at DIY landscaping which I will be sure to touch on sometime in the future.
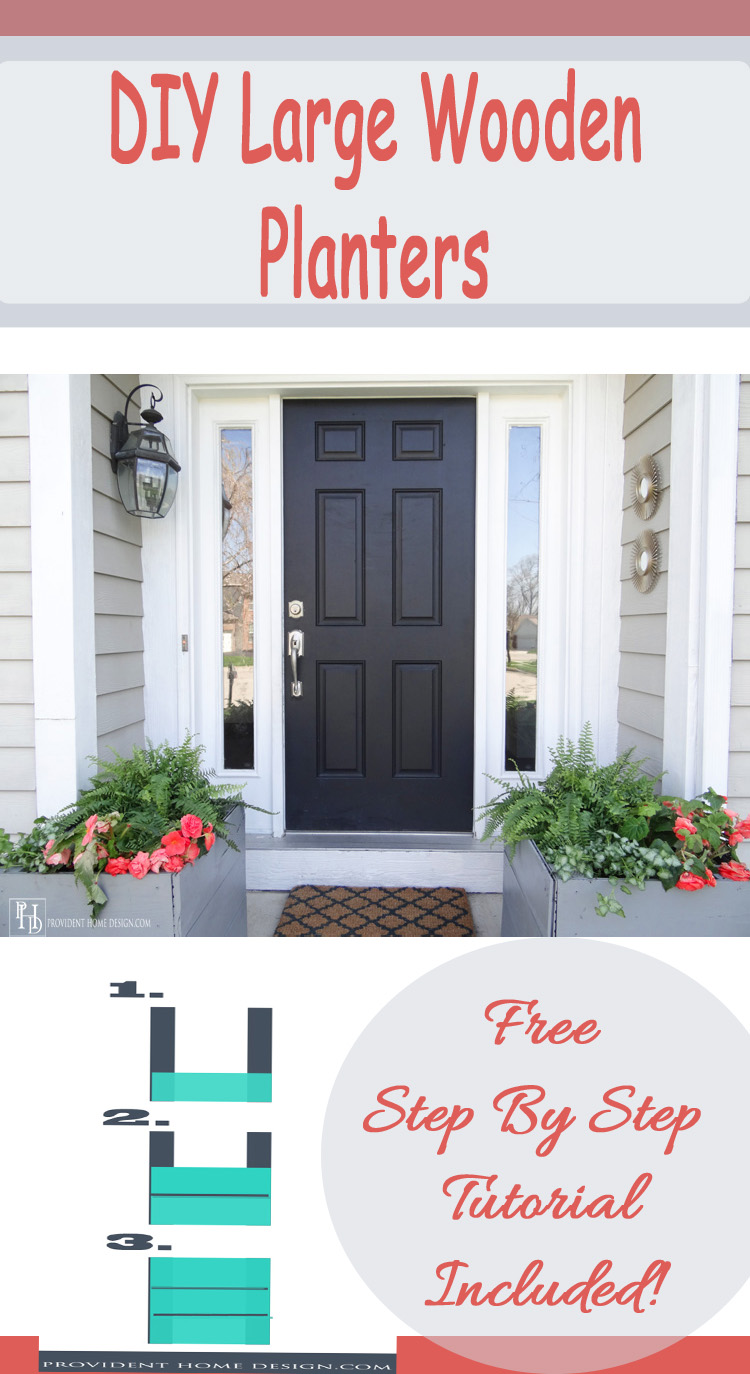
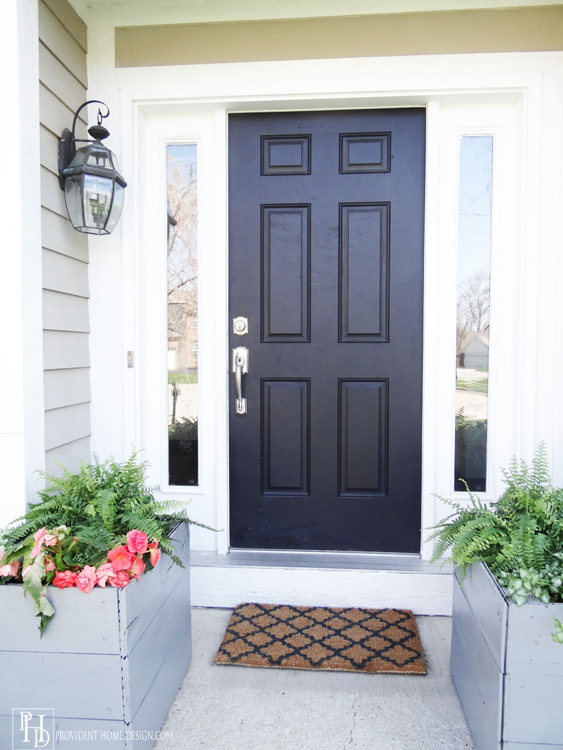
Today I want to share with you how to make large wooden planters. I must admit that I was intensely inspired by these planters from my Design 101-Balance post (photo below).
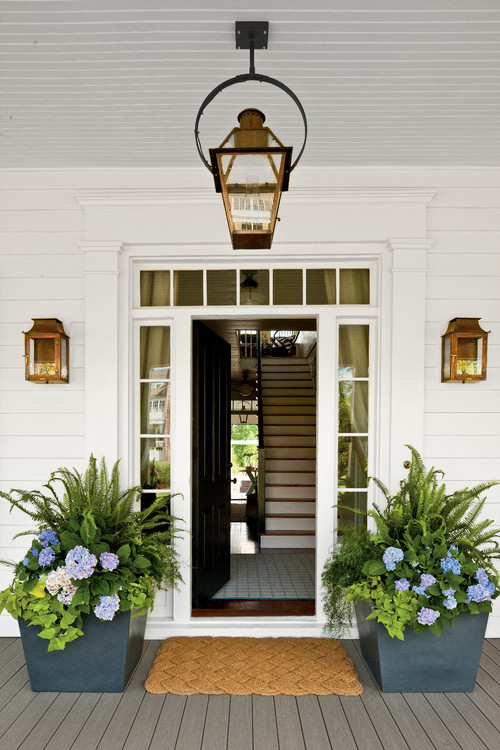
Historical Concepts via Houzz
I am pretty much obsessed with them actually (as well as the whole porch). But unfortunately planters like this cost a small fortune, at least $300 for two of them which is too much for me. So what’s a determined girl to do but to make some herself for a lot less.
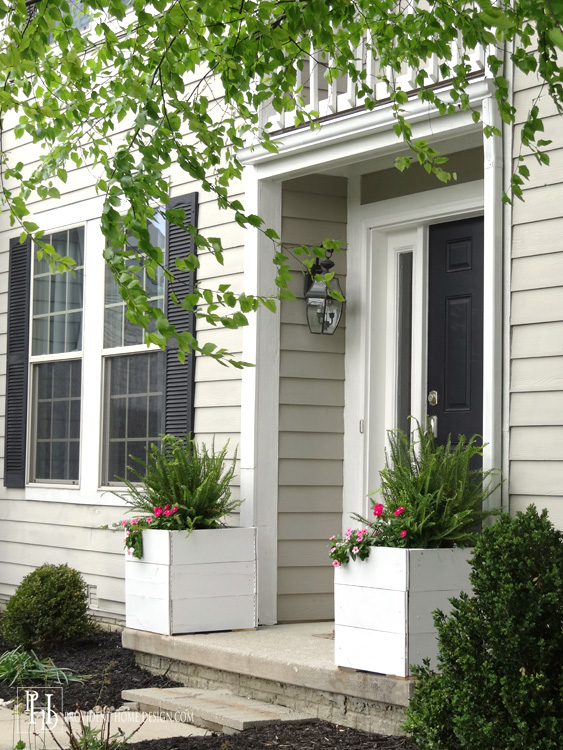
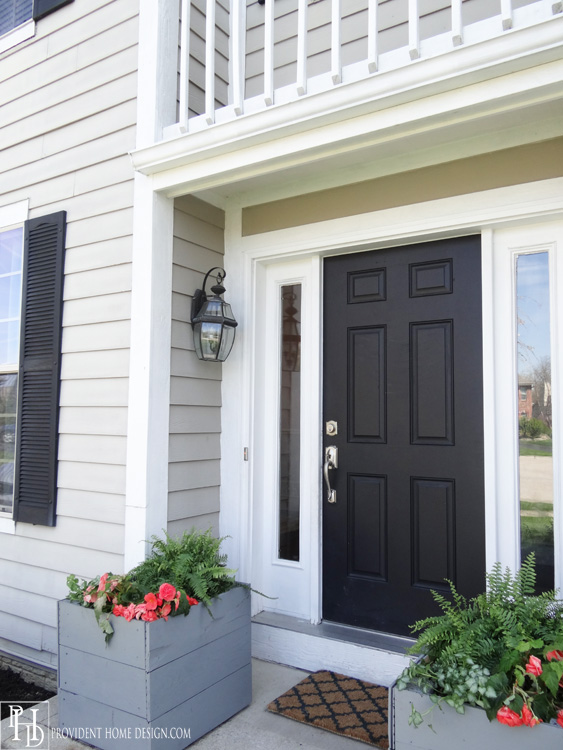
Here are how they turned out!

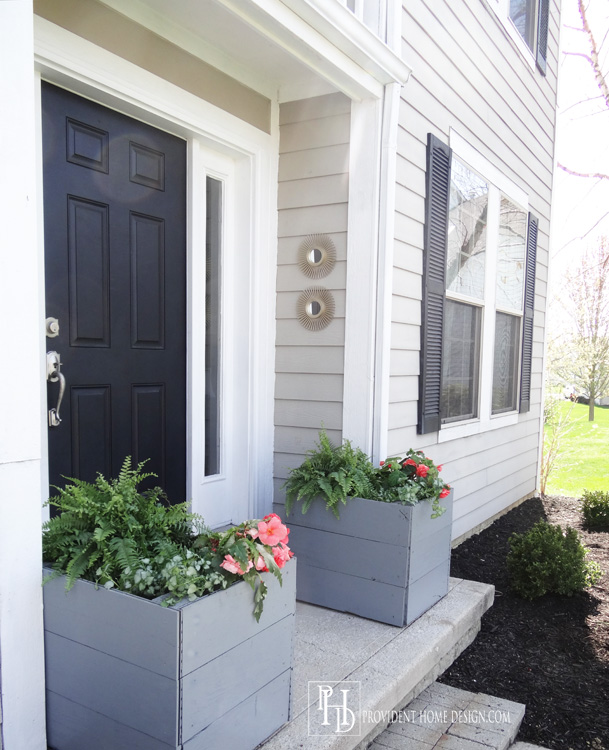
Note: The reason there are vertical gaps on the corners of my planters is because I used wood floor planks. If you use regular wood it will make for a much nicer looking corner.
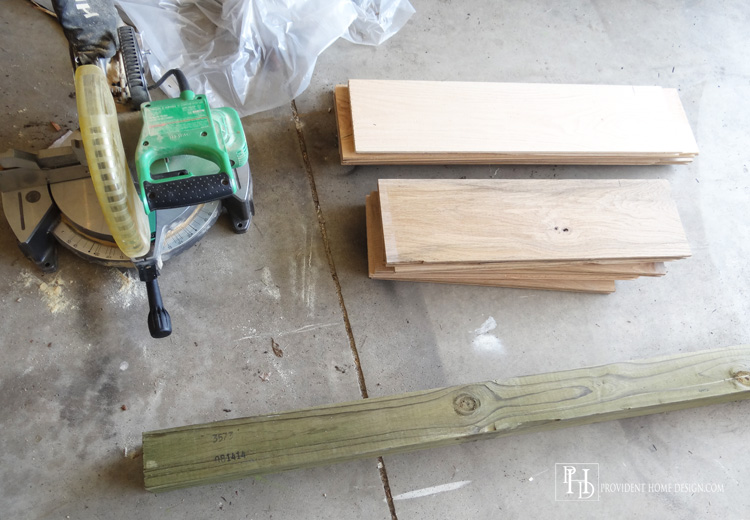
A friend of mine recently unloaded a pile of red oak hardwood flooring left over from her new floor installation into my garage (she didn’t have need or space for it and knew I would love some free DIY material). The oak hardwood came in varying lengths but were all 7 inches wide. Perfect to stack 3 of them horizontally and make a 21 inch tall planter!
Between Shanty -2-Chic’s Planter Box tutorial and several of my own adaptations I came up with these large flower planters.
This is a very simple beginner-friendly DIY. Assuming you don’t have red oak hardwood laying around another great inexpensive option is pressure treated lumber (weather resistant). I know Home Depot carries a pressure treated 6ft fence board that is about 5 inches wide and only costs $1.50 for the whole 6ft board.
So here are the supplies I used: A miter saw to cut the wood (if you know you measurements you could also have your home improvement store cut the wood), (6) 20 inch long wood planks, (6) 25.5 inch long wood planks, weather treated 4×4 post cut into (4) 21 inch long pieces, outdoor or galvanized 1.5 inch wood screws.
If you are doing a rectangular planter start with the sides that are smaller in width. The first step was to put two posts parallel to each other and lay a board over them making sure the board is flush with the bottom and outer sides of the post. Drill 2 holes into the middle of the posts and then drive in the screws as can be seen in the photo below.
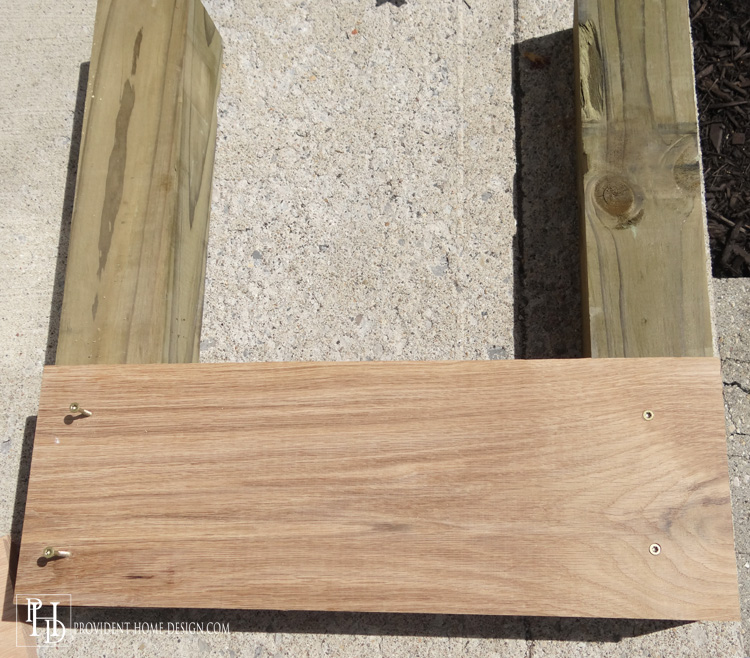
Next, add 2 more boards above it and do the same thing (as shown below).
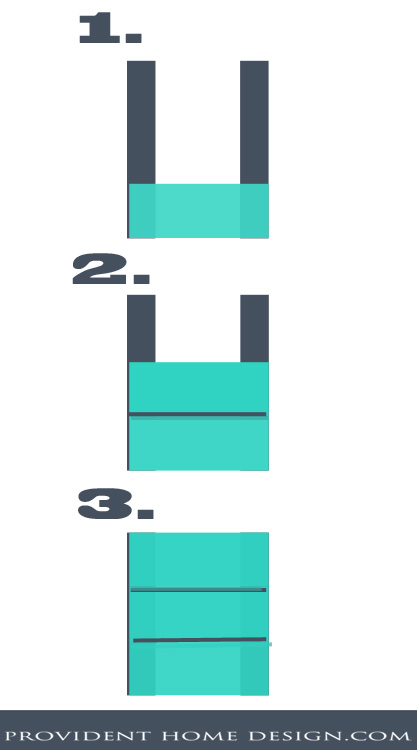
Now that you have one completed side do the same exact thing to the side that will be across from it. So I built another 20 inch wide side.
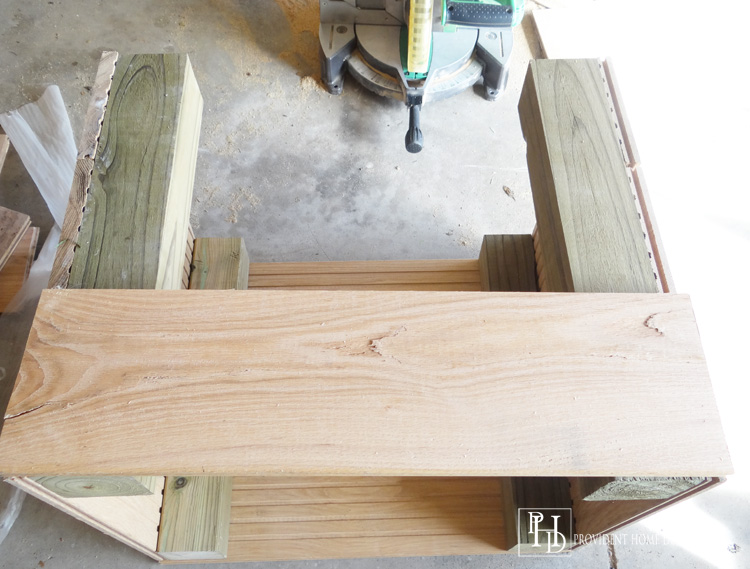
Once I had two parallel sides completed I added the longer sides to them as can be seen below.

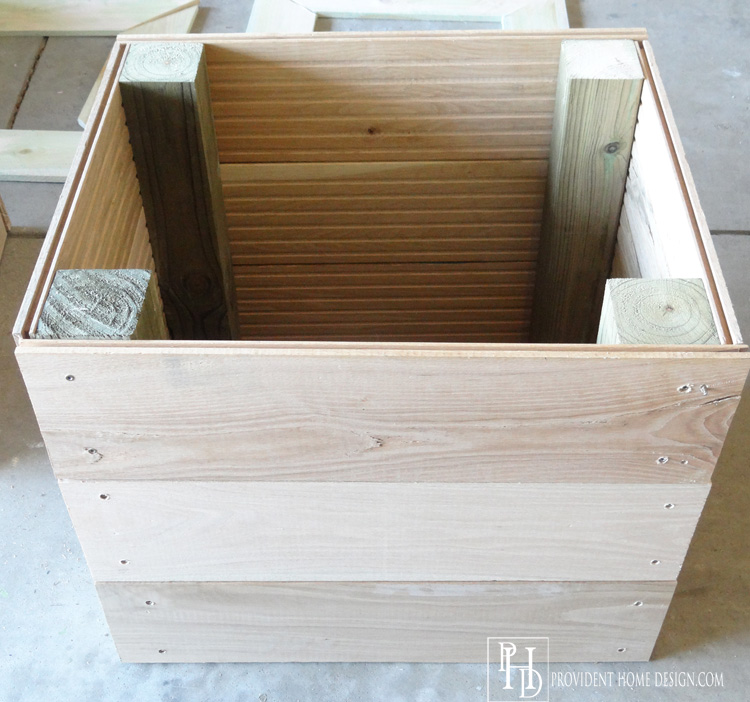
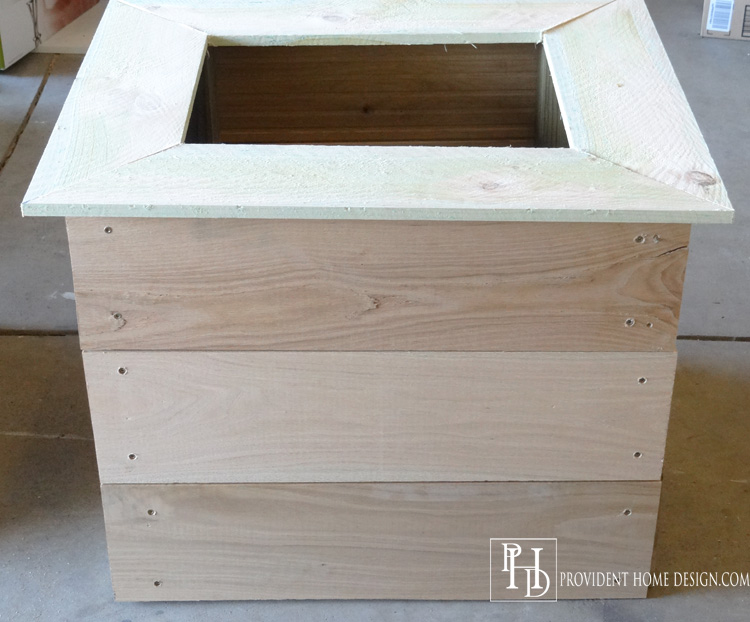
After you have added all of the sides together and turn it upright it should look something like this–
Note: If you don’t want your screws to show you can use a countersink drill bit to create a groove for the screw to go down into and then cover the hole with wood filler.
Next I turned over the planter and added “feet” to it by screwing some left over pieces of wood into the posts.
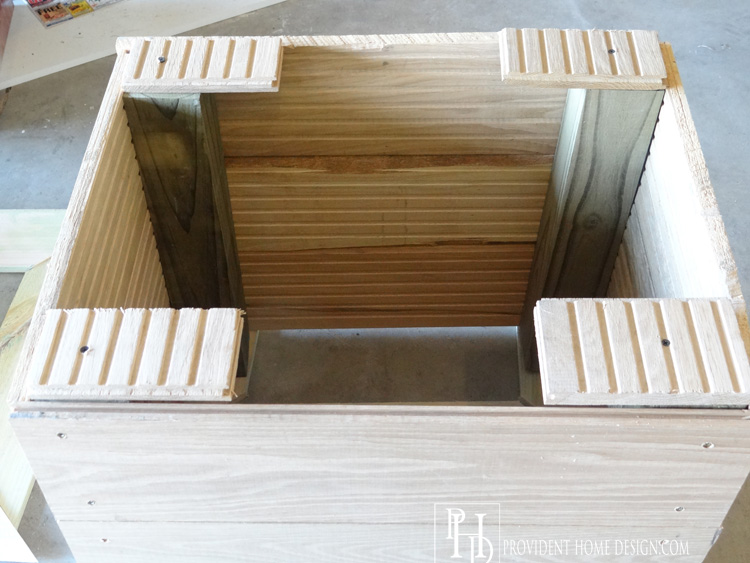
The purpose of this is to create a little space at the bottom for the water to drain out of the planter.
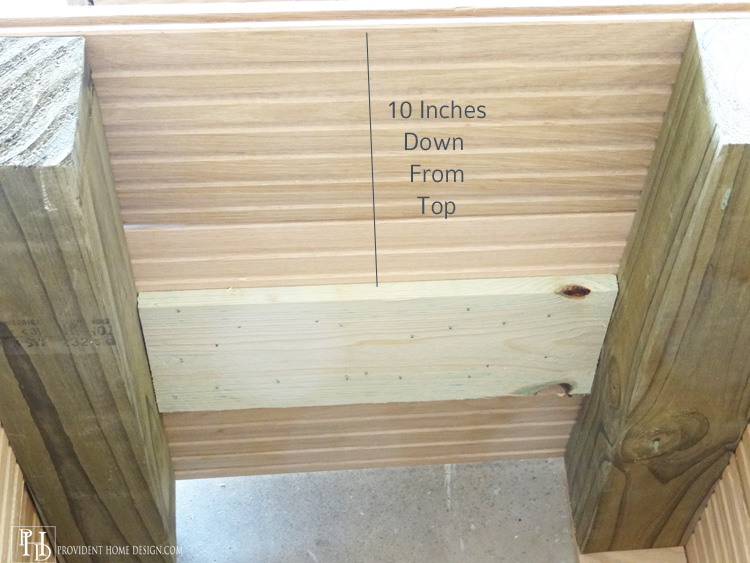
Now, are you still with me?:-) Next, you don’t want to have to fill this huge planter with dirt so you are going to build a little shelf about half way down.
Measure about 10 inches down from the top of the planter and nail a piece of wood across the inside of the planter as seen below.
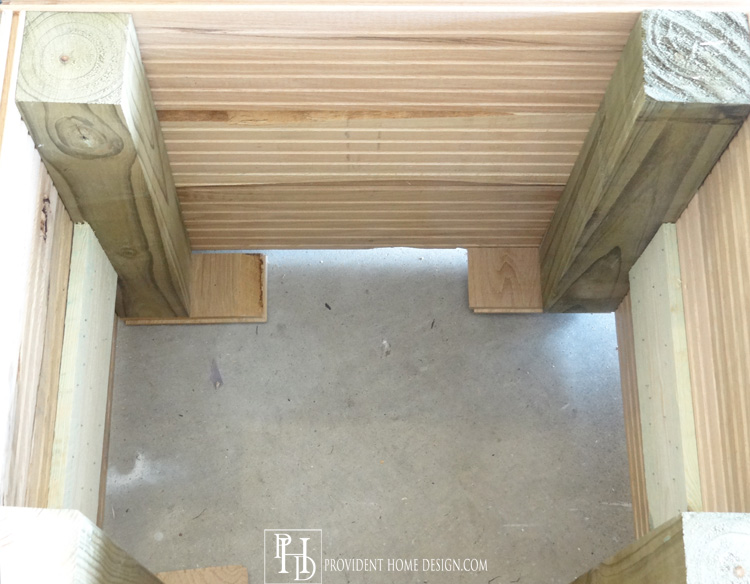
Do the same thing to the side across from it (as seen below).
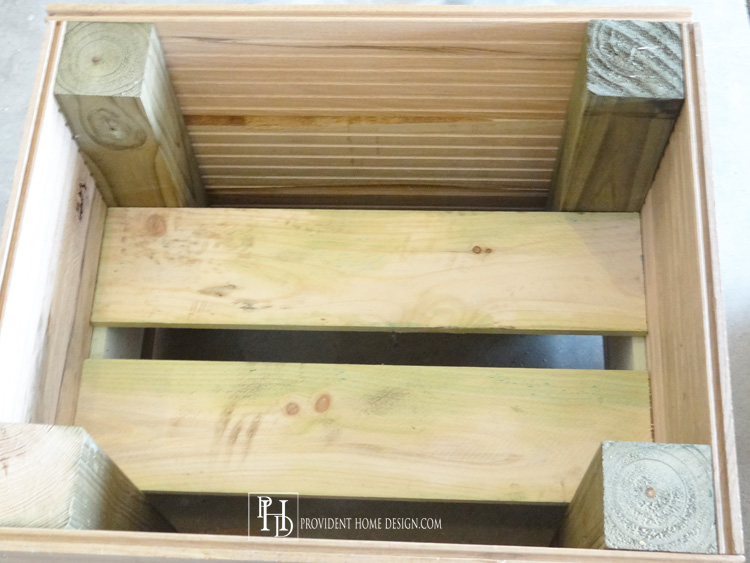
Next, lay two wood pieces of wood on top of the inner side supporters as shown below.
At this point you can paint or stain your planter the color of your choice just make sure to use paint for exteriors or outdoor use.
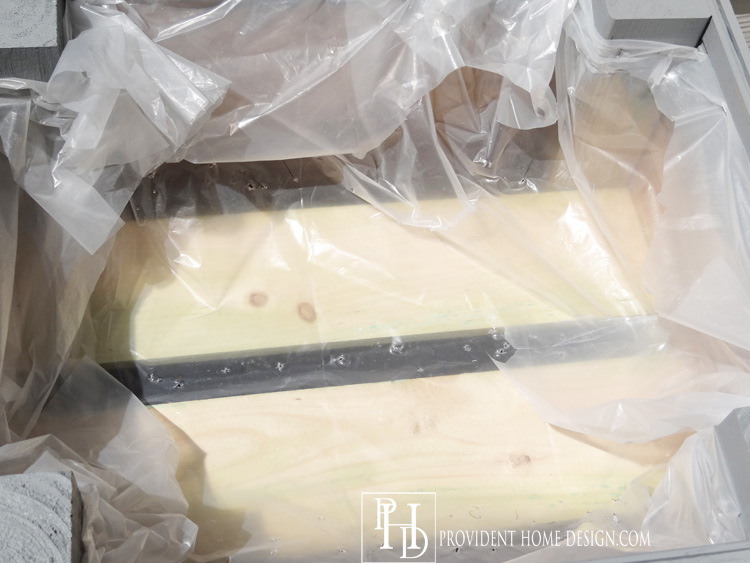
The last step is to line the planter. I used a plastic drop cloth I had bought at Home Depot for about $4.00. I think the brand is HDX. Just make sure it isn’t a wimpy plastic kind of liner.
I cut the plastic to size with scissors.
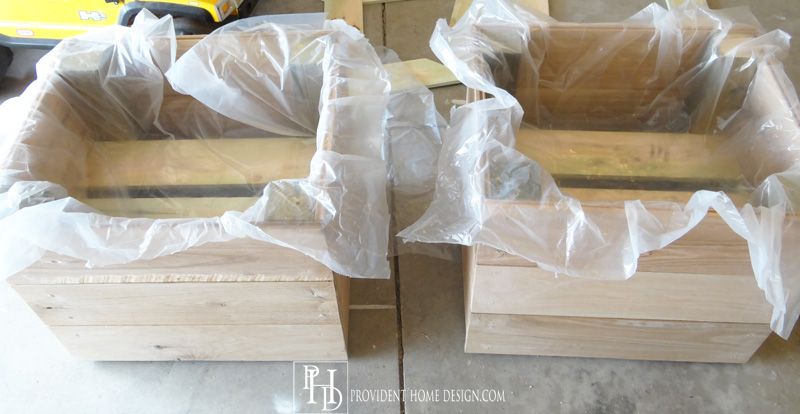
Then I folded the sides of the plastic down and stapled it about an inch down from the top of the planter around the entire planter.
Next, with the tip of a pen I poked holes in the bottom of the liner so that the excess water can drain out of the planter.
At this time if you would like to add a finished trim piece on top you could by making 45 degree cuts to frame the planter out. I decided not to this time.
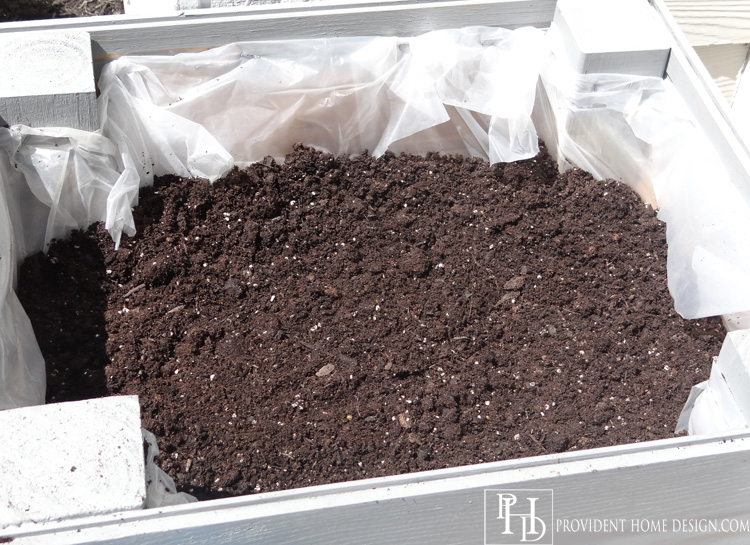
Now it’s time to pour in your potting soil and plant away!
Turns out I am as messy of a gardener as I am cook!:-)
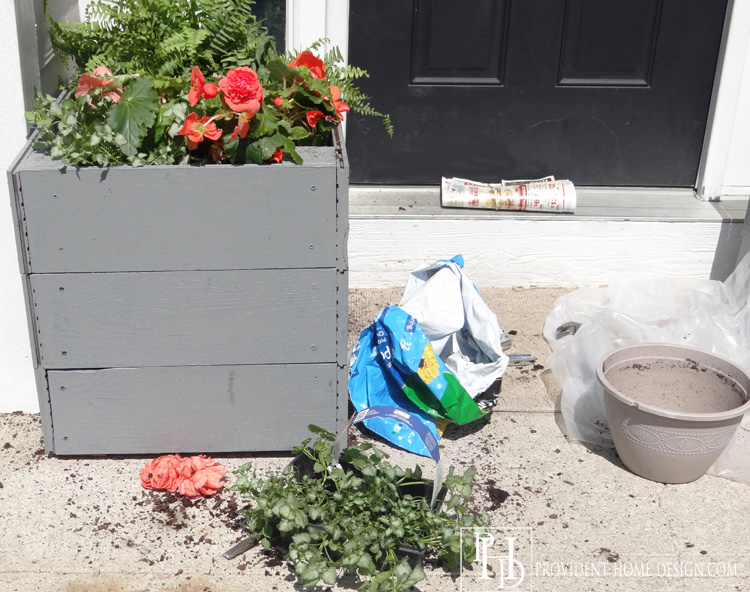
But I always almost always clean up afterwards!:-)

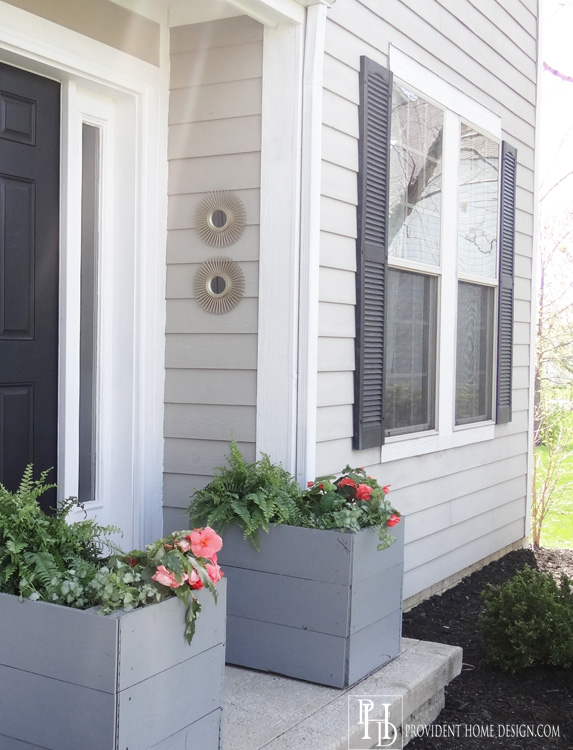
Along with the planters which probably cost me a total of $30 a piece to make I also bought a much needed new mat for the porch for $5.
The mat was on sale at Kohl’s for $15 and then I used a $10 gift card to bring it down to $5 (if you don’t already receive $10 gift cards from Kohl’s in the mail I would see about signing up…I get them in the mail maybe 4 times a year and love it)!
Lastly I added two sunburst mirrors to add an element of interest to the porch space. As I mentioned on Instagram I found the sunburst mirrors at Aldi for $5.99 for a set of 3. Such an amazing deal!!
These simple planters are a great weekend project and if you are lucky enough to have a handy husband they make a great gift for Mother’s Day! I’m not lucky enough to have a handy husband but I am lucky enough to have a wonderful husband who will watch our 4 young kids while I tinker up planters and all sorts of other DIY shenanigans.:-)
I hope you enjoyed this tutorial and as always let me know if you have any questions!!:-)
Update: After living with the large, gray planters on the front porch for a couple of weeks I decided they were too large for the space and so they found a new spot on our back patio. I made some new smaller (but still a good size) ones using the same steps except I painted them white.