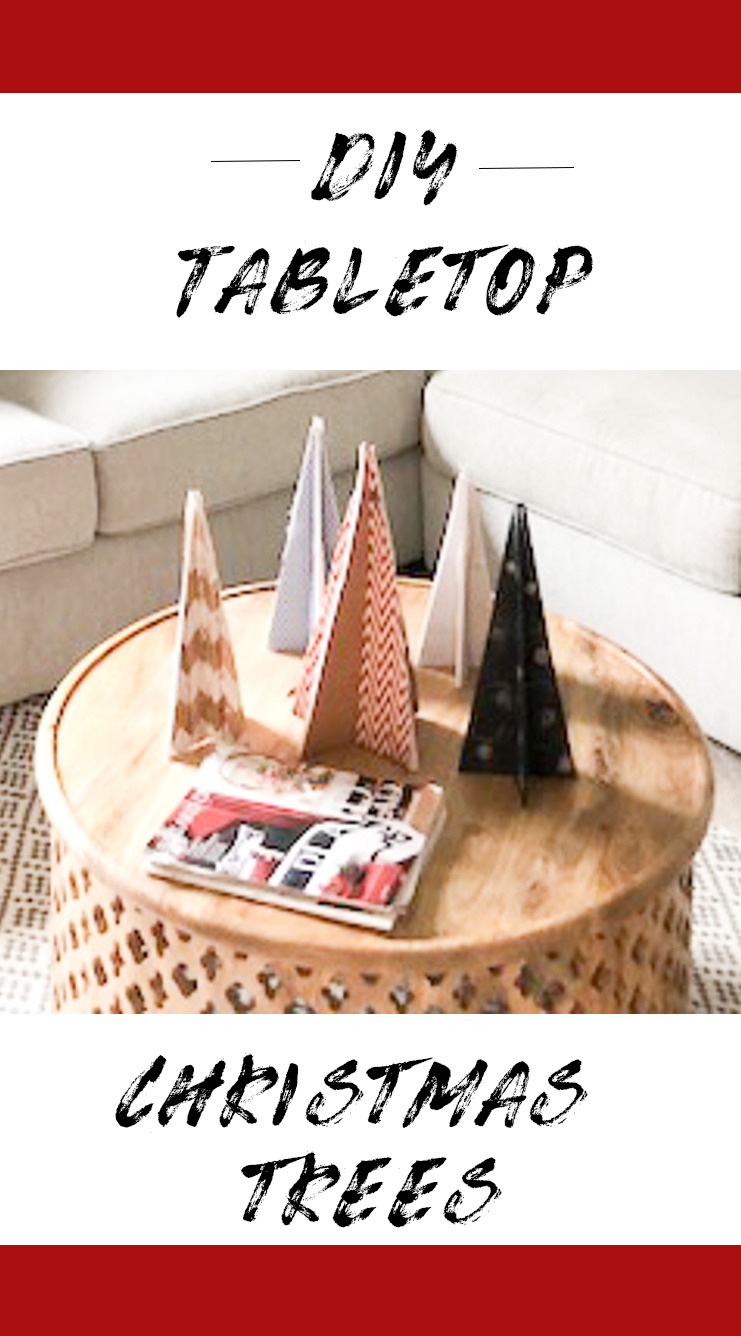
Hello! I hope you are all doing well! I wanted to pop in today and share a tutorial on how to make these versatile DIY tabletop Christmas trees.

They make any type of table look holiday festive–coffee tables, console tables, end tables, buffet tables, and as a centerpiece at your dinner table.
I first spotted them a couple of years ago as decorations at our church Christmas party and thought they were so cute and would be pretty easy and inexpensive to make! And they are!
So let’s begin!
Suppplies
Foam Board (Our Dollar Tree has foam board or Michael’s with a 40% off coupon)
Scrapbook paper (This is the fun part that gives your trees personality and the look you want for your space)
X-acto Knife(Amazon affiliate link)
Glue Adhesive (mod podge, glue stick, double sided tape, spray adhesive, whichever you like)
Ruler
Pencil
Scissors
Directions
1. Have your foam board ready.
Now create your own tree templates or print out mine on typing paper or card stock.
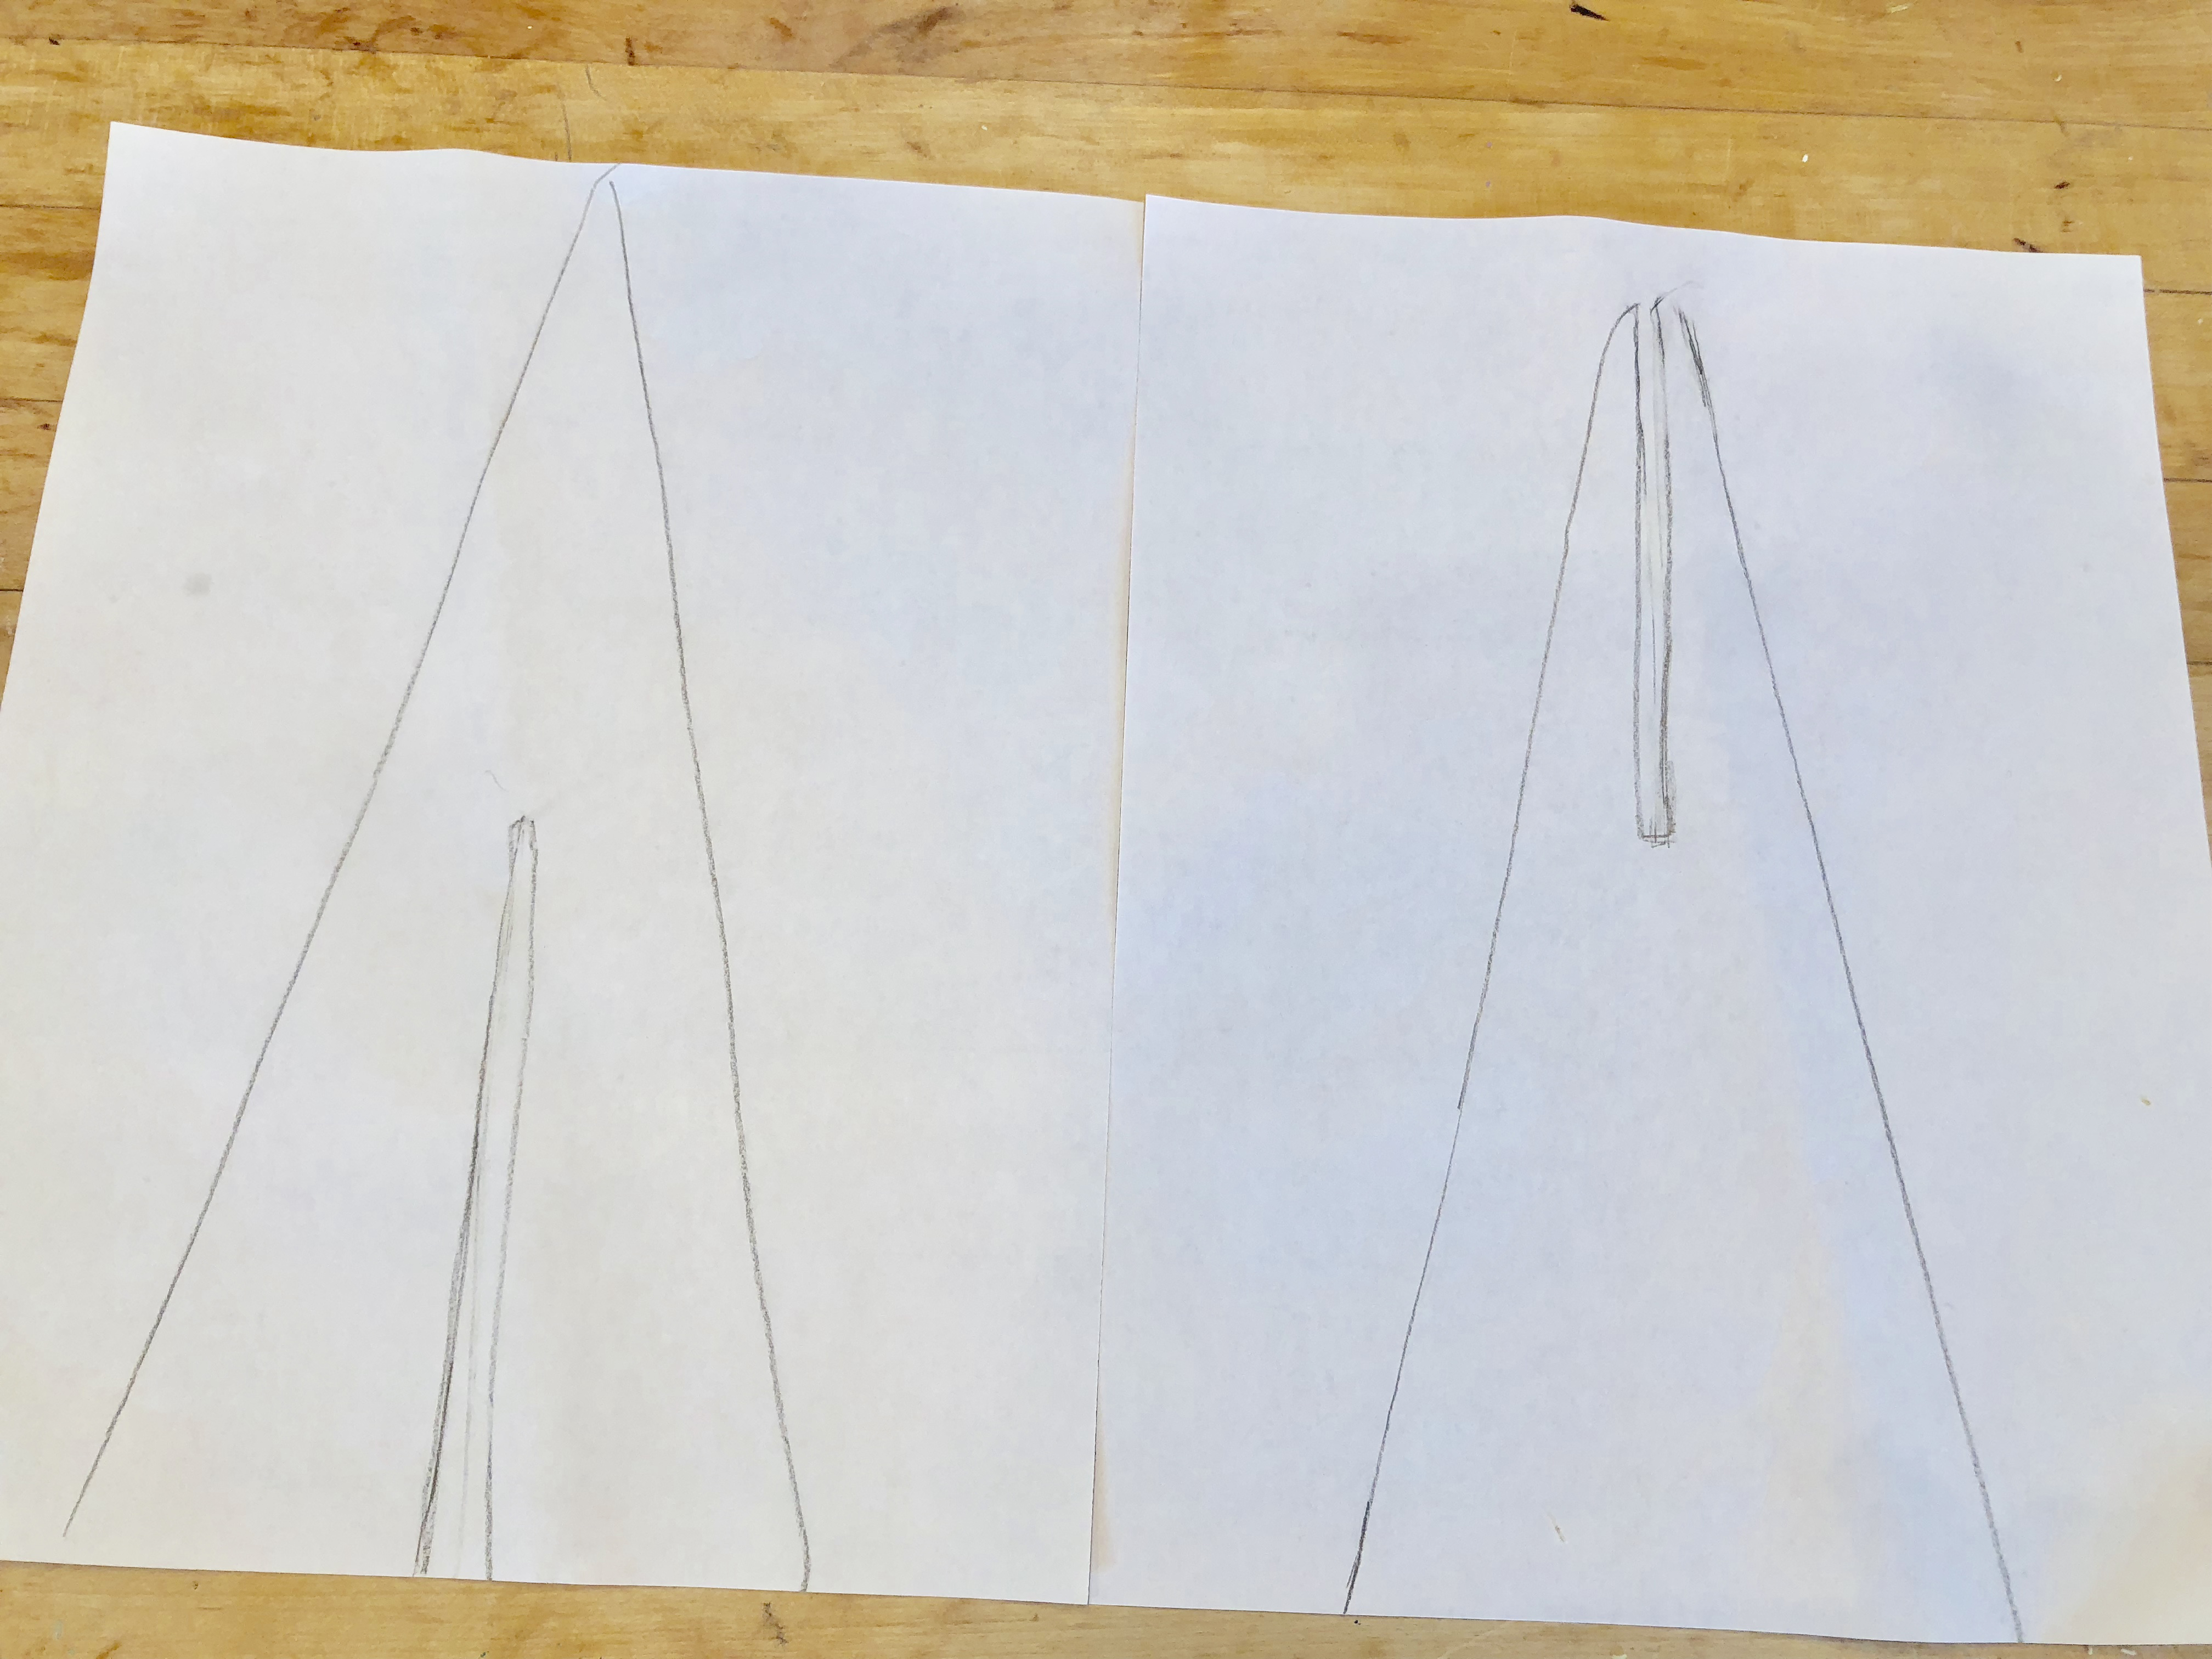
I didn’t use a ruler when I created mine so if you are more of a precise person I would highly suggest using a ruler and creating your own.:-)
Click HERE to print out Template 1. Click HERE to print out Template 2.
2. Once you have printed out the templates cut the trees out with scissors. Next trace the tree templates onto the foam board.
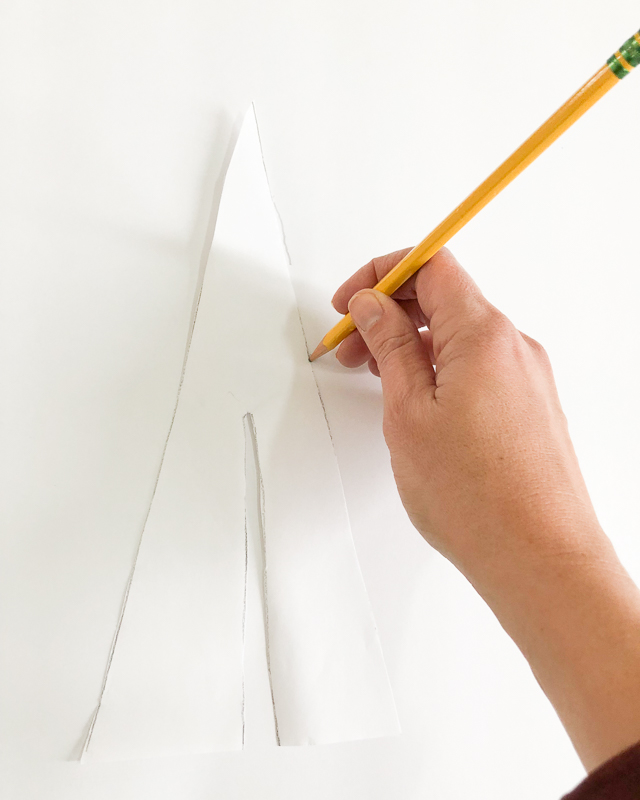
3. Now lay a ruler down on the outline of the trees and carefully slide the x-acto knife next to the ruler to obtain a straight cut.
Hint: When cutting foam board first make a superficial cut then come through again with a deeper cut.
4. After you have cut out the foam board tree pieces put them aside and use your template to trace the same shapes onto your scrapbook paper. Use scissors to cut along the outline of your trees.
Note: You will be gluing these to the foam board trees so you will need to trace and cut out 2 scrapbook pieces per tree so that each tree can be double sided.
5. Now using a glue stick or your preferred adhesive adhere the scrapbook paper cut outs directly onto the matching foam board piece on both sides.

Press down to make sure it adheres well and let it dry completely before handling.
6. Once it is completely dry turn the trees perpendicular to each other and slide the tree with the cut on the bottom over the tree with the cut on the top. The picture below shows me sliding it down.
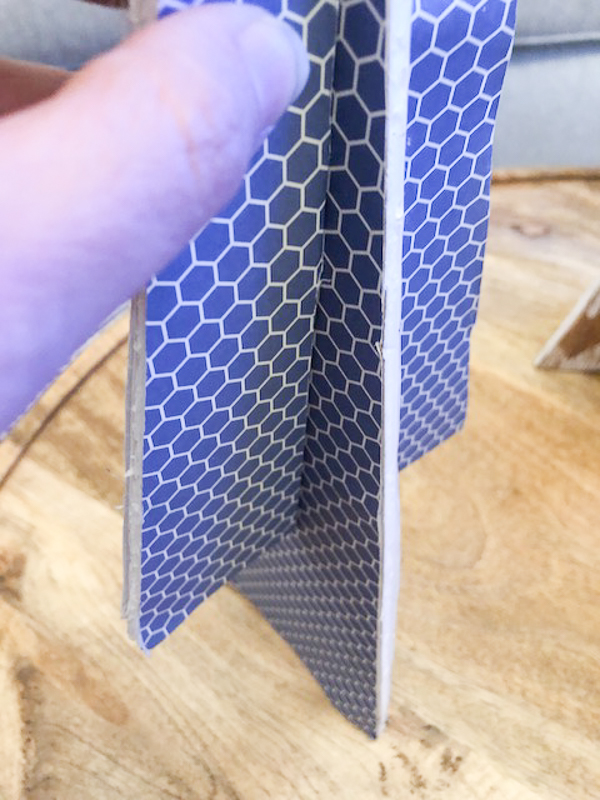
Make sure it slides all the way down so that it can stand flat on your table top!
That’s it! I made these a few years ago and they are still holding up (although you may notice some wear and tear due to the kids playing with them).
It seems like each year I’ve place them in a different spot. This year they in our recently made over TV room.

I can’t believe Christmas is only 10 days away and that the New Year is so close too! I’m hoping to get back to posting more regularly in the New Year! What do you want to learn about decorating, design or DIY in the New Year?
Be thinking about it because I will be sending out a survey after Christmas and I’d love to know your thoughts on the matter!:-)
Until then I hope you have a beautiful Christmas filled with peace, love, and all good things!!


Related Posts From the Blog:
 DIY Brinkley Beveled Mirror Knockoff
 How to Replace a Hollywood Light with 2 Vanity Lights & How to Patch a Hole in the Wall like a Pro
 DIY Cobblestone Boot/Shoe Tray
 Tool Time with Tamara- How to Use a Miter Saw
 My House Hunters Episode
 Design 101-Masculine vs. Feminine
 The One Room Challenge Week 4
 Love Your Kitchen Series- Unique Lighting