Hello! I hope you are all well!! We recently updated our builder Bryant thermostat to the very well-reviewed Nest Thermostat. It’s amazing how in 15 years our old thermostat had yellowed so much and how advanced thermostats have become!
Any projects that have to do with wiring can be intimidating so I thought it might be helpful to others who are making the switch to have a step by step tutorial with pictures and tips!
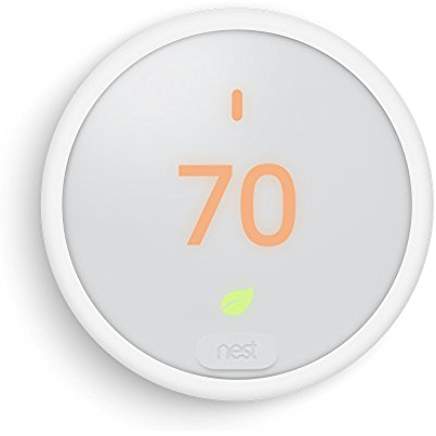
There are 2 Nest thermostats on the market right now.
The Nest E and the Nest 3rd Generation.
I did some heavy duty research and found that they basically provide the exact same functions and features (such as changing temps from your phone or tablet and they both can learn the temperature habits of your home). The only real difference is how they look and how much they cost.
The Nest E ranges from $170-$180 and blends in more given the frosted cover.
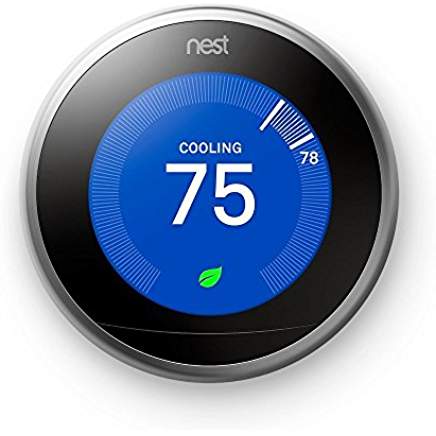
The Nest 3rd Generation has a more modern look and comes in stainless steel, white, or copper but is $235-$245.
We opted for the Nest E because it was significantly less money and I like how it blended in more. But both are great options! And the steps you take to installing them are the same!
So here’s how it all went down!
Step 1– TURN OFF the POWER to the thermostat at the breaker (this is very important so you don’t get electracuted)!
Step 2– Pull off the front plate of the old thermostat. Most come off easily by just wiggling it while pulling towards yourself.
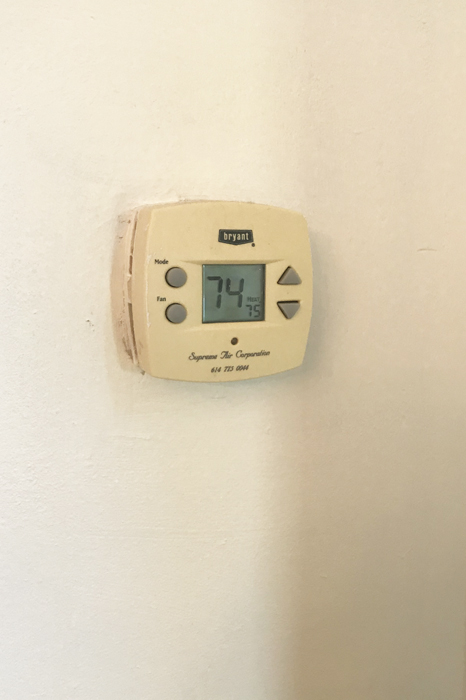
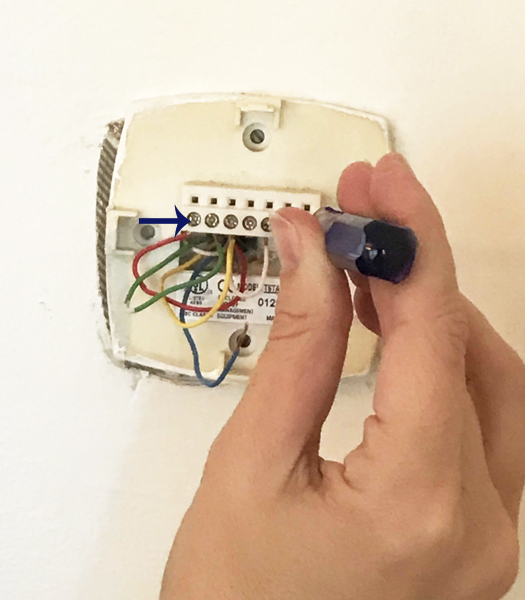
Inside you will see something like this!
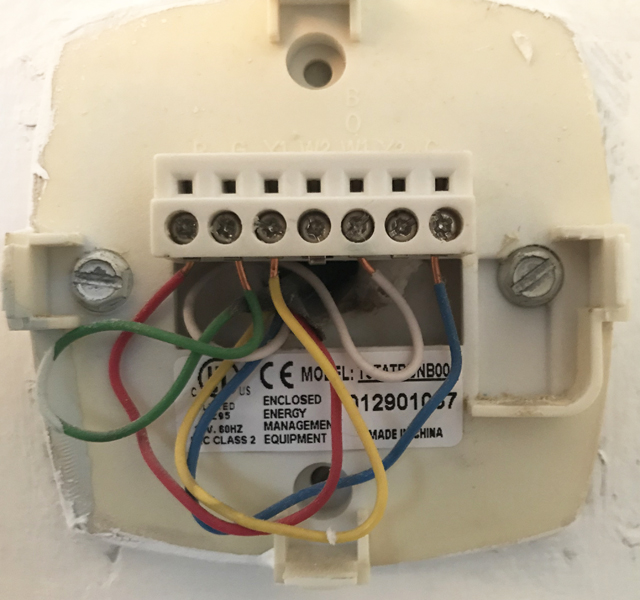
Go ahead and write down the model number of your old thermostat (the model # should be printed inside) just in case you end up needing help along the way from support.
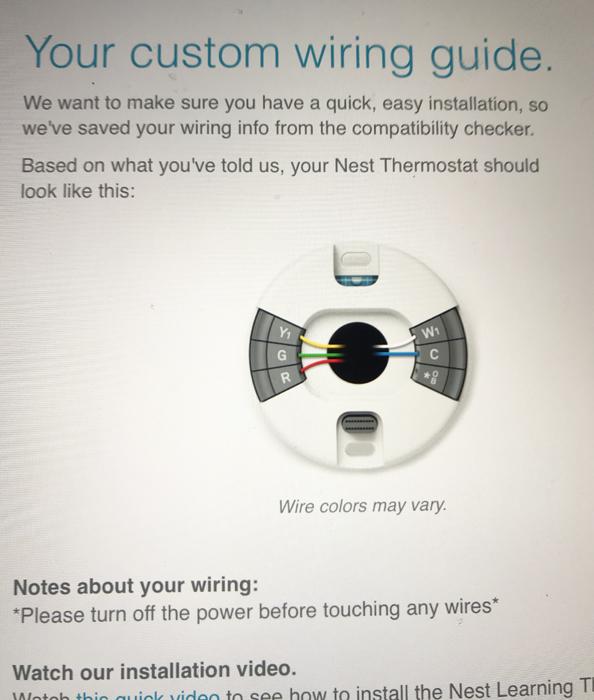
We ended up contacting support because our wires were not labeled and we had an extra (blue) wire that wasn’t showing up on their instruction manual diagram.
If any install issues arise you can just go to www.nest.com click the Support tab on the top, then click on the thermostat you need help with, and then on the bottom click Chat.
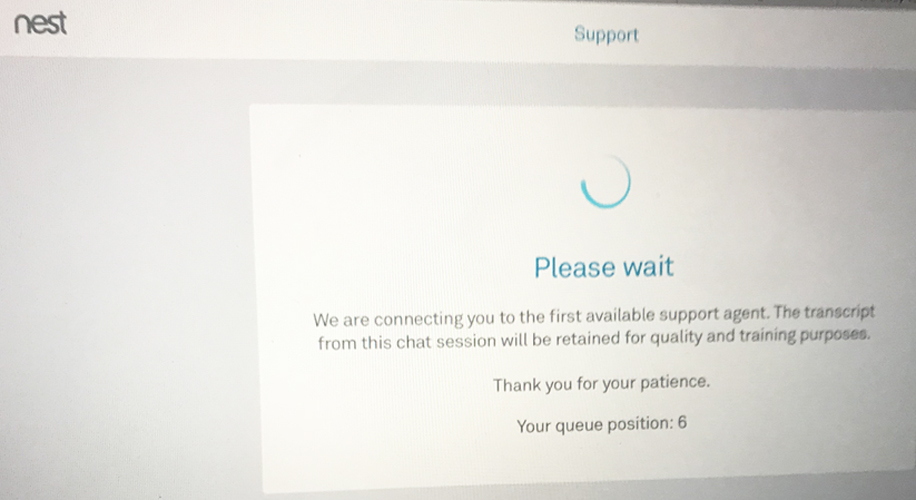

After we gave them our old thermostat’s model # they emailed us a custom wiring guide based on the wires we had.
Tip: If you have a blue wire it mostly likely goes in the C slot.
Step 3– Now take off the old thermostat’s base plate by using a small Phillips screwdriver to unscrew each small screw. Once you unscrew the screws you will be able to pull the wire downwards and they will no longer be connected to the base plate.
With a larger flat head screwdriver unscrew the screws holding the base plate to the wall and remove the base completely.

Step 4– This is a good time to patch and sand the area around where the old thermostat was especially it the old thermostat is bigger than your new one.
Tip: If you want to skip this step there is a white square backdrop to the thermostat that comes with it and that will hide these marks (we just opted not to use it).
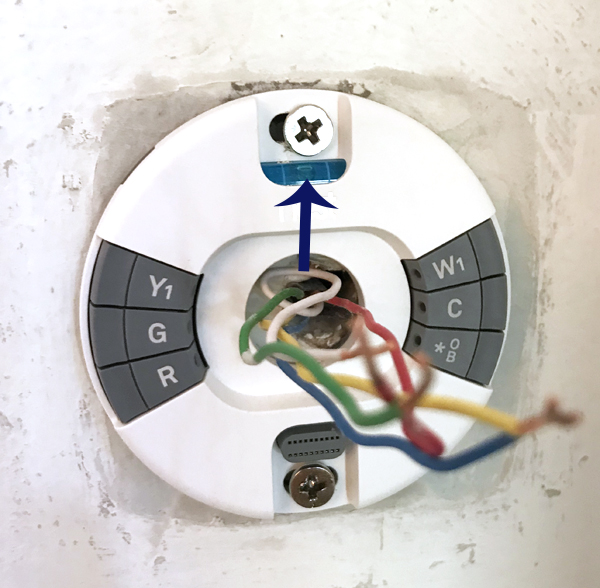
Step 5– Pull the wires through the center of the Nest thermostat and use the built in blue leveler to make sure the unit is level. Mark with a pencil where the screws should go and screw the screws in with a drill or screwdriver.
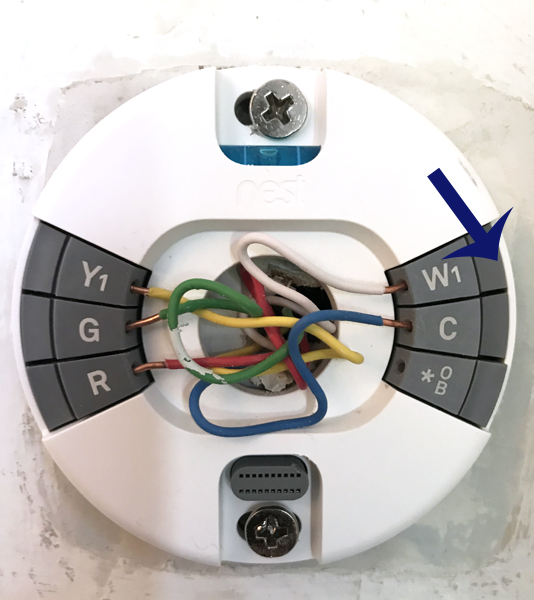
Step 6– While pushing down on the small gray button next the the letter you are inserting, push in the respective wire. When the button stays down by itself you know that the wire is pushed in far enough and securely placed.
Tip: Try and get the wires as tightly pressed into the thermostat as possible so that the cover will go on easily.
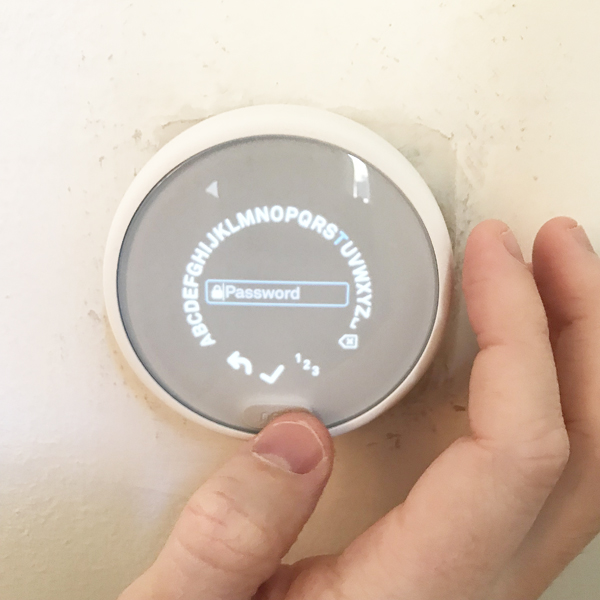
Step 7– Turn the power to you thermostat back on! Push the thermostat cover onto the base. When it clicks you will know it’s on securely. It will light up and take you through a number of setup questions such as your Wifi name and password.
Tip: You twist the outer white ring to change your options.
That’s it! It’s been less than a week but we are already so happy we made the change! For some reason our house heats up quicker with this thermostat and I like how the temperatures are easier to see.
Note: On the Nest E the temperature is a light orange when you are heating and a light blue when you are cooling and only shows up when it senses you are in front of it.

Sorry for the poor quality phone picture!
The Nest is suppose to pay for itself in energy savings over time. We’ll see!
I hope if you were on the fence about making the change because you were worried about the installation that you are now confidant you can do this!! Because you can!!
Need some extra reassurance or prefer learning by video? Here is a great video tutorial by Nest.
If you are interested in this product, here are my Amazon affiliate links that you can click on and check out, Nest E and Nest 3rd Generation!
Let me know if you have any questions!!
I hope you have a safe and Happy Halloween! ?


Related Posts From the Blog:
 Easy Spring Wreath and 11 Curb Appeal Boosters
 Navy & White You Feel So Right
 How to Add Woodwork Above the Mantle/Fireplace
 The Secret to Painting Tall Walls
 Benjamin Moore’s 2017 Paint Color Forecast
 MAD for PLAID: Christmas Decorating
 Awesome Free App for Choosing Color Palettes
 Easy Orange Dinner Rolls + Free Easter Printable