Eight months ago I wrote a post sharing my client/friend’s kitchen. In that post I discussed some of the plans we had to give it a makeover on a budget! A few months ago I gave you an update on it’s progress (you can see HERE)!
And today I get to show you the After and I’m just a little bit excited!!!!!!
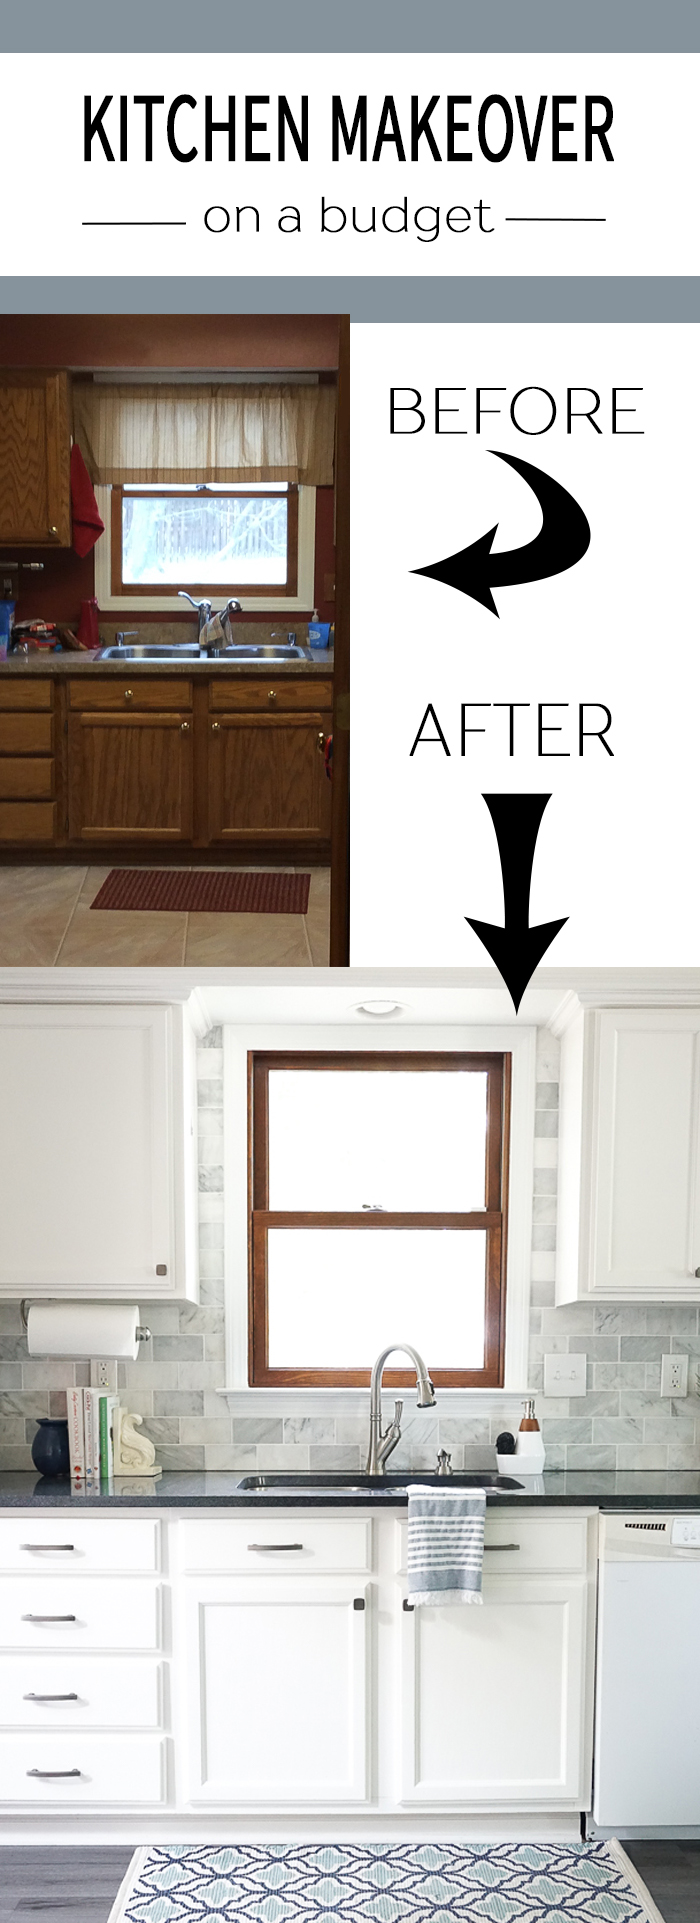
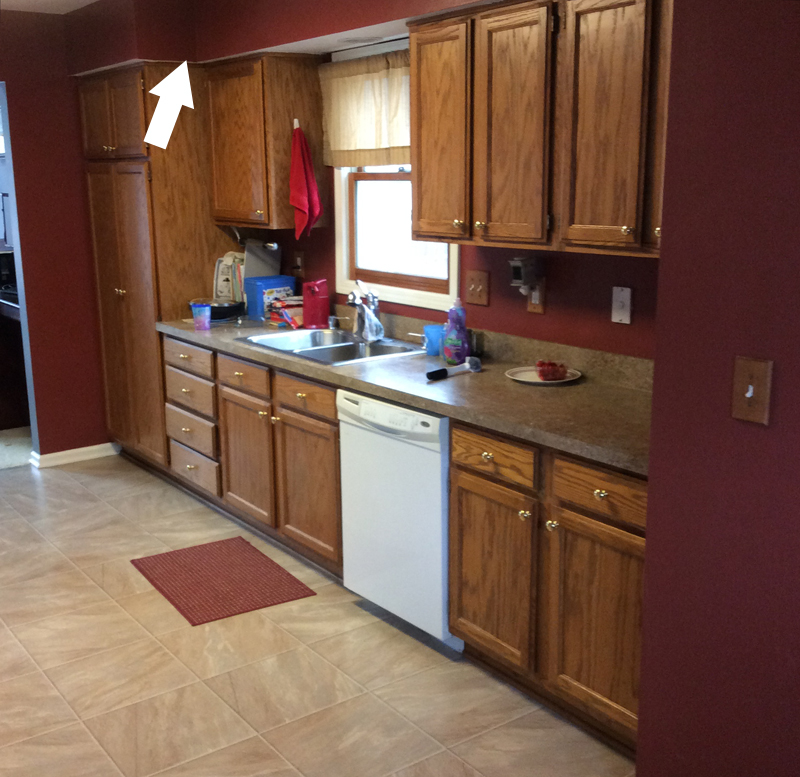
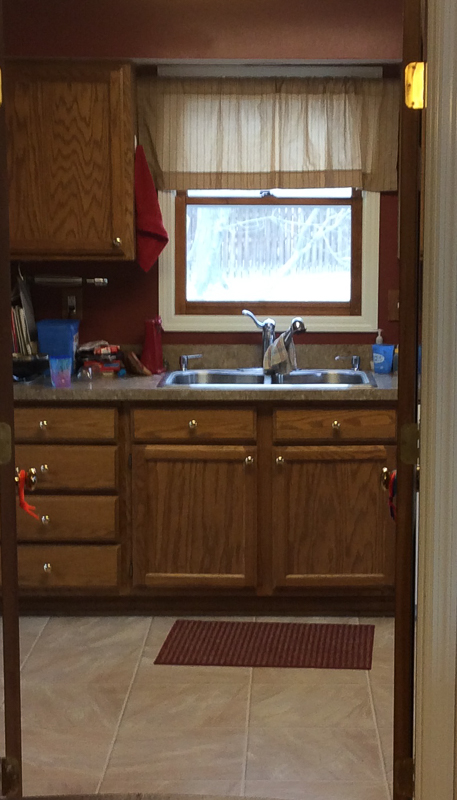
As a reminder (or if you are new here) I’ve included some of the Before pictures.
BEFORE
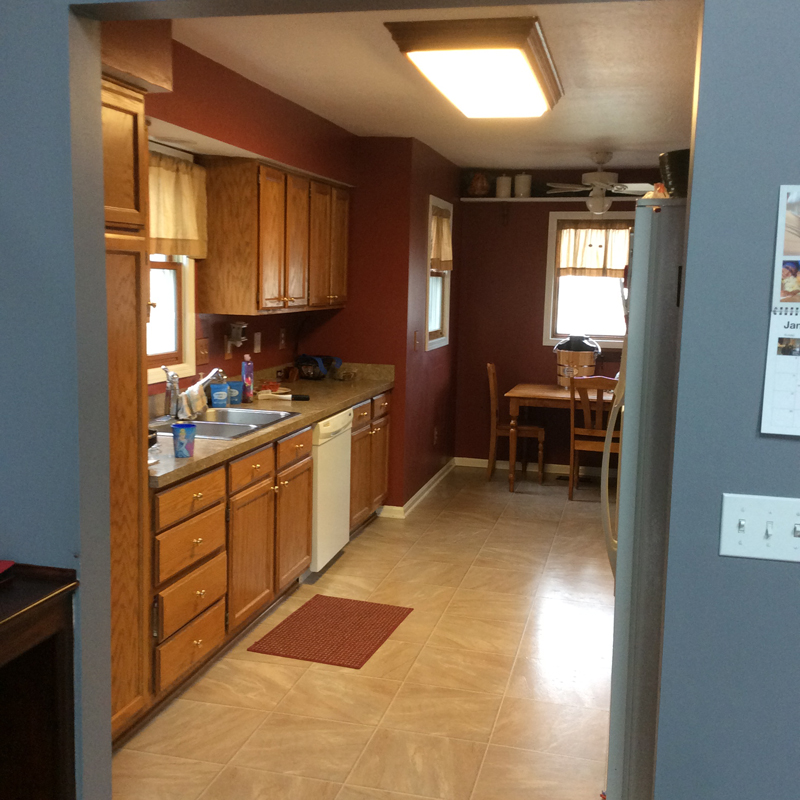
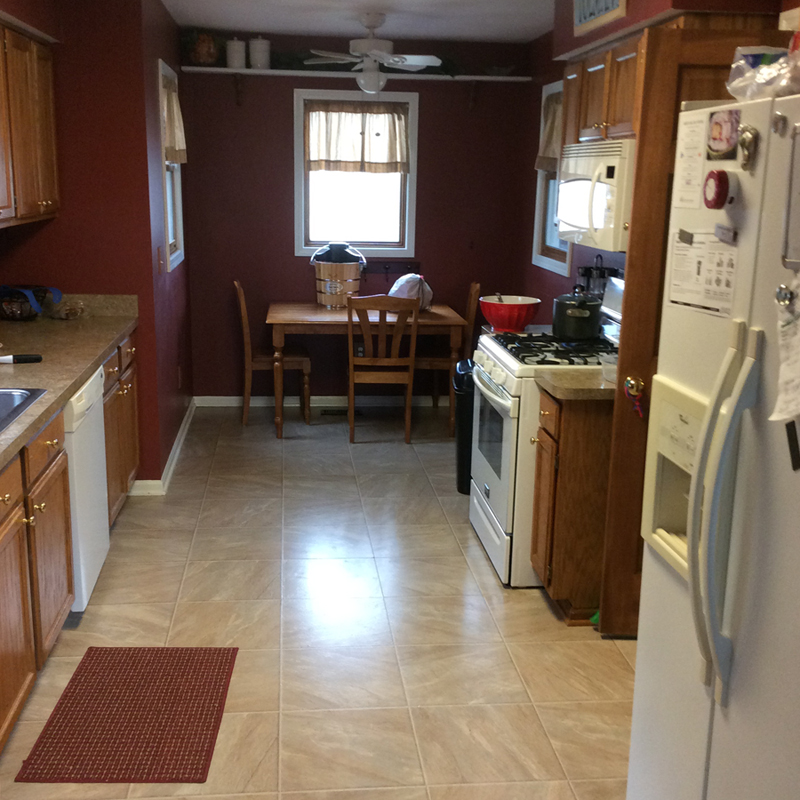
The goals were a “white kitchen” with color (hence the wall color which is Sherwin Williams Watery), more up-to-date features, and a light and airy feeling while still balancing masculine and feminine elements.
What do you think?
AFTER
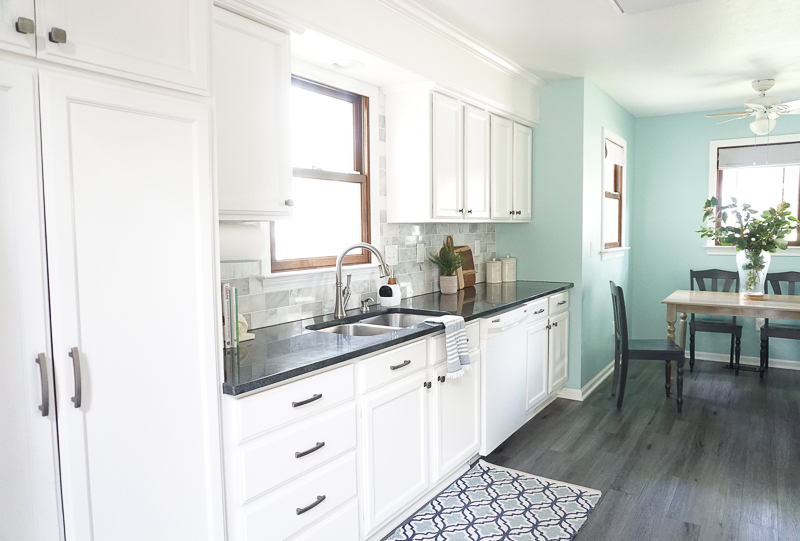
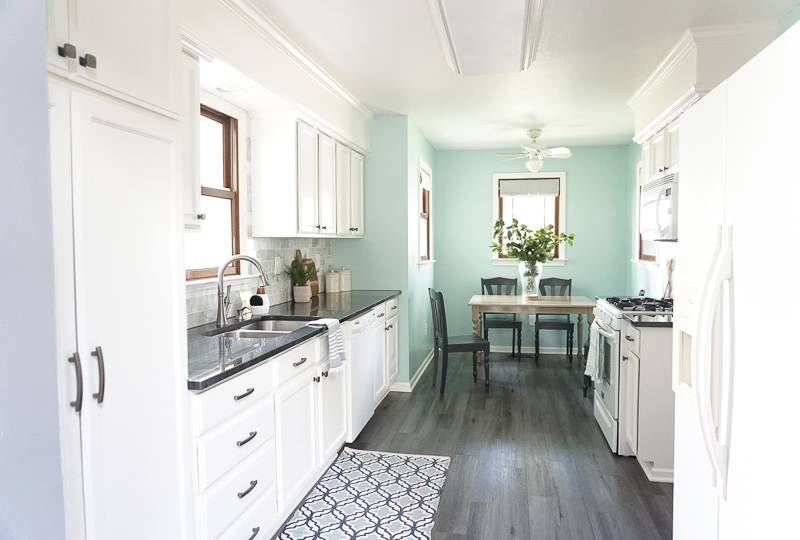
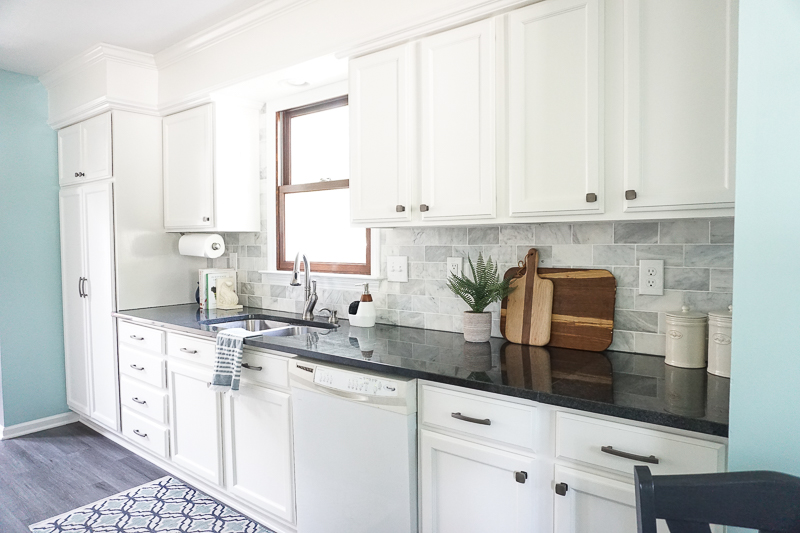

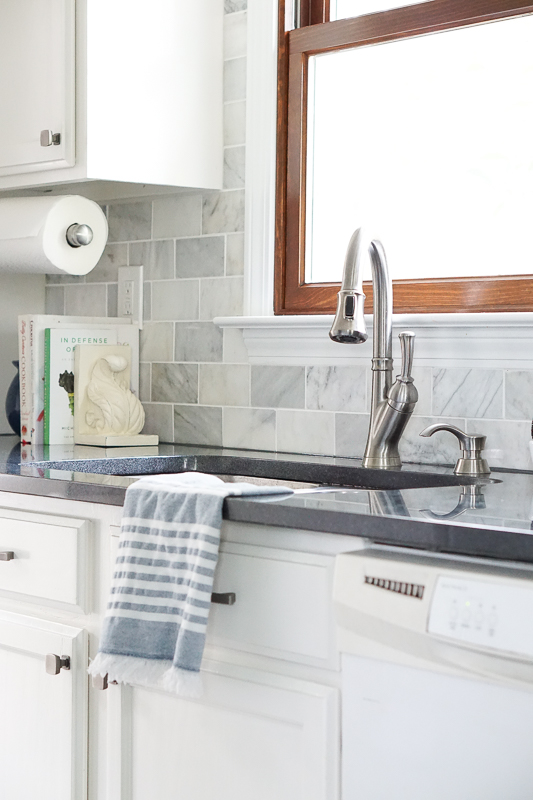


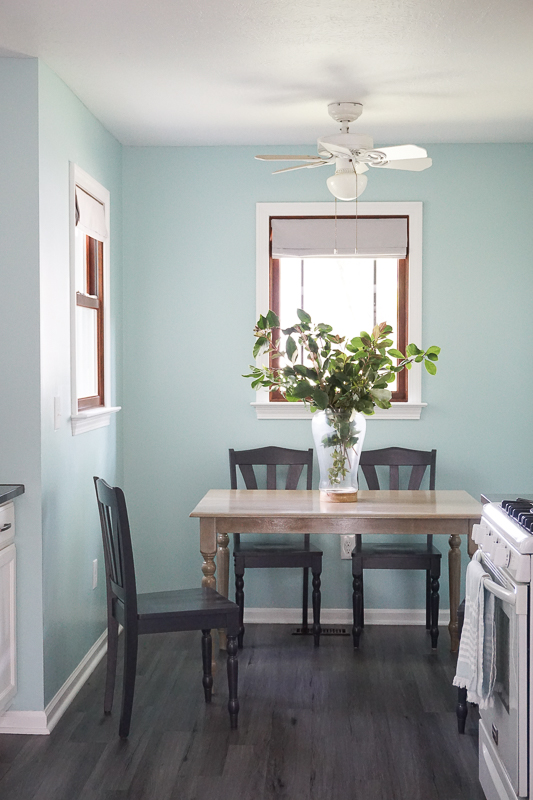

Looks like a different kitchen, right?
I helped with the design decisions, cutting the tiles for the backsplash, and painting the table but other than that Kelli did the rest of the work and I couldn’t be more proud of her!!
She had a lot of firsts with this makeover: First room makeover, first time using a miter saw, first time painting cabinets, first time doing crown molding, first time installing cabinet hardware, first time laying flooring, first time installing a backsplash, first time painting furniture (the chairs),etc.
She did all of these things over an 8 month period (after her 3 little ones went to bed at night) and little by little she reached her goal. Now she has this beautiful kitchen to enjoy for many years to come!
A DIY kitchen makeover is not for the faint of heart but I can tell you from experience that it is so worth it!!
The average cost of a kitchen makeover is $21,826. Kelli’s kitchen makeover came to $3,000 (with the highest cost being the granite for $1500 and the flooring for $500).
Below are links to the sources and tutorials used in making over this kitchen!
Cabinets
Painted in Sherwin Williams Alabaster using THIS tutorial.
Faucet
Sink
Stock sink from Discount Granite