A few months ago I shared the plans of my friend’s kitchen makeover on a budget. I promised I would give you an update on their progress once they had painted the walls, kitchen cabinets, and added trim on the area above the cabinets (the soffit)!
Well, they did it and I’m here today to share their progress so far!
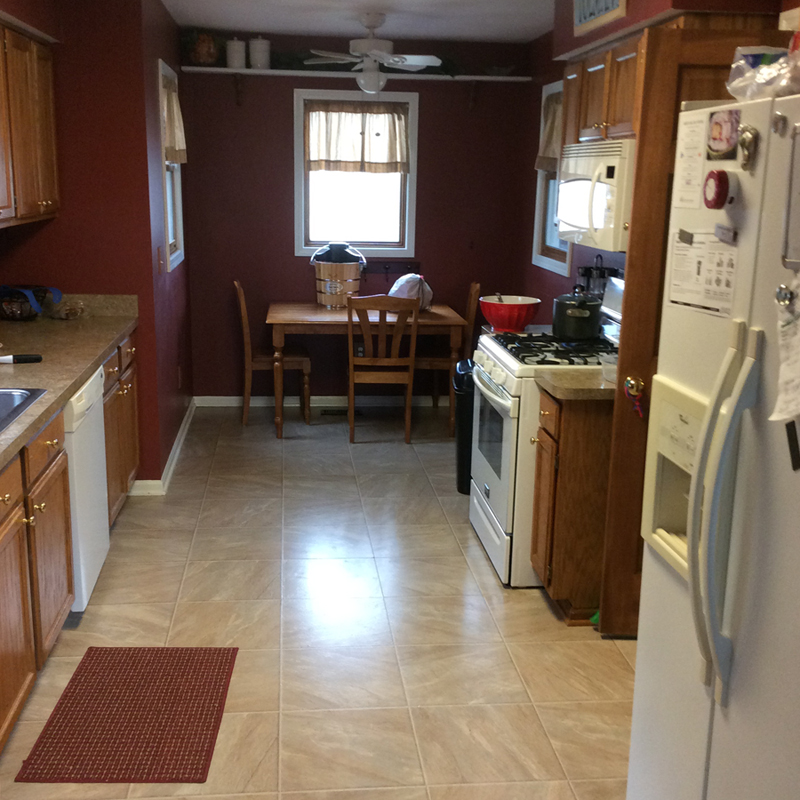
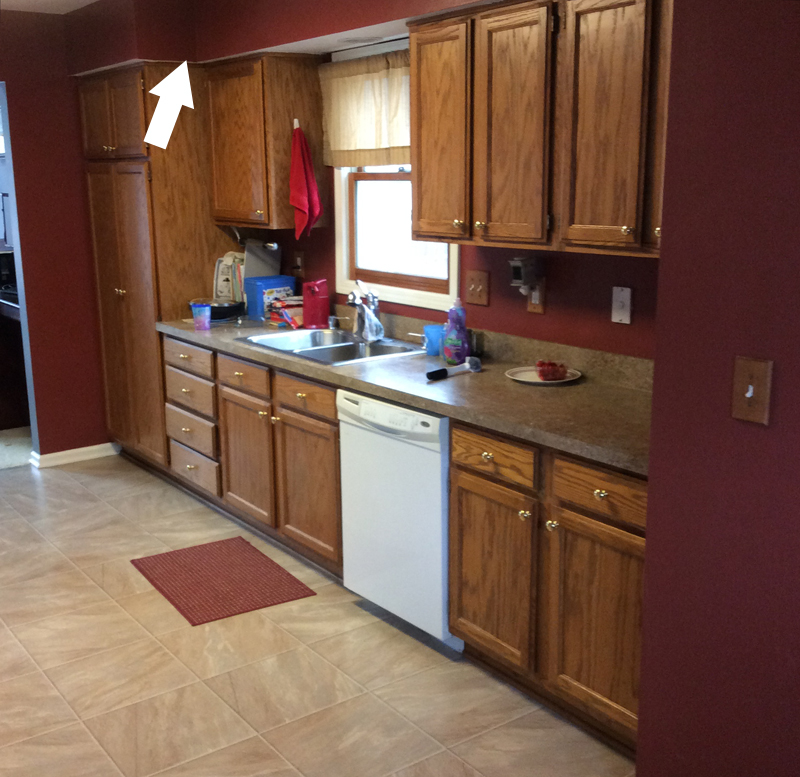
First here is a reminder of what their kitchen looked like before they got started on the makeover.
BEFORE
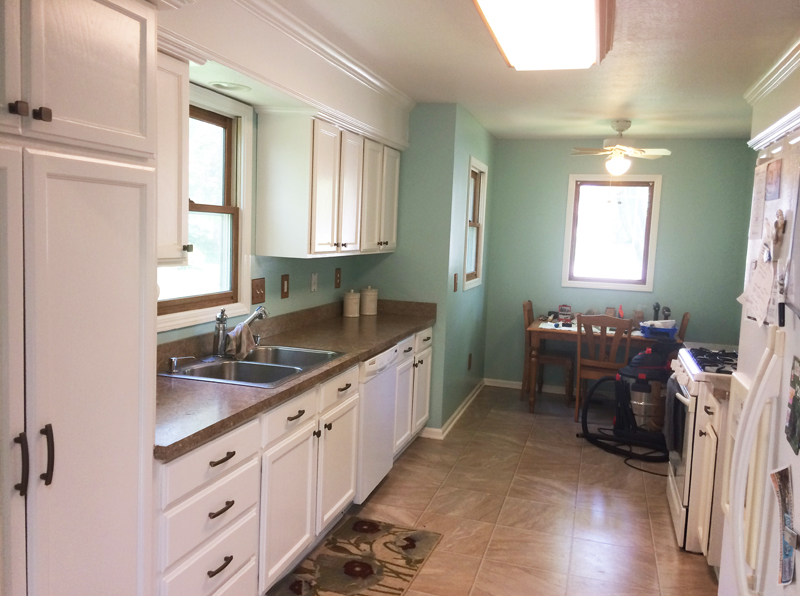
Here is the progress!
PROGRESS
I had suggested a light gray color (specifically Benjamin Moore Classic Gray) for the walls, however, the hubby loves color so color they got!
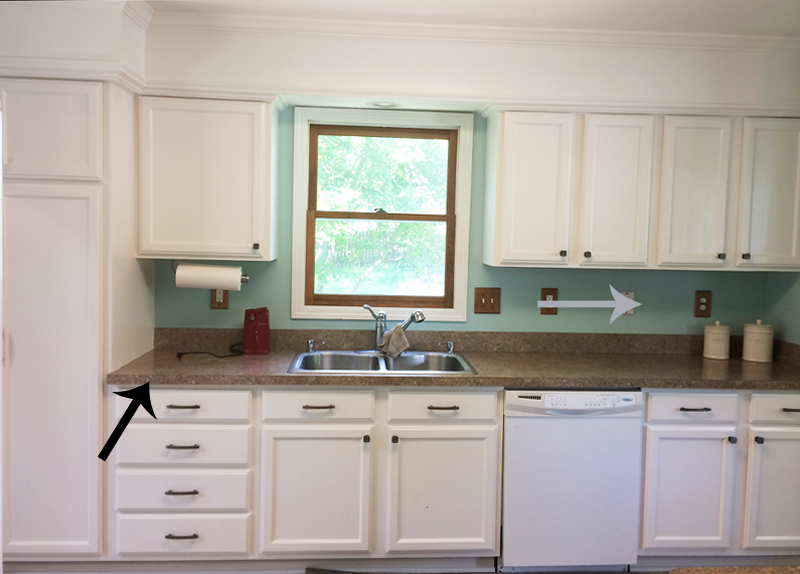
BEFORE
The black arrow in the picture below indicates that they will be replacing the countertops next (probably to a black countertop) and the gray arrow shows that a backsplash will be installed after that (probably a marble one).
PROGRESS
My friend was nice enough to write out all of the steps she took to get from the Before to the Progress.
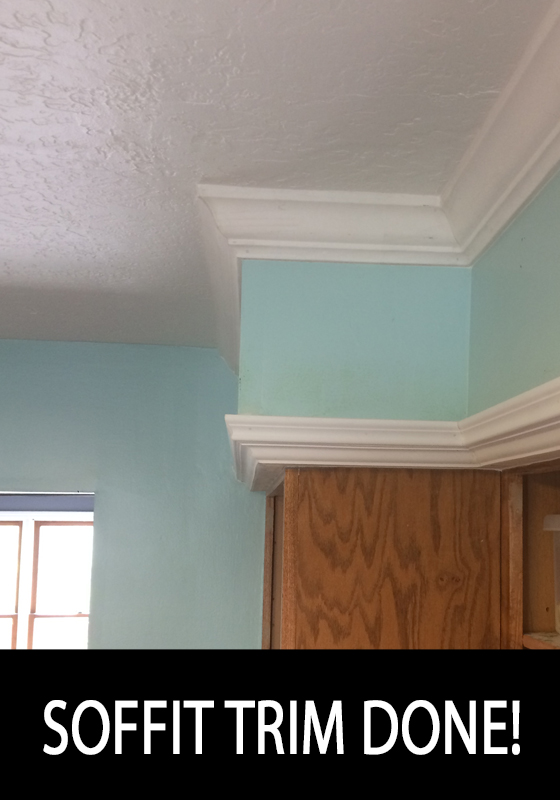
Step 1. Attached boards of varying widths immediately below soffit so that the crown molding would be flush with soffit.
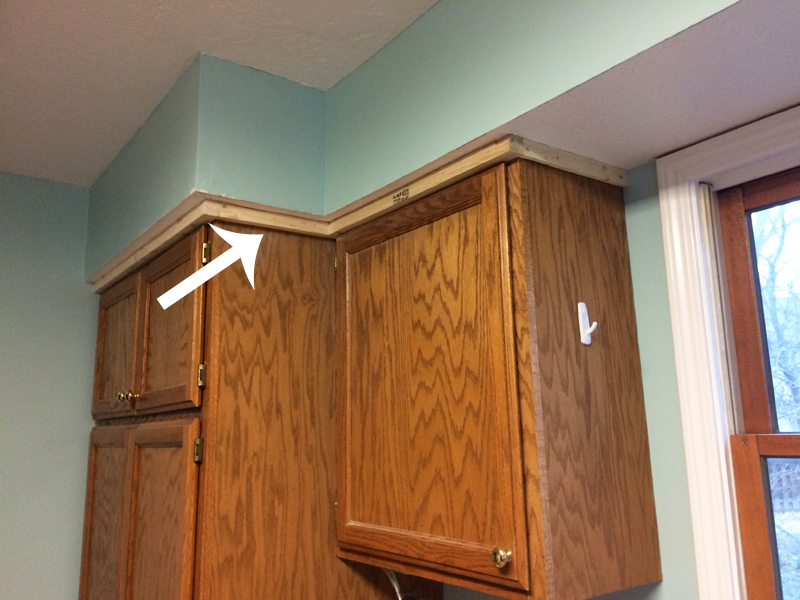
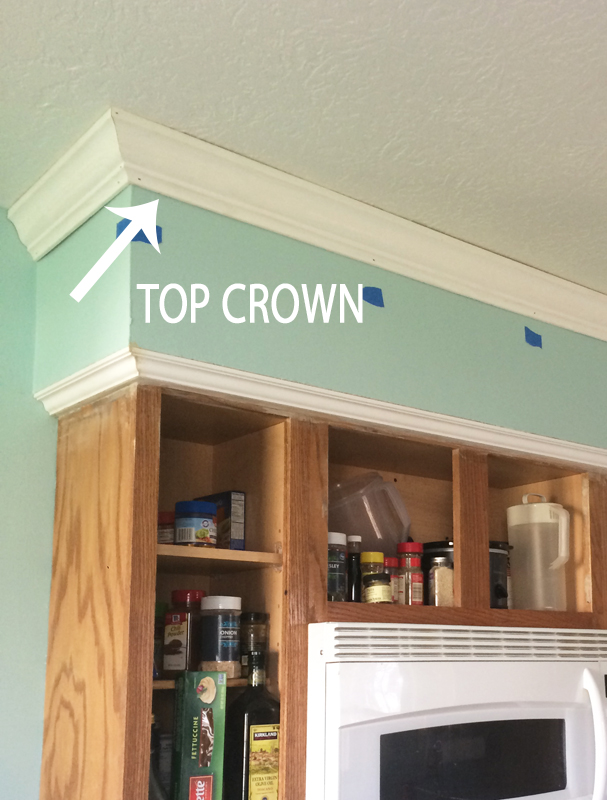
Step 2. Attached crown molding (Ekena Millwork Hillsborogh Crown) from board on cabinet to soffit.

Step 3. Attached crown molding (Evertrue Crown Molding) from soffit to ceiling. https://www.lowes.com/pd/
Step 4. Attached decorative trim (Ekena Millwork Stockport) at the top of the lower crown molding.
Step 5. Used wood filler and caulk to fill gaps.
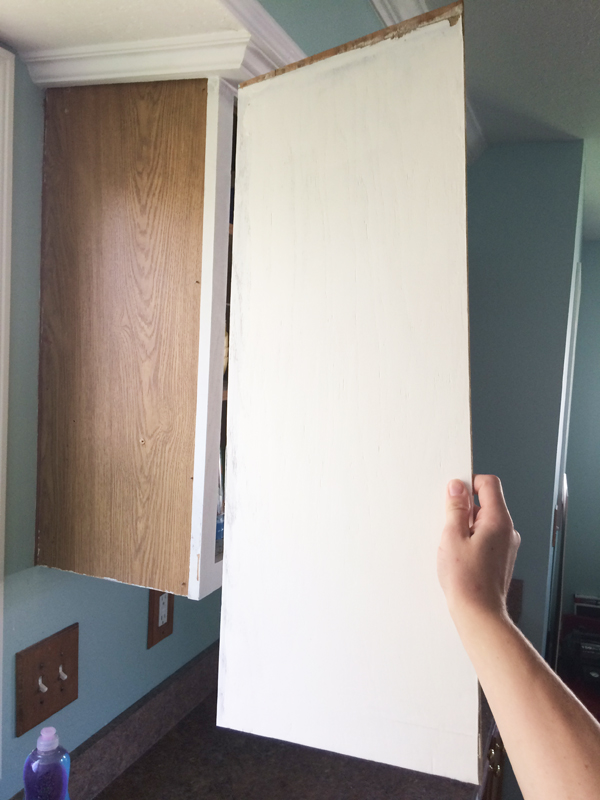
Step 6. Removed all doors & hardware. Filled holes.
Step 7. Repaired damaged wood and replace warped cabinet facing. The side of the cabinet to my sink was looking very old, worn, and warped. I tried filling it and sanding it smooth, but it still did not look good. So, I used a crowbar to carefully pry the wooden piece away from the cabinet. It easily pulled away in one piece, and for $7 at Home Depot I bought a new board, they cut it to size for me, and with just 6 nails the side was as good as new.
Step 8. Cleaned cabinets with TSP substitute. I used one bottle
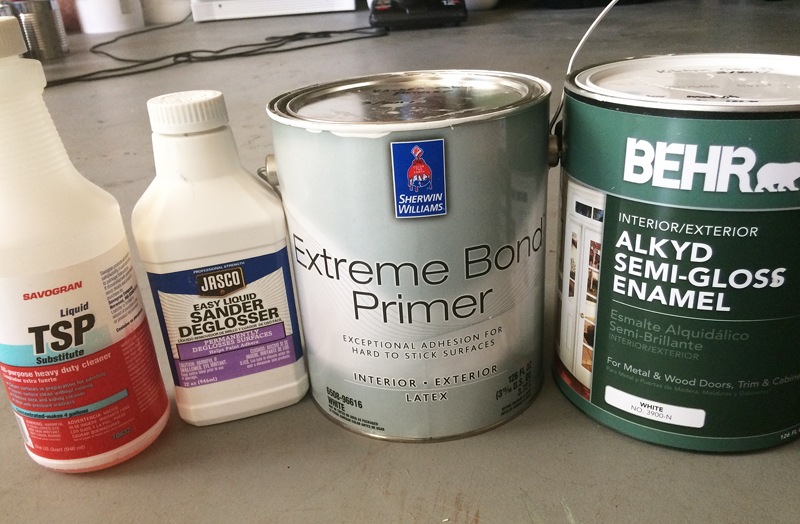
Step 9. Roughened surfaces and remove some varnish with Liquid Deglosser. I used 1.5 bottles.
Step 10. Primed with Sherwin Williams Extreme Bond Primer. I used 1/2 gallon.
Step 11. Painted 3 coats of Behr Alkyd Semi-Gloss Enamel color matched to Sherwin Williams Alabaster (using THIS tutorial). For the cabinet doors, I would paint the bottom of all doors, wait for the paint to dry, and then paint the top side. I lightly sanded everything before the final coat of paint. The paint does take a very long time to fully cure. I foolishly staked some of the doors after they had been drying for over a week, and the paint stuck to each other in some places.
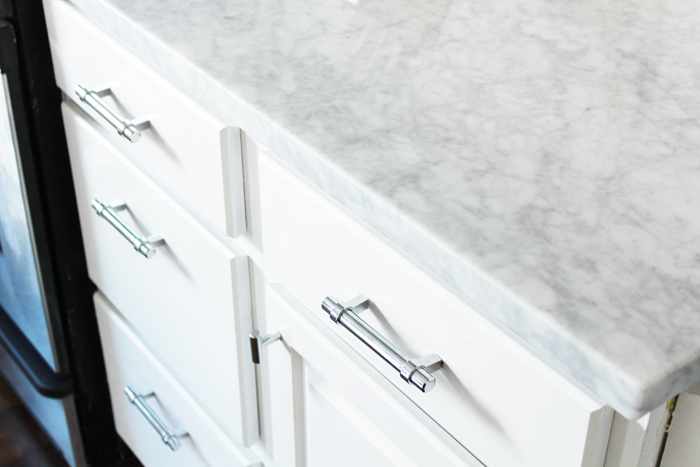
Step 12. Installed Knobs/Handles. I bought them discounted from Amazon Warehouse, which just means that they are open box items, but still new condition. We used Franklin Brass Heirloom Silver 1-1/8-Inch Webber Kitchen Cabinet Hardware Knobs and Franklin Brass Heirloom Silver 4-Inch Pierce Kitchen or Furniture Cabinet Hardware Drawer Handle Pulls (Affiliate Link).
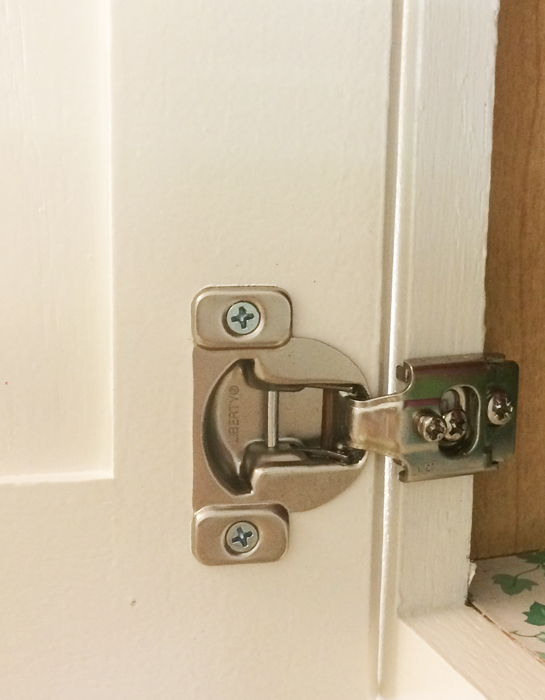
Step 13. Installed Hinges. Our previous hinges were Self-Closing, Partial Wrap Hinges with 1/2 inch Overlay. Because we couldn’t find hinges that perfectly matched the knobs we chose, we decided to use overlay hinges. This is what we bought http://www.homedepot.com/p/
Step 14. Installed under pull-out recycler/garbage can. I have always thought my garbage cans were unsightly, but I didn’t think I had room under my sink for a recycling bin and trash can. And then I found this! https://www.bedbathandbeyond.
Expenses
Trim $122.00
Wood Equip (Nail gun equip, fence for ripping wood, chisels, cabinet side replacement, caulk, wood filler) $95.00
Primer, TSP, Deglosser $56.00
Paint (2 gal cabinets, 1 gal wall) $109.00
Painting Supplies (brushes, trays, etc) $27.52
Knobs/Handles $100.00
Hinges $123.00
Pull Out Garbage Recycler $68.00
Progress Total $700.52
What is Left to Do?
- Replace Countertop
- Install Backspash
- New Sink and Faucet
- Paint Kitchen Table
- Perhaps Build Banquette Seating Around Table
- Window Treatments (shades)
- Paint Trim Around Ceiling Light White
- Accessorize (rug, kitchen towel, etc).
I’m so proud of my friend, Kelli! She has had very limited DIY experience before this kitchen makeover and has simply jumped in and worked so hard on it!
I just know it is going to pay off in the end and I will of course share the final reveal with you when it is all done!!:-)
On a personal note my kids got out of school yesterday for Summer break. I am also watching a friends child 3 days a week this Summer which means most days I will have 5 kids at home 11 years old and under.
I truly hope to maintain my weekly posts this Summer but wanted to give you a heads up that there may be some weeks where I just can’t.:-(
I hope you have a wonderful and safe Memorial Day weekend!! So thankful for those who have sacrificed even their lives for the precious gift of freedom!!
Thank you so much for following along!!!:-)

Related Posts From the Blog:
 One Room Challenge- The Master and Girls’ Bedroom Makeover Week 1
 10 Simple Fall Decor Ideas
 Ballard Designs Knockoff Paintings
 Benjamin Moore’s 2017 Paint Color Forecast
 Favorite Paint Brand-I’ll Share Mine If you Share Yours
 ‘Baby’s got Back’
 Painting Laminate-One Room Challenge Week 2
 Design 101- Repetition of Pattern