Provident Home Design

Decor, DIY, and Interior Design

  • HOME
  • ABOUT
    • About PHD
    • Contact Me
  • DIY PROJECTS
  • DESIGN 101
  • PAINT
  • HOME TOUR
  • DESIGN INSPO
  • DECOR TIPS

GET NOTIFIED VIA EMAIL WHEN THERE'S A NEW POST!

DIY Ceiling Beam-One Room Challenge Week 3`

Hello!  I hope you have had a great week and that you are getting good weather where you live!  Spring has sprung here and I am so in love with the beautiful blossomed tress and low 70’s weather (wish it would stay forever)!

It’s been a very busy and productive week on the bedroom makeovers for the One Room Challenge.  I’ve ordered lots of things for the rooms online and have worked on two main projects this week (they thankfully turned out just how I hoped which of course doesn’t always happen).

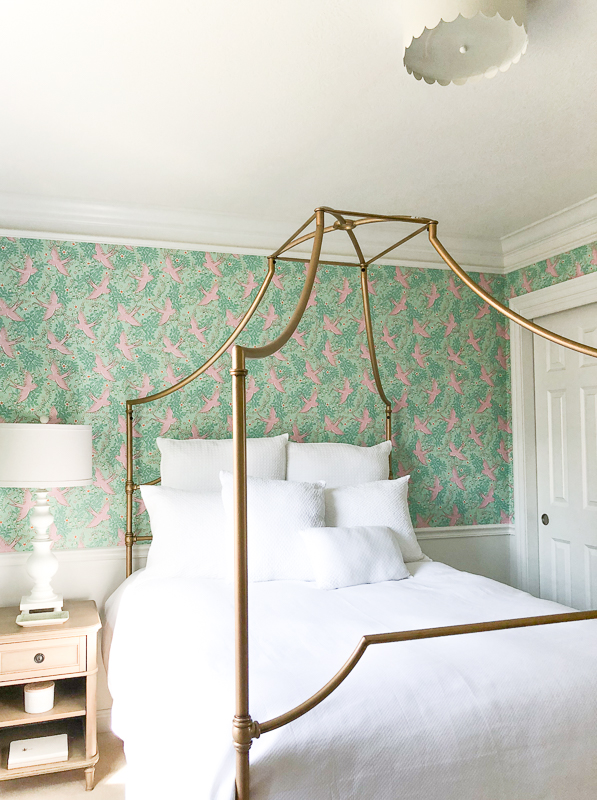
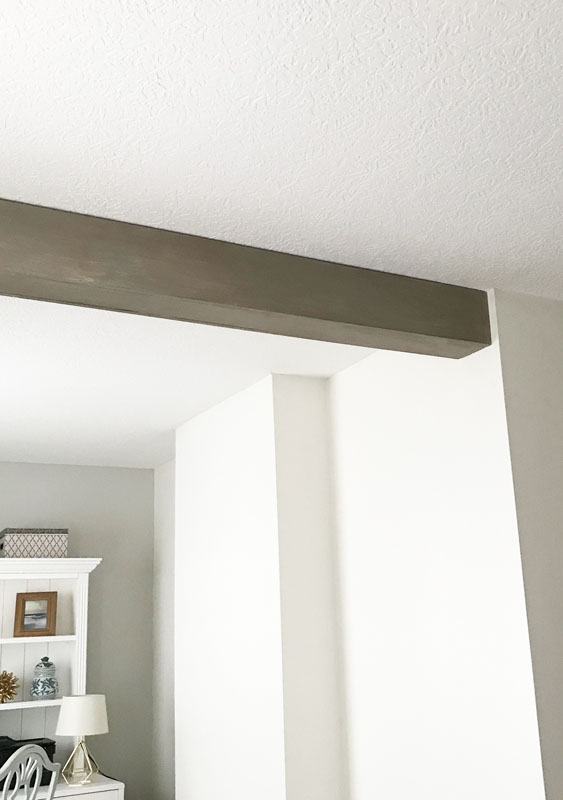
First in the master bedroom I built and installed a ceiling beam.

How to Make a Ceiling Beam

It’s a bit massive but with the size of the room I think it works.

Building a ceiling beam is quite easy to do!

Supplies

DIY Ceiling Beam Supplies

I like using the boards above because I’ve found them to be less warped then other boards.

2- 1 x 6 pine boards

2- 1 x 8 pine boards

Nail Gun/Air Compressor –  If you’ve never used a nail gun don’t let that scare you I have a tutorial HERE.

Stud Finder

Several 2 1/2 inch Wood Screws


How to Build A Ceiling Beam

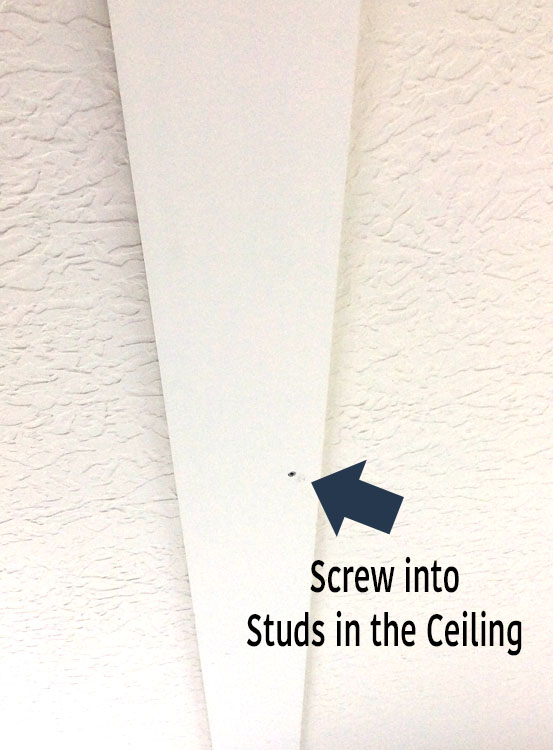
1. The first step is to find and mark where the studs are in the ceiling.  I easily found the stud by placing a magnet stud finder (I bought and love THIS ONE-affiliate link) on the ceiling and then the magnet will be drawn to the stud.

Screw one of the 1 x 6  boards into the stud in the ceiling.

DIY Ceiling Beam Step 1


2. Place the boards like in the picture below and nail the boards together with a nail gun all along the bottom.

DIY Ceiling Beam Step 2


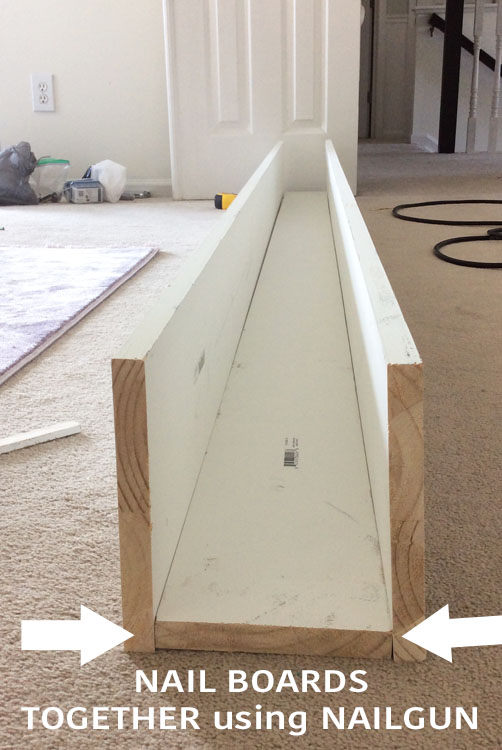
Tip:  Keep a board the same width of the board you screwed into the ceiling between the beam so that when you install it it’s sure to fit around it.

Also, check out the little peek of the new purple rug below.

DIY Ceiling Beam Step 3


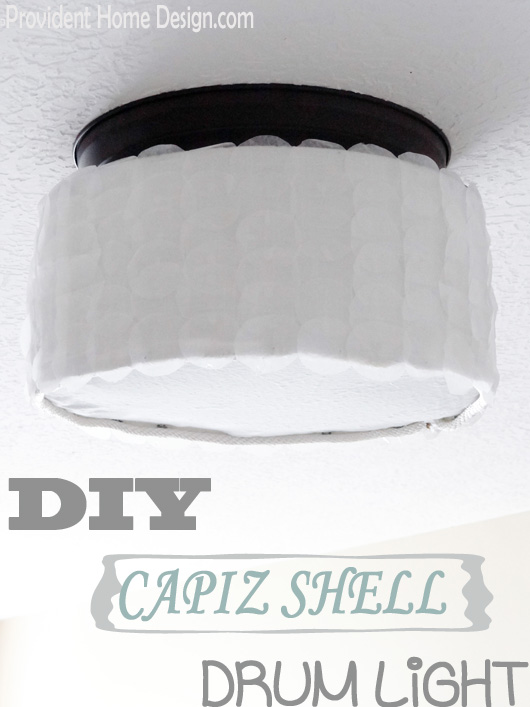
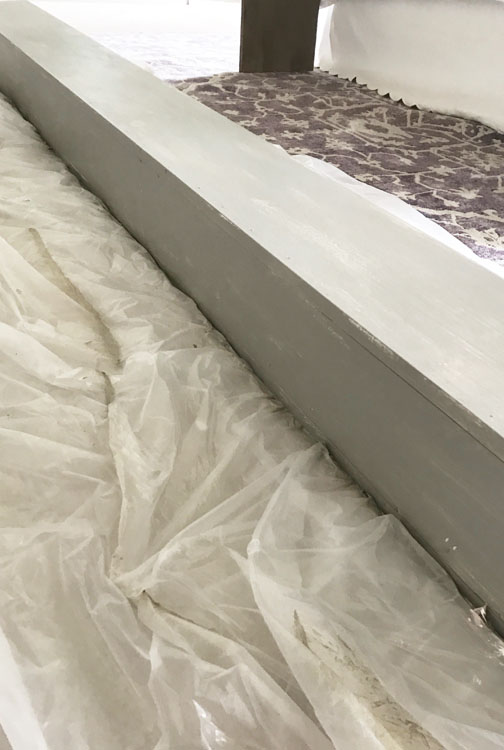
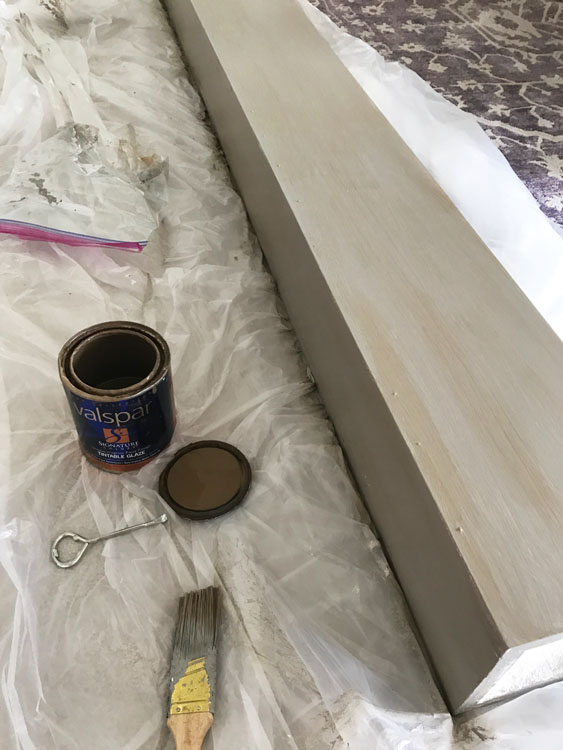
3. Go ahead and stain or paint the beam.  I gave the beam a gray weathered  look with paint ( you can find the tutorial HERE).

DIY Ceiling Beam Paint it Gray

DIY Ceiling Beam Glaze

4. Now it’s time to install the beam!  Because of the hands on nature of this step I wasn’t able to take any pictures so I will do my best to explain it!

My husband and I placed a chair by each side of where the beam would go, we lifted the beam and then stood on the chairs to lift it all the way up.

We pushed the beam up and around the screwed in board (from step 1) and while holding the beam with one hand I used the nail gun with the other hand to nail the beam into both sides of the screwed in board.

DIY Ceioing Beam54

In all it cost around $55 and adds so much character to the room!

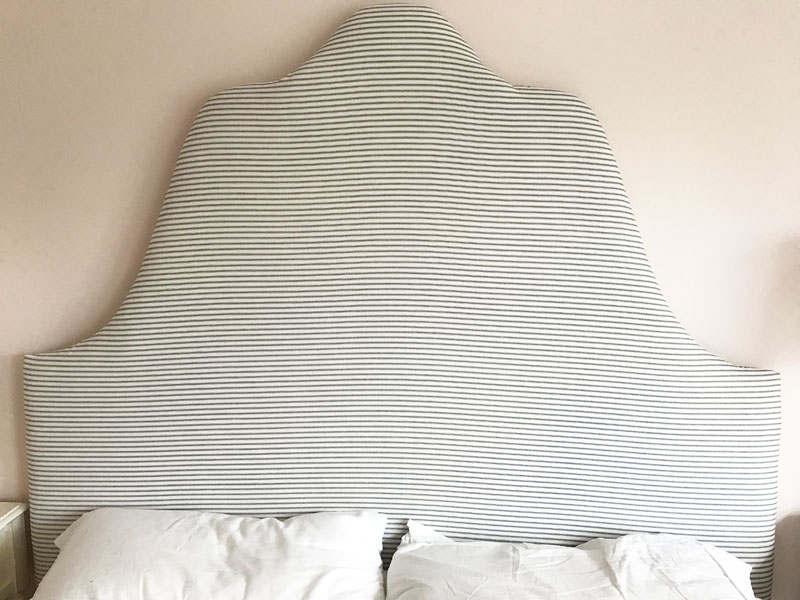
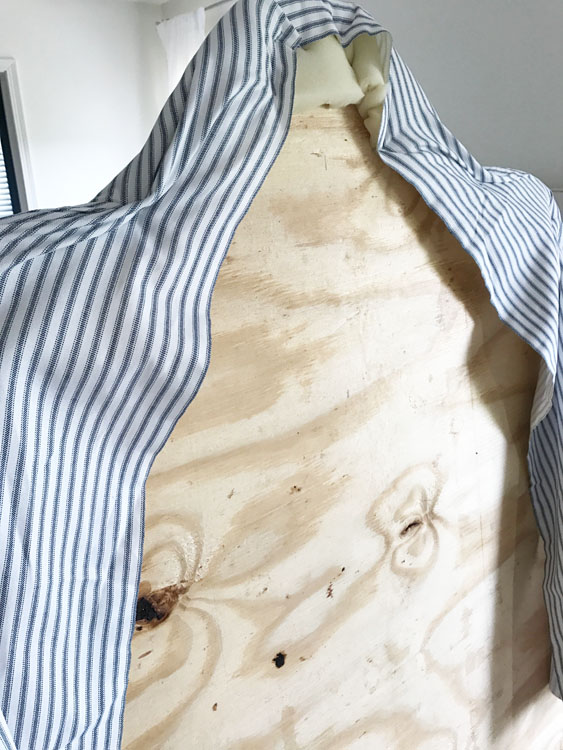
For my daughter’s room  I was able to make her new headboard.  I found THIS adorable, classic, navy and white ticking stripe fabric on Amazon (affiliate link) for only $9 a yard and only needed 2 yards of it.

DIY Pinstripe Headboard After

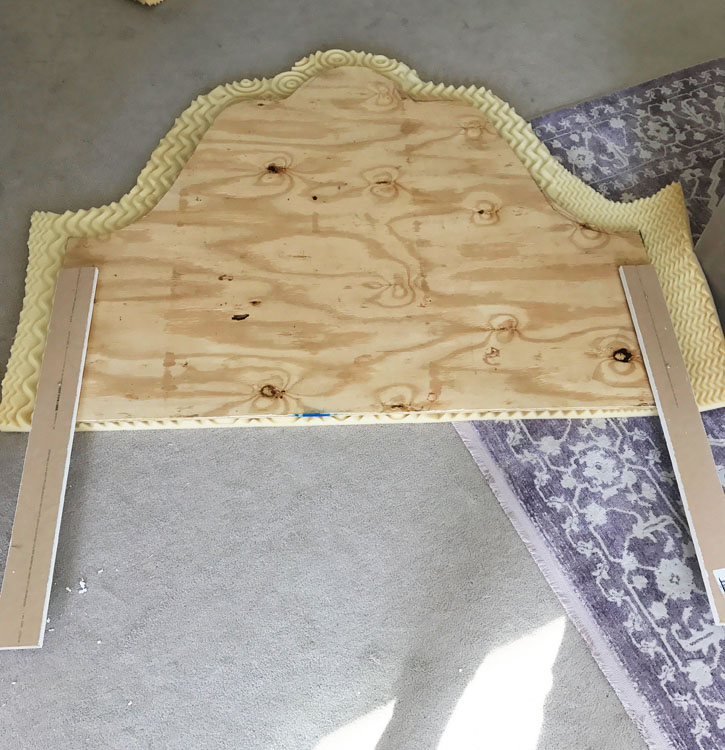
I used the same method I used in making my boys headboards (tutorial can be found HERE).  After cutting out the shape I wanted with a jigsaw I wrapped the foam in plywood and stapled it to the back.

DIY Headboard Step 1

DIY Headboard Step 2

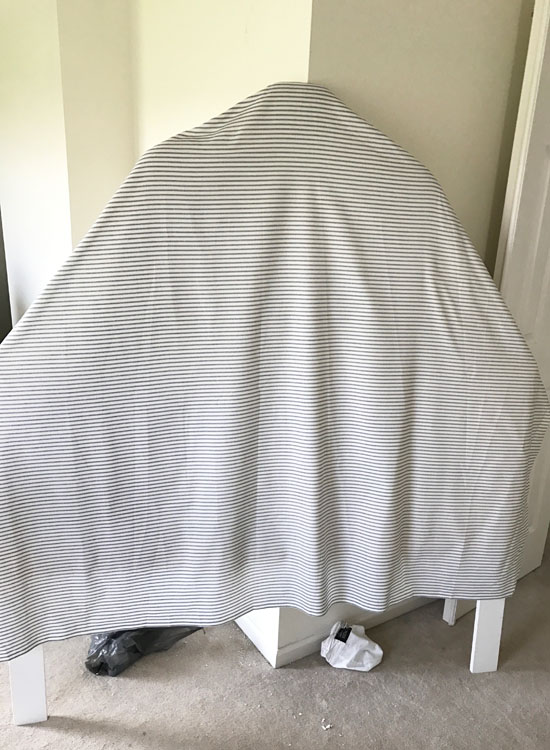
I then wrapped the fabric  around the foam and very careful pulled and stapled it making sure the stripes were straight in front.

DIY Headboard Staple


I’m absolutely love how it turned out!


DIY Pinstripe Headboard After


I hope you enjoyed seeing the rooms progress so far!  I still have much to do.  Please let me know if you have any questions about either of these projects!!

Thanks for being here!:-)  You can check out the progress of the other ORC guest participants, HERE!

signature


DIY Ceioing Beam Step by Step Tutorial


Related Posts From the Blog:

  • Tool Time with Tamara- Air Compressor and Nail Gun KitTool Time with Tamara- Air Compressor and Nail Gun Kit
  • DIY Orb Ceiling Light FixtureDIY Orb Ceiling Light Fixture
  • DIY Beadboard Ceiling + The Fall SeasonDIY Beadboard Ceiling + The Fall Season
  • DIY Beadboard HeadboardDIY Beadboard Headboard
  • Easy DIY Glass Mosaic Wall ArtEasy DIY Glass Mosaic Wall Art
  • 20+ Budget-Friendly Drapes20+ Budget-Friendly Drapes
  • One Room Challenge Week 5- One Week Left!One Room Challenge Week 5- One Week Left!
  • Installing Beadboard Wallpaper HorizontallyInstalling Beadboard Wallpaper Horizontally

decorating// DIY10 Comments

Subscribe

GET NOTIFIED VIA EMAIL WHEN THERE IS A NEW POST!

« Painting Laminate-One Room Challenge Week 2
The One Room Challenge Week 4 »

Comments

  1. Sally says

    Thursday, April 20, 2017 at 4:53 pm

    WOW!! That is amazing!! You amaze me, I don’t know where you get your spunk to do everything you do, but I want some!

    Reply
    • Tamara says

      Thursday, April 27, 2017 at 11:59 am

      Lol, Sally! I’m driven when it comes to making my home beautiful (wish I had the same drive for more practical like things like cooking, etc).:-)

      Reply
  2. Tina Eiser says

    Thursday, April 20, 2017 at 6:05 pm

    It looks Amazing! Great job!!!

    Reply
    • Tamara says

      Thursday, April 27, 2017 at 12:00 pm

      Thank you so much, Tina!!

      Reply
  3. Rhonda says

    Thursday, April 20, 2017 at 6:28 pm

    Looks gorgeous!!

    Reply
    • Tamara says

      Thursday, April 27, 2017 at 12:01 pm

      Thank you, Rhonda!:-)

      Reply
  4. mybodyandmeblog says

    Thursday, April 20, 2017 at 10:41 pm

    This is terrific!

    Reply
    • Tamara says

      Thursday, April 27, 2017 at 12:04 pm

      Thank you! It really is simple to make! The hardest part is lifting it up but if you have 2-3 people helping it is totally doable!

      Reply
  5. Shelly Mathes says

    Friday, April 21, 2017 at 7:18 am

    Really like how that beam adds to the look. What a great headboard, very nice, looking forward to seeing it completed. Thanks.

    Reply
    • Tamara says

      Thursday, April 27, 2017 at 12:02 pm

      Thank you for following along, Shelly!! I’m getting excited about how it is coming along!

      Reply

Leave a Reply Cancel reply

Your email address will not be published. Required fields are marked *

Hello and Welcome!! My name is Tamara and this is where I share my tips and tricks to creating a beautiful home! If you are new, feel free to start HERE.

Subscribe

Get notified via email when there's a new post!

Join me on Instagram!

Follow on Instagram

More Blog Inspiration:-)

  • Icon Caroline on Design

    Close preview

    Loading...
  • Icon Centsational Girl

    Close preview

    Loading...
  • Icon Decorating Delirium

    Close preview

    Loading...
  • Icon Lauren Liess

    Close preview

    Loading...
  • Icon Life on Virginia Street

    Close preview

    Loading...
  • Icon Remodelaholic

    Close preview

    Loading...
  • Icon The Creativity Exchange

    Close preview

    Loading...
  • Icon Thrifty Decor Chick

    Close preview

    Loading...

Categories


Disclosure & Privacy Policy

You might also like

How to Paint Furniture to look Bleached out and House Update

How to Paint Furniture to look Bleached out and House Update

2018 BIA Parade of Homes Sneak Peek

2018 BIA Parade of Homes Sneak Peek

Thursday 5 DIY

Thursday 5 DIY

New Build Update

New Build Update

New Build Update- Framing is Done!!

New Build Update- Framing is Done!!

Join Me on Instagram!

Follow on Instagram

Copyright © 2019 · Savory theme by Restored 316

Enter your name and email to get my weekly post sent to your inbox... it's FREE!
Want to learn more about DIY, decorating, and making your home beautiful? Sign up below!
Your information will *never* be shared or sold to a 3rd party.