Hello! How was your week? It’s been busy here. I have some littles who are excited out of their mind for Halloween. Tonight is their trick or treat night and I still have a little bit left to pull together for their costumes (this year we have a skeleton, army soldier, tinkerbell, and a puppy).
This week I’ve been plugging away on the basement playroom makeover and have been able to get a few projects completed.
First, I made this cute, large “I love you” wall art (tutorial to come) inspired by an “I love you” sign I spotted on Pottery Barn Kids.

I also ordered some “hanging chairs” for the room for only $24.99 each. There was a time in my childhood (I think I was around 10) where my older sister and I would use graph paper to design our dream rooms. I remember mine had steps in it so that the room had different levels and it always had a swing.:-)
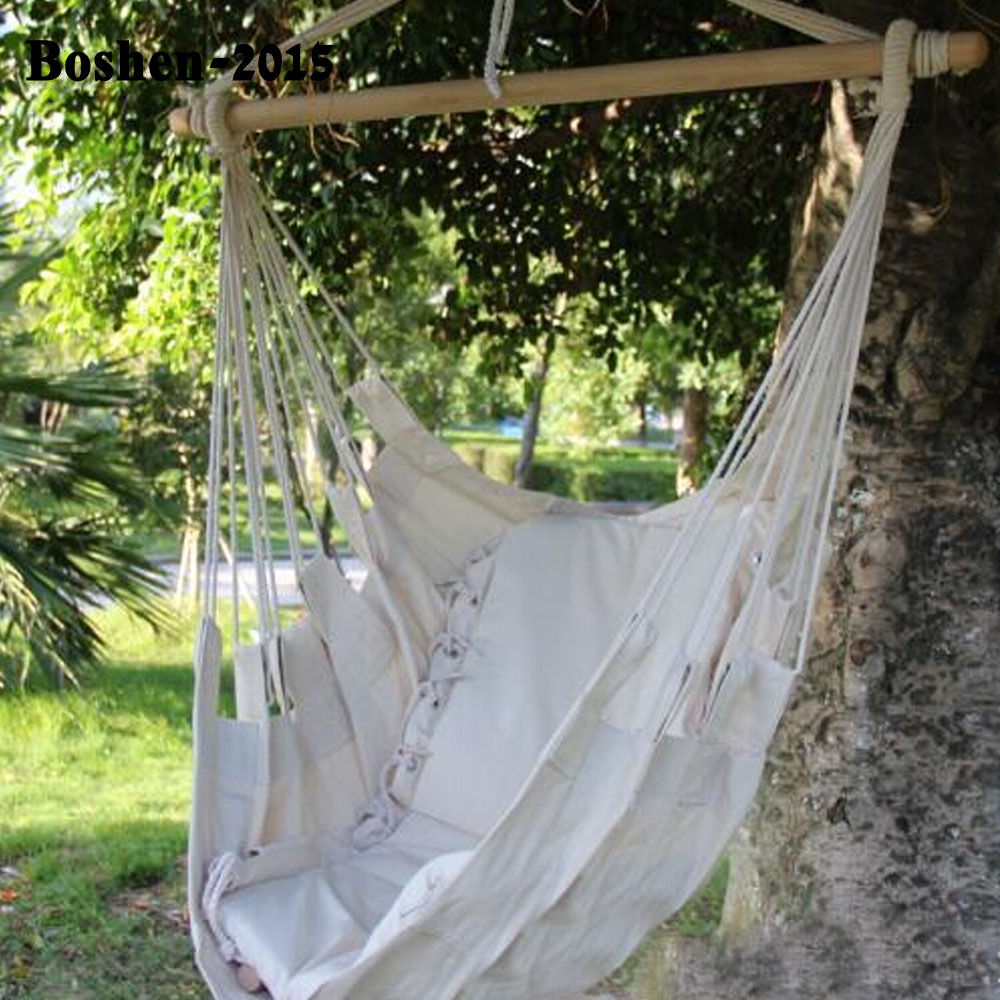
via Ebay
Although this is by no means a swing (the wall will be right behind them) I thought it would be something different and fun! And with 4 kids and only 2 hanging chairs I’m sure we’ll gets lots of practice learning to take turns!! :O/
I also sewed up a couple of envelope pillow covers in a wide striped fabric I bought on sale at Joann Fabrics.

I am picturing that they will go in the hanging chairs as added back support.
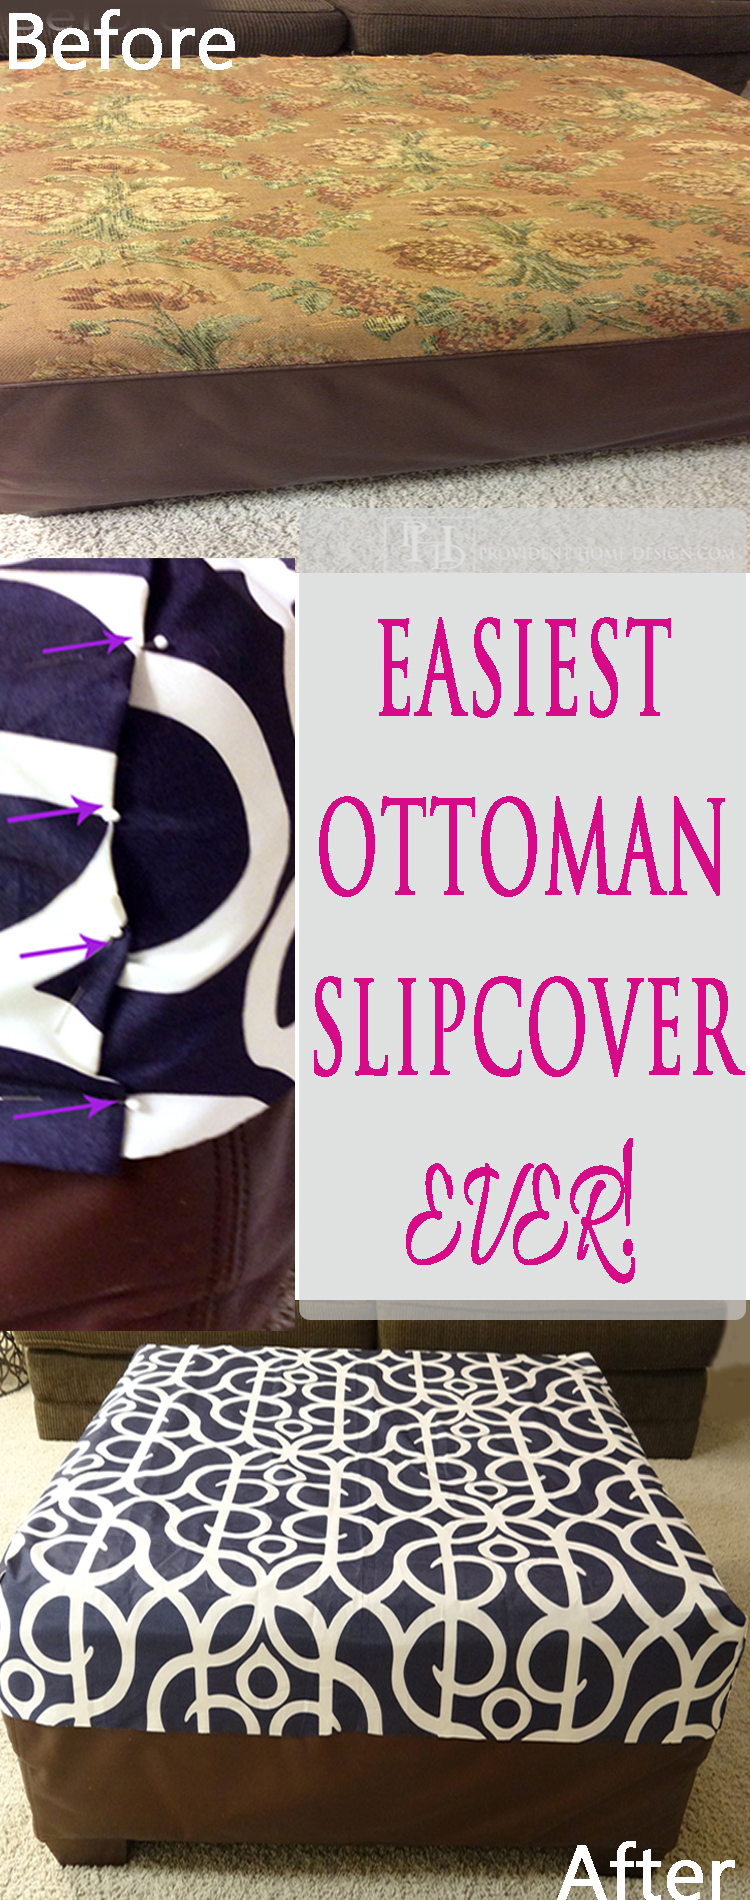
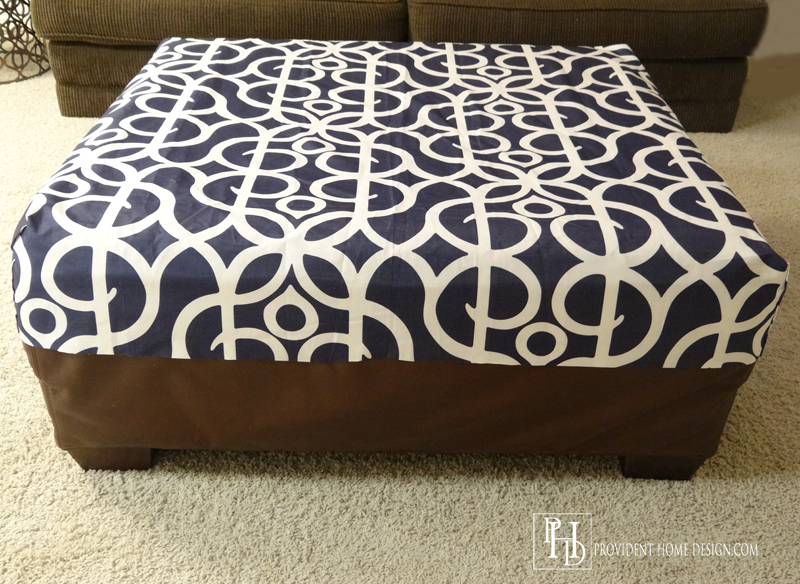
Lastly, I was able to slipcover a large ottoman.
The ottoman below was given to me by a friend who was getting rid of it.
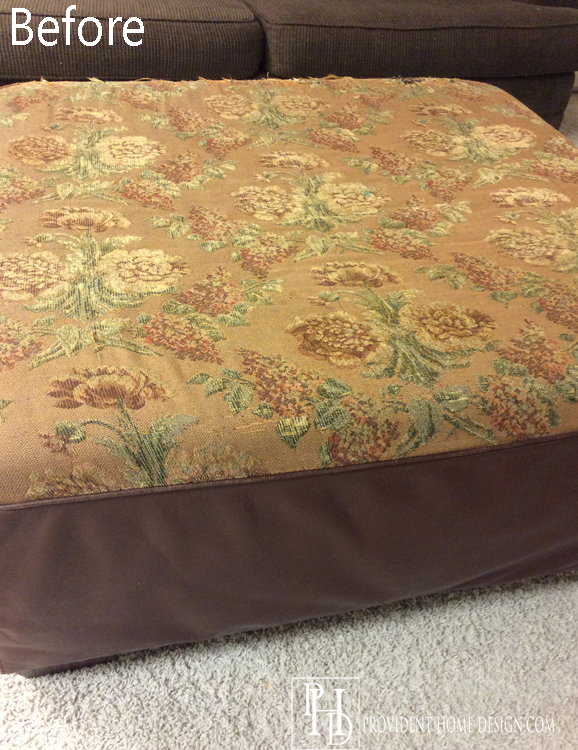
I knew it would need some work but I could imagine it going into the playroom perfectly. It could be used as extra seating or lounging as well as something the kids could jump on (which would be a lot better than them jumping on the couch)!
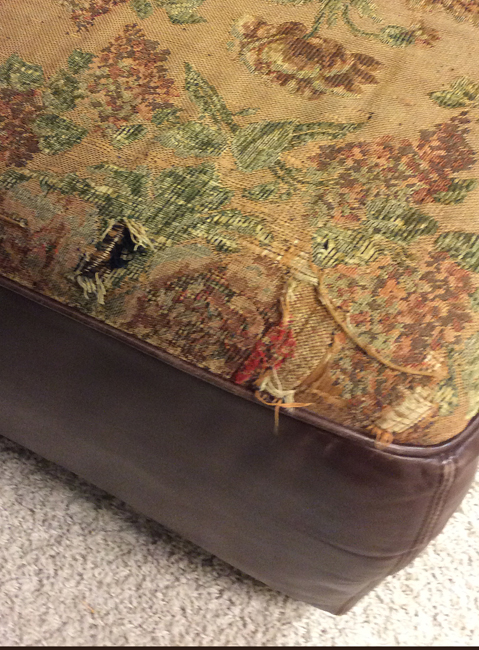
Initially I thought about painting the fabric part but when I saw the condition of the fabric I realized that was not going happen.
So, I sewed up a quick and easy slipcover with material I had on hand. The material is from a Better Homes & Gardens drape panel I found at Walmart clearanced for $5.
Let me show you how quick and easy it is to slipcover an ottoman!
First cut the material so that there is an equal amount of material hanging over on each side of the ottoman.
Note: If you are covering the whole ottoman make sure the material is long enough on each side to tuck under the ottoman and staple underneath.
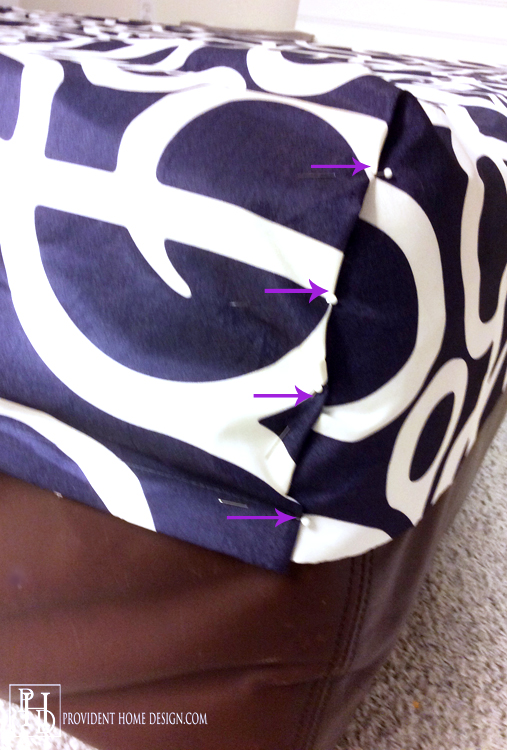
Starting at one corner of the ottoman take the tip of the corner as shown below and with your left hand gently pull it directly to the left.
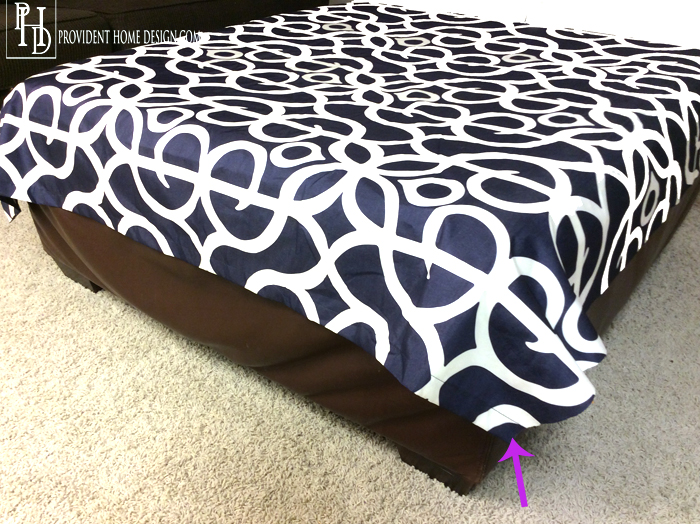
When you pull it to the left the fabric will bunch up above it. With your other hand take that section of fabric and pull it to the right.
Note: The photo below shows this step. The material with the arrow pointing right is the “bunched up” part that with your right hand you pull right (I couldn’t show this because I was holding the camera with my right hand #Ineed3hands #bloggerproblems):-)

Doing the above step will create a clean fold. If you need to shimmy it around a little so that it is a cleaner fold do so (didn’t know we would be shimmying in this project, did ya?) 🙂
Once it is a clean fold like below pin it together.
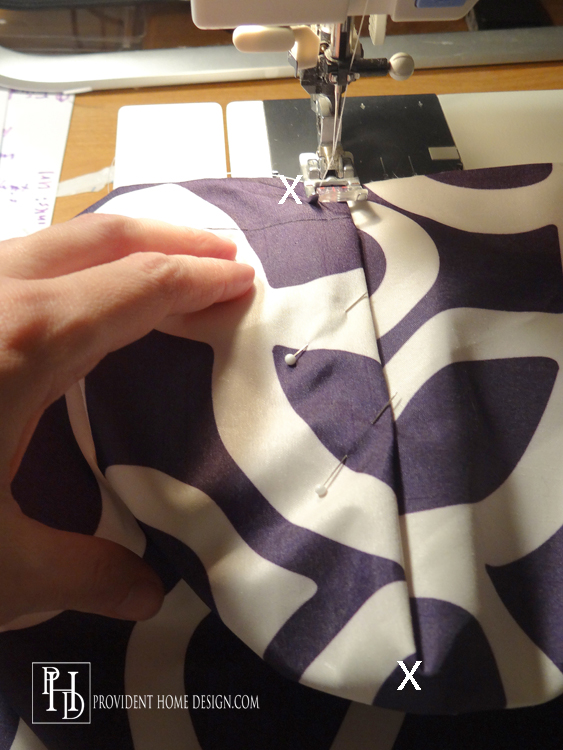
After doing this to all 4 corners it’s time to sew it up which I promise is the easiest part! Put the bottom of the corner onto the sewing machine as shown below. All you do is sew a straight line removing the pins as you go until you get to the top of the corner.
Note: The X’s below show where I started sewing and where I stopped sewing.
After you sew all of the corners flip the material inside out and you will see that there is extra material in each corner as shown below.
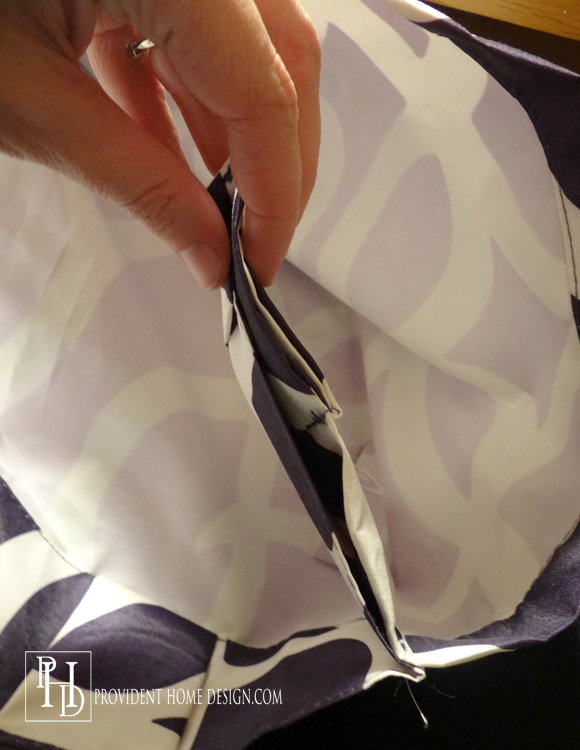
It is good to cut that extra inside material off so that the slipcover fits smoothly against the ottoman. Just slip it on over the ottoman and if you are slipcovering the whole body of it pull it tight and staple it in underneath. And you’re DONE! Not too bad, eh?
On Saturday an electrician will be coming to add recessed lighting to the playroom and I’m really hoping to get the wide beadboard ceiling up as well as some additional DIY artwork. You can check out the other One Room Challenge Participant’s progress this week, HERE.
I hope you found this slipcover tutorial helpful! Feel free to pin for later cuz you never know when you’re friend’s going to give you a free ottoman that needs tlc.:-) Have a great week and Happy Halloween!!

[jetpack_subscription_form]
Follow me on Pinterest and Instagram for more decorating ideas and inspiration!