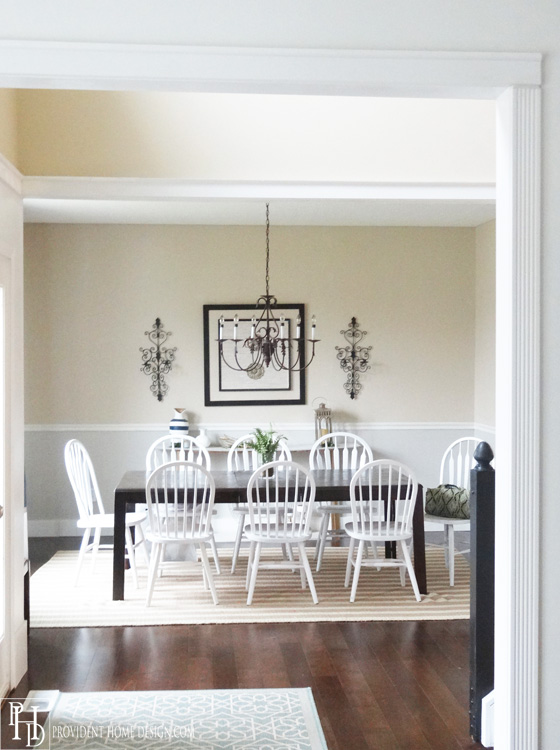
Hi Guys! I hope you had a great week and a fabulous Mother’s Day for the all Moms out there!! Today I want to share a simple tutorial for installing DIY doorway casings. This is a very easy DIY that goes a long way to increasing a home’s architectural beauty! Below is a photo of our entryway before we bought our home. There is a doorway opening into the living room on one side of the entry and a doorway opening to the dining room on the other side.  As you can see in the photo above the doorway openings were not cased with wood trim. Now they are!!
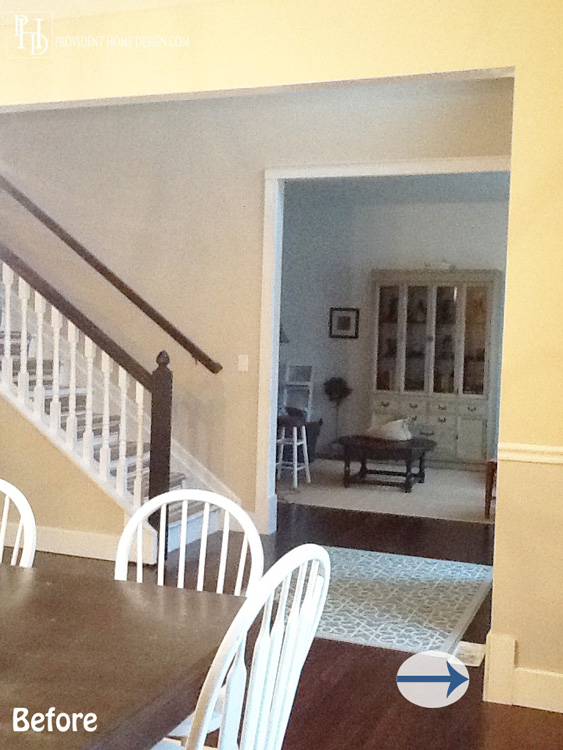
Before I trimmed the opening on the inside of the dining room:
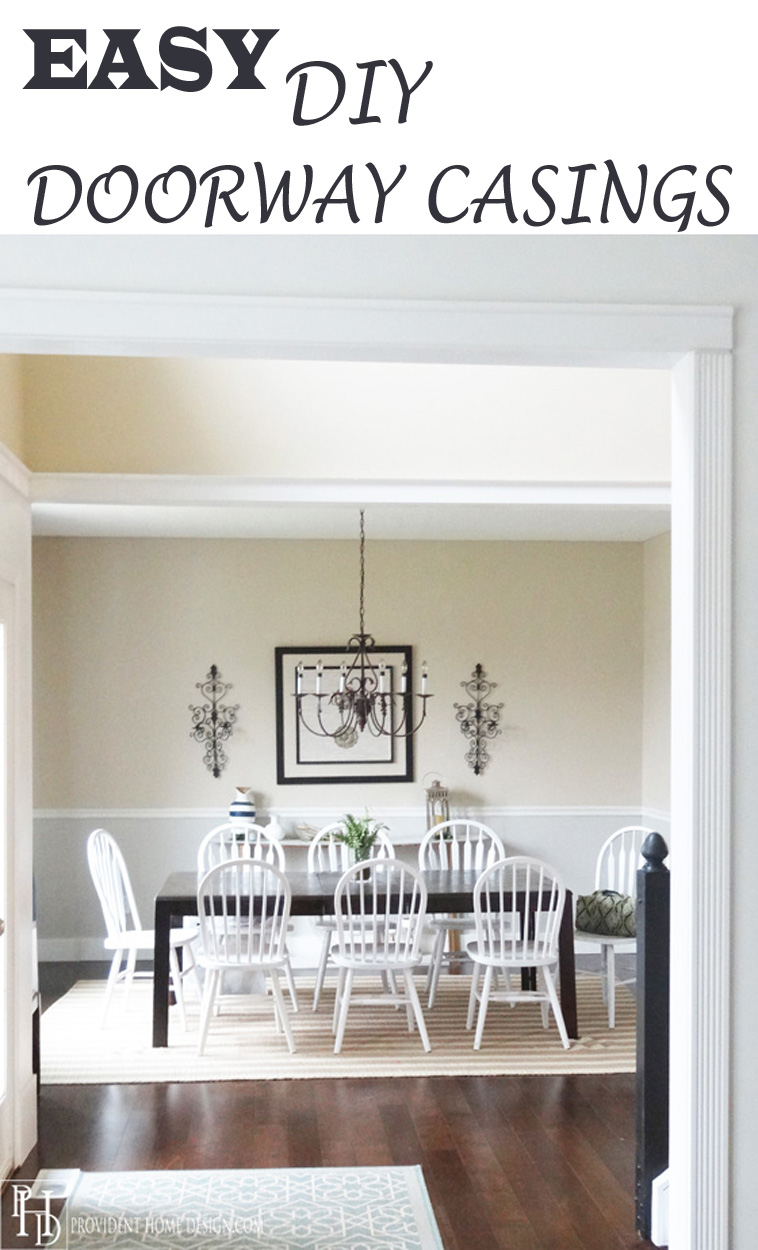
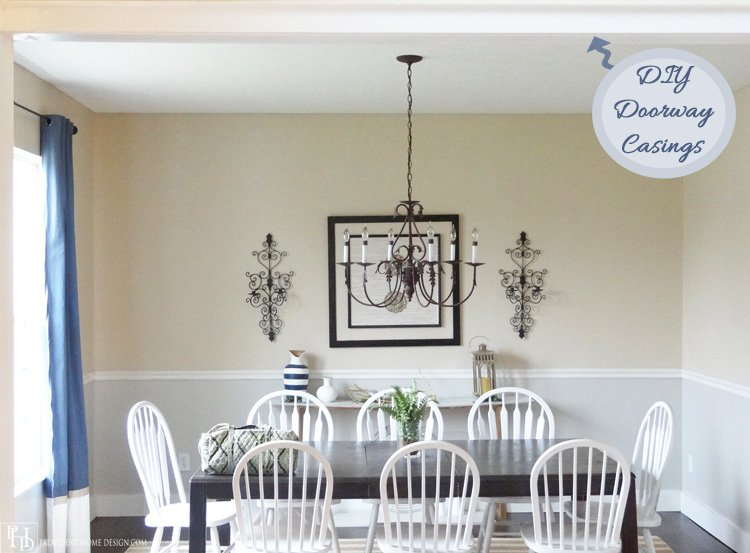
The After:
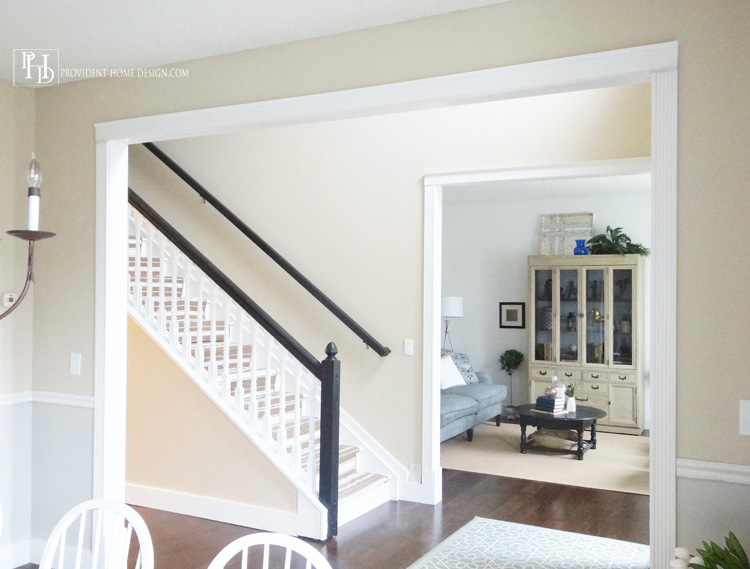
Makes a big difference, doesn’t it?? Let me walk you through how very easy it is to do.
The first step may be the most “intimidating” part and yet you can see in this 1 minute video how simple and not scary it is. The first step is to remove about 4 inches of the existing baseboard on each side of your door opening.
See how I had to cut the baseboard in order to install the bottom piece? Check out the quick video it will take care of any questions of concerns you may have about cutting the baseboard.
The next 3 steps are as easy as 1, 2, 3.
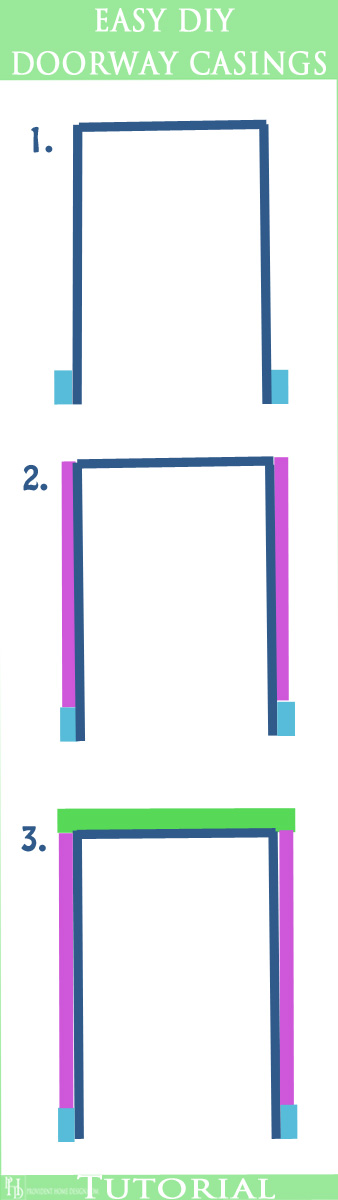
You can buy pre-cut door casing bases for about $5 a piece at Home Depot or Lowes OR you can buy an 8ft. 1×4 for about the same price and cut them to your desired lengths. I did the latter option and cut the 1×4 into 9.75 inch lengths. This way I got all of the bases for around $5 instead of the pre-cut option which would have been over $20.
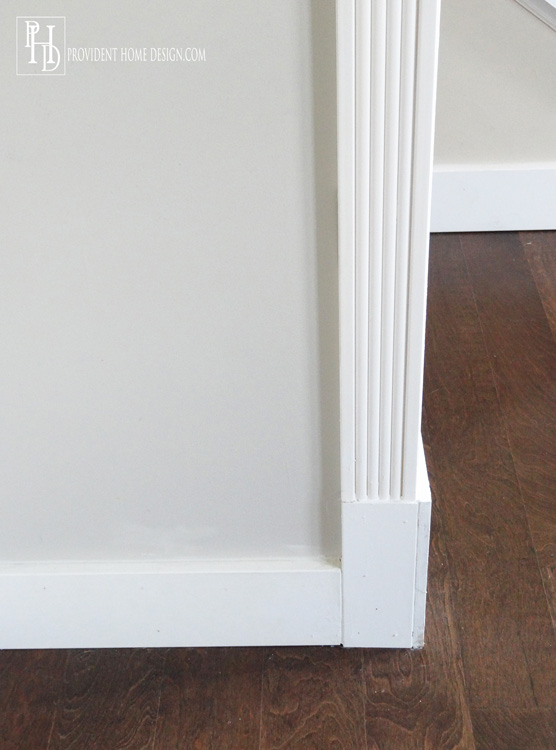
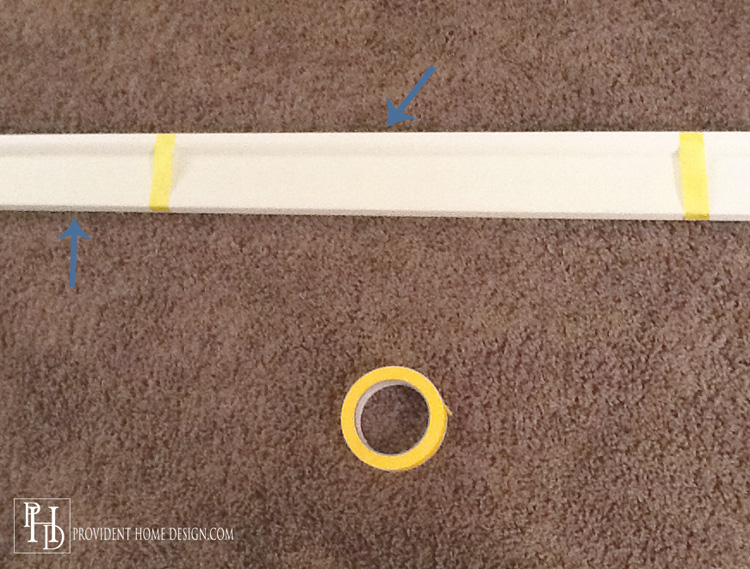
After nailing the bases to the wall, prop the vertical casings on top of the bases. I chose fluted styled molding that I got at Menards at a good deal (7ft. for $5.50).
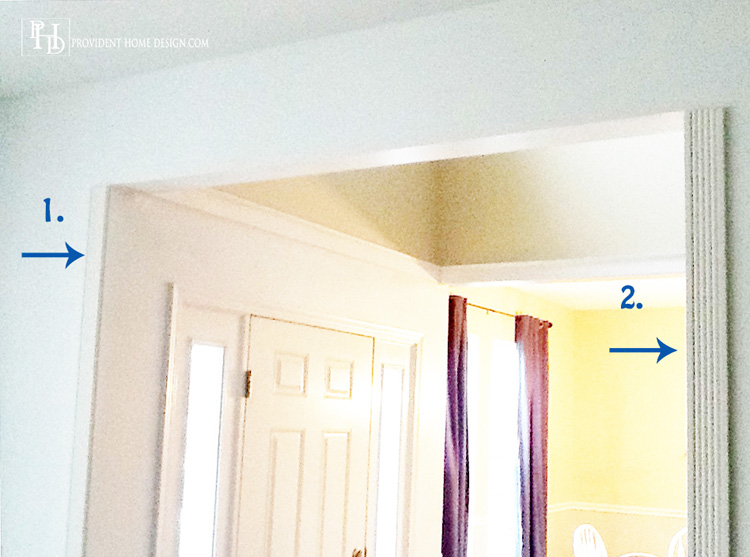
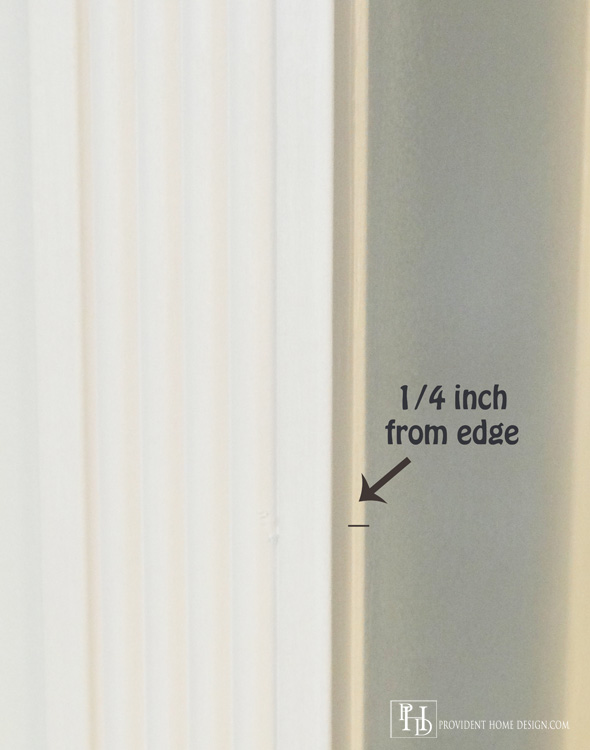
Nail them to the wall making sure to leave a 1/4 inch gap from the edge of the opening as seen below.
This is how the professionals do it! Later you will caulk and paint it so that it looks like it is all one piece. Next you will make the top piece of the casing which is also very simple. The top piece is made from a 1×4 and a piece of quarter round moulding.
Add a line of Liquid Nails across the entire 1×4.
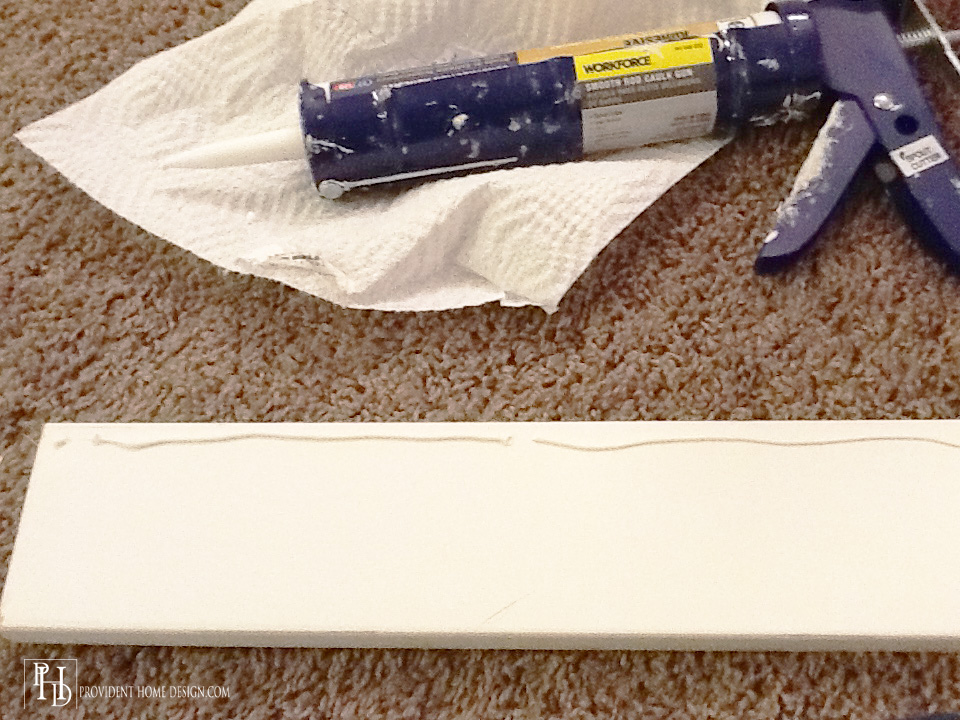
Then I placed the piece of quarter round onto the 1×4 and secured it with painter’s tape until it dried.
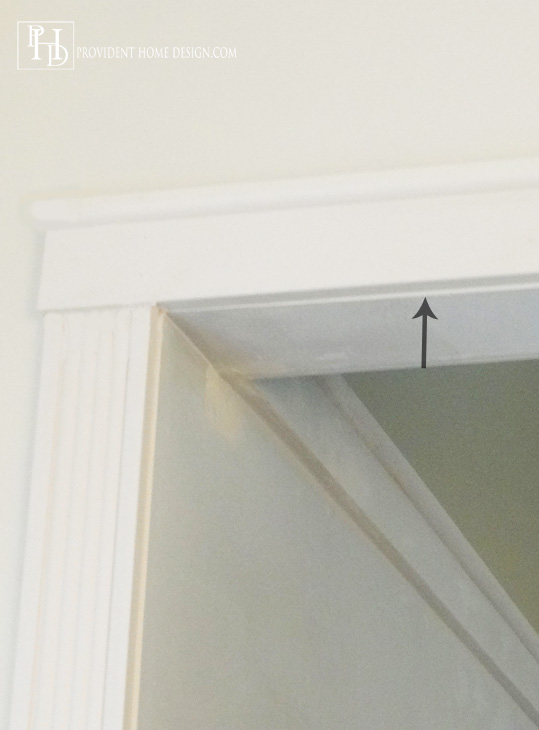
When the top piece is dry you can place it on top of the vertical casings making sure again to leave a 1/4 gap from the edge of the opening.
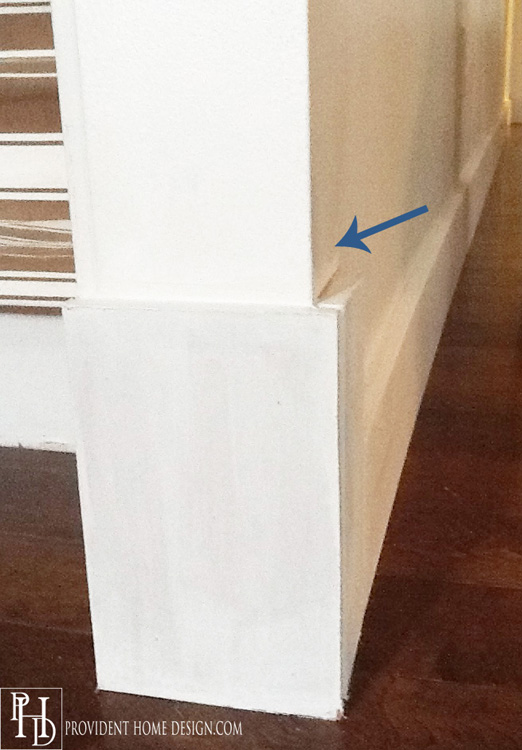
At the bottom between where the two bases are you can add a piece of wood to connect the two bases as seen below.
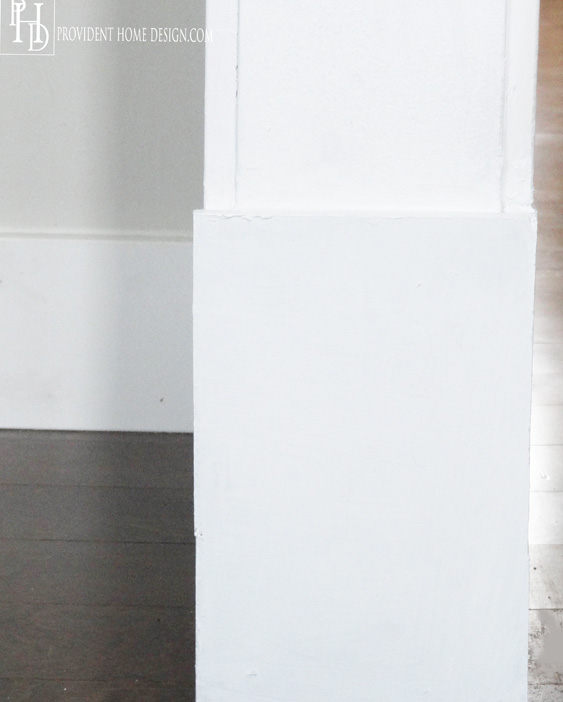
To do this I just measured the width between the two bases and cut a sheet of 1/2inch mdf to that width and the length to the same as the bases.
I use to wonder how everyone always got their nails all the way in without damaging the wood with a hammer. No one ever mentions the step of using a nail setter in their tutorials so I didn’t know!:-)

So in case you are in the DIY dark like I was you can purchase an inexpensive (maybe $4) tool to get those pesky nails all the way in, called a nail setter.:-)
The last step is to caulk the edges of the casings and paint all the molding and the top and side ends of the opening all the same color!
It will look amazing! If you have some uncased doorway openings in your home I can’t wait for you to try this! You won’t be sorry you did! DIY doorway casings will take your home from builder basic to beautiful!
I’m here if you have any question just leave them in the comment section! I hope you have a great week!