When I first moved into our current home my goal was to lighten up the kitchen without painting the cabinets. My husband did not mind the cherry cabinets and asked if I would give them some time to see if they would grow on me. I really didn’t want to go through painting cabinets again (I had done it in our previous place) so I obliged hoping that I would warm up to them.
One of the many ways I tried to lighten the kitchen up was with white kitchen window treatments.
I had gone to our local Parade of Homes (aka-Homearama) and had been inspired by these kitchen window treatments below. Sorry for the poor photo quality, I took the picture with my ipad camera. This year when I go I will take my real camera so I can share nicer pictures! 🙂
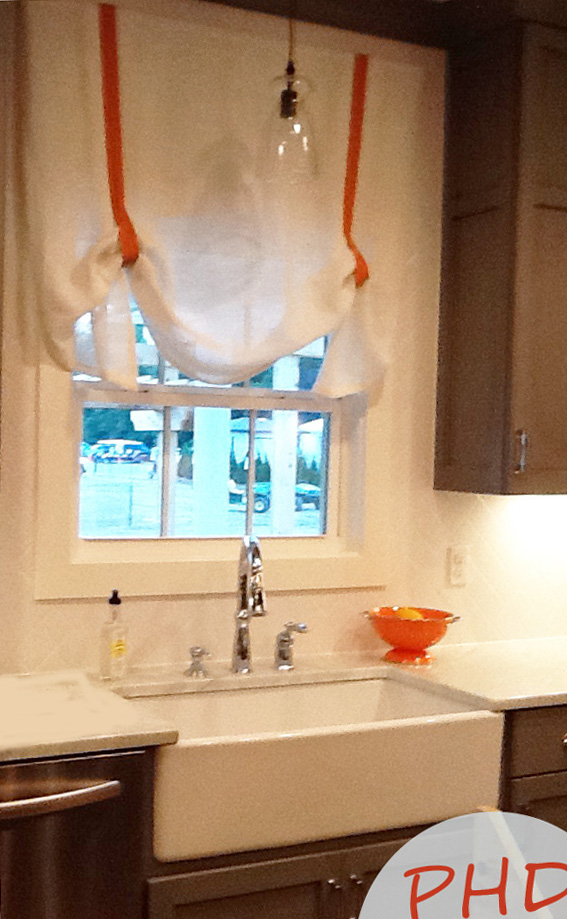
I loved the fresh, clean, cheerful ambience of these over the sink kitchen window treatments. There wasn’t a way for me to find out where they were from so I decided I would try to DIY them.
Here is how they turned out–
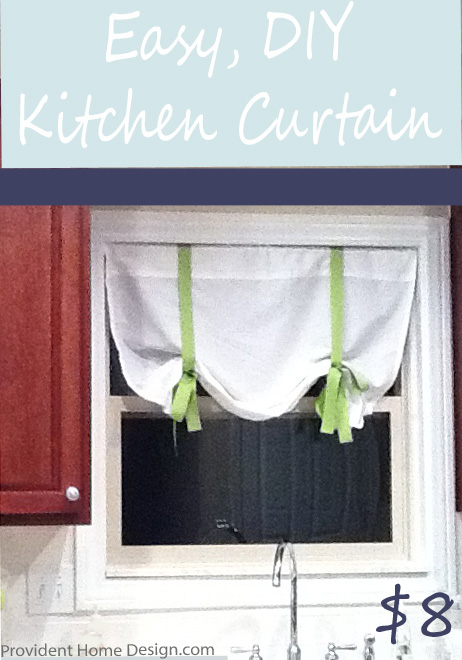
I looked to my favorite source of inexpensive window fabric, yep, Walmart’s Mainstay white flat sheet. It is only $5 and provides lots of fabric (you can’t see through them either even at night with lights on).
I purchased the ribbon online from a store called Ribbon Retreat. They have a ton of different colors and shades of this particular grosgrain ribbon. I bought 5 yards for $1.82 plus shipping.
They are quite simple to make!
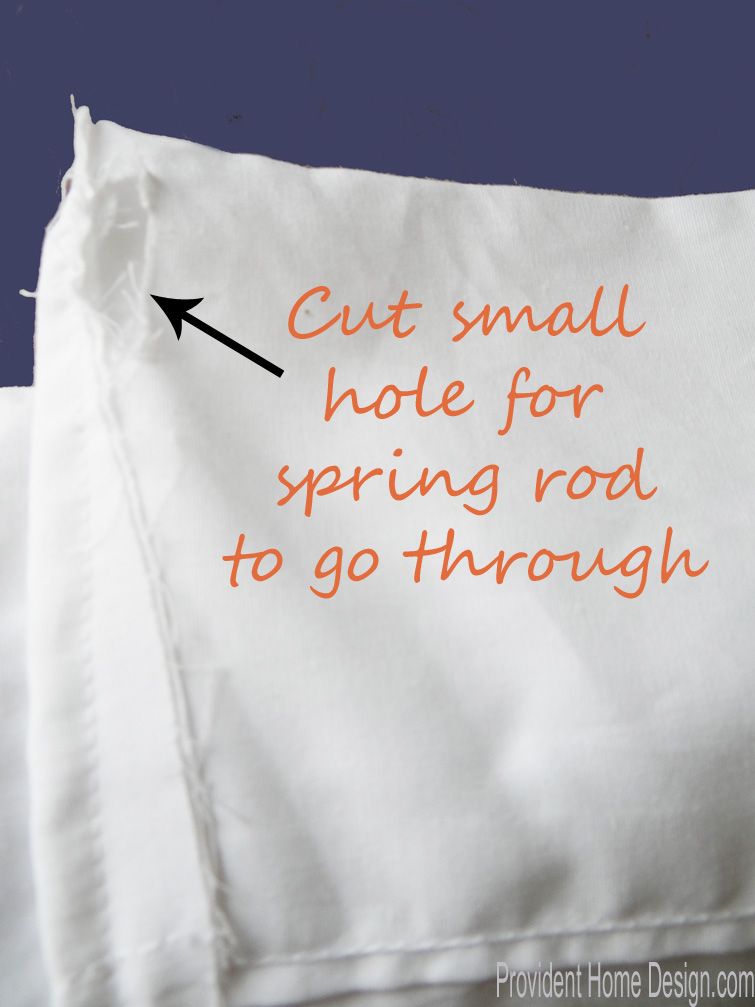
Lay the flat sheet down on the floor as if you were laying it down on the bed. Find the top left corner of the sheet. This corner will have two layers of fabric. Turn the corner over and cut a small slit making sure to only go through the back layer of the material.
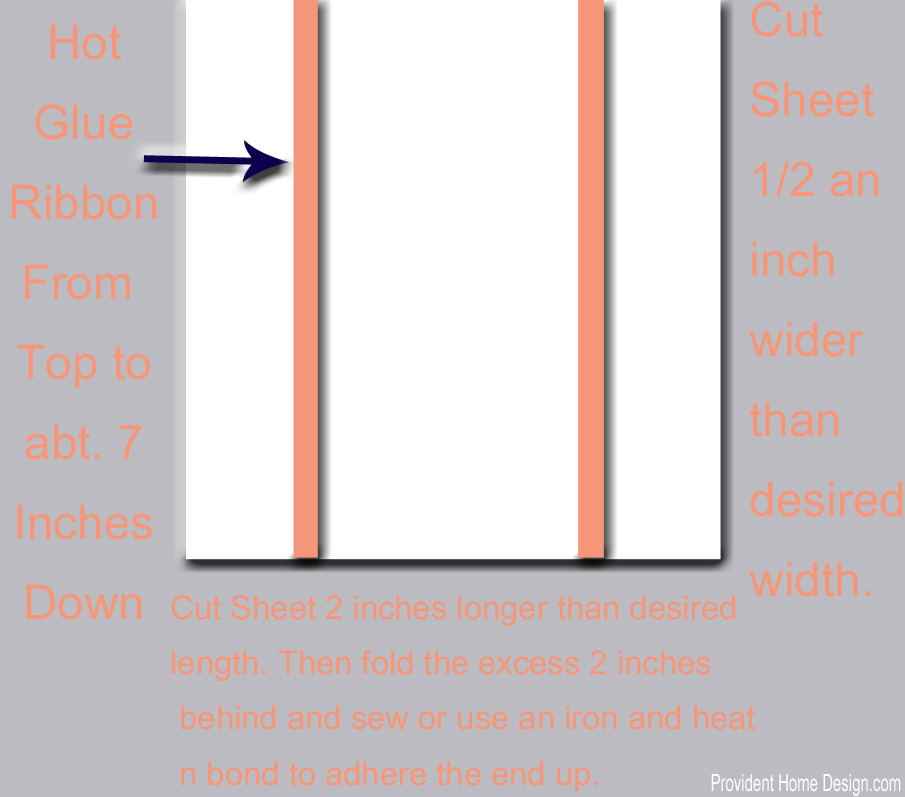
Measure your window and determine how long and wide you want your curtain to be. I wanted my curtain to be 34 1/2 x 36 1/2 inches. For the width– I measured from the left side of the flat sheet out 34 1/2 inches and then added 1/2 inch (so a total of 35 inches) and made a light mark. For the length- I measured from the top down 36 1/2 and then added 2 inches for a total of 38 1/2 inches and made a mark. Use a long ruler to draw a light line across and down where you made your marks.
Cut along those lines and put the excess sheet material aside. Then turn the curtain over and fold up 2 inches worth of the sheet material and pin. Do the same thing on the right side but only fold up a half an inch. If you have access to a sewing machine sew across the bottom and side. If you do not have access to a sewing machine you can use the Heat n’ Bond method.
Cut your ribbon to the length of your curtain times 2. Since my curtain was 36 1/2 inches I cut my ribbon to 73 inches. Now cut another piece of ribbon the same length.
Find the middle of your ribbon and place it on top of the curtain so that an equal amount of the ribbon falls in front and in back of the curtain. Do the same thing with the other ribbon. Now adjust the ribbons so that they are located on your curtain in about the same position as in the pictures above. For my size of curtain I placed the ribbons about 7 inches in from the sides.
Apply hot glue or fabric glue to the top 7 inches of the ribbons on each side to keep them in place. Cut the other slit in the top back layer of the curtain so that the spring rod can be pushed all the way through. You can now hang the curtain! You can tie them up like I did or I bet the Parade of Home’s curtain in Velcro-ed up.
As always let me know if you have any questions!! And I hope you have a fabulous day!